The CloudBees Inactive Items plugin analyzes the jobs, folders, multibranch pipelines, and organization folders within your controller and produces a report that lists the inactive items.
Configuring the Inactive Items plugin
The Inactive Items plugin is enabled per controller. A job is considered inactive if the last build occurred over the configured time limit. A folder is considered inactive if it only contains inactive items.
When you enable the plugin, you can configure the frequency at which the analysis will run in the background and the length of time a job is considered inactive.
To configure the Inactive Items plugin:
-
From the main Dashboard, select a controller.
-
On the left menu, select Manage Jenkins.
-
On the Manage Jenkins page, select Configure System.
-
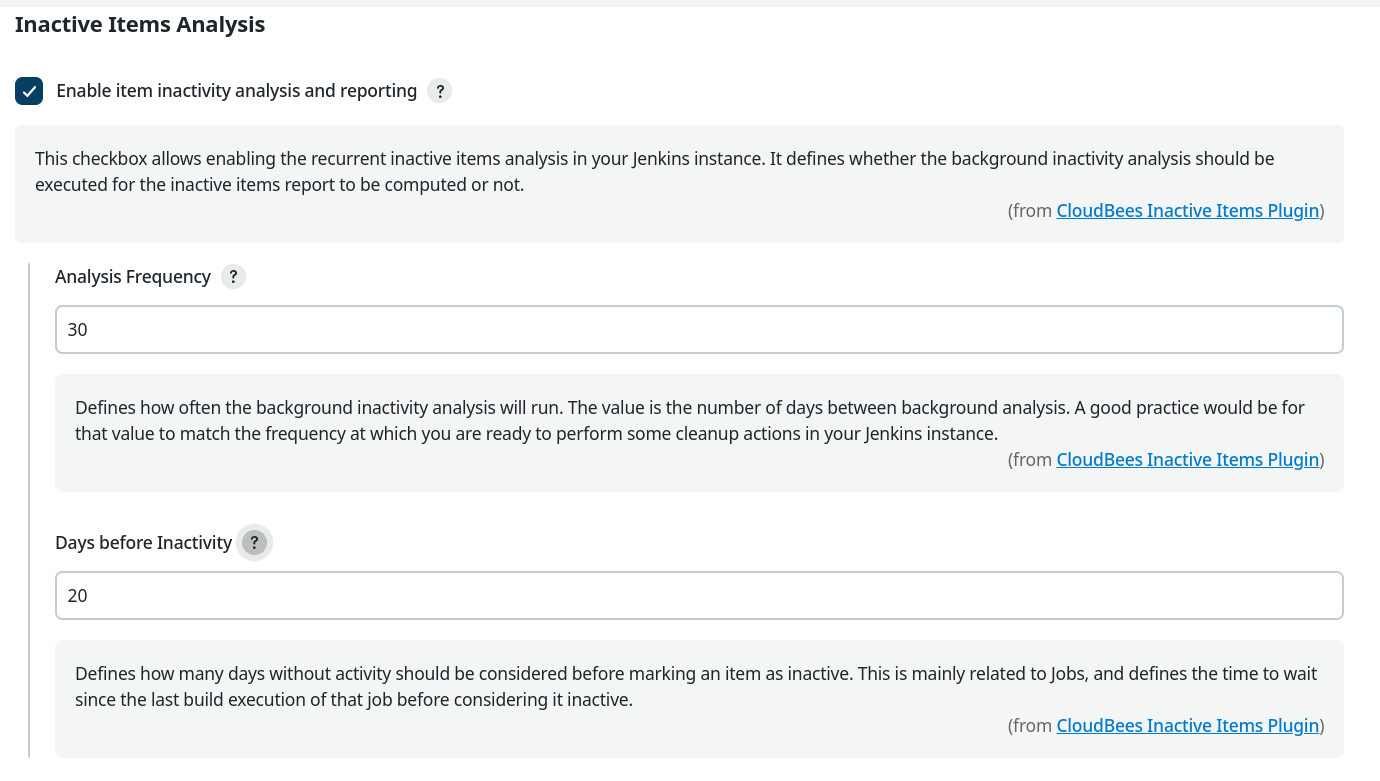
On the Configure System page, navigate to Inactive Items Analysis setting.
 Figure 1. Inactive Items Analysis
 -
Select Enable item inactivity analysis and reporting. This setting enables the inactive items analysis for your controller.
Clear this checkbox to disable the plugin so that it does not run the analysis. -
Enter the following values:
-
Analysis Frequency - Enter how often the analysis should run. The default is 30 days.
-
Days before Inactivity - Enter the number of days without activity makes a job inactive. The default is 20 days.
It is recommended that you set the Analysis Frequency to match the frequency of the cleanup of your CloudBees CI instance.
-
-
Select Save.
Once the plugin is configured, the analysis runs based on the frequency set. The results are displayed on the Inactive Items Report Summary page.
Inactive Items Report Summary page
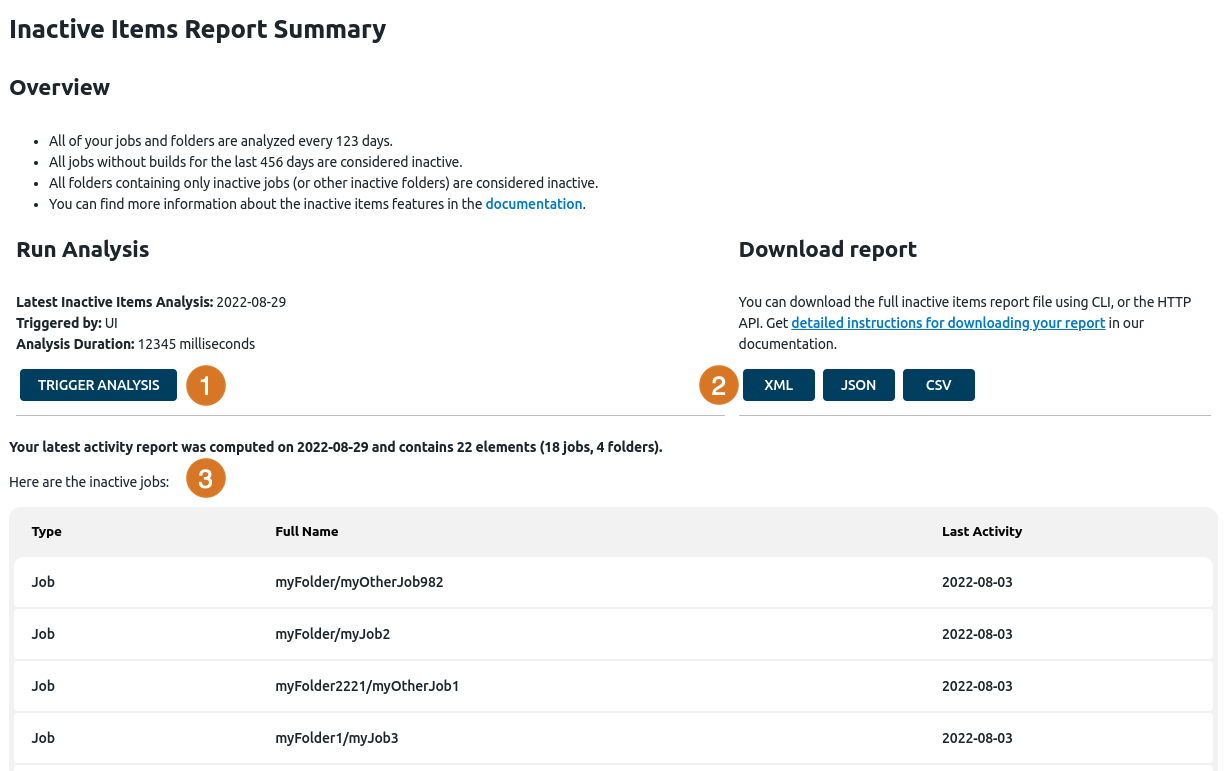
The Inactive Items Report Summary page lists the first 100 inactive items within a controller, the job type, and the last date the job was active.
To view the Inactive Items Report Summary page:
-
Select a controller from the main dashboard.
-
On the left menu, select Manage Jenkins.
-
On the Manage Jenkins page, navigate to Tools and Actions and select Inactive Items Report.
 Figure 2. Inactive Items Report Summary page
1
Select Trigger Analysis to run the inactive items report on-demand.
2
Select one of the following formats, XML, JSON, or CSV, to download the Inactive Items report and access every inactive job and folder within a controller. You can also download the report using HTTP API or Jenkins CLI.
3
This table provides users with a summary of the inactive jobs within a controller. It displays up to 1000 jobs and the last date of activity for each job.
Downloading Inactive Items reports with HTTP API or Jenkins CLI
Use HTTP API or the Jenkins CLI to download the full Inactive Items report in XML, JSON, or CSV.
HTTP API
Run the following commands to retrieve the inactive items report.
In XML format:
curl --user <admin-user>:<token> <your-controller-url>/inactive-items/api/report
In JSON format:
curl --user <admin-user>:<token> <your-controller-url>/inactive-items/api/report? format=json
In CSV format:
curl --user <admin-user>:<token> <your-controller-url>/inactive-items/api/report? format=csv
Jenkins CLI
Run the following commands to retrieve the inactive items report.
In XML format:
java -jar jenkins-cli.jar -s <your-controller-url> -auth <admin-user>:<token> download-inactive-items-report
In CSV format:
java -jar jenkins-cli.jar -s <your-controller-url> -auth <admin-user>:<token> download-inactive-items-report -csv
In JSON format:
java -jar jenkins-cli.jar -s <your-controller-url> -auth <admin-user>:<token> download-inactive-items-report -json
Viewing inactive items in the operations center
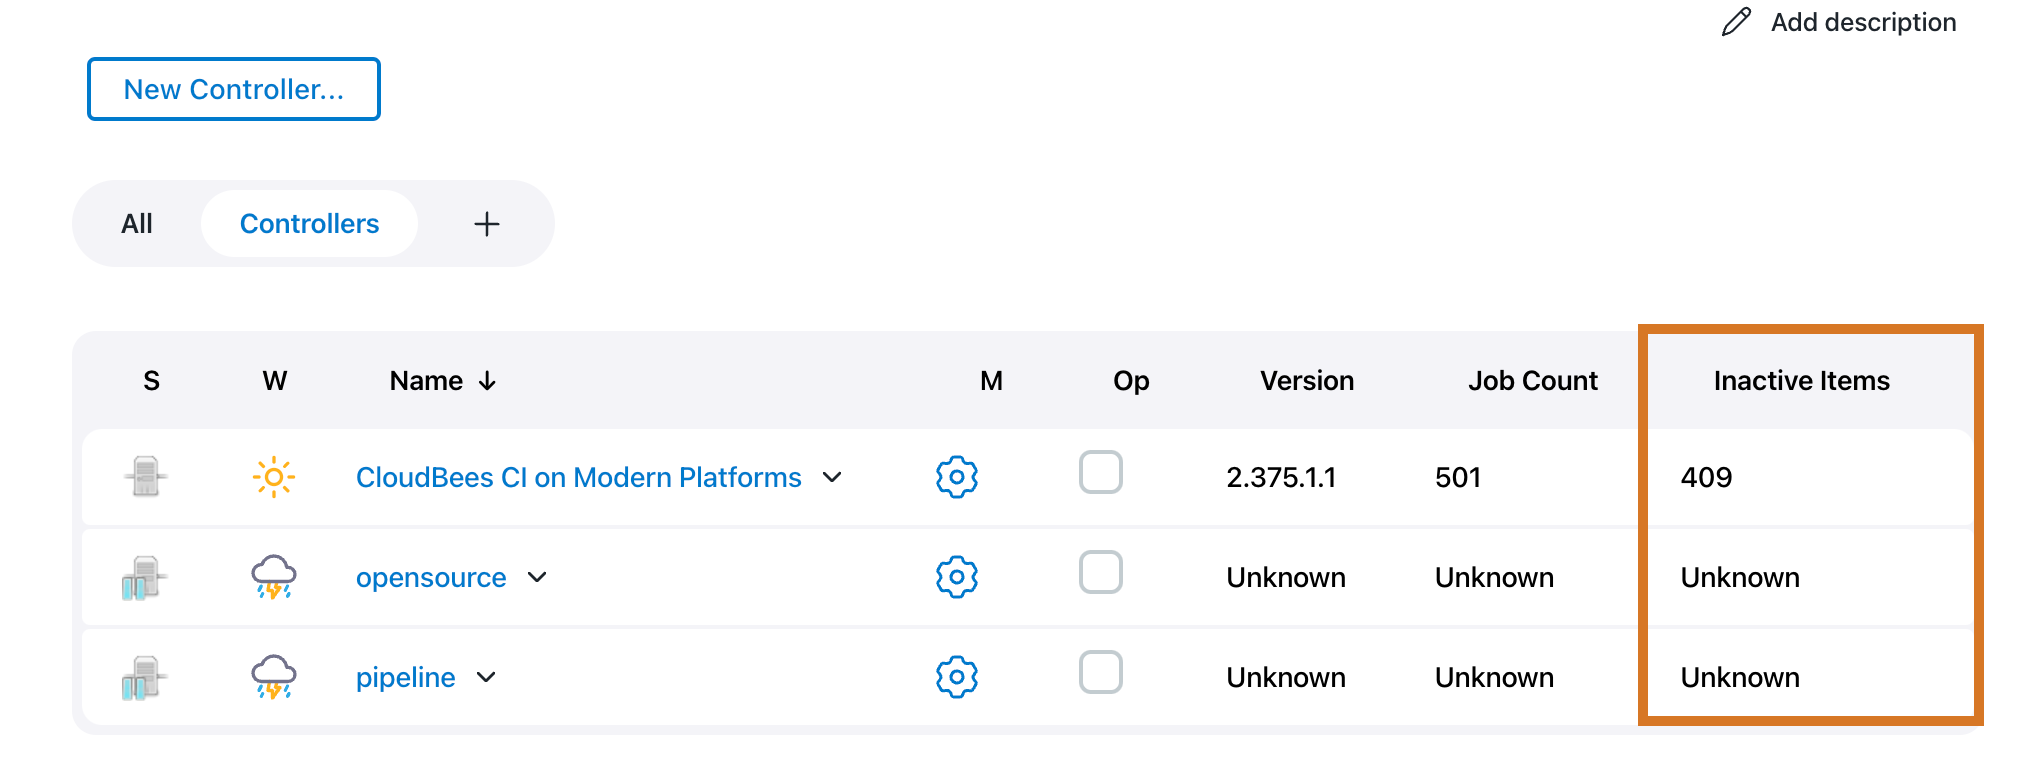
On your operations center dashboard, you can add the Inactive Items column to show the total number of inactive items for each controller. Inactive items are exposed by the controller as a metric.
To add the Inactive Items column to the operations center dashboard:
-
From the operations center dashboard, select Edit View from the left menu.
-
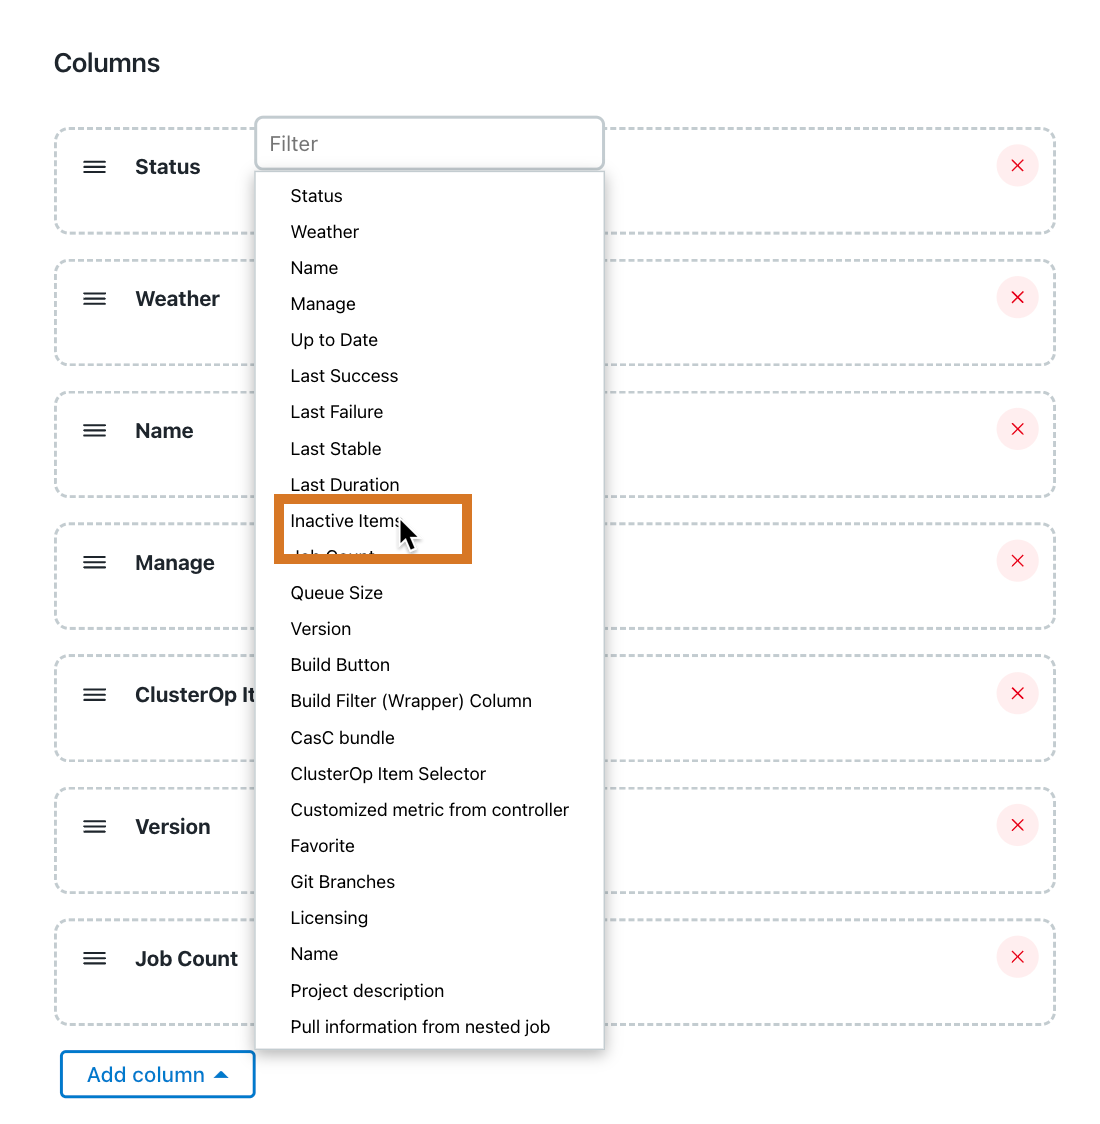
On the controller page, scroll down to the Columns area.
-
Select Add column and then select Inactive Items.
 Figure 3. Add Inactive Items column
 -
Select Apply to save your changes.
-
Select OK to return to the operations center dashboard.
 Figure 4. Inactive Items column
If your controller contains too many inactive items, you can create metric-based alerts with the Creating metric-based alerts with the CloudBees Monitoring plugin.