A persona is a logical collection of CloudBees CD/RO pages that are relevant to a specific job role. One or more personas are assigned to a user or group based on their job role or roles within CloudBees CD/RO. A persona object includes:
-
Top-level categories
-
A set of pages included in each category
-
A default home page
Out of the box, CloudBees CD/RO includes personas for the following job roles, which are read only:
-
Deployment Engineer
-
Global-default persona, assigned to the admin user
-
Release Manager
-
System Administrator
By default, a persona is not assigned to a newly created user; however, all pages and categories for the site default persona are available to the user. Privileged users then assign one or more personas to the new user.
Managing personas
Personas list page
The personas list shows all the personas defined for the CloudBees CD/RO installation and is the location in which you manage personas for your site. To open it, log in as a user having the Personas page available in their home menu—for example, the admin user—and select Personas under the Administration category.
This is a personas list:

Each row in the list represents a persona definition, consisting of the persona name, number of users and groups to which the pipeline is assigned, and the last modified time. You can select All or None and then select Delete to remove the selected personas from the list. You can select the blue + button in the upper right corner to configure a new persona.
Header Section |
|
1 |
Main menu: Opens the CloudBees CD/RO left navigation. |
2 |
My Work: Opens the My Work dashboard. For more information, refer to My work dashboard. |
3 |
Service Catalog: Opens the All Items list page for the Self-Service Catalogs. |
4 |
Release Calendar: Opens the release calendar page for all projects or a specific project. |
5 |
Indicates the user who is currently logged in and provides the following actions: 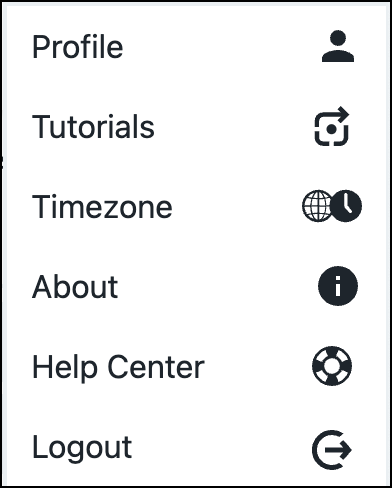
|
Main Page Content |
|
6 |
Identifies the object you are viewing and the total number of personas. |
7 |
Delete personas button for currently selected personas. This button is active when one or more personas are selected. |
8 |
Selects personas on the list. This is used in combination with the delete function. |
9 |
The Add persona button. |
10 |
Find box that allows you to search personas. |
11 |
List of personas configured for this CloudBees CD/RO site. Included in each entry:
|
Viewing persona details
To view configuration details for a specific persona, select its name in the personas list—the Edit Persona dialog displays, opened to the Details page. Alternatively, select Actions and select a specific configuration page.
The details for the Release Manager persona is shown below.
Details Page

1 |
The persona name. |
2 |
Pages comprising the Edit Persona dialog. The current page is underlined.
|
3 |
Name of the persona. |
4 |
Description of the persona. |
5 |
General configuration details:
|
Navigation page
The navigation pages shows which categories and pages are visible to this persona. Additionally, it denotes the persona’s home page. The navigate page for the Release Manager is displayed below.
-
The home page is denoted by blue highlighting and home icon. In this persona below, Releases is the home page.
-
Pages included in the persona are denoted by check marks.

User and group pages
You can use these pages to control users and groups to which this persona is assigned. Users and groups assigned to this persona display on the right side of the respective page. You can add and remove users and groups by selecting the name and using the move right/left buttons: ![]() .
.

Up to 1000 user and group names display in their respective dialogs. If a known user is not included in the list, select the search button ![]() to locate the user.
to locate the user.
Creating a new persona
Privileged users can create new personas at your site for custom, site-specific roles that aren’t addressed by the out-of-box personas.
To create a new persona:
-
Navigate to the Personas list page: From the CloudBees CD/RO main menu, select .
-
Select Add persona. The New Persona dialog displays. From here, you can create a new persona or copy from an existing one.
-
Select Create New. The New Persona dialog displays.
-
Enter top-level details:
-
Name: Enter the name.
-
Description: Optional description.
-
Default: If selected, this persona becomes the site-wide, default role. Users without a persona assignment use navigation from the default for their home menu.
-
-
Continue to Step 3.
-
-
New persona from an existing one:
-
Select Copy Existing. The New Persona From Existing dialog displays.
-
Choose the existing persona on which to base your new one. The New Persona From Existing Details dialog displays.
-
Enter top-level details:
-
Name: Enter the name.
-
Description: Enter an optional description.
-
Associate Groups and Users from <personaName> Persona: Select if you want to carry over existing associations from the source persona.
-
Default: Select if this persona is to become the site-wide, default role.
-
-
Select Copy. The Edit Persona dialog displays.
-
Select the Default option if this persona is to become the site-wide, default role. Continue to Step 3.
-
-
Configure the navigation: select the Navigation tab; the navigation configuration dialog displays.
-
Select the pages you wish to be included in the persona.
-
Select the home page of the persona (optional): Hover over the name of the desired page and select the house icon.

-
-
Assign this persona to groups and users: Visit the Groups tab and Users tab to assign the persona to groups and users, respectively. On each tab, select groups/users to be assigned from the available list on the left side. Then select Move to move them to selected list on the right. Up to 1000 user and group names are displayed in their respective dialogs. If a known user is not included in the list, select the search button
 to locate the user.
 -
Select OK to save the persona.
Modifying a persona
Privileged users can modify personas.
To modify personas:
-
Navigate to the Personas list page: From the CloudBees CD/RO main menu, select .
-
Select the name of the persona to modify. Alternatively, select three-dots for the entry and select the page you want to modify. The Edit Persona dialog displays.
-
Using tabs at the top of the page, navigate to the page where modifications are to be made.
Details and navigation for the original personas shipped with CloudBees CD/RO are read-only. -
Select OK to save the persona.
Deleting a persona
Privileged users can delete personas.
To delete personas:
-
Navigate to the Personas list page: From the CloudBees CD/RO main menu, select .
-
Select the persona to delete.
-
Select Delete persona.
-
Select Delete on the confirmation dialog.
To delete multiple personas:
-
Navigate to the Personas list page: From the CloudBees CD/RO main menu, select .
-
Select the personas you want to delete, and then select Delete personas. A confirmation dialog box displays.
-
Select Delete personas.
A Note about persona privileges
As shipped, all users are able to view personas. However, only the admin user is able to modify and delete persona definitions and are able to change permissions. To view and manage persona access control settings, navigate to the Access Control/Personas page via Home Menu > Server > Personas. Refer to Security for further information about access control management.
Using the personas API
Use the Personas API commands to programmatically manage personas. For details about these commands, refer to CloudBees CD/RO APIs (Preview).