To deploy the hybrid SaaS model, there are three options for installing and managing the required CloudBees Release Orchestration SaaS agent:
-
Managed agent
-
Self-hosted agent with Kubernetes
-
Self-hosted agent with stand-alone server
| You cannot change the agent type once the agent is installed. If you need a different agent option, send us a request. |
With the managed agent model, the agent is installed in a secure CloudBees Release Orchestration SaaS-managed AWS cloud environment for each user, and CloudBees manages all upgrades. The managed agent is kept up to date automatically with the latest release.
The self-hosted agent is for users who manage their DevOps tools behind a firewall, or those users who prefer to secure DevOps access credentials for CloudBees Release Orchestration SaaS within their own network.
The self-hosted agent installation environment can be either Kubernetes or a stand-alone server.
For self-hosted agent updates, displays any notifications that an new agent release is available. Updating the agent requires only a few commands.
Installing the managed agent
To install the managed agent:
-
Select Managed Agent.
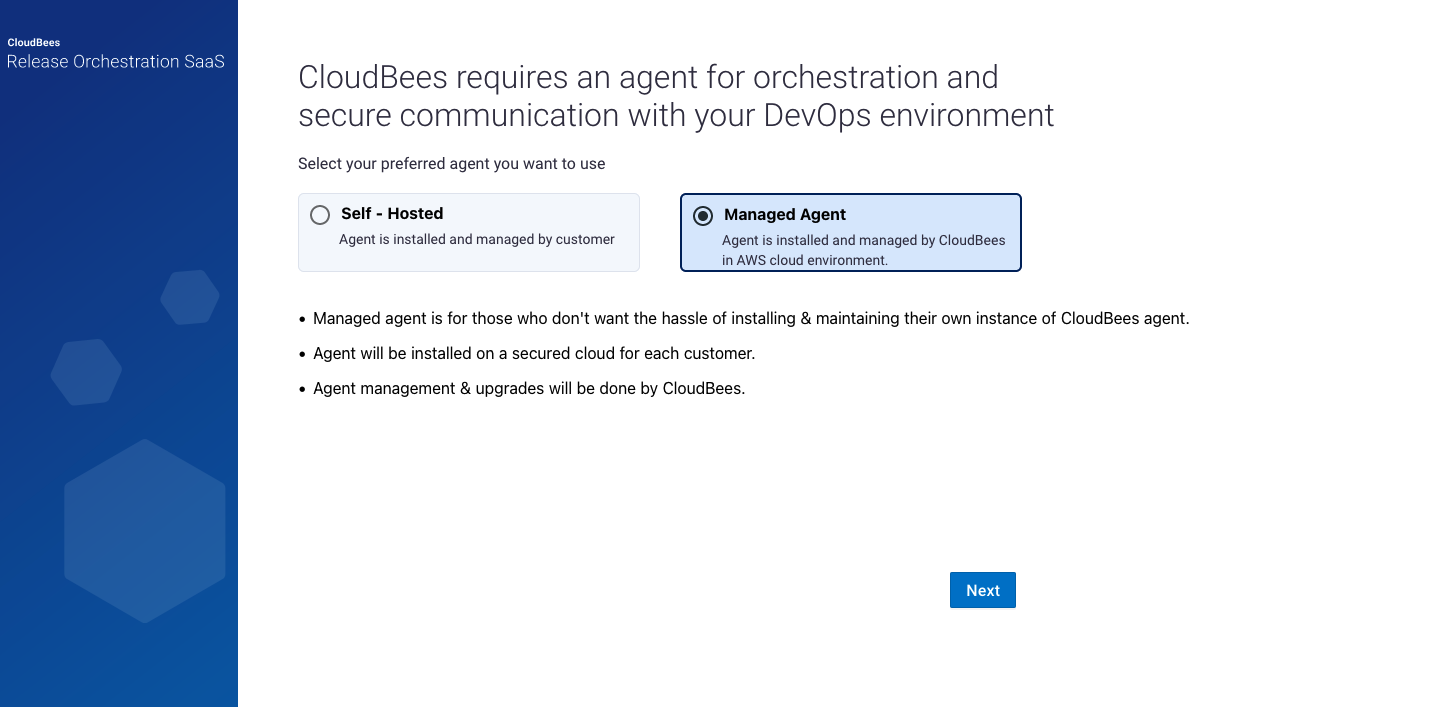 Figure 1. Selecting managed agent installation
 -
Select Next.
-
Select PROCEED.

You have installed the managed agent. The agent status and version display briefly, and then an option to configure a CI tool displays. To learn more, refer to CI tool integration.
Installing the self-hosted agent with Kubernetes
With the self-hosted agent option, the agent is installed on-prem, and any upgrades are managed by the user.
You can choose from four different Kubernetes environments:
-
Amazon Elastic Kubernetes Service
-
Google Kubernetes Engine
-
Azure Kubernetes Service
-
VMware Tanzu Kubernetes Grid Integrated Edition
To install the self-hosted agent with Kubernetes:
-
Select Self-Hosted.
-
Select the Kubernetes Agent installation environment.
-
Select a Kubernetes cluster environment from the options. Note the minimum required system specification for your option.
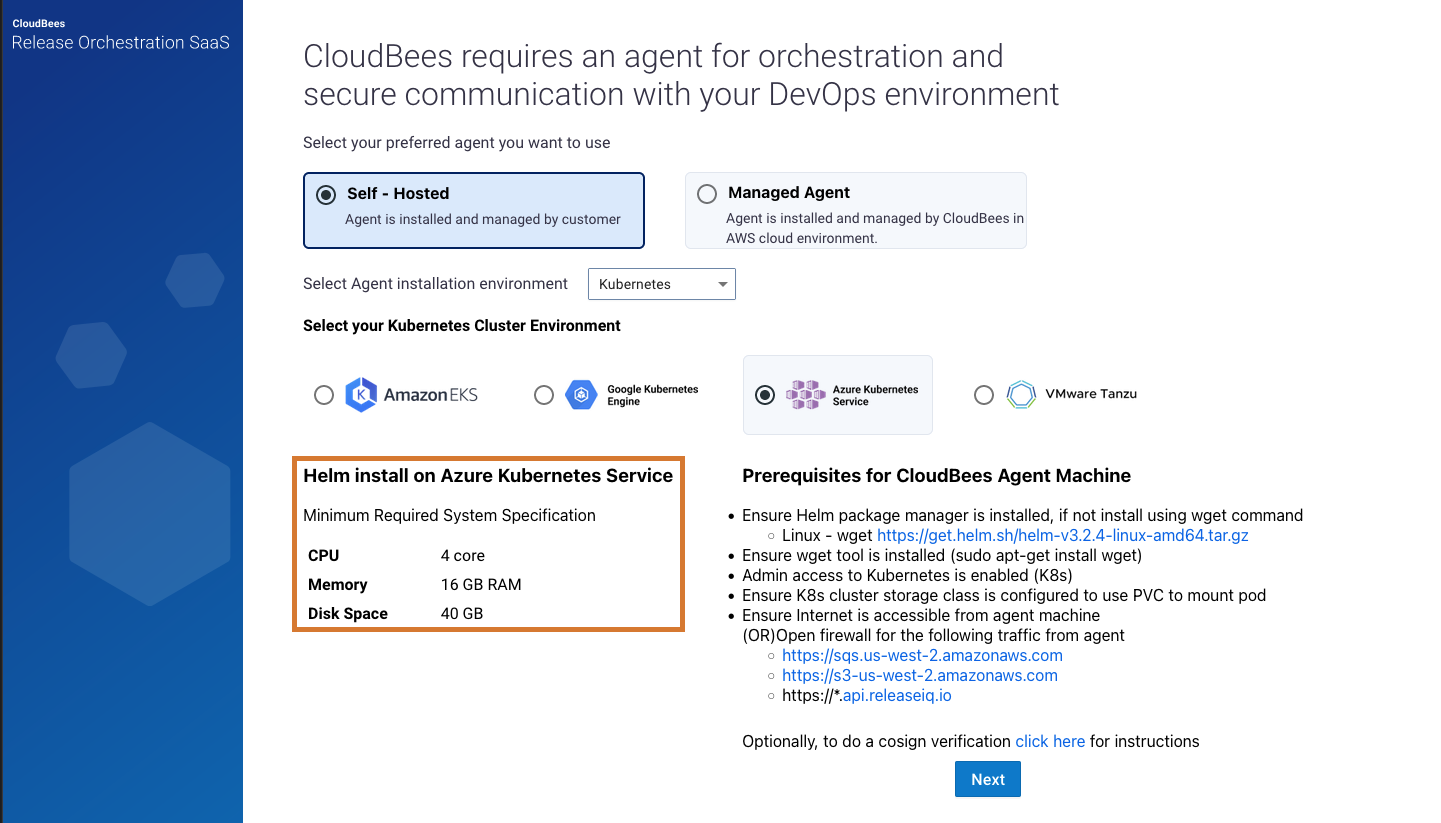 Figure 3. Minimum specifications highlighted for selected option
 -
Select Next.
-
Select PROCEED.
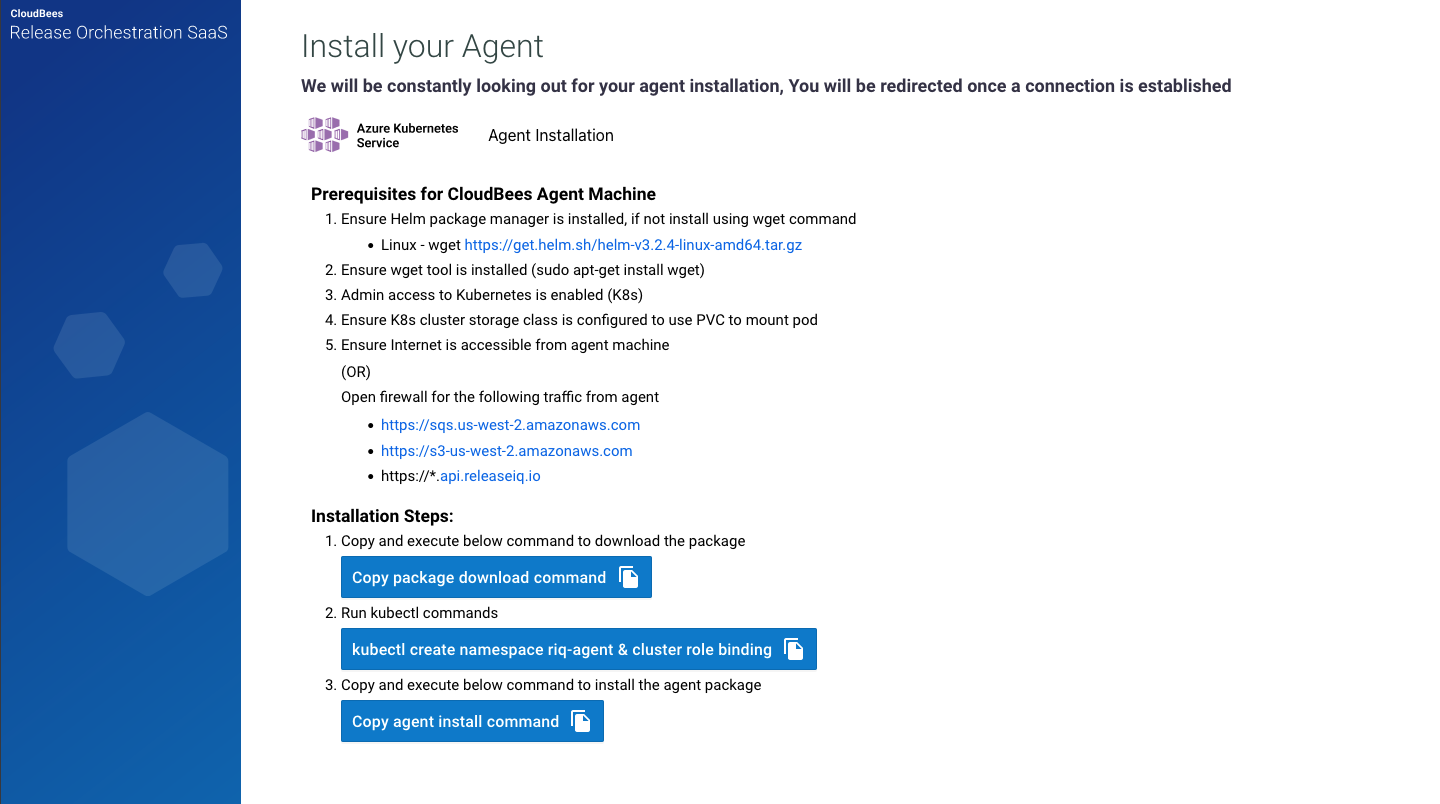 Figure 4. Installing an Azure Kubernetes Service agent
 -
Verify that you have the prerequisites to install the agent.
-
Copy and execute the following commands to download the package and install:
-
Select Copy package download command to copy and run.
-
Select kubectl create namespace riq-agent and cluster role binding to copy and run.
-
Select Copy agent install command to copy and run.
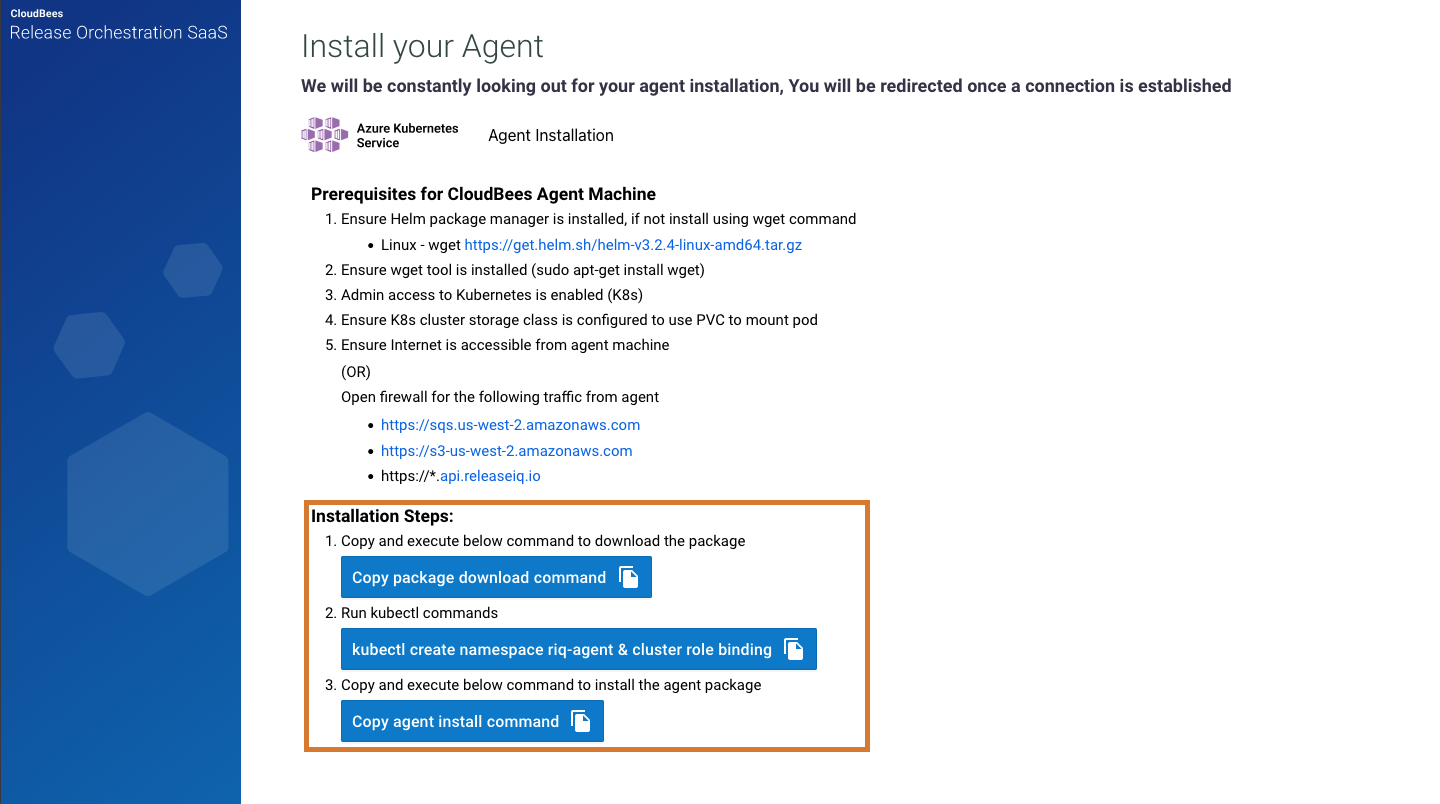 Figure 5. Installation steps for agent installation highlighted
 -
Agent installation takes approximately ten minutes, depending on the actual deployment time, including the pod startup and progression to ready state.
In the agent, run kubectl get pods -n riq-agent or, to watch the status, run kubectl get pods -n riq-agent -w. Upon completion, the services display READY, and the agent screen refreshes to display the agent version with all menus enabled.

You have installed the self-hosted agent with Kubernetes.
Installing the self-hosted agent with a stand-alone server
Minimum requirements for installation of the CloudBees Release Orchestration SaaS self-hosted agent with a stand-alone server are:
-
CPU: 4 CPUs
-
Memory: 16 GB RAM
-
Disk space: 40 GB
-
OS: Ubuntu Server 20.04
To install the self-hosted agent with a stand-alone server:
-
Select Self-Hosted.
-
Select the Standalone server Agent installation environment.
-
Select a sytem type from the options.
-
Select a deployment preference from the options.
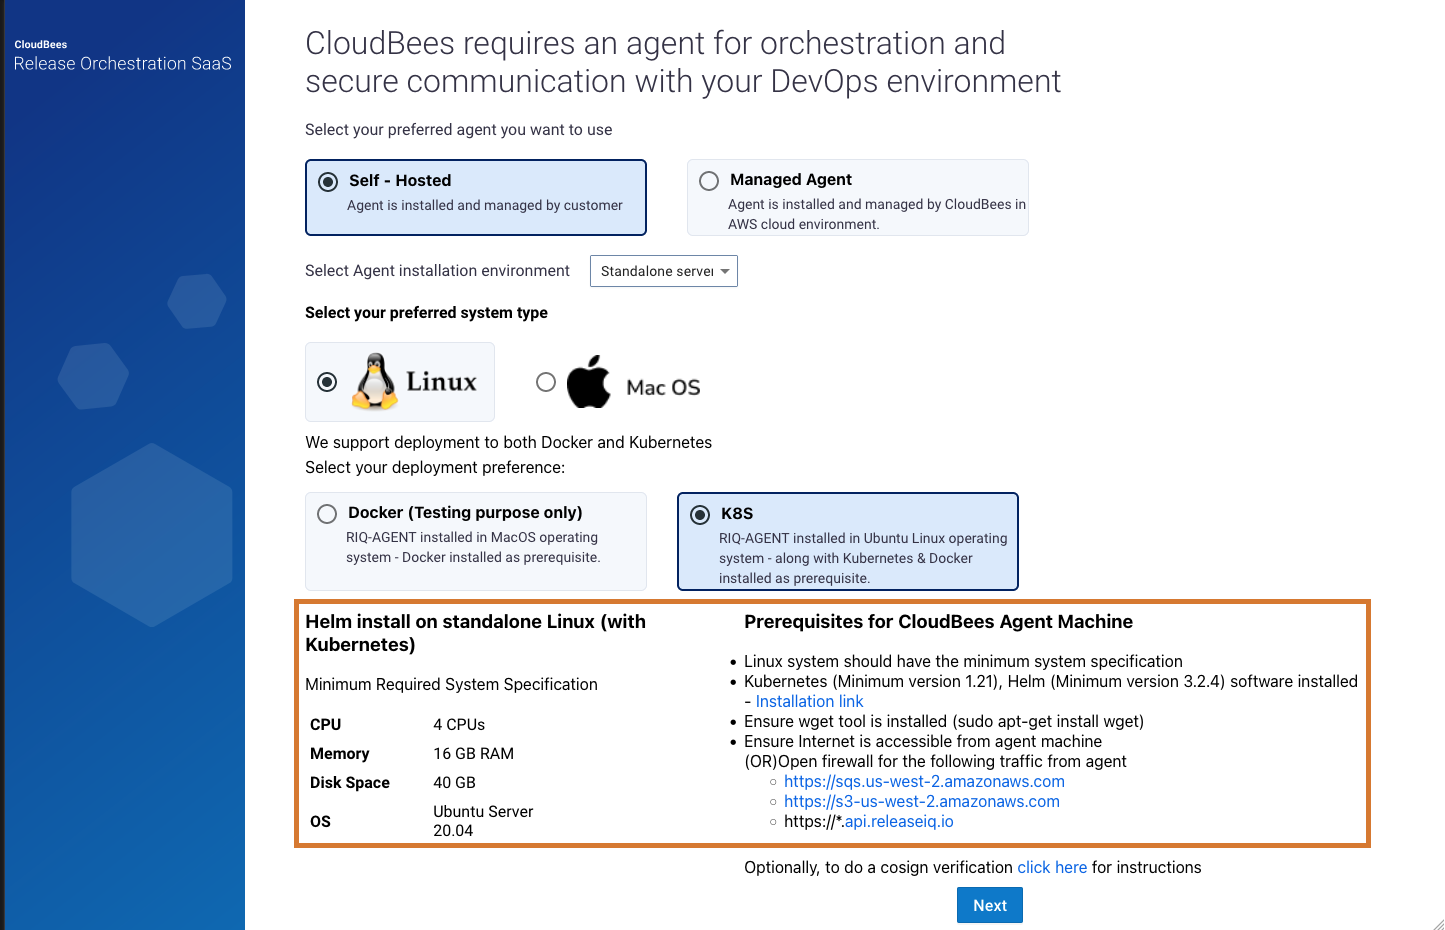 Figure 7. Minimum specifications highlighted for selected option
 -
Select Next.
-
Select PROCEED.
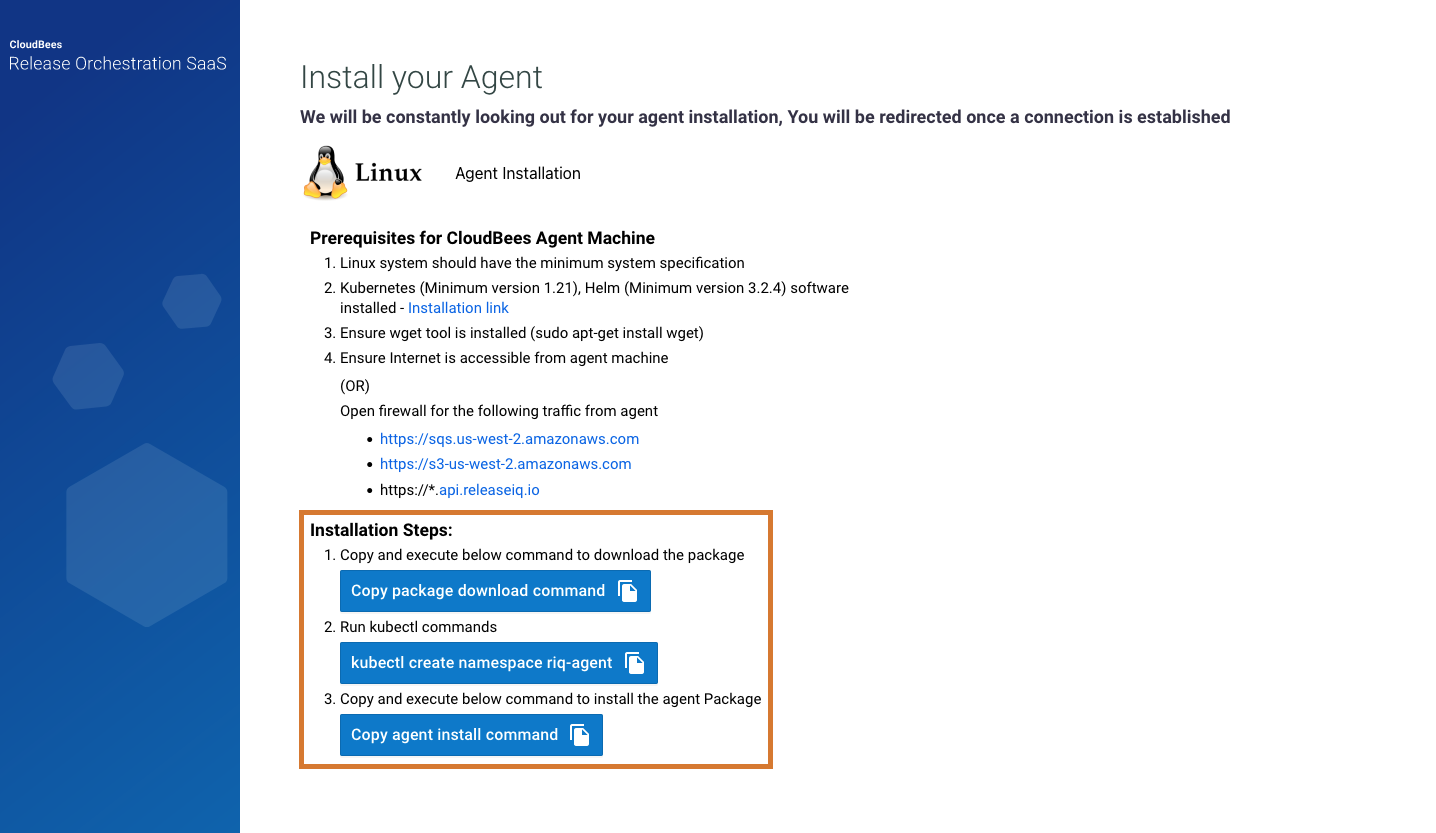 Figure 8. Installing an agent on a stand-alone server
 -
Verify that you have the prerequisites to install the agent.
-
Copy and execute the following commands to download the package and install:
-
Select Copy package download command to copy and run.
-
Select kubectl create namespace riq-agent to copy and run.
-
Select Copy agent install command to copy and run.
-
Agent installation takes approximately ten minutes, depending on the actual deployment time, including the pod startup and progression to ready state.
In the agent, run kubectl get pods -n riq-agent or, to watch the status, run kubectl get pods -n riq-agent -w. Upon completion, the services display READY, and the agent screen refreshes to display the agent version with all menus enabled.
You have installed the self-hosted agent with a stand-alone server.
|
To install the agent on an agent machine which uses a proxy, run:
In the above command, the variables are:
An example of this command is:
|
|
To install the agent on an agent machine whose Jenkins is using SSL:
kubectl create configmap ssl-cert --from-file=ssl-cert.crt -n riq-agent
|