CloudBees Release Orchestration SaaS enables you to view all pipeline tasks or actions assigned to you. You can approve pipeline stages and send manual test results.
Accessing and filtering actions
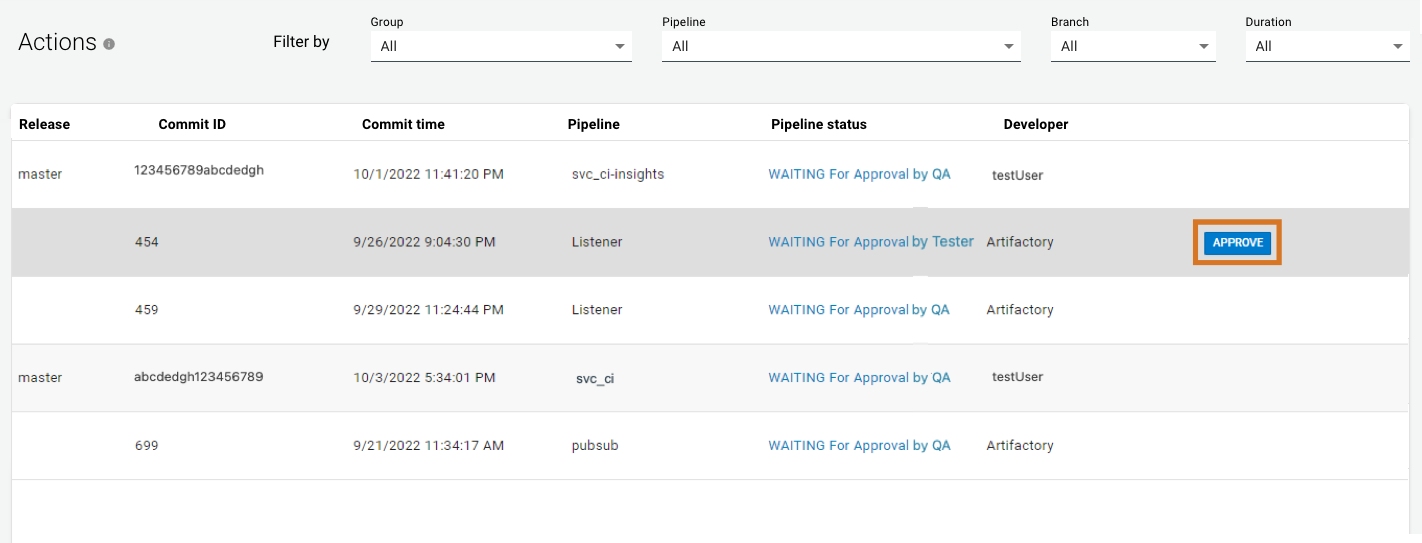
Filter the list of actions by:
-
Pipeline group
-
Pipeline
-
Code branch
-
A time duration
Depending on your filter option, action details include:
-
Release name
-
Commit ID
-
Commit date and time
-
Pipeline name
-
Pipeline status
-
Developer performing the check-in
To filter and display actions:
-
From the CloudBees Release Orchestration SaaS Home page, select
 Actions, to the left of the user settings.
 -
Select a Group, Pipeline, Branch, and/or Duration to filter.
Your selected actions are displayed.
Approving/rejecting a pipeline execution
You can add an approval step to your pipeline to request approval from an individual or group. The approval step enables you to pause the pipeline execution until manual approval is received.
| You must be a designated approver, either individually or as part of a group, to approve or reject a pipeline stage execution. |
To approve or reject a pipeline stage, if you are an approver:
-
From the CloudBees Release Orchestration SaaS Home page, select one of the following:
-
 Actions, to the left of the user settings
 -
-
-
-
-
Select a Group, Pipeline, Branch, and/or Duration to filter actions.
-
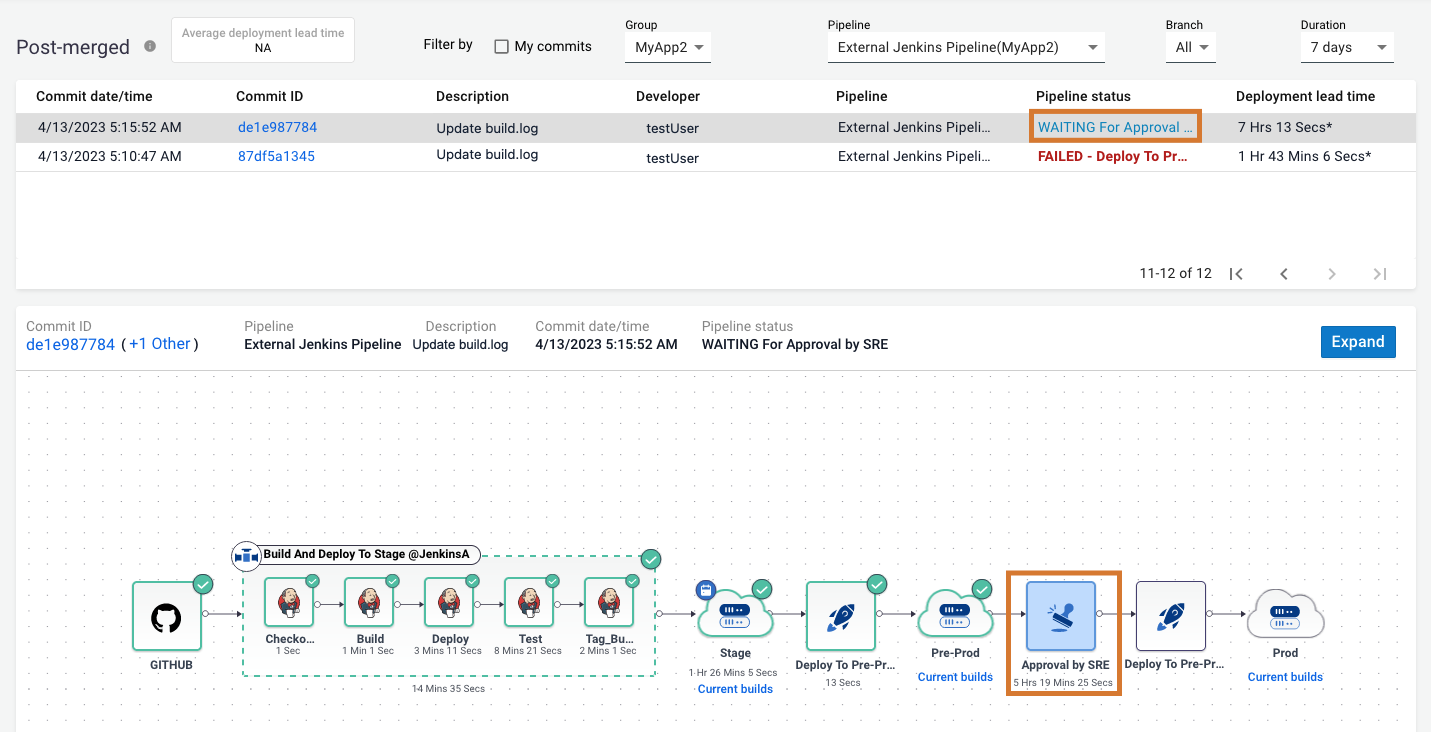
Select a pipeline with a WAITING For Approval status.
-
Select the pipeline stage, and then select APPROVE.
 Figure 1. Selecting the pipeline stage to APPROVE in Post-merged
 Figure 2. APPROVE highlighted on a pipeline in Actions
 -
Select either the Approve or Reject option.
 Figure 3. Approving or rejecting a pipeline stage
 -
Select SUBMIT.
With the Approve option selected, your pipeline continues execution. Alternatively, with the Reject option selected, your pipeline remains at the current stage.
Sending test results
You can either upload a test report or manually enter results, and notify a developer.

To manually enter results:
-
From the CloudBees Release Orchestration SaaS Home page, select
 Actions, to the left of the user settings.
 -
Select a Group, Pipeline, Branch, and/or Duration to filter actions.
-
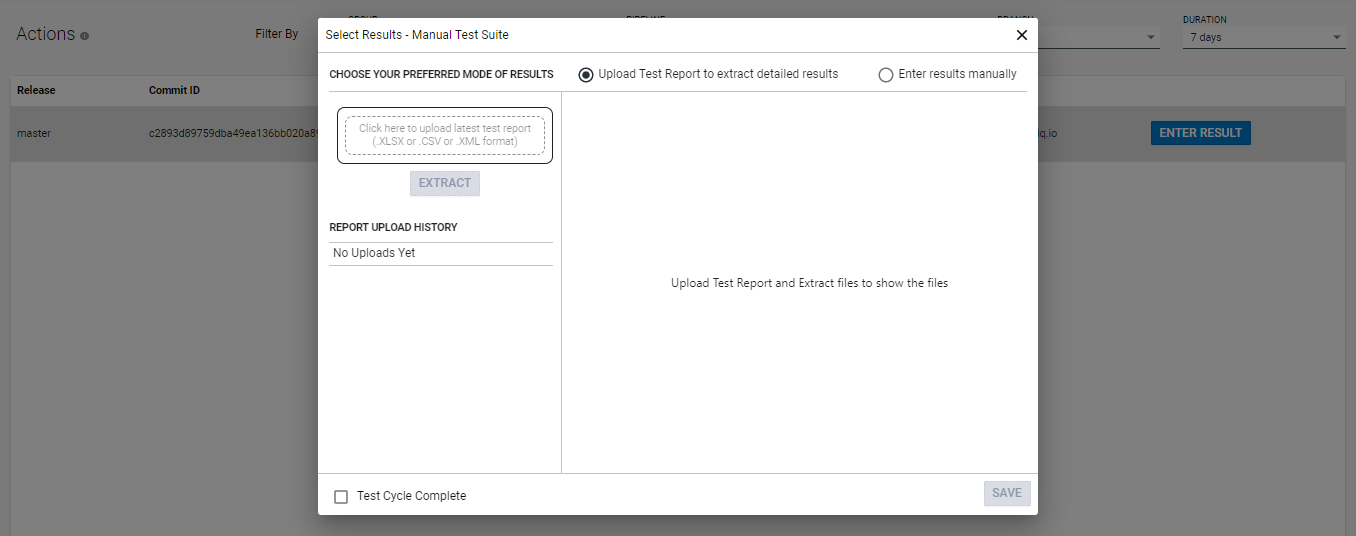
Select ENTER RESULT next to the appropriate pipeline.
-
Select Enter results manually.
-
Enter Total Tests Executed.
-
Enter Total Tests Passed.
-
Enter Total Tests Failed.
-
Select Passed or Failed as appropriate.
-
(Optional) Enter Comments.
-
Select SAVE.
Your manually entered test results are submitted and the developer is notified.
To upload a test report:
-
From the CloudBees Release Orchestration SaaS Home page, select
 Actions, to the left of the user settings.
 -
Select a Group, Pipeline, Branch, and/or Duration to filter actions.
-
Select ENTER RESULT next to the appropriate pipeline.
-
Select Upload Test Report to extract detailed results.
-
Select Click here to upload latest test report to upload your file.
-
Select EXTRACT.
-
Select SAVE.
Your uploaded test results are submitted and the developer is notified.