CloudBees Release Orchestration SaaS enables you to create complex pipelines by connecting external pipeline definitions into a new pipeline. Any pipeline that is in a different pipeline group is considered an external pipeline. For more information about pipeline groups, refer to Manage groups.
| To add a pipeline from the same pipeline group to your pipeline, use the Pipeline connector tool. To learn more, refer to Pipeline connector. |
Adding an external pipeline
Configure an external pipeline and any associated job parameters in Pipeline composer. You can also set a schedule and enable notifications.
To add an external pipeline:
-
From the CloudBees Release Orchestration SaaS Home page, select .
-
Select an existing pipeline, or create a new pipeline. Refer to Working with pipelines for more information.
-
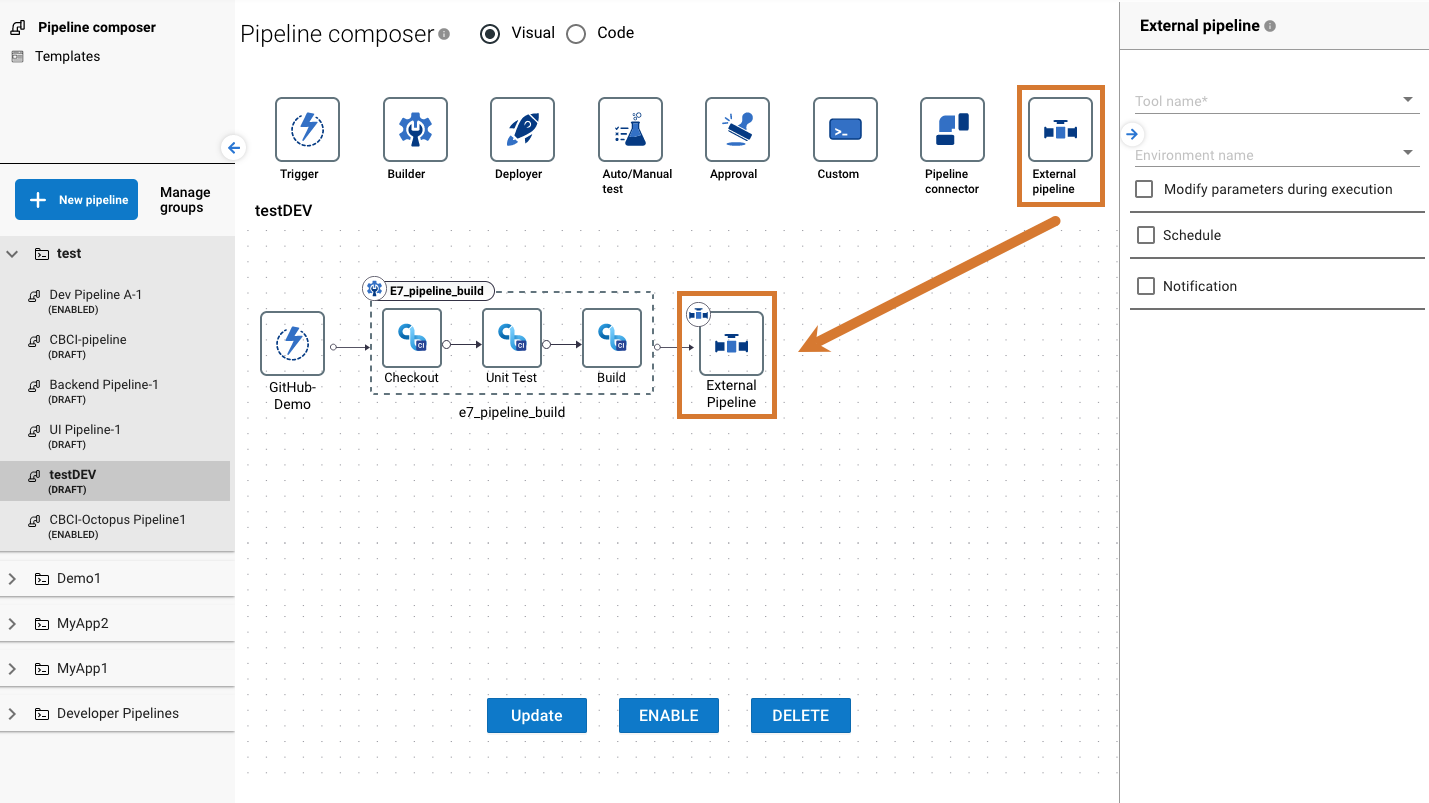
Select External pipeline from the icon options, which adds it to your pipeline.
-
On the right pane:
-
Select Tool name from the options.
-
Select Environment name from the options.
 Figure 1. Adding an external pipeline
 -
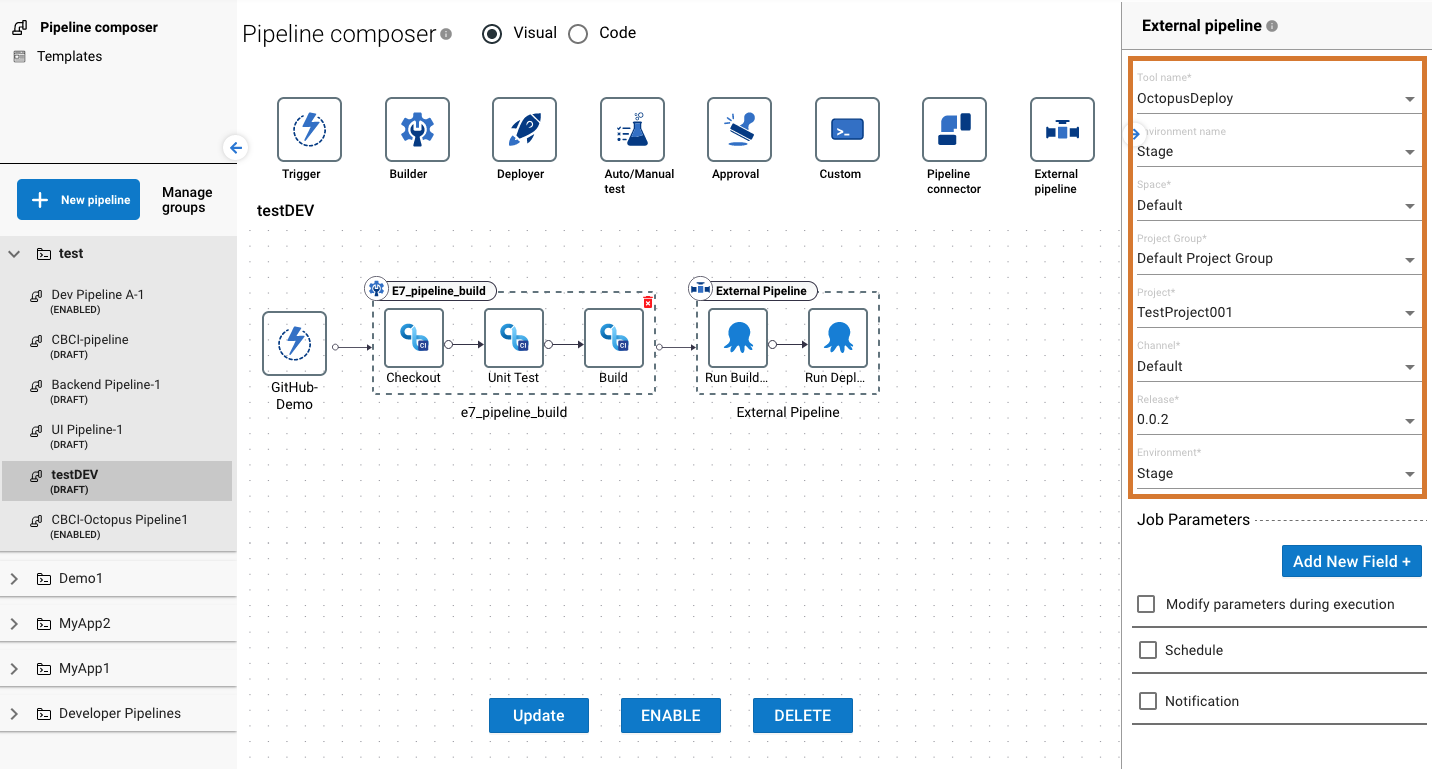
Depending on the external pipeline added, enter any other required settings, such as Pipeline name, Controller name, or Project.
 Figure 2. An external pipeline with a configured pipeline name
 -
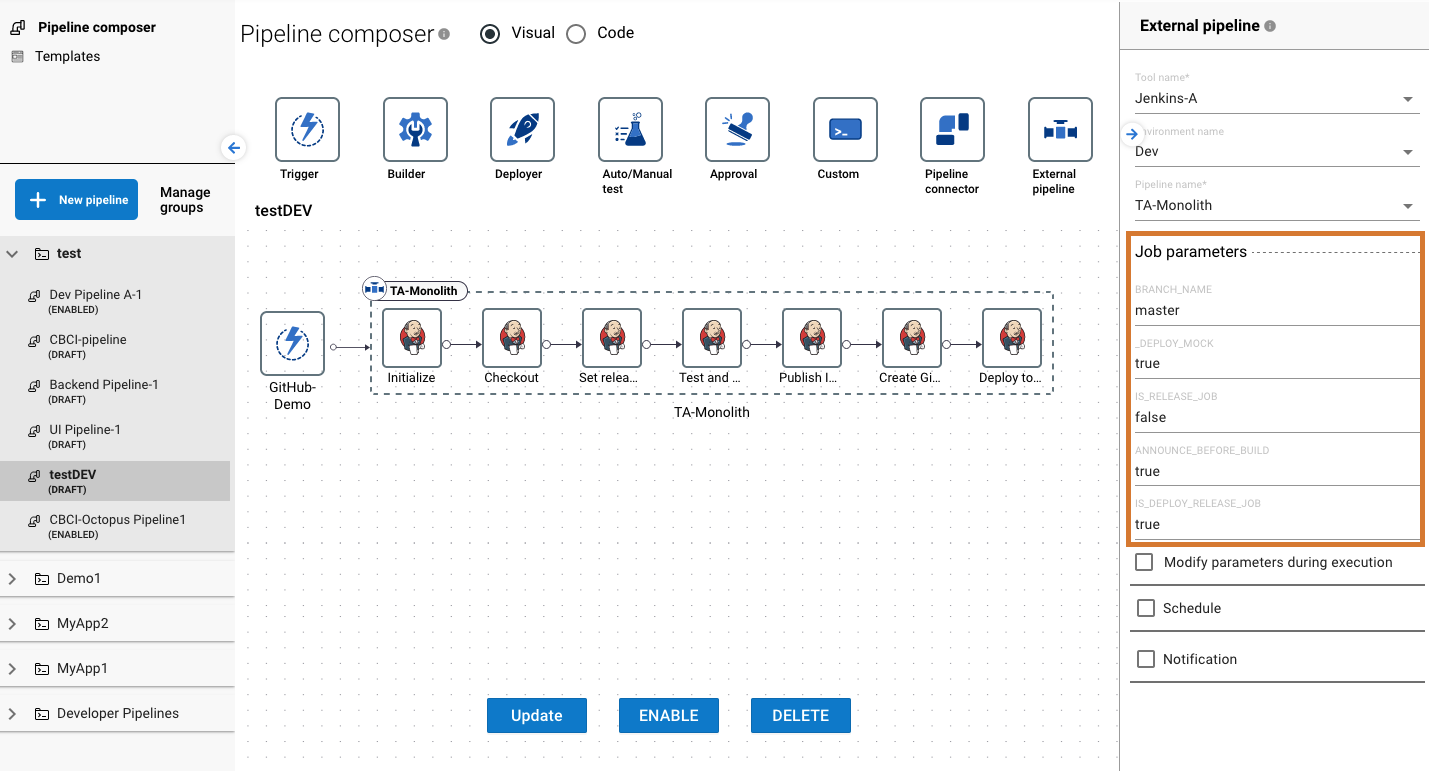
Depending on the external pipeline added, enter any necessary job parameters for the external pipeline.
 Figure 3. An external pipeline with job parameters configured
 -
(Optional) Select Modify parameters during execution if you want to update external pipeline job parameters during the pipeline execution.
-
(Optional) Select Schedule. Refer to Scheduling for more information.
-
(Optional) Select Notification. Refer to Notifications for more information.
-
-
Select UPDATE.
You have added an external pipeline to your pipeline.
| To update an external pipeline, refer to Working with pipelines. |