You can organize your pipelines in CloudBees Release Orchestration SaaS using groups. Pipelines, regardless of their definition, can be placed in the same group. Pipeline groups are useful for setting up user access in a specific project. You can move pipelines from one group to another, and you can control user access at both the group and pipeline levels.
| To return to the Pipeline composer UI, select Back to Pipeline composer on the upper right of Groups. |
Creating a group
You can create a new group in the CloudBees Release Orchestration SaaS UI to organize your pipelines.
To create a new group:
-
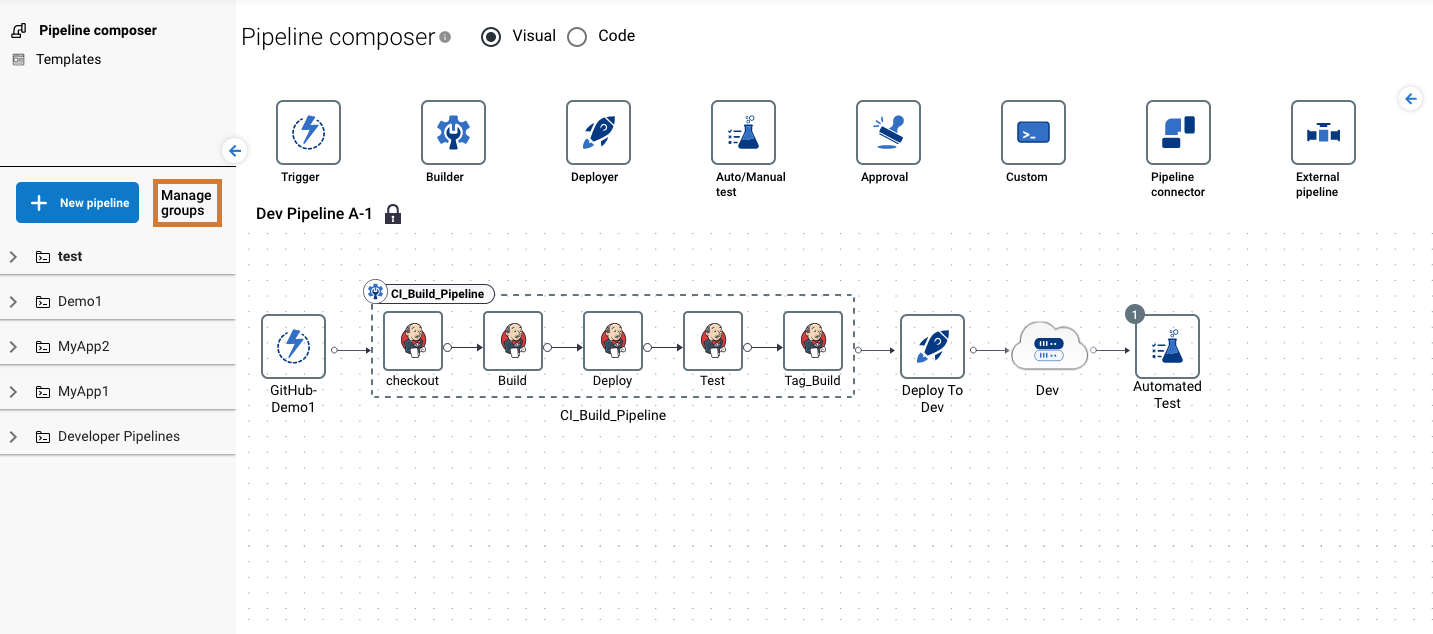
From the CloudBees Release Orchestration SaaS Home page, select , and then select Manage Groups at the top of the Pipeline composer screen.
 Figure 1. Manage Groups highlighted
 -
Select Create group on the left pane.
-
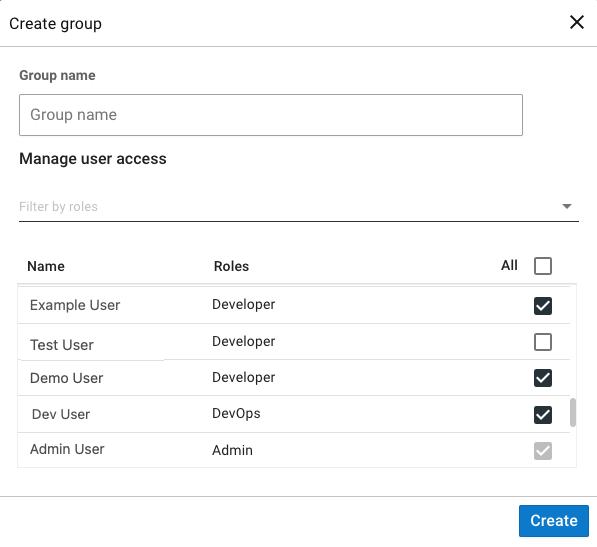
Enter a Group name.
You cannot change the group name after the group is created. -
Select user(s) that you would like to be granted access to the group. You can filter the user list by role, and you can select All to include all users in the list.
Users with the Admin role automatically have access to any pipeline group.  Figure 2. A new pipeline group
 -
Select Create.
You have created a new pipeline group, and it is available on the left pane.
Updating a group
You can update a group in Pipeline composer. You can move pipelines from one group to another, and you can control user access at both the group and pipeline levels.
To update group user access:
-
From the CloudBees Release Orchestration SaaS Home page, select , and then select Manage groups at the top of the Pipeline composer screen.
-
Select a group on the left pane.
-
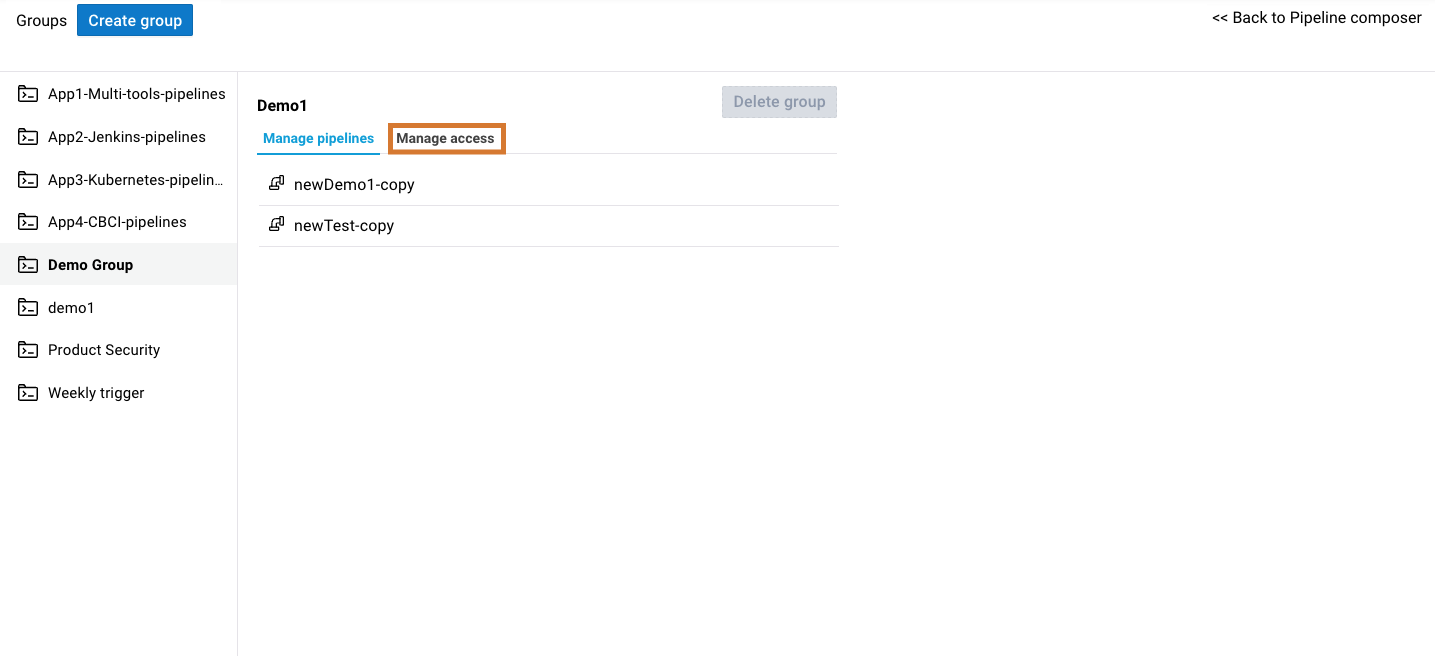
Select Manage access to the right of Manage Pipelines.
 Figure 3. Manage access for groups highlighted
 -
Make any desired updates.
-
Select SAVE.
You have updated group user access. Every pipeline in the group is also updated.
To update pipeline user access:
-
From the CloudBees Release Orchestration SaaS Home page, select , and then select Manage groups at the top of the Pipeline composer screen.
-
Select a group on the left pane.
-
Select a pipeline.
-
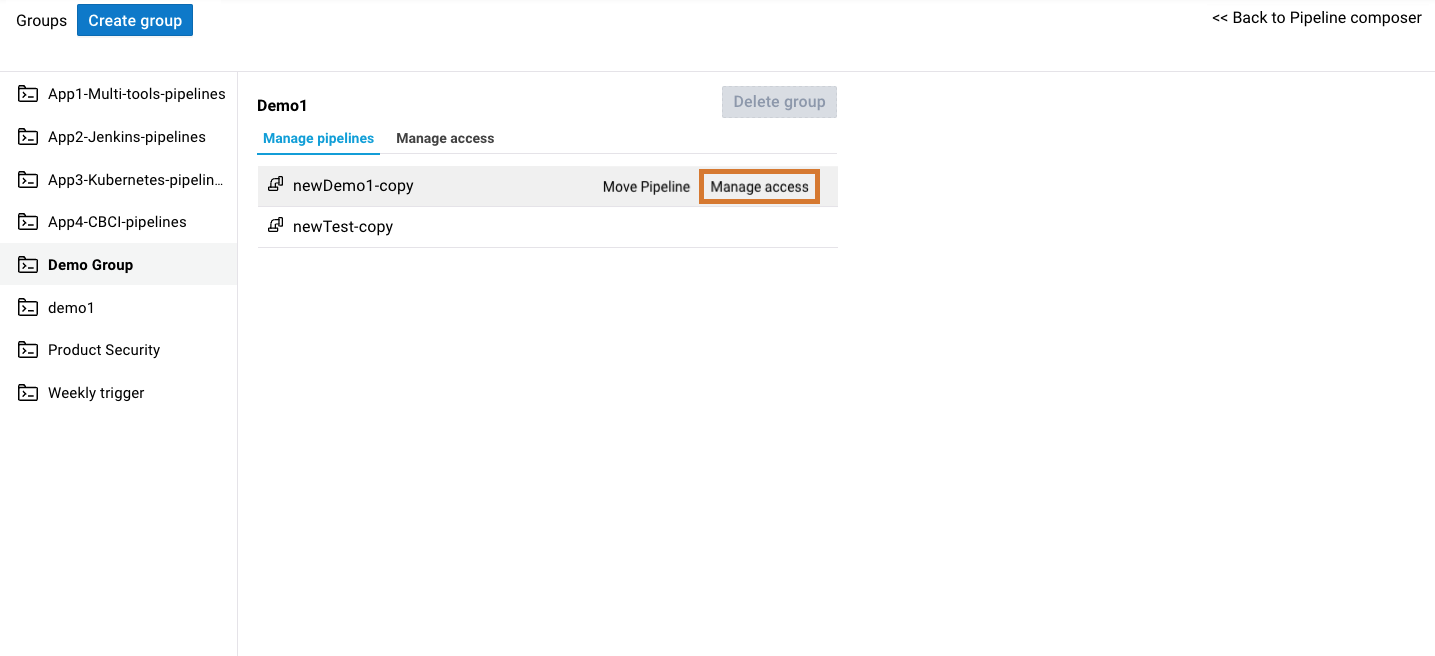
Select Manage access.
 Figure 4. Manage access for pipelines highlighted
 -
Make any desired updates.
-
Select SAVE.
You have updated pipeline user access, and the other pipelines in the group are not affected.
To move a pipeline to a different group:
-
From the CloudBees Release Orchestration SaaS Home page, select , and then select Manage groups at the top of the Pipeline composer screen.
-
Select a group on the left pane.
-
Select a pipeline.
-
Select Move Pipeline.
-
Select the destination group from the options.
-
Select Move Pipeline.
-
Select Proceed.
You have moved your pipeline to its destination group.
Deleting a group
You can delete a group only if it contains no pipelines.
To delete a group:
-
From the CloudBees Release Orchestration SaaS Home page, select , and then select Manage groups at the top of the Pipeline composer screen.
-
Select a group on the left pane.
-
Select Delete group.
-
Select Delete.
You have deleted your pipeline group.