The build repository is the tool that stores the build binary. CloudBees Release Orchestration SaaS supports JFrog and Amazon Elastic Container (AWS ECR) repositories.
Configuring an AWS ECR repository
You can add AWS ECR as a build repository to CloudBees Release Orchestration SaaS.
To configure an AWS ECR build repository:
-
From the CloudBees Release Orchestration SaaS Home page, select .
-
Select Build Repository on the left pane.
-
Select Add new to display a blank form. If there are no current configurations, the blank form is displayed by default.
-
Select the AWS ECR Tool Type from the options.
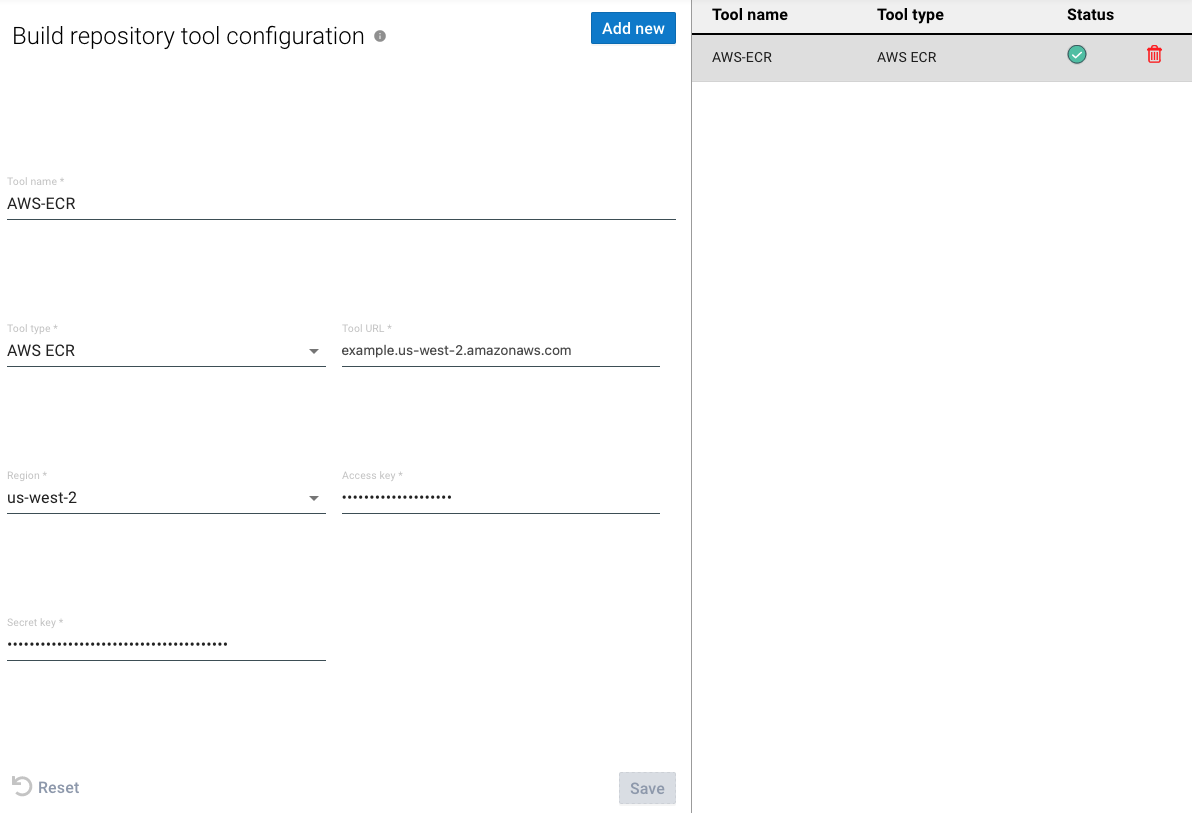 Figure 1. AWS ECR configuration
 -
Enter a Tool name.
-
Select the AWS ECR Tool Type from the options.
-
Enter the Tool URL.
-
Select a Region from the options.
-
Add the following policy to both your Access key and Secret key files:
AWS ECR Access key and Secret key policy{ } "Effect": "Allow", "Action":[ "ecr:DescribelmageScanFindings", "ecr:StartImageScan", "ecr:CreateRepository", "ecr:GetDownloadUrlForLayer", "ecr:DescribeRegistry", "ecr:PutImageScanning Configuration", "ecr:GetAuthorizationToken", "ecr:UploadLayerPart", "ecr:BatchDeletelmage", "ecr:PutImage", "ecr:BatchGetImage", "ecr:CompleteLayerUpload", "ecr:Describelmages", "ecr:TagResource", "ecr:DescribeRepositories", "ecr:InitiateLayerUpload", "ecr:BatchCheckLayerAvailability" ], "Resource":"*" } -
Enter your Access key.
-
Enter your Secret key.
-
Select Save.
Your AWS ECR build repository tool configuration is saved and listed on the right pane.
Configuring a JFrog Artifactory repository
You can add JFrog Artifactory as a build repository to CloudBees Release Orchestration SaaS.
To configure a JFrog Artifactory build repository:
-
From the CloudBees Release Orchestration SaaS Home page, select .
-
Select Build repository on the left pane.
-
Select Add new to display a blank form. If there are no current configurations, the blank form is displayed by default.
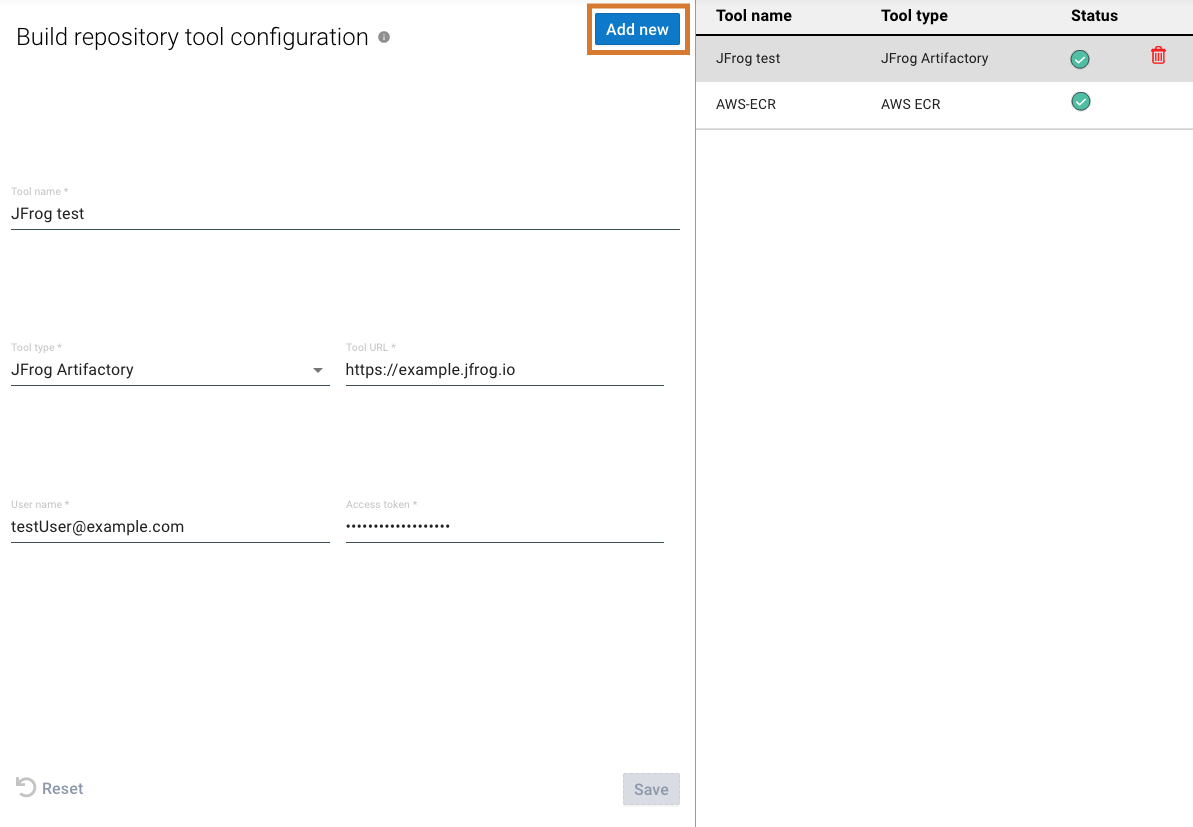 Figure 2. Tool configuration Add new highlighted
 -
Enter a Tool name.
-
Select the JFrog Artifactory Tool type from the options.
-
Enter the Tool URL.
-
Enter your User name.
-
Enter your Access token.
The JFrog Access token must have:
-
A Never Expires configuration
-
Access to Xray and Artifactory services
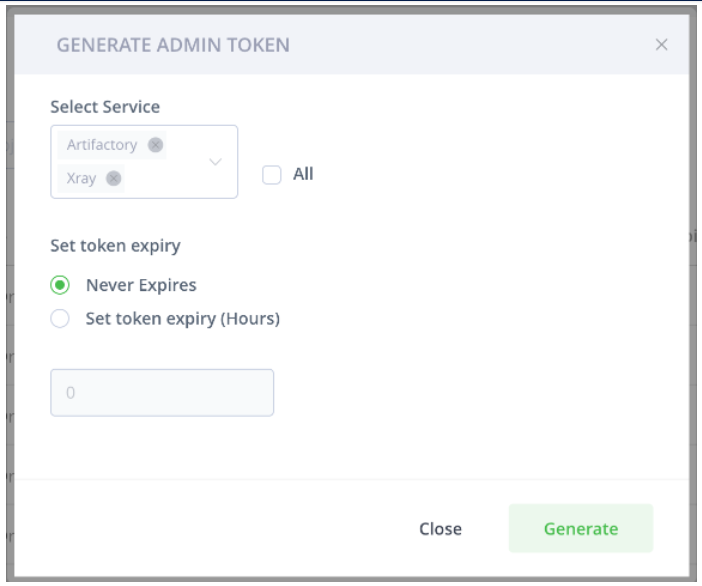 Figure 3. JFrog access token configuration
 -
-
Select Save.
Your JFrog Artifactory build repository tool configuration is saved and listed on the right pane.
Configuring JFrog webhooks
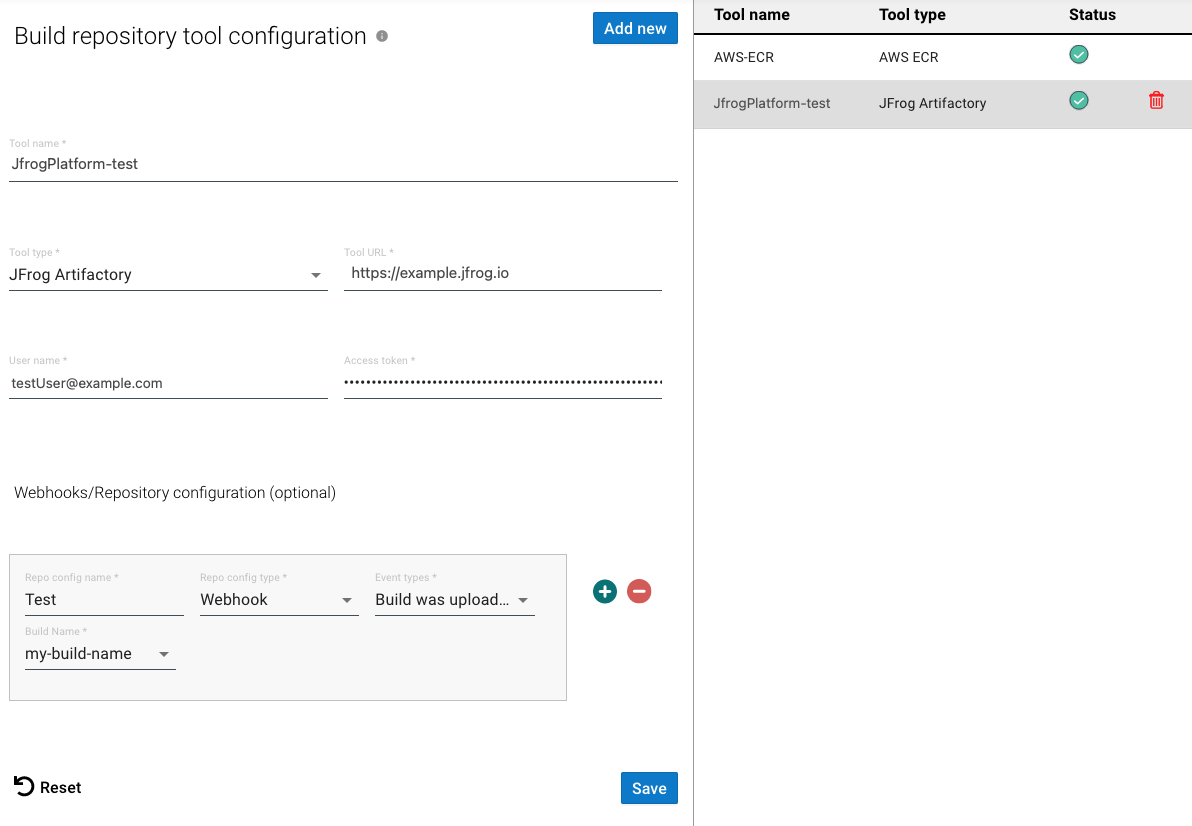
Using a JFrog webhook, CloudBees Release Orchestration SaaS can integrate with automated notifications, thus enabling pipelines to work seamlessly. You can add any number of JFrog webhooks.
To configure JFrog webhooks:
-
From the CloudBees Release Orchestration SaaS Home page, select .
-
Select Build repository on the left pane.
-
Select a JFrog Artifactory tool configuration from the right pane.
-
Enter a Repo config name.
-
Select the Webhook Repo config type.
-
Select Event types from the options.
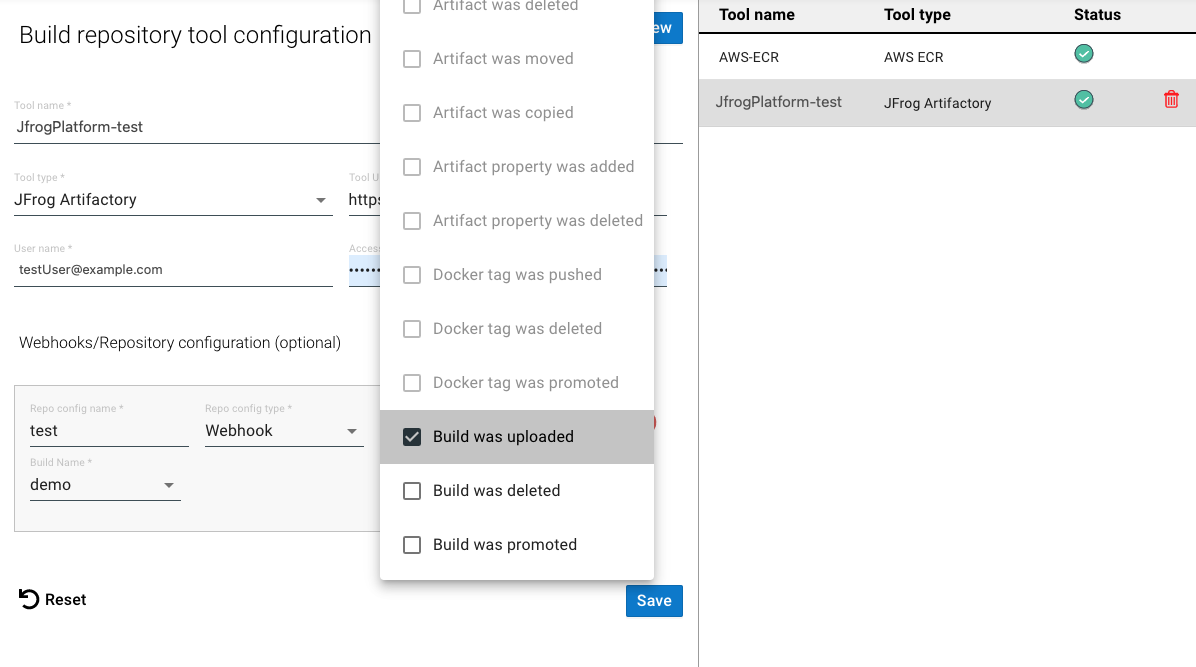 Figure 4. Selecting the Build was uploaded event type.
-
For Artifact or Docker Event types, enter the Repo Name and an optional Artifact location.
-
For Build Event types, enter the Build Name.
-
To uncheck an event type, select the event type again.
-
Once an event type is selected, only related event types remain available for selection.
-
To add or remove a webhook configuration, select
 or
or  , respectively.
-
-
Your webhook configuration in the JFrog build repository is saved and listed on the right pane.
| Select Reset to clear your selection at any time. |
Updating a configuration
You can update the build repository configuration.
To update your build repository configuration:
-
From the CloudBees Release Orchestration SaaS Home page, select .
-
Select Build repository on the left pane.
-
Select a configuration on the right pane.
-
Make any updates.
-
Select Update.
Your build repository configuration is updated.
Deleting a configuration
To delete your build repository configuration:
-
From the CloudBees Release Orchestration SaaS Home page, select .
-
Select Build repository on the left pane.
-
Select a configuration on the right pane.
-
Select
 Delete.
 -
Select DELETE.
Your build repository configuration is deleted.