In CloudBees Release Orchestration SaaS, you can run tests after the build stage has been completed and the code is deployed. You can run tests such as unit tests, UI tests, and integration tests at this stage to maintain code quality and accelerate deployment.

Adding automated testing
Automated testing helps you find bugs and fix any issues early, preventing deployment delays.
To add automated testing:
-
From the CloudBees Release Orchestration SaaS Home page, select .
-
Select an existing pipeline, or create a new pipeline. Refer to Working with pipelines for more information.
-
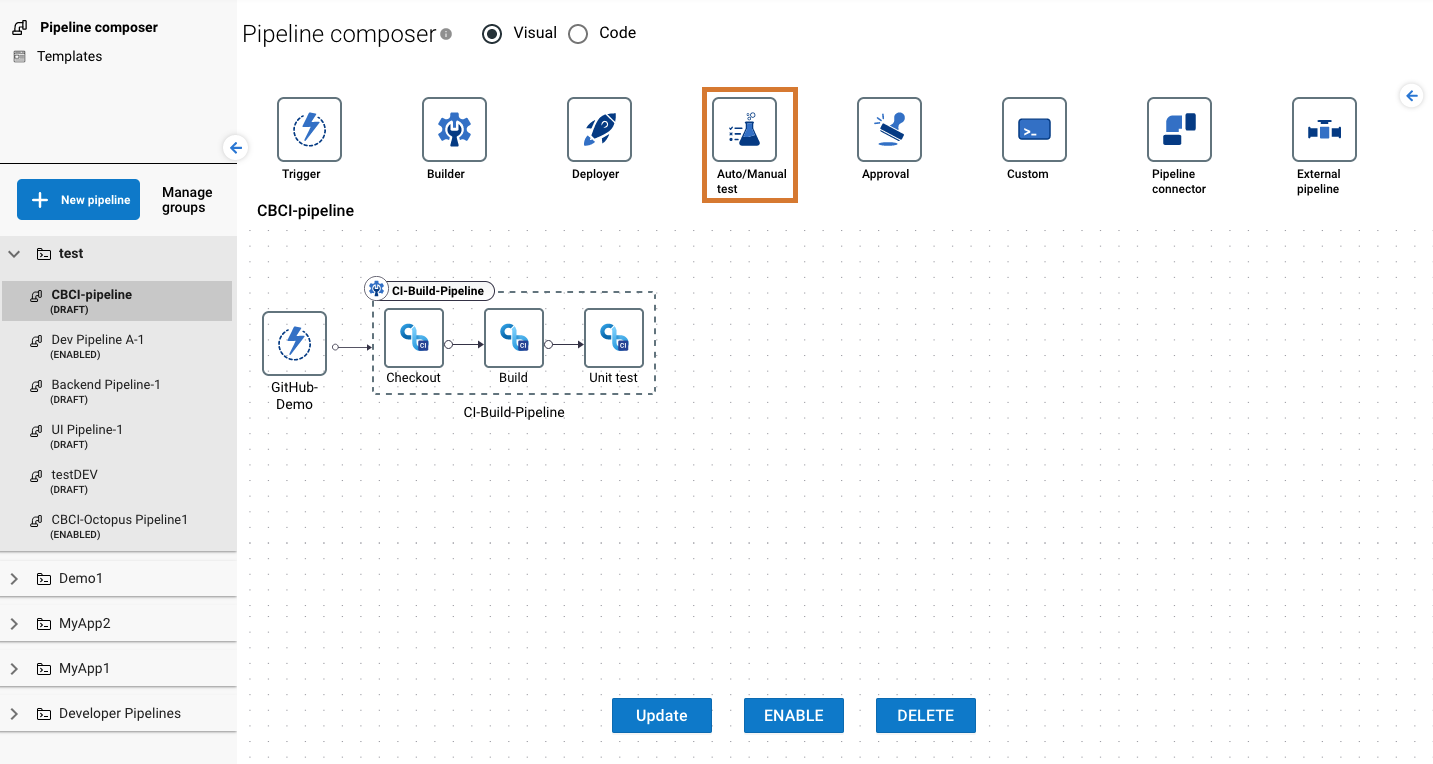
Select Auto/Manual test from the icon options, which adds it to your pipeline.
-
On the right pane:
-
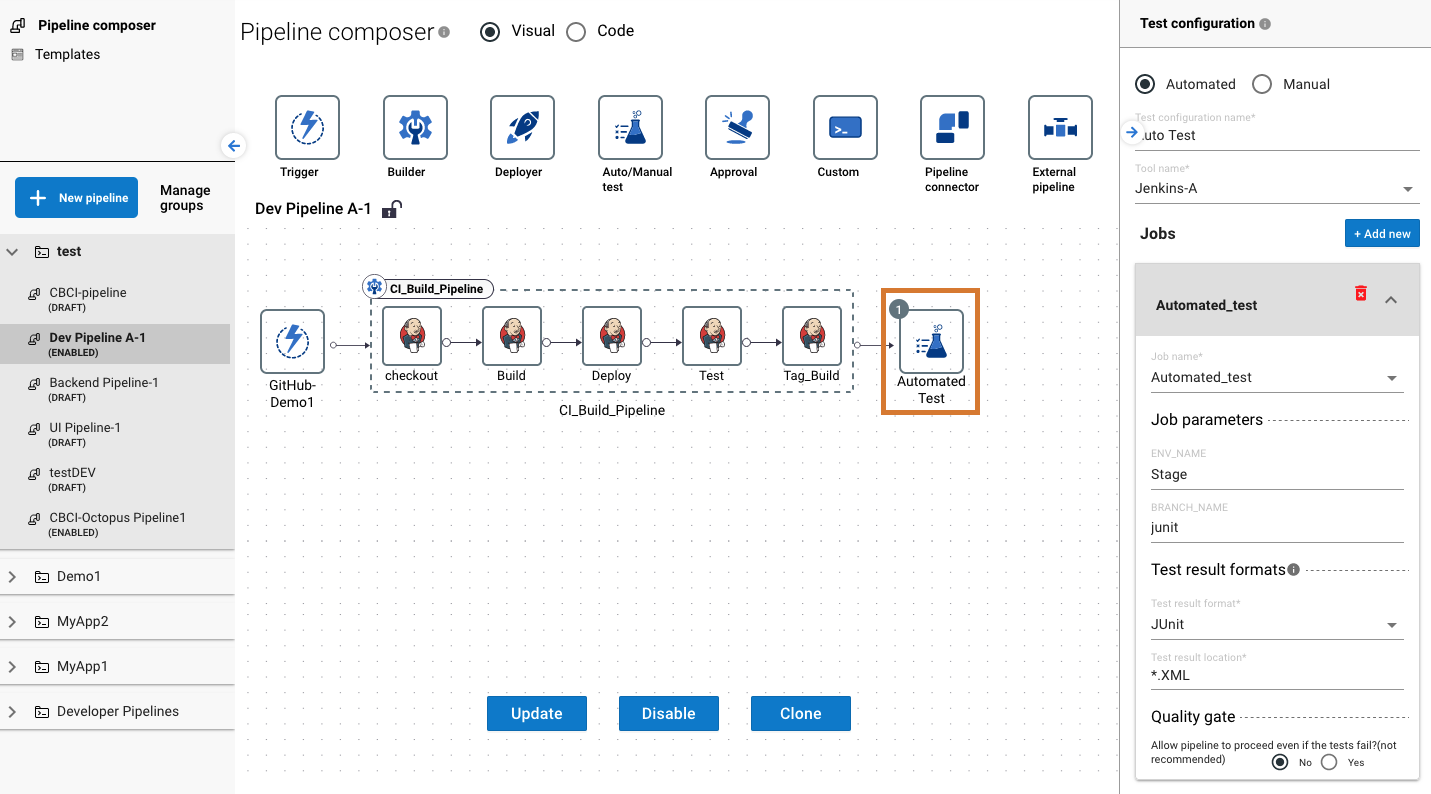
Select Automated.
-
Enter Test configuration name.
-
Select a Tool name from the options.
-
Select + Add new to add a test job.
-
Select the job settings from the options. Depending on the tool type, these may include:
-
Project
-
Plan
-
Job name
-
Repo name
-
Branch name
-
Workflow name
-
-
Select a Test result format from the options.
-
Enter a Test result location path relative to the testing workspace.
-
For Quality gate, select No to have the pipeline stop execution if tests fail (recommended). Refer to Configuring the quality gate for more information.
-
(Optional) Select Ability to override the Quality Gate. Refer to Configuring the quality gate for more information.
-
(Optional) Select Schedule. Refer to Scheduling for more information.
-
(Optional) Select Notification. Refer to Notifications for more information.
-
-
You may add and configure more jobs if desired by selecting + Add new.
-
Select UPDATE.
You have added automated tests to your pipeline.

Adding manual testing
Manual tests help to verify a build when you introduce a new feature into the software.
To add manual testing:
-
From the CloudBees Release Orchestration SaaS Home page, select .
-
Select an existing pipeline, or create a new pipeline. Refer to Working with pipelines for more information.
-
Select Auto/Manual test from the icon options, which adds it to your pipeline.
-
On the right pane:
-
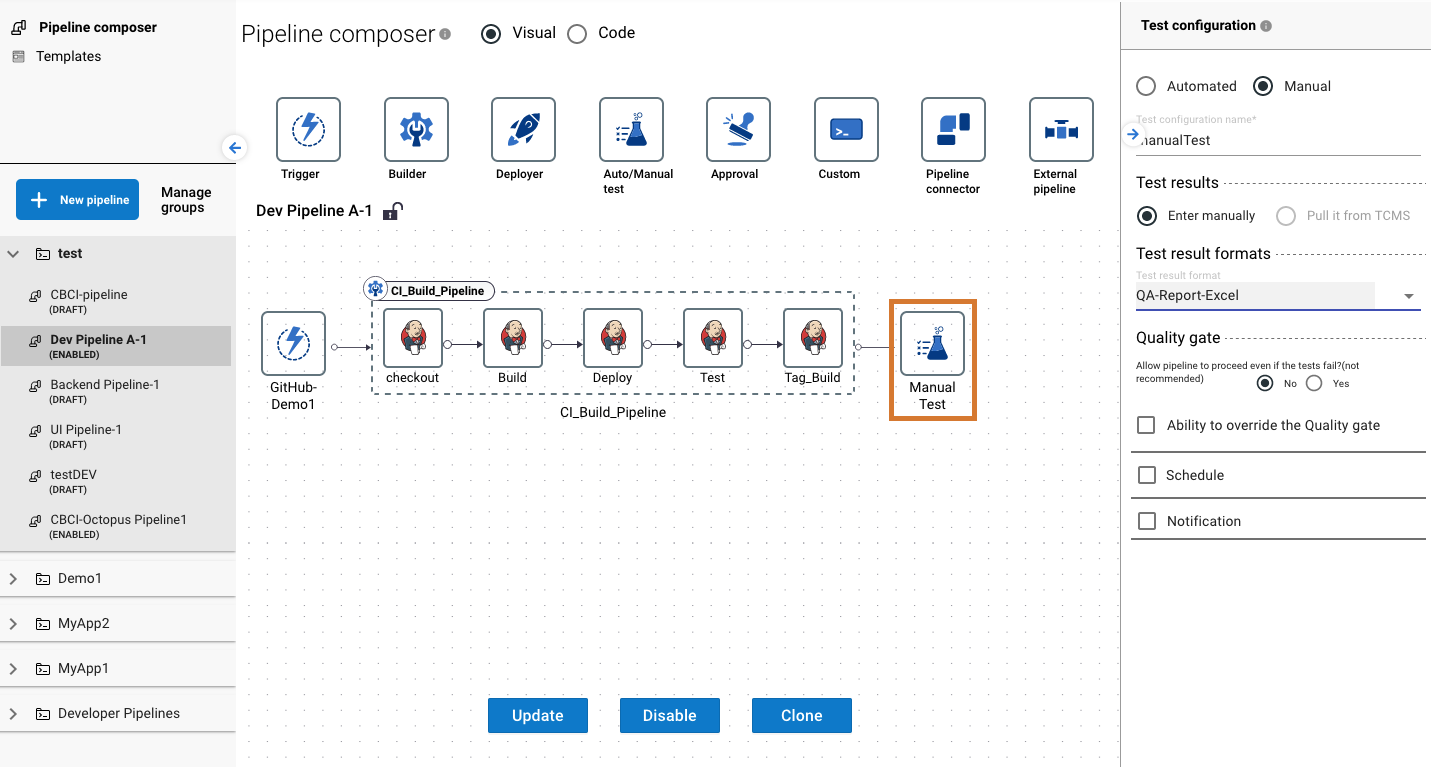
Select Manual.
-
Enter Test configuration name.
-
Select Enter manually to upload the test results, or select Pull it from TCMS to import the test from a test case management system (TCMS).
-
Select a Test result format from the options.
-
For Quality gate, select No to have the pipeline stop execution if tests fail (recommended). Refer to Configuring the quality gate for more information.
-
(Optional) Select Ability to override the Quality gate. Refer to Configuring the quality gate for more information.
-
(Optional) Select Schedule. Refer to Scheduling for more information.
-
(Optional) Select Notification. Refer to Notifications for more information.
-
-
Select UPDATE.
You have added manual tests to your pipeline.

Configuring the quality gate
A quality gate is defined by devOps teams as a set of requirements necessary to move a build through a stage.
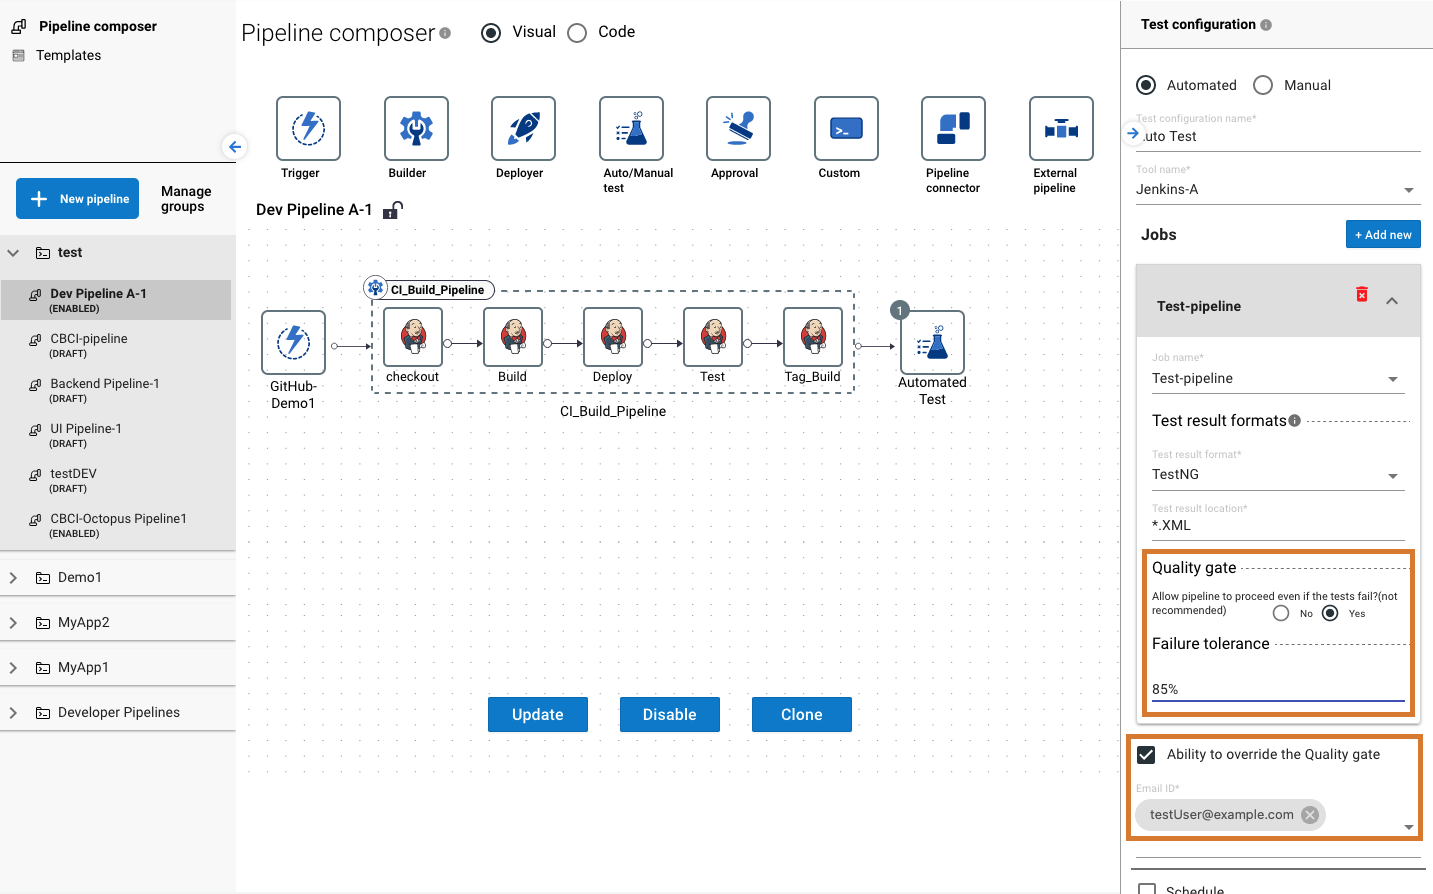
In CloudBees Release Orchestration SaaS test configuration, you can select Yes in the quality gate settings, which allows the pipeline to proceed even if tests fail, according to failure tolerance, entered as a percentage. A failure tolerance of 90%, for example, means that if ≥90% of tests are successful and ≤10% are failed, then the pipeline still proceeds.
If the percentage of passing tests is less than your entered failure tolerance percentage, you can still allow the pipeline to proceed, by selecting Ability to override the Quality gate. This means your pipeline still executes, for example, if your settings are as follows:
-
Quality gate selection is Yes
-
Failure tolerance is 85%
-
Ability to override the Quality gate is selected
-
Passing test rate is 80%
| If Quality gate is set to No, the pipeline will only execute if all tests are successful. |
To override the quality gate:
-
Configure testing according to Configuring automated testing or Configuring manual testing, as appropriate.
-
Select Ability to override the Quality gate.
-
Select your Email ID from the options.
-
Select UPDATE.
You have overridden the quality gate.

| To update testing settings, refer to Working with pipelines. |