Issue
The Jenkins Gradle plugin is installed but not using the correct version of gradle for builds.
Resolution
Jenkins will let you use the latest version of gradle but it needs to be configured through "Configure System" first. Follow these 4 steps and you’ll have the appropriate tools provisioned.
1) Gradle Plugin
First make sure that the gradle plugin is installed in your copy of CloudBees Jenkins Enterprise. From the home page, navigate to:
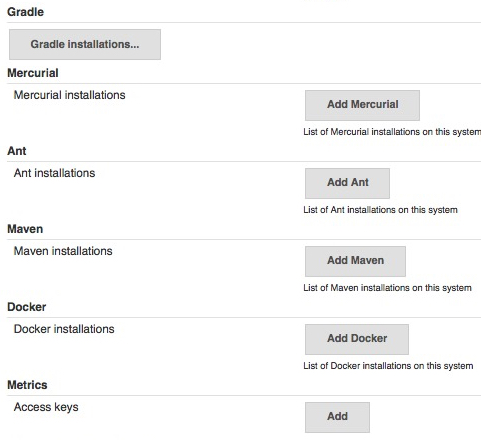
Manage Jenkins -> Manage Plugins -> Available
Use the filter box in the upper right corner and search for the word gradle.
If nothing shows up in the list, then it should already be installed and you can confirm this by selecting the available tab and searching for the word gradle again.
2) Configure Gradle Plugin
With the gradle plugin installed, it now needs to be configured. You can do this by going to "Configure System" (Jenkins 1.x) or to "Global Tool Configuration" (Jenkins 2.x). From the home page navigate to:
Manage Jenkins -> Configure System (Jenkins 1.x) Manage Jenkins -> Global Tool Configuration (Jenkins 2.x)
Scroll down a little bit and you should encounter a small section for gradle with a single button labeled "Gradle installations…". Click on that button to expand the configuration panel.
The gradle configuration panel will ask for a few parameters. Here you can set the tool to a static path, or let Jenkins handle the installation for you. We recommend using "Install automatically" for ease of use. Below is an example of an automatic installation of gradle 2.5.
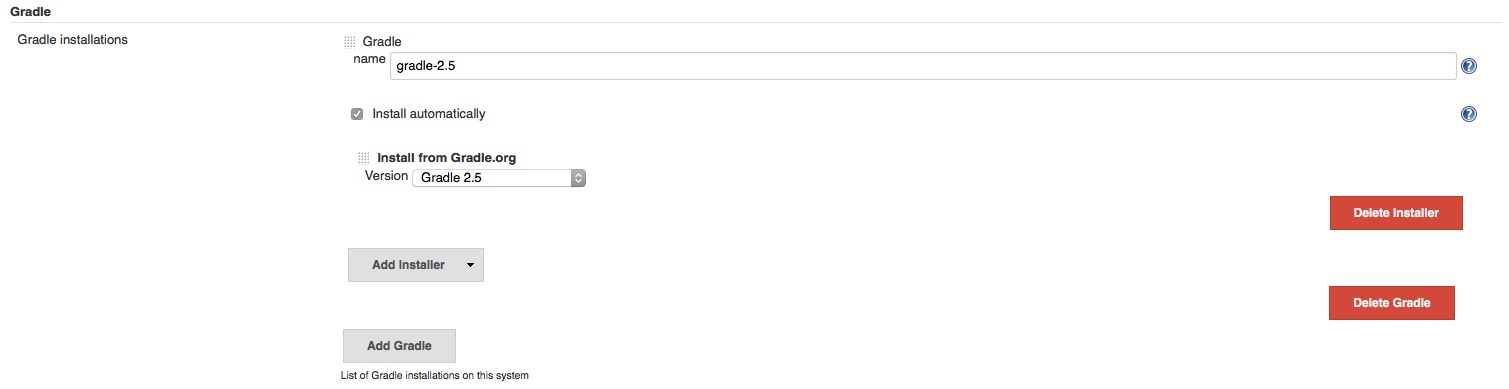
You can always add more versions by using this panel…
3) Click on "Check Now"
There is a problem where builds will indicate that they can’t find the installation ID of gradle at build time. To workaround this problem, you need to click on a "check now" button that is under the advanced tab in "Manage Plugins" at the very bottom right corner of the page:
Manage Jenkins -> Manage Plugins -> Advanced Tab -> Scroll Down -> Check Now

4) Configure Build Job
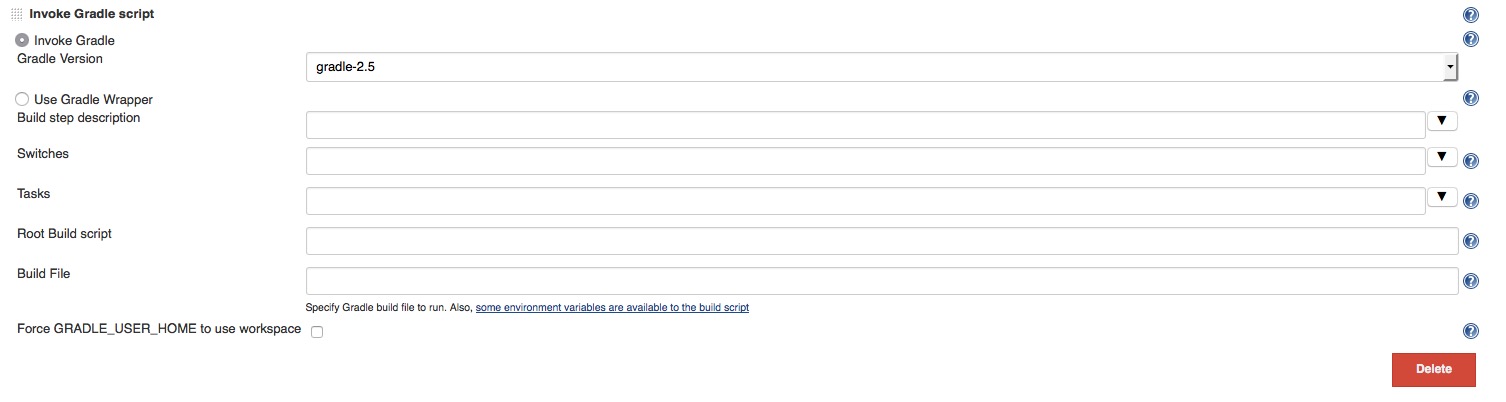
With the plugin configured, you can now add a build step to invoke gradle from your build job by selecting the the "Add build step" in your job configuration:![list_item.jpg][]
You will now be presented with a panel that will give you the option to select the version of gradle which was configured earlier:
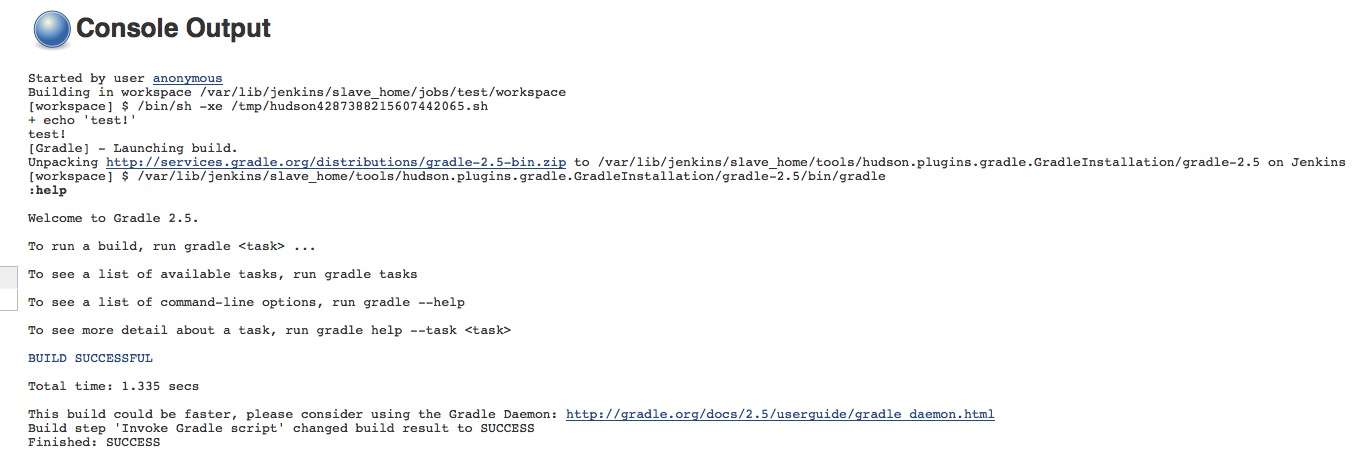
Save this and assuming your code is already in your workspace at the top level, you should see a successful execution of your gradle version of choice: