Resolution
There are multiple approaches
-
Use container image build tools in Kubernetes
-
Use a permanent or shared agent outside of Kubernetes
-
Use Docker inside Docker (not recommended for security reasons)
Options 1 or 2 are our recommended approach.
1) Use container image build tools in Kubernetes
There are multiple tools that can build container images in Kubernetes, this list is not exhaustive as many projects exist for this, but a few are:
For more information, you can refer to:
pipeline { parameters { string defaultValue: '2.401.2.6', name: 'AGENT_VERSION', trim: true string defaultValue: '', name: 'REGISTRY', trim: true } agent none stages { stage('build-image'){ agent { kubernetes { yaml ''' kind: Pod spec: containers: - name: kaniko image: gcr.io/kaniko-project/executor:debug command: - sleep args: - infinity volumeMounts: - name: cache mountPath: /cache volumes: - name: cache persistentVolumeClaim: claimName: kaniko-cache ''' } } stages { stage('Dockerfile'){ steps { sh '''cat >Dockerfile <<EOF FROM cloudbees/cloudbees-core-agent:${AGENT_VERSION} USER root RUN dnf update -y && dnf install -y maven-3.5.4 && dnf clean all && rm -rf /var/cache/dnf RUN alternatives --remove-all java RUN alternatives --install /usr/bin/java java /usr/lib/jvm/jre-11-openjdk/bin/java 99 USER jenkins EOF ''' } } stage('Build with Kaniko') { steps { container('kaniko') { sh '''#!/busybox/sh /kaniko/executor \ --context `pwd` \ --cache=true \ --cache-dir=/cache \ --cache-run-layers \ --cache-repo=${REGISTRY} \ --destination=${REGISTRY}:${AGENT_VERSION} ''' } } } } } stage('parallel scans'){ parallel { stage('syft'){ agent { kubernetes { yaml ''' kind: Pod spec: containers: - name: syft image: YOUR_SYFT_IMAGE command: - sleep args: - infinity env: - name: DOCKER_CONFIG value: /config volumeMounts: - mountPath: /config name: registry-config readOnly: true volumes: - name: registry-config secret: secretName: registry-config ''' } } steps { container('syft') { sh 'syft ${REGISTRY}:${AGENT_VERSION} -o json=sbom.json' archiveArtifacts artifacts: 'sbom.json', followSymlinks: false } } } stage('grype'){ agent { kubernetes { yaml ''' kind: Pod spec: containers: - name: grype image: YOUR_GRYPE_IMAGE command: - sleep args: - infinity env: - name: DOCKER_CONFIG value: /config volumeMounts: - mountPath: /config name: registry-config readOnly: true volumes: - name: registry-config secret: secretName: registry-config ''' } } steps { container('grype') { sh 'grype ${REGISTRY}:${AGENT_VERSION} --file vulnerabilities.json --output json' archiveArtifacts artifacts: 'vulnerabilities.json', followSymlinks: false } } } } } } }
For generating YOUR_SYFT_IMAGE and YOUR_GRYPE_IMAGE you can use the following Dockerfiles:
FROM alpine:3.18 WORKDIR /app RUN apk add --no-cache \ curl RUN curl -sSfL https://raw.githubusercontent.com/anchore/syft/main/install.sh | sh -s -- -b /usr/local/bin CMD ["syft", "-h"]
FROM alpine:3.18 WORKDIR /app RUN apk add --no-cache \ curl RUN curl -sSfL https://raw.githubusercontent.com/anchore/grype/main/install.sh | sh -s -- -b /usr/local/bin CMD ["grype", "-h"]
2) Use a permanent or shared agent outside of Kubernetes
You can still connect a permanent or shared agent running outside of Kubernetes to your controller running inside of Kubernetes, we recommned utilizing websocket transport for connecting them:
Connecting inbound agents using WebSocket for Agent Remoting Connections
Then you can utilize any of the exisiting ways to build container images using Docker, such as sh 'docker build .', or the multiple plugins that achieve similar functionality.
3) Use Docker inside Docker (not recommended for security reasons)
Risks of DooD
There are usually 2 solutions when running docker inside docker container:
-
"Docker outside of Docker" (DooD): uses the underlying host socket from a container by bind mounting the docker socket
/var/run/docker.sock -
"Docker inside Docker" (DinD): uses its own docker installation and engine inside a container
There are some risks from using "Docker outside of Docker" (DooD) and mounting the Docker socket /var/run/docker.sock for building containers on CloudBees CI for Modern Cloud Platforms.
-
resources launched outside of the k8s scheduler’s oversight are not properly accounted for and may lead to resource over-utilisation
-
resources launched by Docker will not be cleaned up by the Kubernetes scheduler and may consume CPU and memory resources until the instances are removed
-
exposing the
docker.sockto processes effectively grants host root access to the container processes -
the Docker build cache is not Garbage Collected by Kubernetes (container_gc.go, image_gc_manager.go), so you will find nodes run out of disk space due to the Docker build cache usage continually growing
It is strongly discouraged to use DooD and mounting the docker socket.
Risks of DinD
To run Docker inside Docker, you need to run the container in privileged mode:
    securityContext:
      privileged: true
Kubernetes administrators likely will not allow privileged pods to run in their cluster, for security reasons: https://kubernetes.io/docs/concepts/security/pod-security-standards/#privileged
Instructions
Following we provide two options to define your DIND Agent Pod Templates:
-
Kubernetes Pod Templates GUI
-
Jenkinsfile
Kubernetes Pod Templates GUI
Kubernetes Pod Templates can be added at CJOC or controller level.
-
In CJOC, access to CJOC main page, click on the view
Alland open thekubernetes shared cloudconfig page. -
In a controller, go to
Manage Jenkins > Kubernetes Pod Template.
Add a new Pod Template
Click on the Add Pod Template button and fill the following fields

Name   : pod-dind
Labels : pod-dind
Usage  : Only build jobs with label expressions matching the node
Add the DinD container spec
In the "Raw YAML for the Pod" field, add the following spec:
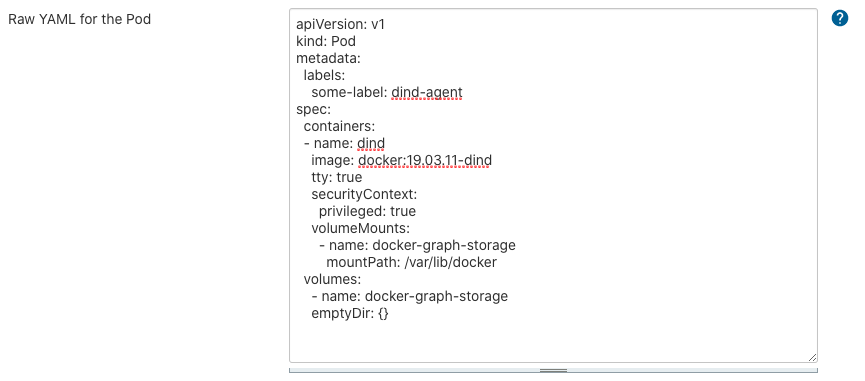
apiVersion: v1
kind: Pod
metadata:
  labels:
    some-label: dind-agent
spec:
  containers:
  - name: dind
    image: docker:19.03.11-dind
    tty: true
    securityContext:
      privileged: true
    volumeMounts:
      - name: docker-graph-storage
        mountPath: /var/lib/docker
  volumes:
    - name: docker-graph-storage
      emptyDir: {}
| Using a volume for the docker graph storage can help improve performances. The docker graph storage is the storage solution used by Docker for container / images layers, used by the docker daemon when running and building images. Docker relies on a specific kind of file system that uses layers and that can generate some overhead. Volumes bypass this file system which should generate less overhead and maybe speed up some operations. |
Testing job
In order to test the Pod Template, create a new Pipeline job using the following code.
node('pod-dind') {
    container('dind') {
        stage('Build My Docker Image') {
            sh 'docker info'
            sh 'touch Dockerfile'
            sh 'echo "FROM centos:7" > Dockerfile'
            sh "cat Dockerfile"
            sh "docker -v"
            sh "docker info"
            sh "docker build -t my-centos:1 ."
        }
    }
}
Jenkinsfile
pipeline { agent { kubernetes { yaml """ apiVersion: v1 kind: Pod metadata: labels: some-label: dind-agent spec: containers: - name: dind image: docker:19.03.11-dind imagePullPolicy: Always tty: true securityContext: privileged: true volumeMounts: - name: docker-graph-storage mountPath: /var/lib/docker volumes: - name: docker-graph-storage emptyDir: {} """ } } stages { stage('Build My Docker Image') { steps { container('dind') { sh 'docker info' sh 'touch Dockerfile' sh 'echo "FROM centos:7" > Dockerfile' sh "cat Dockerfile" sh "docker -v" sh "docker info" sh "docker build -t my-centos:1 ." } } } } }
Expected output
It would be similar to the following
[Pipeline] podTemplate
[Pipeline] {
[Pipeline] node
Created Pod: kubernetes cbci/mm-1-dind-test-185-lzfs5-h1xr5-84bx5
[...]
Agent mm-1-dind-test-185-lzfs5-h1xr5-84bx5 is provisioned from template mm-1_dind-test_185-lzfs5-h1xr5
[...]
Running on mm-1-dind-test-185-lzfs5-h1xr5-84bx5 in /home/jenkins/agent/workspace/dind-test
[Pipeline] sh
+ docker info
Client:
 Debug Mode: false

Server:
 Containers: 0
  Running: 0
  Paused: 0
  Stopped: 0
 Images: 0
 Server Version: 19.03.11
...
[Pipeline] sh
+ docker build -t my-centos:1 .
Sending build context to Docker daemon  2.048kB

Step 1/1 : FROM centos:7
7: Pulling from library/centos
2d473b07cdd5: Pulling fs layer
2d473b07cdd5: Verifying Checksum
2d473b07cdd5: Download complete
2d473b07cdd5: Pull complete
Digest: sha256:0f4ec88e21daf75124b8a9e5ca03c37a5e937e0e108a255d890492430789b60e
Status: Downloaded newer image for centos:7
 ---> 8652b9f0cb4c
Successfully built 8652b9f0cb4c
Successfully tagged my-centos:1
[Pipeline] }
[Pipeline] // container
[Pipeline] }
[Pipeline] // stage
[Pipeline] }
[Pipeline] // node
[Pipeline] }
[Pipeline] // podTemplate
[Pipeline] End of Pipeline
Finished: SUCCESS
Depending on the version you are running, you may receive an error during your test build similar to process apparently never started in /home/jenkins/workspace/dind-test. This is due to a change in the default working directory for containers. If you receive this error, change the Working directory to: Working directory: /home/jenkins/agent. This should be auto-populated when creating your container if you need to use this new location.