In this module, you will learn how to deploy applications in CloudBees CD (CloudBees Flow):
-
Deploy an application.
-
Take a snapshot of the application.
-
Redeploy the application after one of the artifacts changes.
-
Create a second snapshot, save the change, and compare the two snapshots.
-
Send notifications when an event occurs. Create schedules to run the deployments.
-
Launch a full run of the application.
-
Launch a partial run of the application.
The steps below describe how to deploy an application as demonstrated in the video.
Deploying an Application
To deploy jpetstore-app:
-
In the Applications List, go to the jpetstore-app row, click the Run process button (
 ), and select New Run .
The dialog box to set the application deployment settings opens.
-
Select Deploy in the Select Process field.
-
Select jpetstore-env in the Select Environment field.
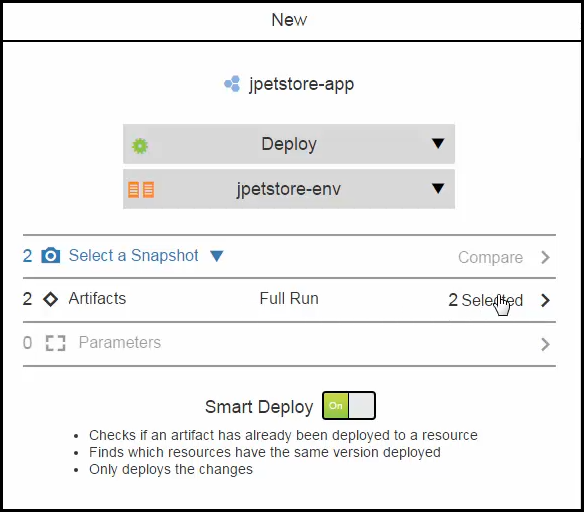
If Smart Deploy is set to Off , all the artifacts in the application process are deployed, even if they have not changed. 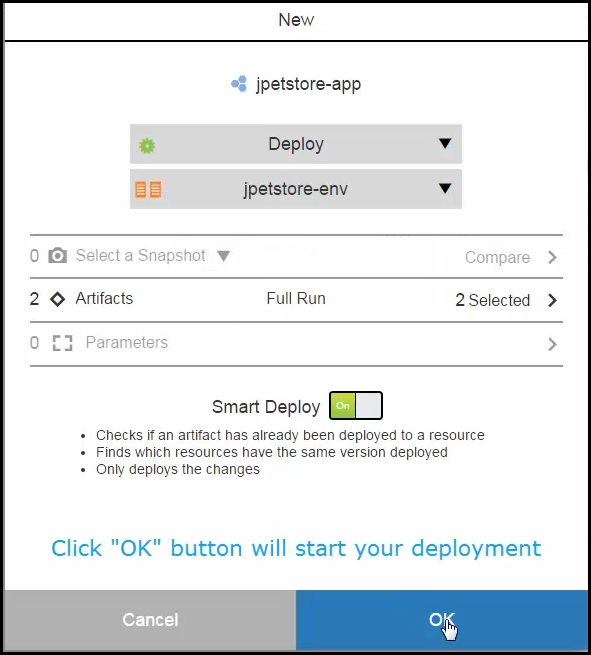
-
Click OK to start the application deployment.

-
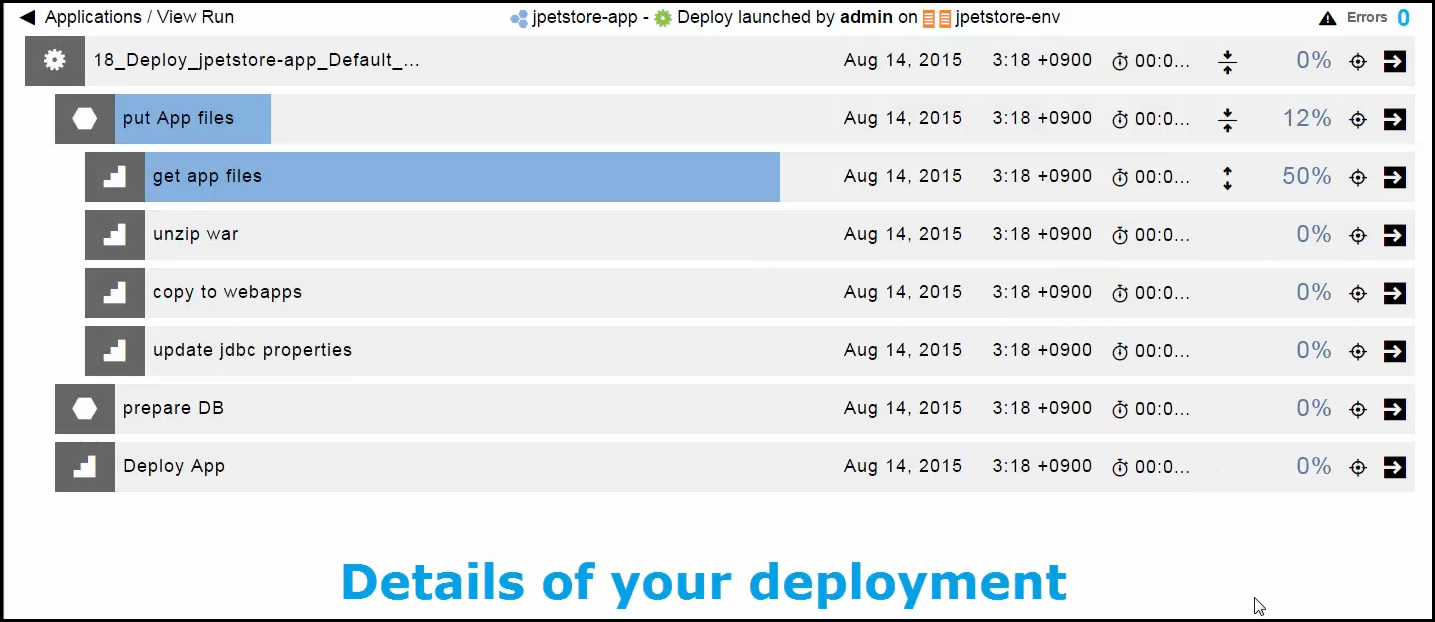
Watch the progress of the deployment in the "Applications / View Run" page.
-
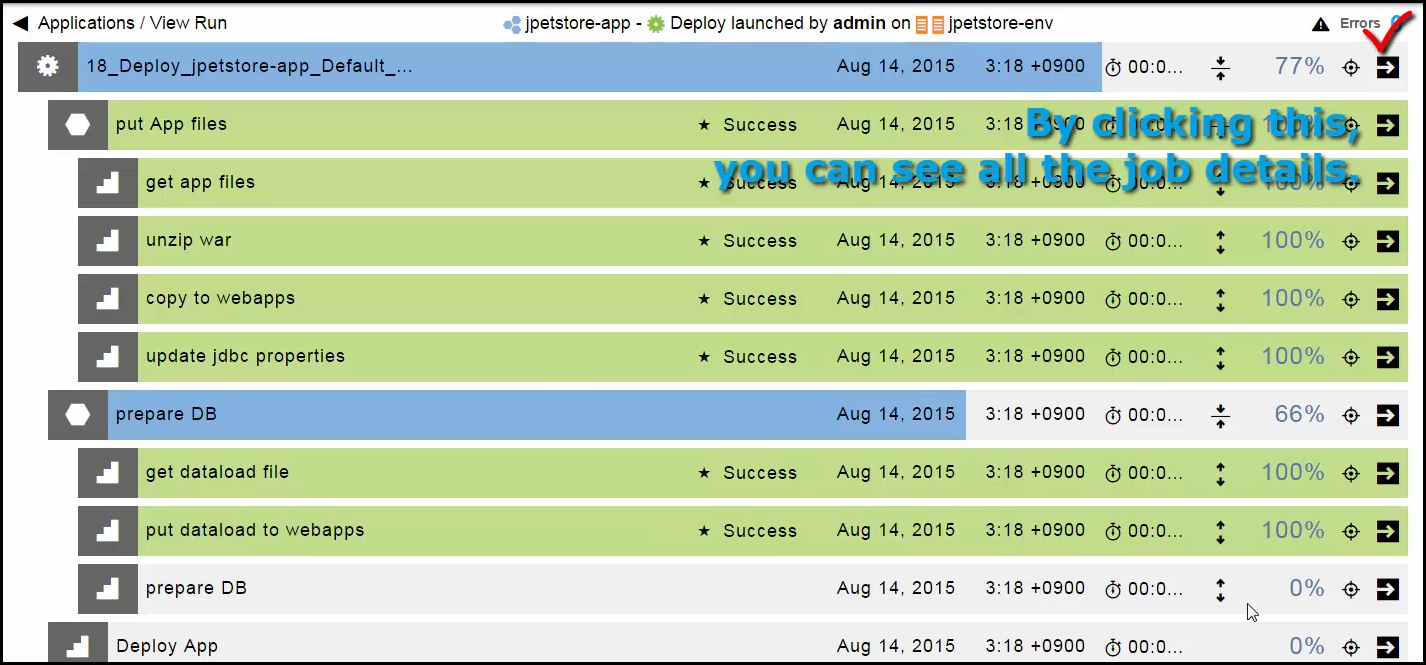
In the top row, click the View details button (
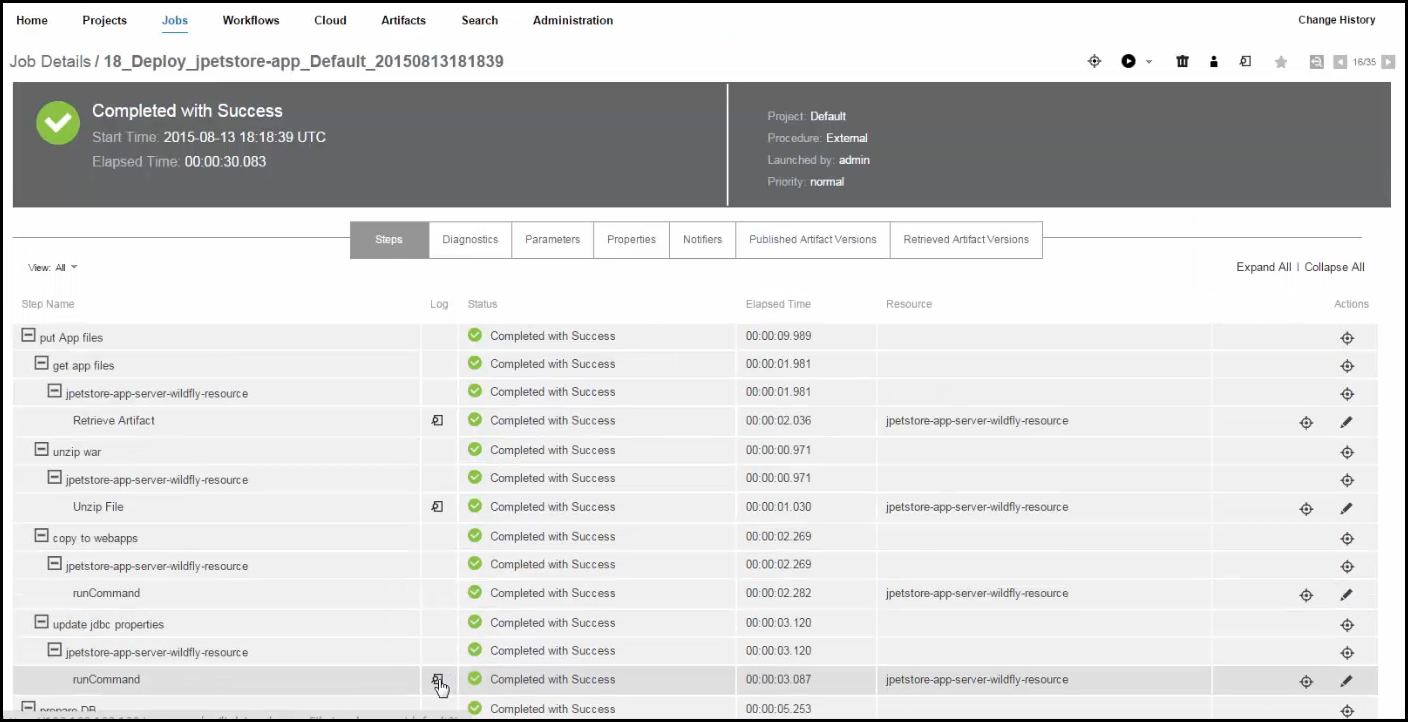
 ) to view the job details of the application process.
-
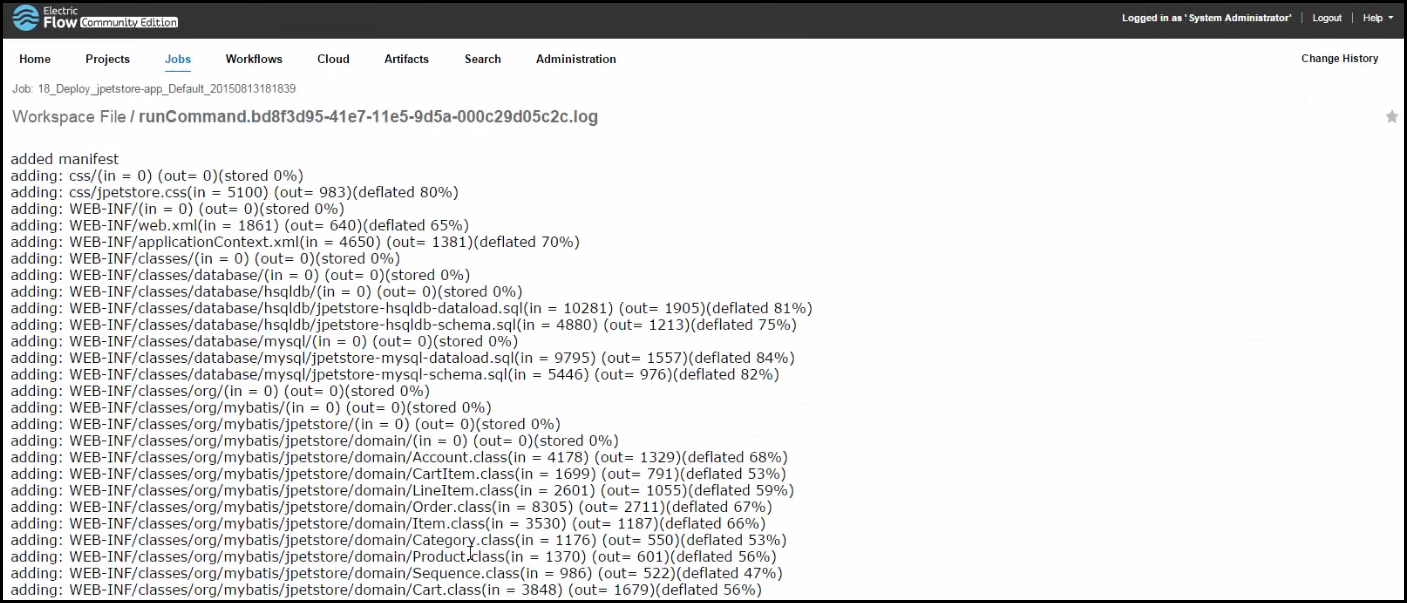
Click the Log button to see the log file for the runCommand procedure.
-
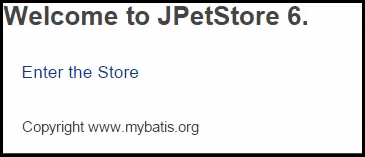
Verify that the application was successfully deployed by going to <localhost:8080/jpetstore-mysql/>.
-
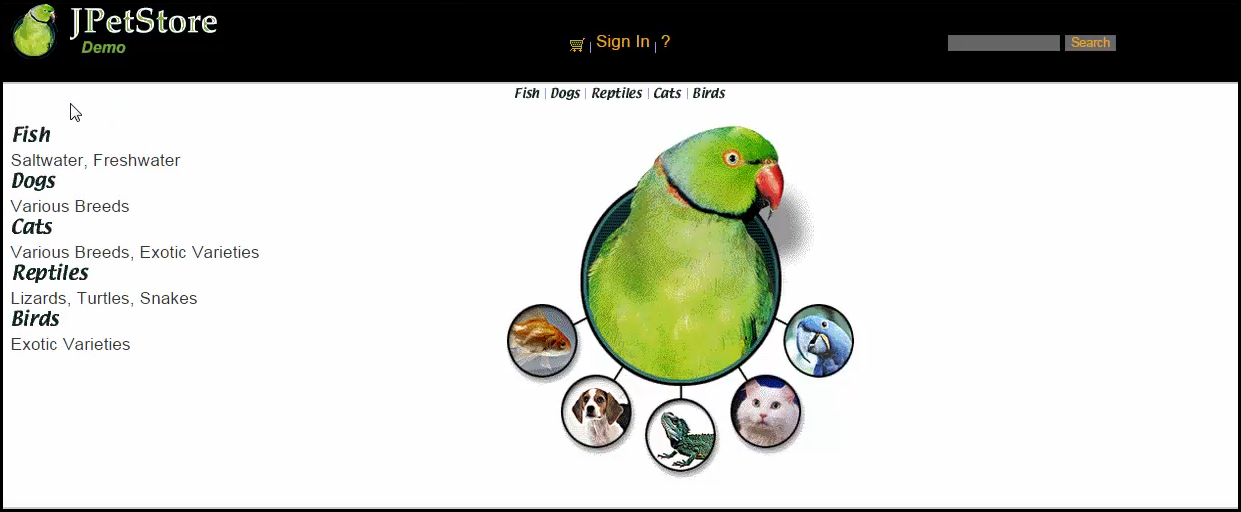
Click Enter the Store .
Creating a Snapshot
We will create a snapshot to save the current version of the application as a reference with specific artifact versions and the state at any point in time.
To make the deployment repeatable, create a snapshot:
-
In the Applications List, click the Snapshot button (
 ), and select New Snapshot .
-
In the Snapshot dialog box, enter initial as the snapshot name in the Name field, and click Next .
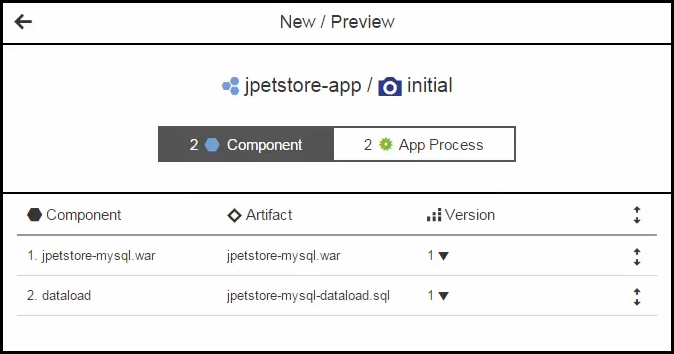
A preview of the new snapshot appears. In the Component tab, it shows that the snapshot has two components. Each component is based on a specific version of an artifact. If you click the Expand button (
 ), more details about the components appear.
-
Click OK to save the snapshot.
Redeploying the Application
If the default login account of the application changes and the artifact version changes to version 2, the application should be redeployed.
-
In the Applications List, click jpetstore-app .
The Applications Visual Editor for this application opens. -
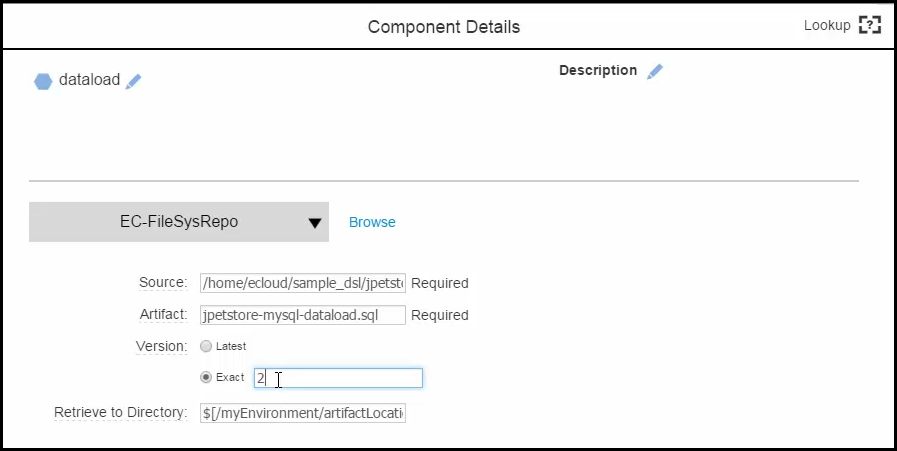
Click the Menu button (
 ) in the dataload component and select Details .
-
In the Component Details dialog box, change the Version from 1 to 2, and click OK .
-
When the application is redeployed, set Smart Deploy to On because only the version of jpetstore-mysql-dataload.sql artifact has changed.
-
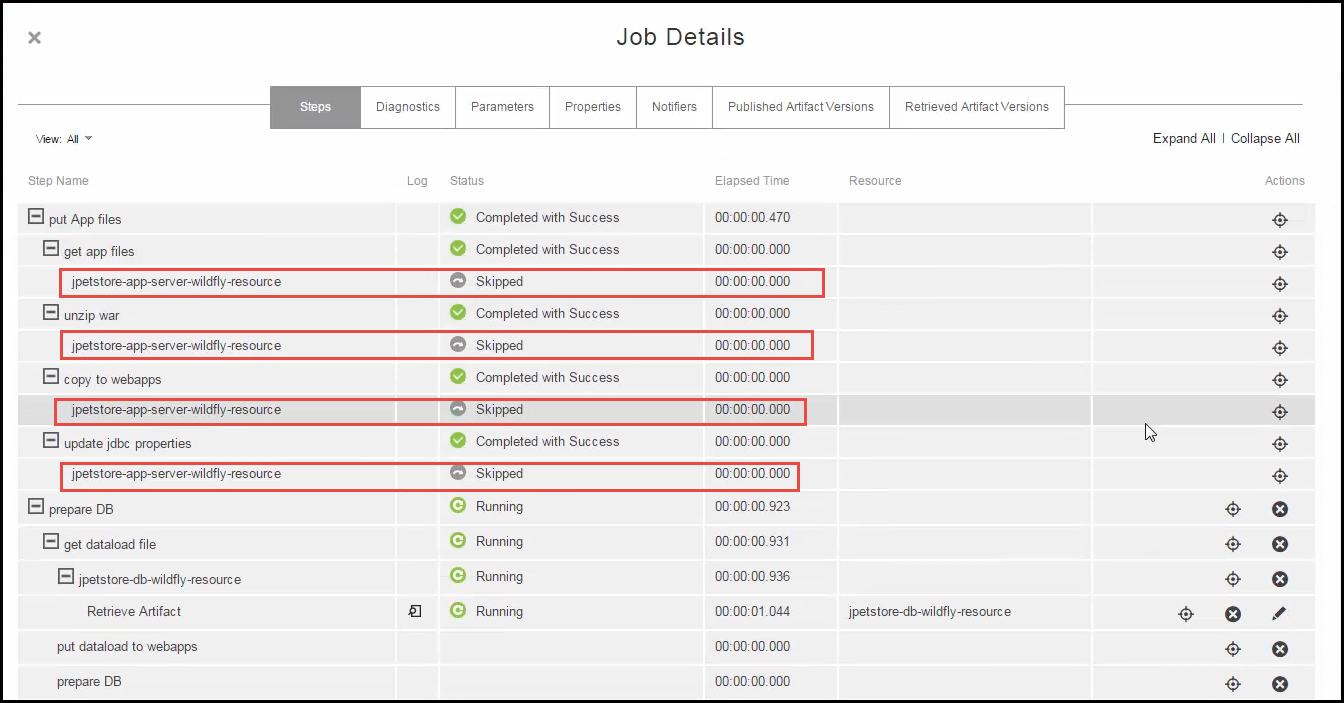
View the progress of the application deployment.
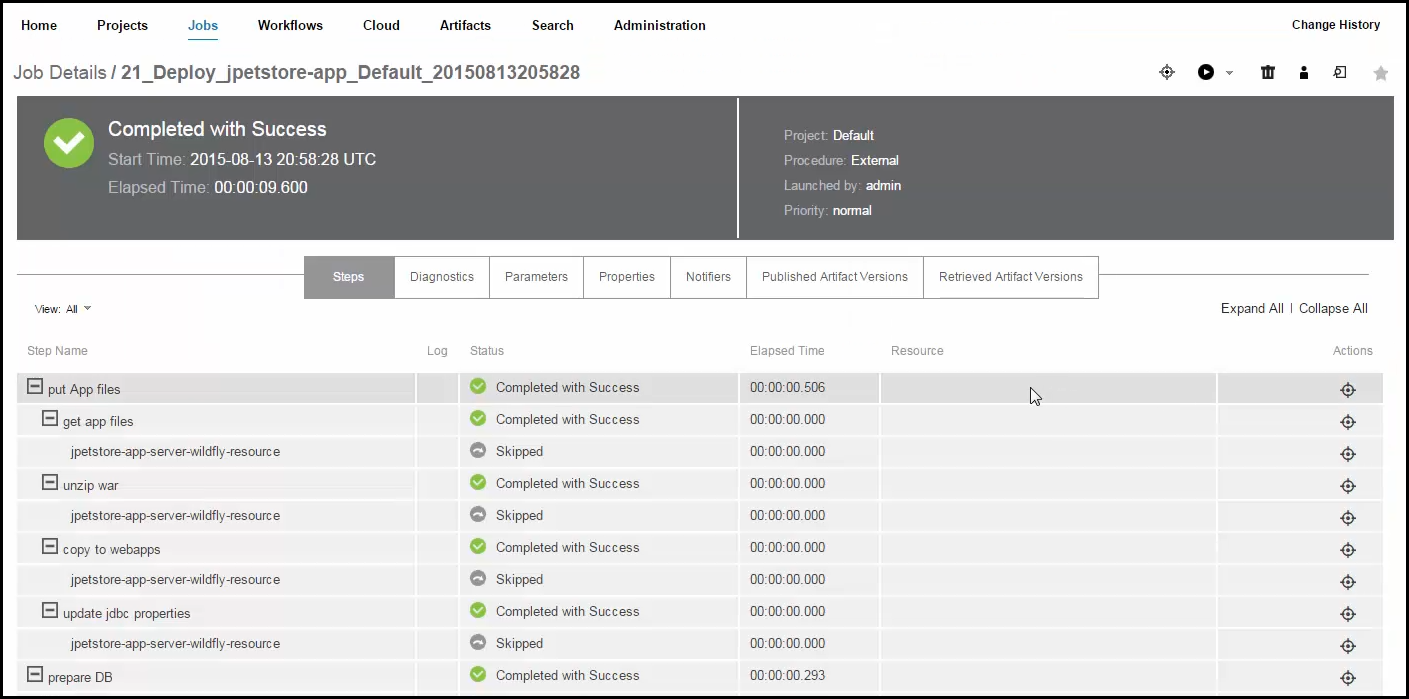
In the Job Details page, the steps for the artifact that did not change (jpetstore-app-server-wildfly-resource) are skipped.
Create a New Snapshot and Compare the Snapshots
Create a second snapshot with the change to the dataload component, and compare the two snapshots.
-
In the Applications List, click the Snapshot button (
 ), and select New Snapshot.
 -
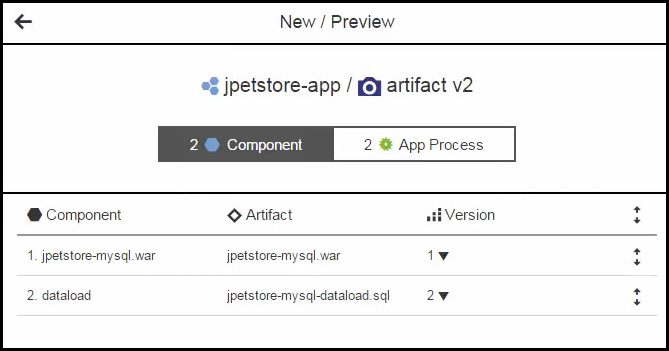
In the Snapshot dialog box, enter artifact v2 as the snapshot name in the Name field, and click Next .
A preview of the new snapshot appears. In the Component tab, it shows that the snapshot has two components. Each component is based on a specific version of an artifact. If you click the Expand button (
 ), more details about the components appear.
-
Click OK to save the snapshot.
-
In the Applications List, click the Snapshot button (
 ), and select Snapshot List .
-
Select rows 1 and 2, and click the Compare Snapshot button (
 ).
). -
See the differences in the Snapshots comparison page, which shows the differences between the initial and "artifact v2" snapshots.
There is one difference between the snapshots. The version of the artifact for the dataload component (jpetstore-mysql-dataload.sql) changed from 1 to 2.

Sending Notifications
CloudBees CD (CloudBees Flow) sends notifications via email based on your own email notification template. Before the steps in the section were performed, we set up an email configuration in the Administration > Email configuration page in the CloudBees CD (CloudBees Flow) platform.
To send an email notification every time that the jpetstore-app application is deployed:
-
In the Applications List, click jpetstore-app .
The Applications Visual Editor for this application opens. -
Click the Menu button (
 ) in the upper right corner of the visual editor, and select Notifications .
The Application notifications dialog box opens.

-
To enable notifications at the application level, change the toggle switch from Off to On .

-
Click the Edit button (
 ) to edit the notification settings.
 -
Edit who should receive notifications in the Who field, and click OK .
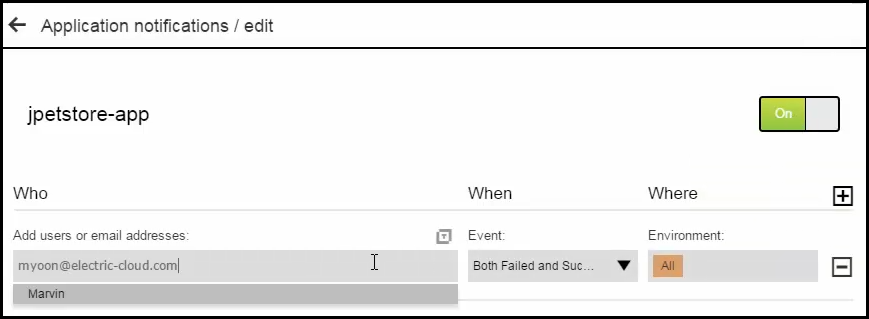
The Application notifications dialog box now shows that notifications will be sent at the application level. When one or more recipients receive a notification, "Some" appears in the Recipient column.

-
In the Applications Visual Editor, click the Run process button (
 ) to deploy the application.
 -
Select Deploy in the Select Process field.
-
Select jpetstore-env in the Select Environment field.
-
Keep Smart Deploy set to On , and click OK.
-
View the progress of the deployment in the "Applications / View Run" page.
-
Check your email.
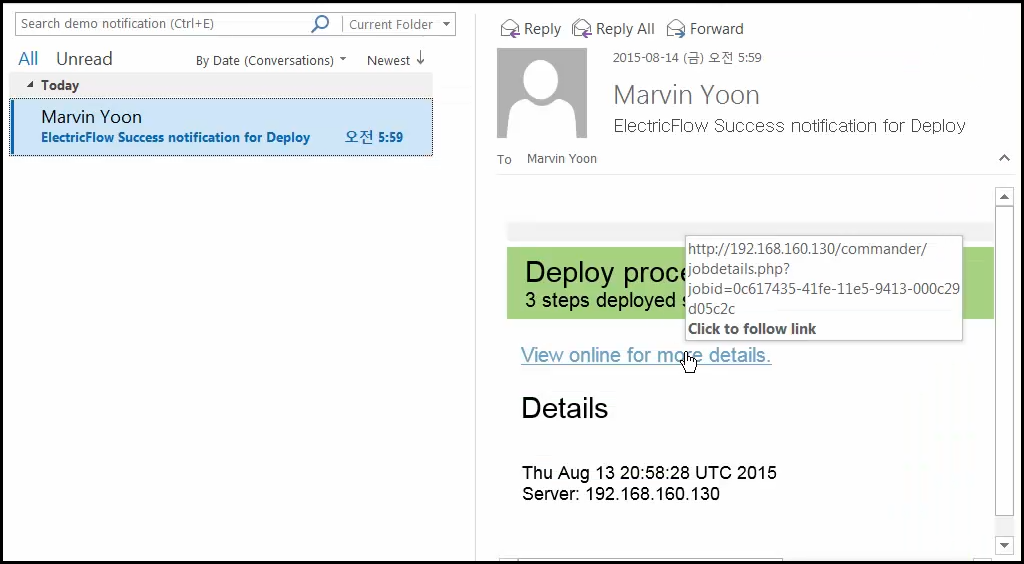
When you click on the link, the Job Details page for the jpetstore-app application opens.
Creating a Schedule to Run the Deployment
You can also create a schedule that specifies a set of times and days when the deployment should automatically run.
-
In the Applications List, go to the jpetstore-app row, click the Run process button (
 ), and select Schedule .
The Schedules List opens.

-
Click Add + to add a schedule.
-
In the Schedule dialog box, select Previous Run .
The last five runs appear in the dialog box.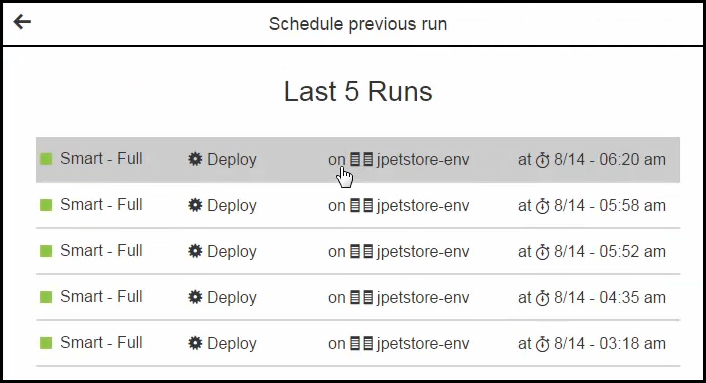
-
Click in the row for the latest run (first one in the list).
-
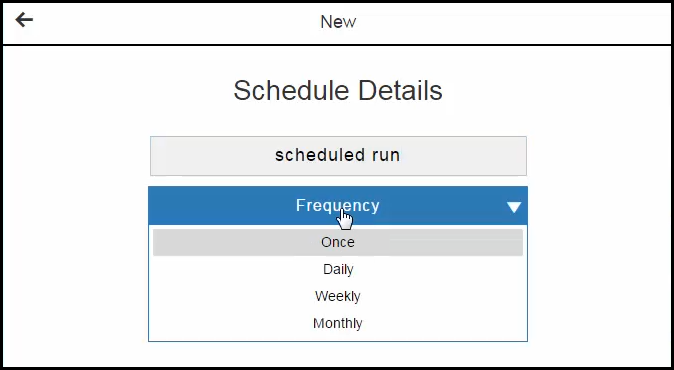
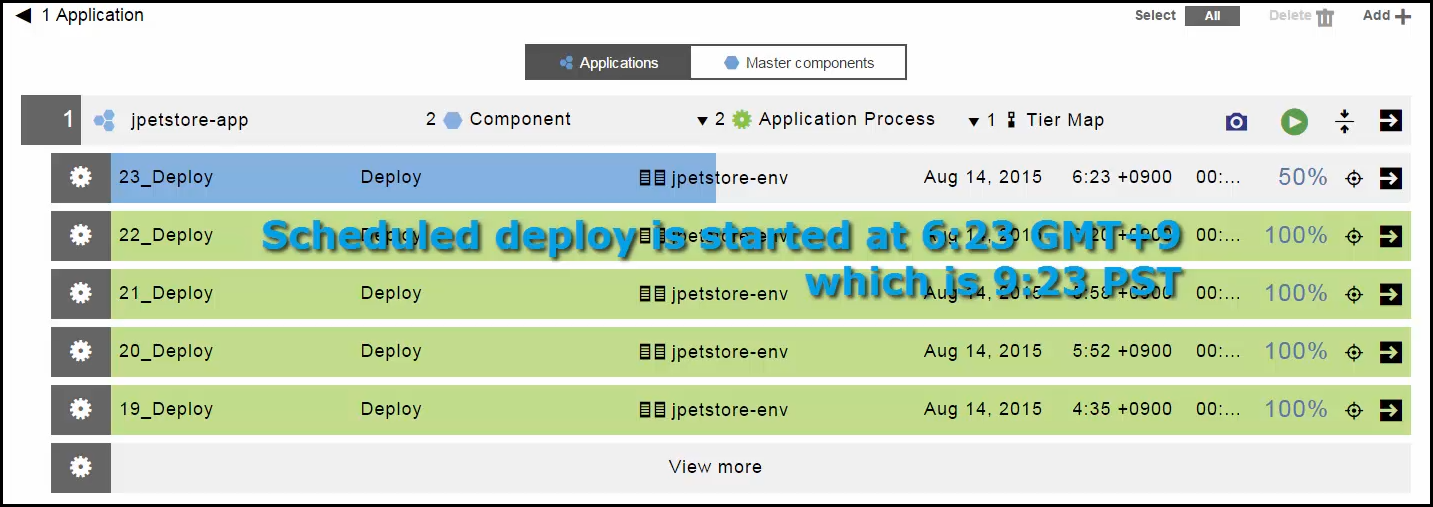
In the Schedule Details dialog box, enter "scheduled run" in the Schedule name field and click in the Frequency field to select Daily .
-
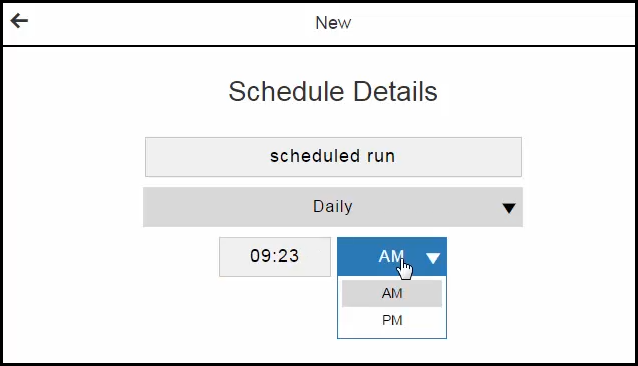
Enter 9:23 PM as the time when the deployment run, and click Next .
-
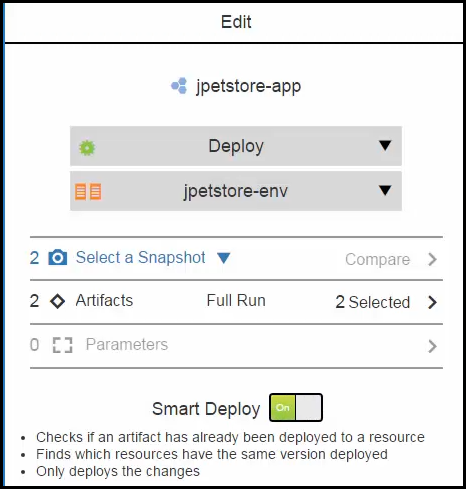
Enter the deployment settings when the application is deployed, and click OK .
The dialog box confirming the schedule appears:
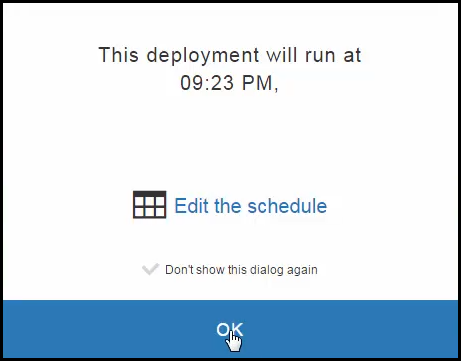
CloudBees CD (CloudBees Flow) schedules the deployment to start at the set time.
Environment Inventory
CloudBees CD (CloudBees Flow) keeps track of the what is deployed in each environment. You can view the Environment Inventory at any time. The Environment Inventory is the state of the environment at a point in time.
-
Go to the Environments List and select the Environments tab.
-
Go to the jpetstore-env row, and click the Inventory button (
 ).
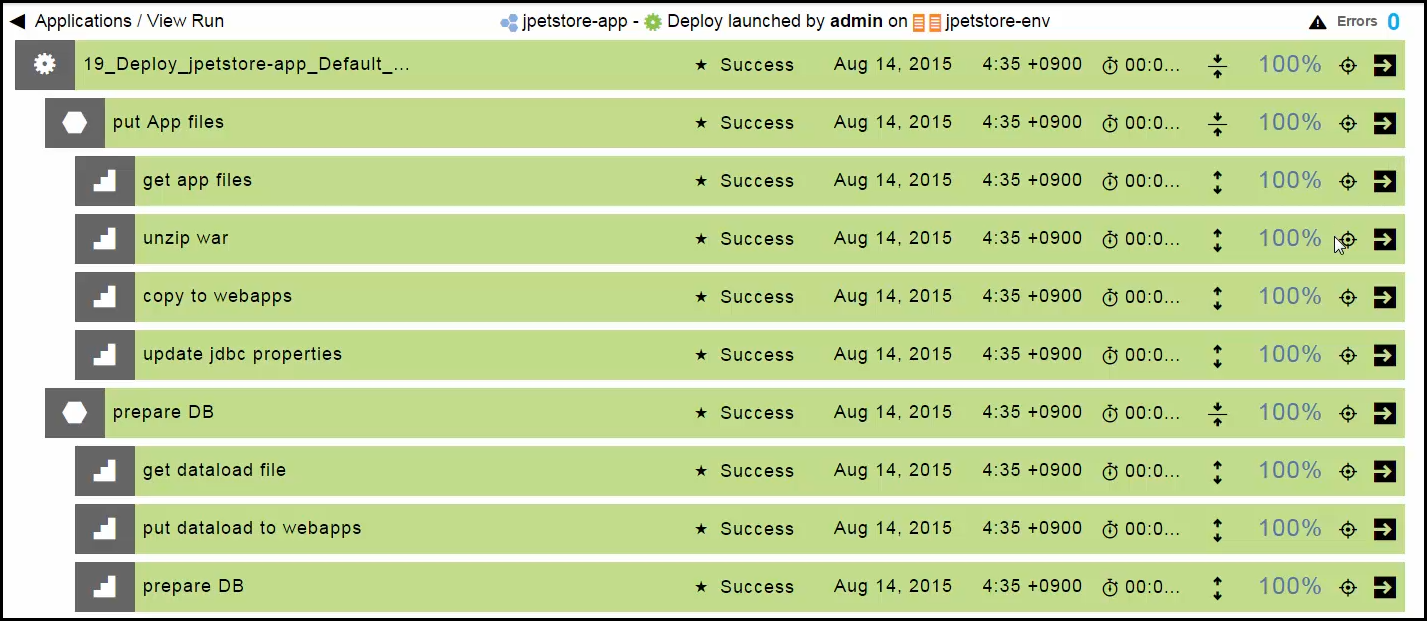
).The Environment Inventory appears and shows the details about the deployed artifacts including the environment name, the application mapped to this environment, the number of deployed artifacts, when the artifacts were deployed, and the status of the deployment (success or failure).

If you do not see the details, click the Expand button (
 ) in the jpetstore-app row.
 -
Click the Process Details button (
 ) to see more details about the application run.
Deploying an Application Based on a Snapshot
You can deploy your application based on a specific snapshot.
-
In the Applications List, click the Run process button (
 ) in the jpetstore-app row and select New Run.
 -
In the dialog box to set the application deployment settings, select Deploy in the Select Process field and jpetstore-env in the Select Environment field.
-
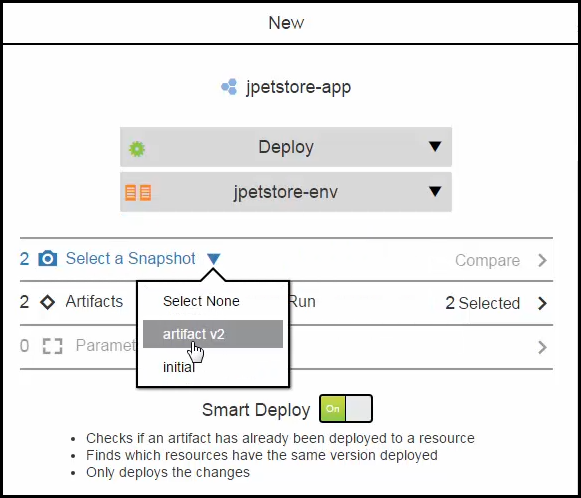
In the "Select a Snapshot" row, click the down arrow to see the list of snapshots.
-
Select the initial snapshot and then click the right arrow in the Artifacts row.
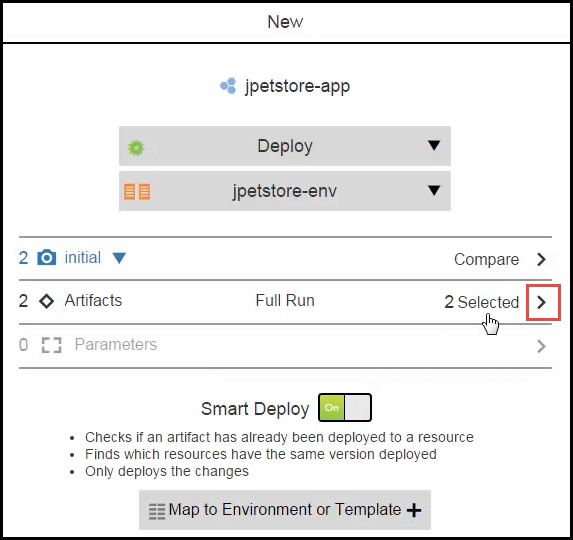
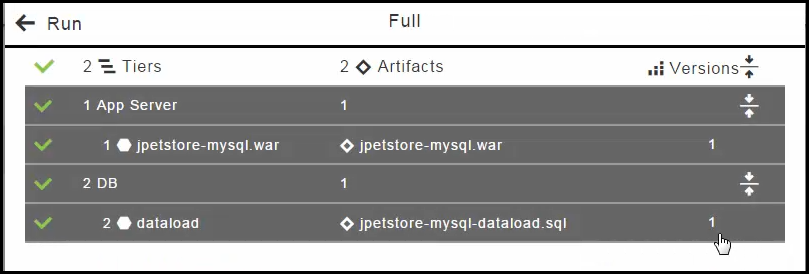
The dialog box showing the artifacts in the application that will be deployed appears. All the artifacts will be deployed. If there is no green check mark next to an object, it will not be deployed during the deployment.
These are the artifacts that will be deployed using the initial snapshot based on the settings in the previous dialog box.
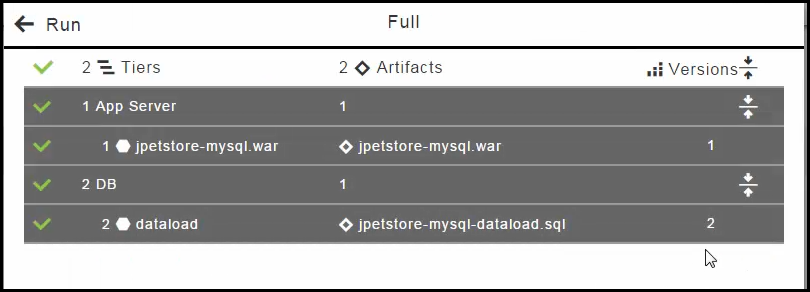
If the artifact v2 snapshot was selected, these artifacts would be deployed during a Full Run :
-
Click OK to deploy the application using the initial snapshot.
-
View the progress of the application in the "Applications / View Run" page.

Partial Deployment of the Application
You can also do a partial deployment by selecting specific artifacts.
-
In the Applications List, click the Run process button (
 ) in the jpetstore-app row and select New Run.
 -
In the dialog box to set the application deployment settings, select Deploy in the Select Process field and jpetstore-env in the Select Environment field.
-
In the Artifacts row, click in the row.

-
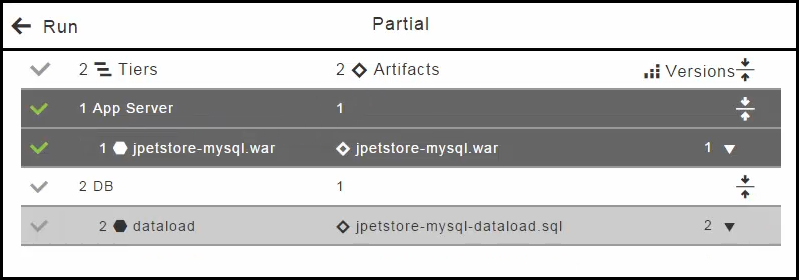
In the Artifact List, click on the check mark in the top row (2 Tiers) to unselect every object in the list and then click on the check mark in the App Server row to select only the App Server tier and its component.
-
Click OK > OK.
-
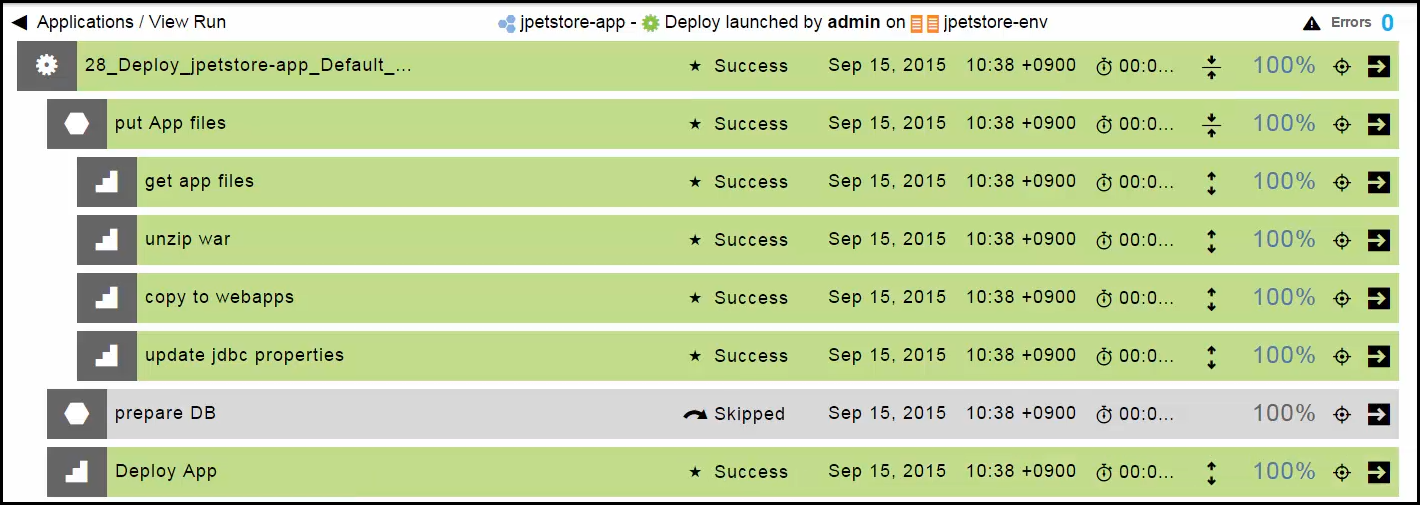
View the progress of the deployment, which is a partial run. Only the jpetstore-mysql.war file was deployed. The "prepare DB" component was not deployed and the CloudBees CD (CloudBees Flow) skipped its component process.
What’s next
Create and run more application deployments.
To learn more, go to learn.electric-cloud.com.