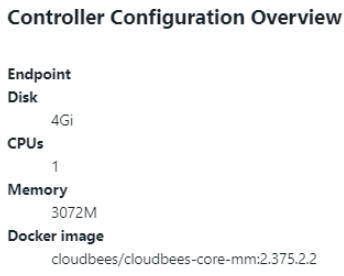
When new teams join an organization, or existing teams start a new project, CloudBees CI makes it easy to provision a fully managed and access controlled controller per team. In CloudBees CI, a controller is referred to as a managed controller.
Administrators can provision managed controllers from a standardized template, or they can allow team leads to provision their own managed controllers "on-demand."
Setting the default namespace for new managed controllers and team controllers
To set the default namespace for any new managed controller or team controller, navigate to on your operations center, and then set the namespace to your preferred value.
| By default, managed controllers are created in the same namespace as the operations center instance. However, you can create a managed controller in a separate namespace or an OpenShift project. |
Add client controllers
Occasionally administrators will need to connect existing controllers to a CloudBees CI cluster, such as in the case of a team requiring a controller on Windows. Existing controllers that are connected to operations center lack key benefits of managed controllers like high availability and automatic agent management. Whenever possible, administrators should use a managed controller with CloudBees CI rather than connecting an existing controller.
Client controllers are monitored by the operations center just as managed controllers are monitored. Administrators can view the status of all their managed controllers, and client controllers from the operations center controllers page. Client controllers can receive configuration updates from the operations center with configuration snippets. Client controllers can share agents hosted in the cluster, offloading the burden of agent management from teams.
Client controllers do not have the high availability features of managed controllers.
To add a client controller:
-
Sign in to CloudBees CI and navigate to the operations center dashboard.
-
Select New Item in the left-hand menu.
-
Enter the name of the existing client controller to connect to the cluster.
-
Select client controller.
-
Select Submit.
Just as with managed controllers, client controllers offer some customization and configuration options on creation:
-
On-controller executors: Enforces the number of built-in executors on the client controller itself. Not enforced by default.
-
Controller Owner: Email addresses for the administrators responsible for maintaining the client controller.
-
WebSocket: Enable this to connect client controller over WebSocket instead of TCP, since TCP port is not exposed outside kubernetes cluster by default.
Once these settings are saved, you should be redirected to the client controller item’s Manage page which includes instructions for how to connect the client controller to the operations center.
Once the client controller is connected, administrators should configure security and access controls for the controller.
Upgrade managed controllers
To update a managed controller’s version, the administrator needs to update the version of the Docker image for the managed controller. Once this version is updated, the managed controller and its default plugins will be upgraded to the latest versions defined in the image, while any non-default plugins will be left at their current versions.

Once the Docker image definition is updated, the CloudBees CI administrator must restart the instance so the managed controller can begin using its upgraded components.
Bulk-upgrade managed controllers
When a CloudBees CI cluster serves many teams and contains many controllers, an administrator can save time and greatly reduce the overhead of upgrading those controllers by creating a repeatable task to automate this process. In CloudBees CI, this can be achieved by defining a cluster operation in operations center.
To create this task, the administrator must first sign in to the operations center, and then create a New Item of the type Cluster Operations. The administrator must then select the managed controllers cluster operation, and is given a set of pre-configured upgrade patterns to choose from.
The administrator must then specify which controllers to target by using the filter Uses Docker Image and picking a Docker image used by their cluster’s controllers as the upgrade target for this operation. Any controllers in the cluster using the selected image will be affected by this cluster operation.
In the Steps section, the administrator should select Update Docker Image and pick the new Docker image to bulk-upgrade the targeted controllers to. Next, the administrator should add a Reprovision step to restart the targeted controllers.
Once these settings are configured, the administrator can run the cluster operation to perform a bulk upgrade of their cluster’s controllers, or schedule the operation to run at a later time.
Quiet start
There may be times during an upgrade or other maintenance when it is best to have Jenkins start, but launch no projects. For example, if an upgrade is being performed in multiple steps, the intermediate steps may not be fully configured to run projects successfully. The "quiet start plugin" can immediately place the Jenkins server in "quieting down" state on startup.
Enable "quiet start" by checking the box in . When the server is restarted, it will be in the "quieting down" state. An administrator can cancel that state using the regular UI.
Uncheck the box in when maintenance is complete. Projects will start as usual on server restart.