Unified authentication via single sign-on (SSO) enables CloudBees Software Delivery Automation users to sign in once to access both CloudBees CI and CloudBees CD/RO. CloudBees CI can be configured to authenticate with CloudBees Software Delivery Automation using SSO, where the CloudBees Software Delivery Automation server acts as the identity provider for CloudBees CI. CloudBees CI delegates to the CloudBees Software Delivery Automation server to authenticate CloudBees CI users.
To configure CloudBees CI to use SSO with CloudBees Software Delivery Automation, you must complete the following steps:
Configuring SSO for CloudBees Software Delivery Automation
If you have not done so already, you must first configure SSO for CloudBees Software Delivery Automation. SSO for CloudBees Software Delivery Automation supports the following protocols:
Setting up the connection to CloudBees Software Delivery Automation in CloudBees CI
Once you have configured SSO for CloudBees Software Delivery Automation, you must enable the connection to CloudBees Software Delivery Automation in CloudBees CI.
This procedure is required only in the following situations:
-
CloudBees CI on traditional platforms is installed.
-
You installed CloudBees CI on modern cloud platforms, but omitted
ci.OperationsCenter.Hostname.
To enable the connection to CloudBees Software Delivery Automation in CloudBees CI:
-
From the CloudBees navigation, select CI.
-
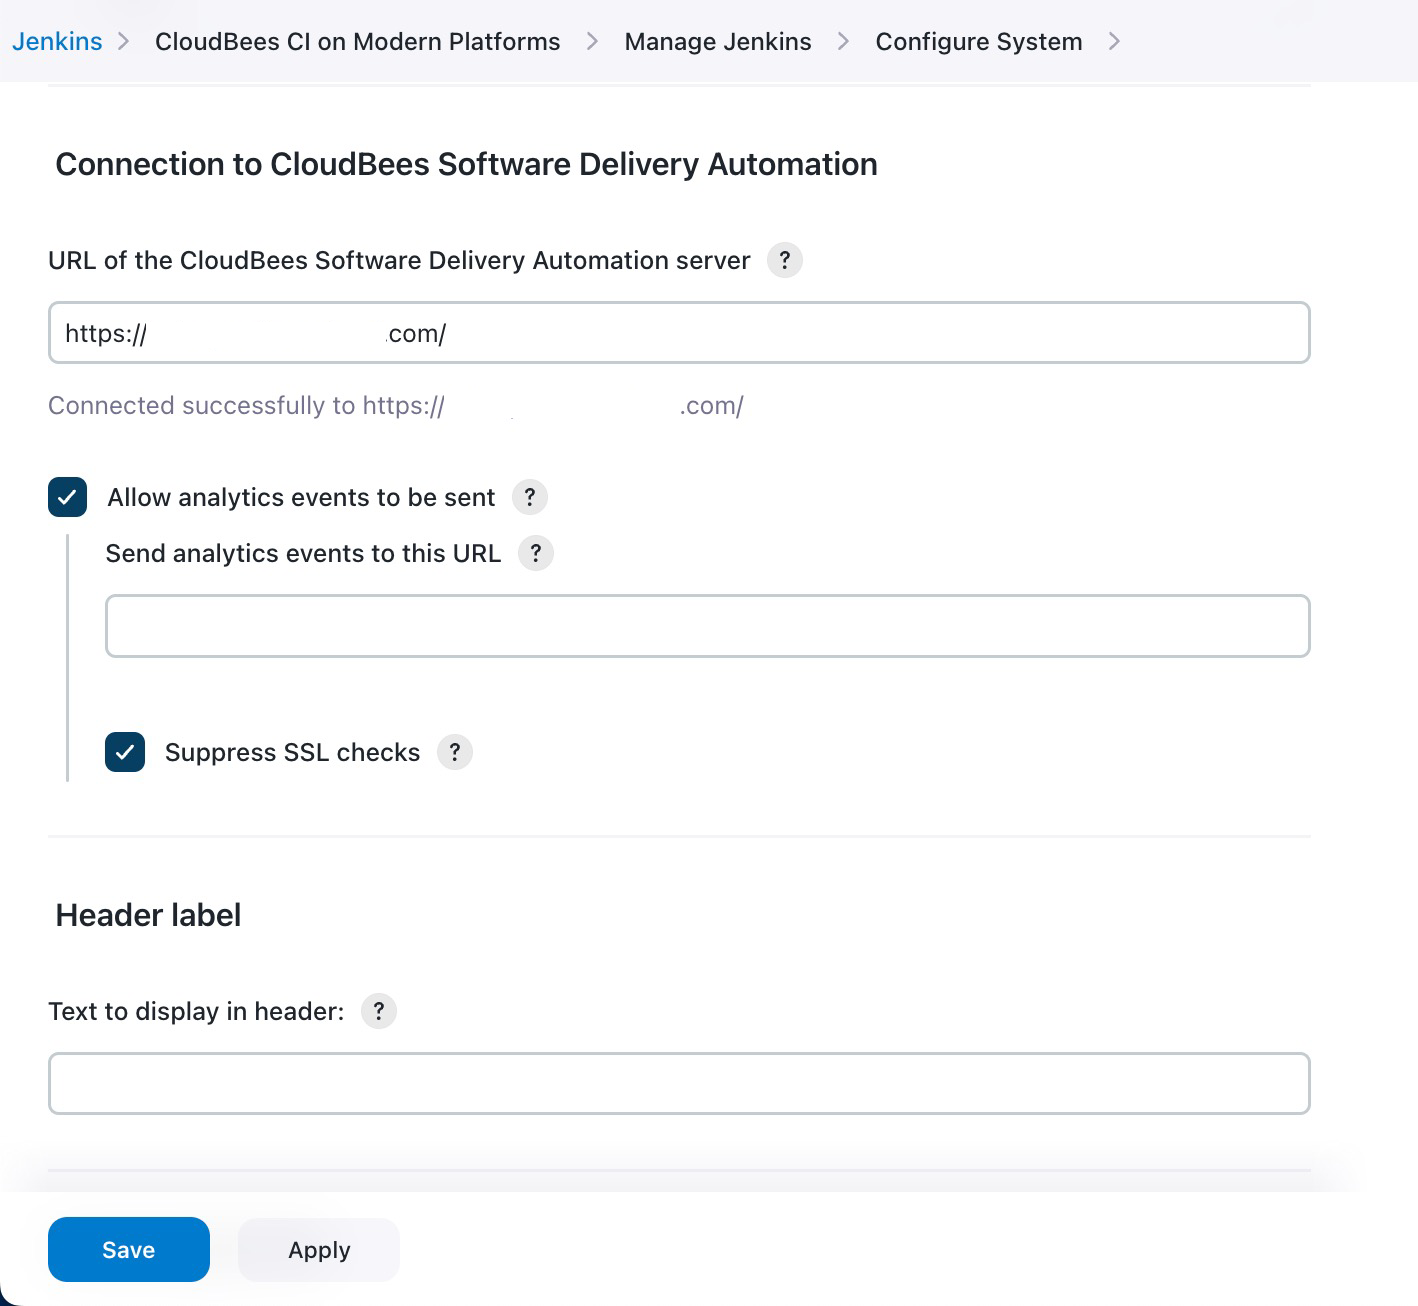
Select , and then scroll down to Connection to CloudBees Software Delivery Automation.
 Figure 1. Connection to CloudBees Software Delivery Automation
 -
Enter the URL of the CloudBees Software Delivery Automation server. For example,
https://your.hostname/. -
Select Allow analytics events to be sent.
-
Enter URL of the CloudBees Software Delivery Automation server.
If you receive the
Failing response from https://automation server address/ci-events: 403error, then you must use CloudBees Software Delivery Automation to configure this connection. Refer to:-
Configuring CloudBees CI controller to modify the connection via the UI.
-
createCIConfiguration to use
ec-tool.
You may also encounter the 403 error if you did not add the operations center public key into the CloudBees CI configuration in CloudBees CD/RO. You can get the operations center public key at
OPERATIONS_CENTER_URL/instance-identityand then copy and paste the public key into the CloudBees CI configuration in CloudBees CD/RO.After completing the connection configuration in CloudBees Software Delivery Automation, return to CloudBees CI and disable and re-enable the Allow analytics events to be sent option.
-
-
Select Save.
Enabling CloudBees CI to use SSO
Once you have set up the connection to CloudBees Software Delivery Automation, you must enable CloudBees CI to use SSO.
|
Before enabling CloudBees CI to use SSO, CloudBees recommends that you:
|
To enable CloudBees CI to use SSO:
-
From the CloudBees navigation, select CI.
-
Select .
-
Under Security Realm, select Single sign-on via CloudBees Software Delivery Automation.
-
Select Check connection to CloudBees Software Delivery Automation to verify that the URL for CloudBees Software Delivery Automation is valid and the CloudBees CD/RO or CloudBees Analytics version is 10.2.0 or later, which is required to use SSO.
-
Select Save.
Signing in to CloudBees Software Delivery Automation
To sign in, copy https://<webHostName>/flow/ into a browser window, then enter your CloudBees Software Delivery Automation web host name as the <webHostName>.
|
If you experience page redirect problems during SSO sign in, you can modify the
|
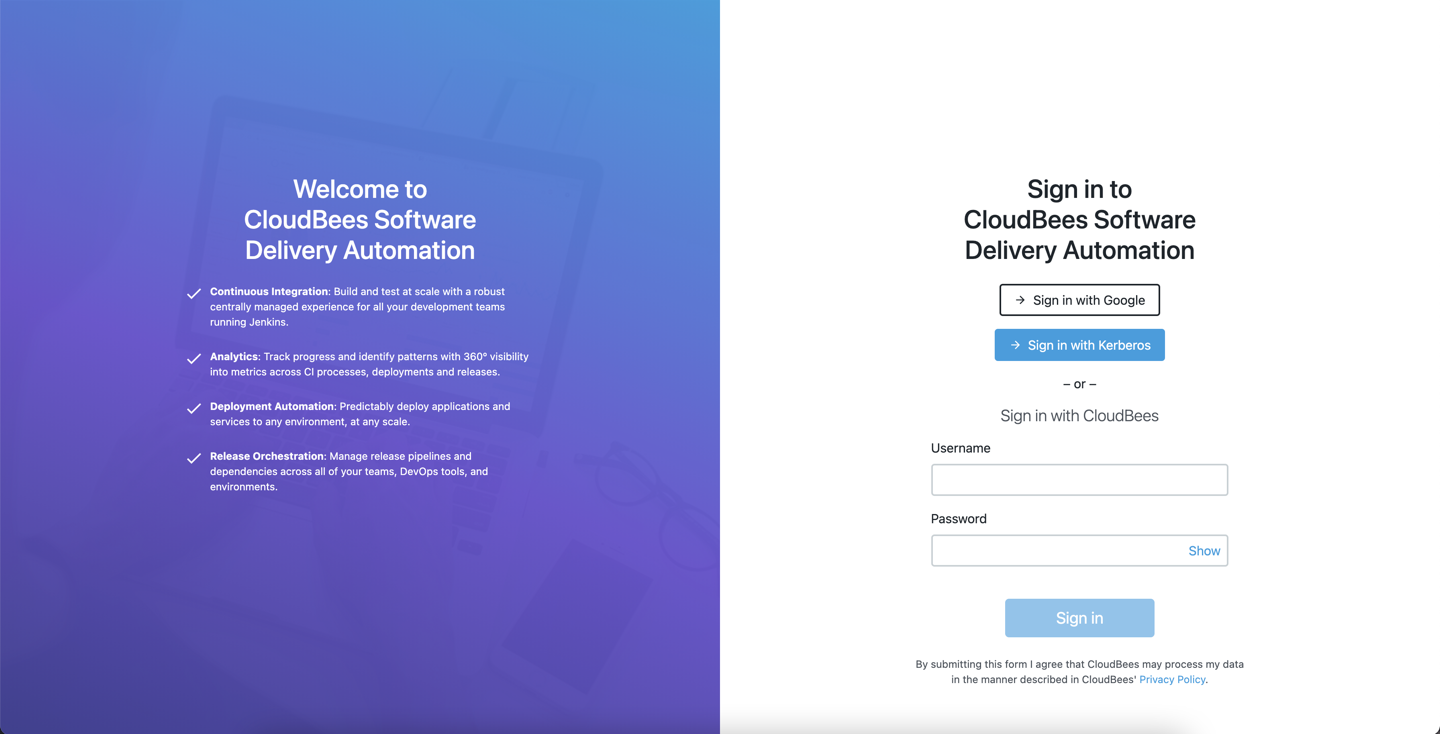
The sample sign-in page below is SSO-enabled with GSuite and Kerberos SSO. Your page may be enabled with other SSO identity providers, such as Okta.

From here, use one of the following methods to sign in:
-
Select Sign in with Google: The credentials are authenticated via the Google identify provider, and if successful, you are redirected to the home page.
-
Select Sign in with Kerberos: This system has additionally been enabled with Kerberos SSO. The credentials are authenticated, and if successful, you are redirected to the home page.
-
Enter a Username and Password for local authentication. Then select Sign in. If successful, you are redirected to the home page.
| If you do not already have an active session, you are unable to sign in through the CloudBees Software Delivery Automation server when the CloudBees Software Delivery Automation server is being upgraded. The following message appears on the sign-in screen until the CloudBees Software Delivery Automation server upgrade is complete: “Server is starting. Please wait.” |