Introduction
This basic tutorial provides instructions to create a Basic Reporting Plugin called SampleReporting that demonstrates how a plugin can be used to provide numbers for RCC Dashboard metrics. The purpose of this tutorial is to demonstrate usage of plugins in RCC that do not require connecting to a Third Party Tool. Please notice that this basic tutorial uses randomly generated numbers instead of real data from a third-party tool.
Prerequisites
These are assumptions for this Tutorial.
-
Introductory Tutorial has been completed.
-
pdkis installed and setup. -
An active CloudBees CD/RO instance with CloudBees Analytics.
-
Internet connection.
-
A GitHub account.
Step 1 : Generate a plugin using sample spec fromGitHub
After making sure pdk is available in your PATH, create a plugin
workspace, typing the name SampleReporting. Copy pluginspec.yaml from
the cloned repository to the config directory of your plugin and
generate the plugin. Please note that the values you have provided to
the 'generate workspace' command, will be replaced by the copied
pluginspec.yaml
cd ~/work git clone https://github.com/electric-cloud-community/flowpdf ~/temp/flowpdf pdk generate workspace cp ~/temp/flowpdf/groovy/SampleReporting/config/pluginspec.yaml SampleReporting/config cd SampleReporting pdk generate plugin
Step 2 : Modify ReportingSampleReporting.groovy
Modify ReportingSampleReporting.groovy (dsl/properties/groovy/lib/ReportingSampleReporting.groovy) to add an imports and a basic implementation of all its generated methods.
Replace the entire content of Reporting.groovy as follows: Optionally you can compare the content below with generated code and do each of these changes one by one.
import com.cloudbees.flowpdf.FlowPlugin import com.cloudbees.flowpdf.Log import com.cloudbees.flowpdf.components.reporting.Dataset import com.cloudbees.flowpdf.components.reporting.Metadata import com.cloudbees.flowpdf.components.reporting.Reporting import java.time.Instant /** * User implementation of the reporting classes */ class ReportingSampleReporting extends Reporting { /** * Default compareMetadata implementation can compare numeric values automatically * This code is here only as a reference. */ @Override int compareMetadata(Metadata param1, Metadata param2) { def value1 = param1.getValue() def value2 = param2.getValue() return value2['buildNumber'].compareTo(value1['buildNumber']) } @Override List<Map<String, Object>> initialGetRecords(FlowPlugin flowPlugin, int i = 10) { Map<String, Object> params = flowPlugin.getContext().getRuntimeParameters().getAsMap() flowPlugin.log.logDebug("Initial parameters.\n" + params.toString()) // Generating initial records return generateRecords(params, i, 1) } @Override List<Map<String, Object>> getRecordsAfter(FlowPlugin flowPlugin, Metadata metadata) { def params = flowPlugin.getContext().getRuntimeParameters().getAsMap() def metadataValues = metadata.getValue() def log = flowPlugin.getLog() log.info("\n\nGot metadata value in getRecordsAfter: ${metadataValues.toString()}") // Should generate one build right after the initial set return generateRecords(params, 1, metadataValues['buildNumber'] + 1) } @Override Map<String, Object> getLastRecord(FlowPlugin flowPlugin) { def params = flowPlugin.getContext().getRuntimeParameters().getAsMap() def log = flowPlugin.getLog() log.info("Last record runtime params: ${params.toString()}") // Last record will always be 11th. int initialPos = 11 return generateRecords(params, 1, initialPos)[0] } @Override Dataset buildDataset(FlowPlugin plugin, List<Map> records) { def dataset = this.newDataset(['build'], []) def context = plugin.getContext() def params = context.getRuntimeParameters().getAsMap() def log = plugin.getLog() log.info("Start procedure buildDataset") log.info("buildDataset received params: ${params}") log.debug("Records in buildDataset()") for (def row in records) { def payload = [ source : 'Test Source', pluginName : '@PLUGIN_NAME@', projectName : context.retrieveCurrentProjectName(), releaseName : params['releaseName'] ?: '', releaseProjectName : params['releaseProjectName'] ?: '', pluginConfiguration: params['config'], baseDrilldownUrl : (params['baseDrilldownUrl'] ?: params['endpoint']) + '/browse/', buildNumber : row['buildNumber'], timestamp : row['startTime'], endTime : row['endTime'], startTime : row['startTime'], buildStatus : row['buildStatus'], launchedBy : 'N/A', duration : row['duration'], ] for (key in payload.keySet()) { if (!payload[key]) { log.info("Payload parameter '${key}' don't have a value and will not be sent.") payload.remove(key) } } dataset.newData( reportObjectType: 'build', values: payload ) } log.info("Dataset: ${dataset.data}") return dataset } /** * Generating test records (imagine this is your Reporting System) * @param params CollectReportingData procedure parameters * @param count number of records to generate * @param startPos first build number for the generated sequence * @return List of raw records */ static List<Map<String, Object>> generateRecords(Map<String, Object> params, int count, int startPos = 1) { List<Map<String, Object>> generatedRecords = new ArrayList<>() for (int i = 0; i < count; i++) { String status = new Random().nextDouble() > 0.5 ? "SUCCESS" : "FAILURE" Instant generatedDate = new Date().toInstant() int buildNumber = startPos + i Log.logInfo("StartPos: $startPos, Generating with build number" + buildNumber) // Minus one day generatedDate.minusSeconds(86400) // Adding a seconds, so builds have a time sequence generatedDate.plusSeconds(buildNumber) String dateString = generatedDate.toString() def record = [ source : "SampleReporting", pluginName : "@PLUGIN_NAME@", buildNumber : buildNumber, projectName : params['releaseProjectName'], releaseName : params['releaseName'], timestamp : dateString, buildStatus : status, pluginConfiguration: params['config'], endTime : dateString, startTime : dateString, duration : new Random().nextInt().abs() ] generatedRecords += (record) } return generatedRecords } }
Step 3 : Modify SampleReporting.groovy
Modify SampleReporting.groovy (dsl/properties/groovy/lib/SampleReporting.groovy) to add a basic implementation for the collectReportingData().
Replace the entire content of collectReportingData() as follows. Optionally you can compare the content below with generated code and do each of these changes one by one.
/** * Procedure parameters: * @param config * @param param1 * @param param2 * @param previewMode * @param transformScript * @param debug * @param releaseName * @param releaseProjectName */ def collectReportingData(StepParameters paramsStep, StepResult sr) { def params = paramsStep.getAsMap() if (params['debug']) { log.setLogLevel(log.LOG_DEBUG) } Reporting reporting = (Reporting) ComponentManager.loadComponent(ReportingSampleReporting.class, [ reportObjectTypes : ['build'], metadataUniqueKey : params['param1'] + (params['param2'] ? ('-' + params['param2']) : ''), payloadKeys : ['buildNumber'], ], this) reporting.collectReportingData() }
Step 4 : Build, Install, Promote and Configure the Plugin
Use flowpdk to build the plugin. Install the zip in CloudBees CD/RO and promote it. Create a plugin configuration with any name your prefer, filling in the required fields just to make sure they are non-empty. As the plugin configuration for this sample is a placeholder, the values you type for URL or credentials will not be used.
Step 5 : Setup RCC
Open CloudBees CD/RO and create new release SampleReporting release in your
project.
Go to CloudBees Analytics Dashboards and navigate to the Release Command Center.

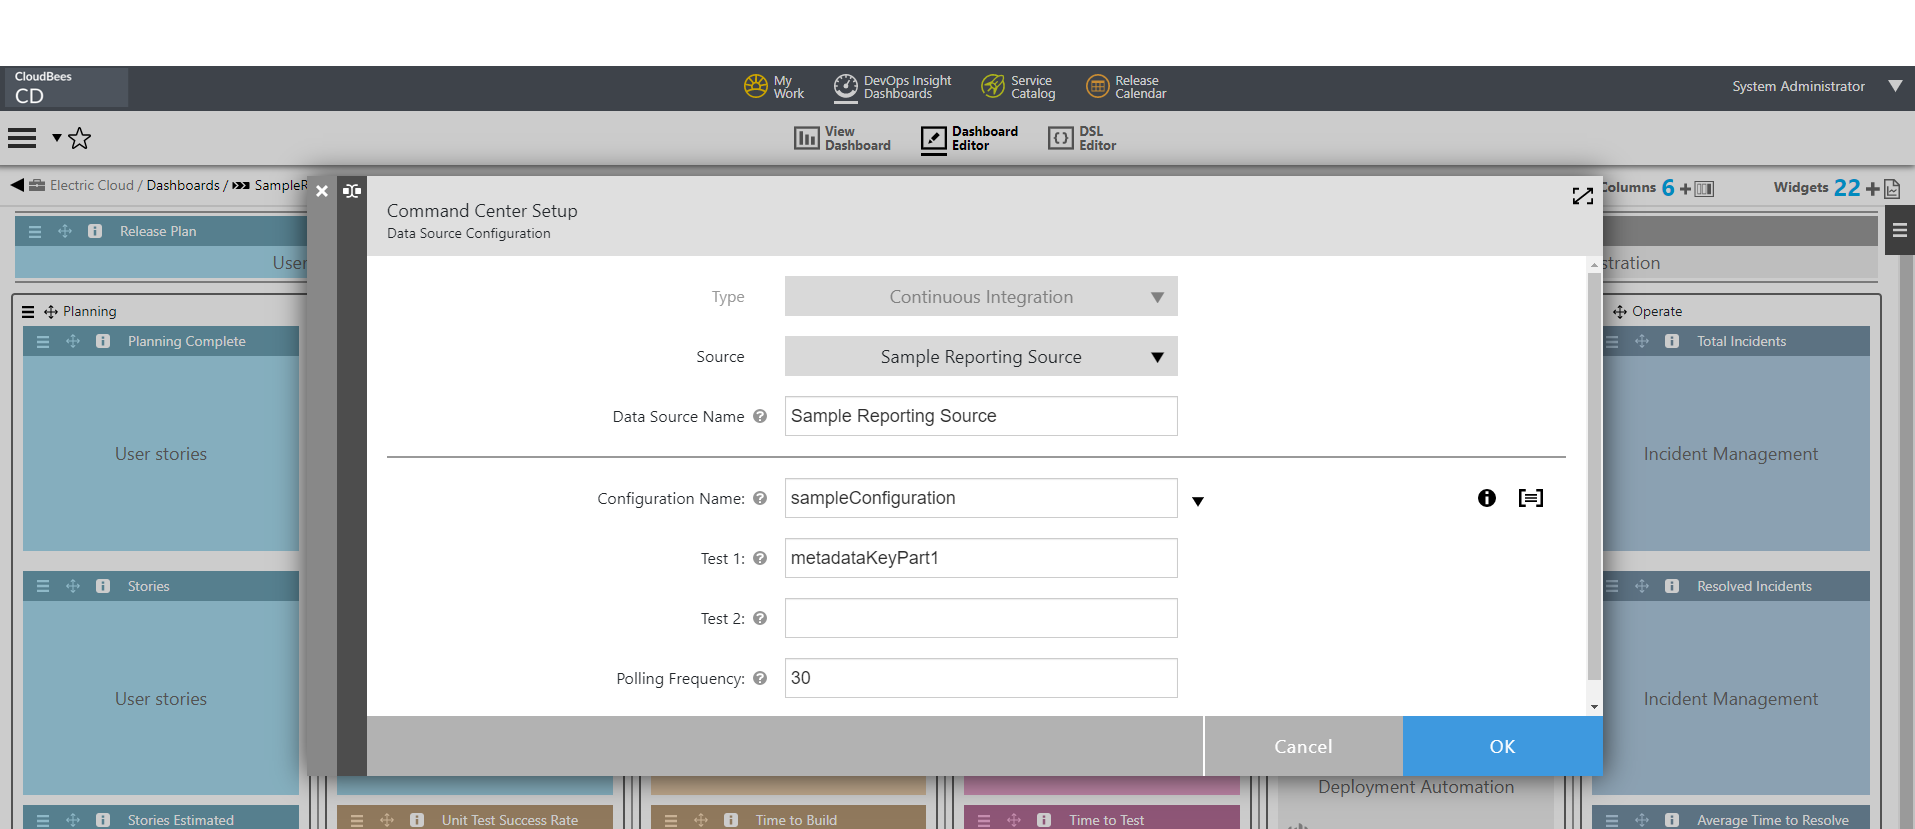
Choose your release from the list and open the Dashboard Editor. Click on the "Setup" link and configure new datasource as follows:

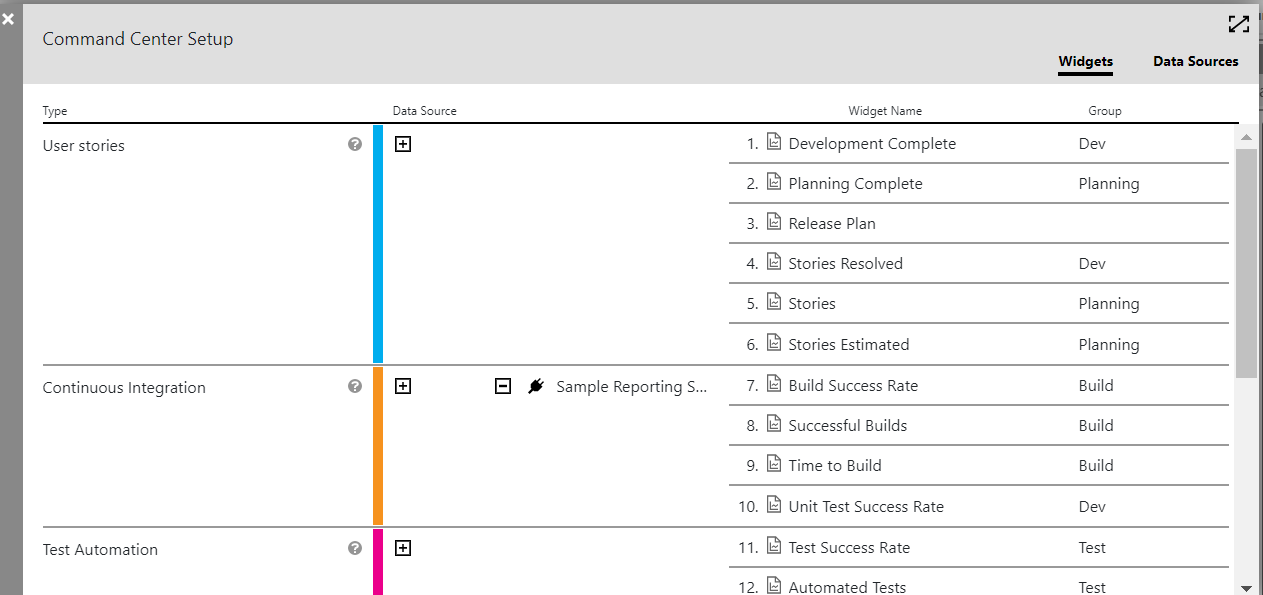
You should have following setup.

Step 6 : Examine the Schedules created and numbers in the RCC Dashboard
Navigate to the "Platform Home page". Open your project and notice the following schedules that get automatically created.

Manually run the schedule to perform an initial data retrieve. Notice the CollectReportingData procedure getting called.

The schedule metadata now contains value "\{buildNumber : 10}". Click on the "Run again" to execute the CRD second time. Our reporting system generated a new record with build number 11. This record was reported and new build number is saved to metadata.

And finally run the schedule one more time. This time the generated record with build number 11 has the same build number as is stored in metadata, so CollectReportingData doesn’t report it.

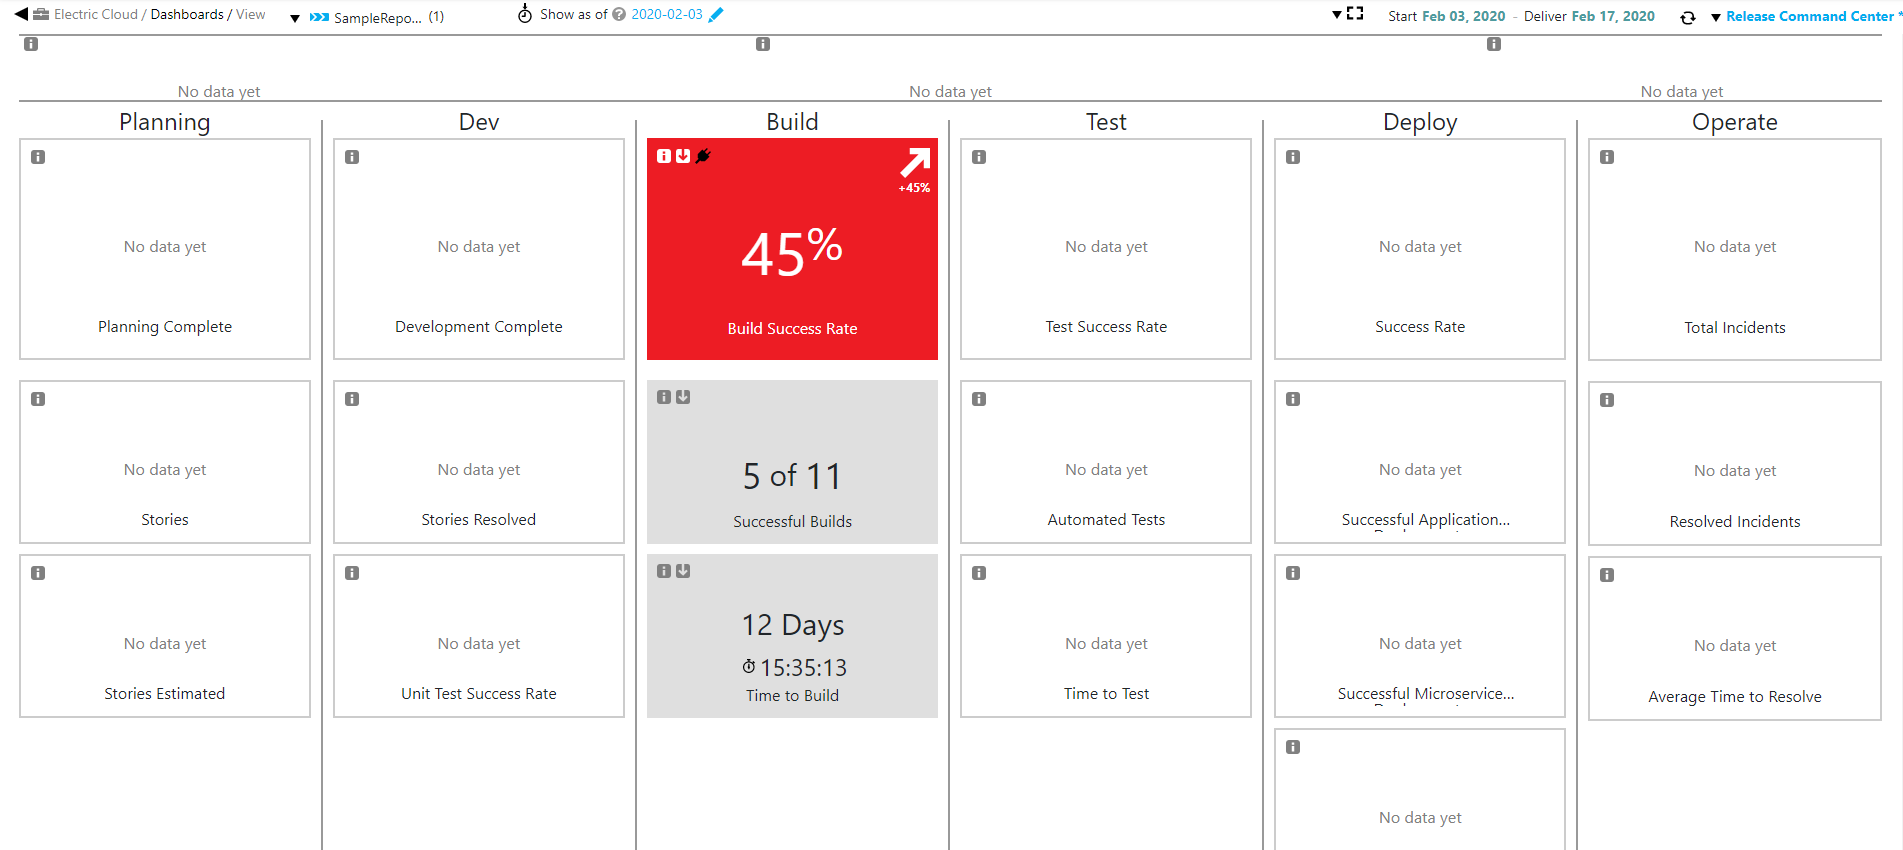
Now go to the RCC and notice numbers getting populated in the RCC Dashboard. Build status and duration is random, so your numbers can be different.

Step 7 : Summary
This Summary is provided in order to help a Developer conceptualize the steps involved in the creation of this plugin.
- Specification
-
-
pluginspec.yamlprovides the declarative interface for the plugin procedure CollectReportingData.
-
- Generated Code
-
-
pdkgenerates boiler plate code for procedures the reporting component and plugin. The former consists of boiler plate code for the implementation of CollectReportingData, while the later provides the Procedure Interface that gets invoked by RCC. -
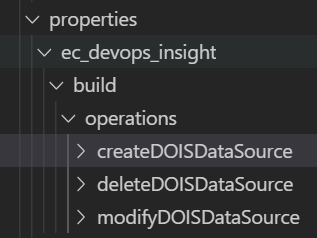
pdkalso generates the boiler plate code for creating the DOIS DSL scripts (see picture below). When creating or modifying the Data Source in RCC, these DSL scripts get executed. Their execution results in creating schedules which in turn call CollectReportingData.
-

- User Modifications
-
-
Implement compareMetadata, initialGetRecords, getRecordsAfter, getLastRecord, buildDataset.
-
Note that all the above methods are part of the Reporting Component.
-