The CloudBees CI licenses page provides read-only visibility into the list of active user licenses across all CloudBees CI controllers in the customer’s environment. Information on this page is aggregated from the preinstalled CloudBees Software Delivery Automation plugin on each CloudBees CI controller.
| Looking for CloudBees CD/RO license information instead? See CD Licenses. |
Viewing CloudBees CI licenses and active users
The CloudBees CI licenses UI is available from CloudBees CD/RO:
-
From the CloudBees navigation, select CloudBees CD/RO.
-
From the CloudBees CD/RO main menu, navigate to . The Licenses dashboard displays.
From here you can:
-
View current licenses.
-
View detailed information about a specific license.
-
View the list of active users for a license.
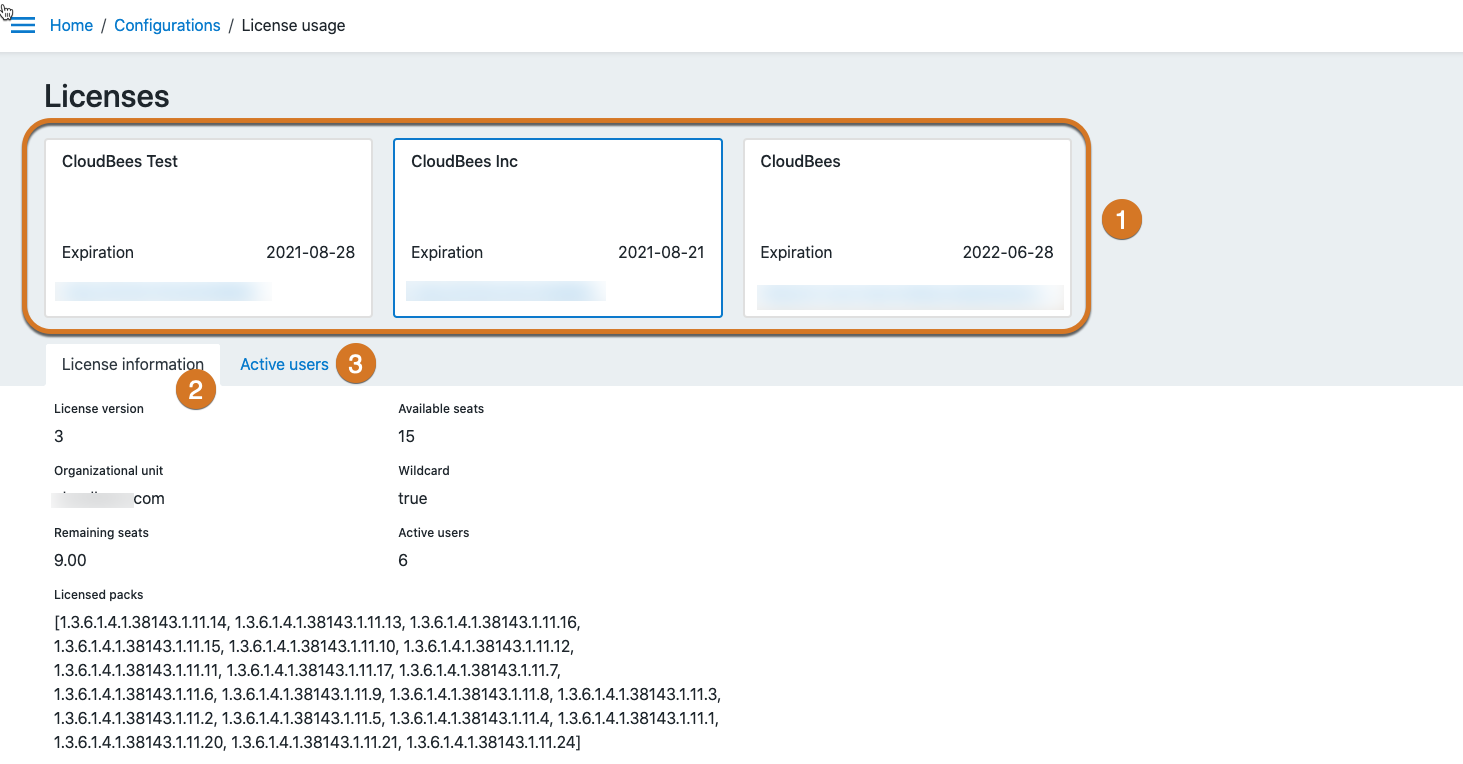
1 |
Tiles representing each CloudBees CI operations center. Three operations centers are shown here; the second one is selected. |
2 |
The License information tab showing specific information for the selected license. |
3 |
The Active users list for the selected license. |
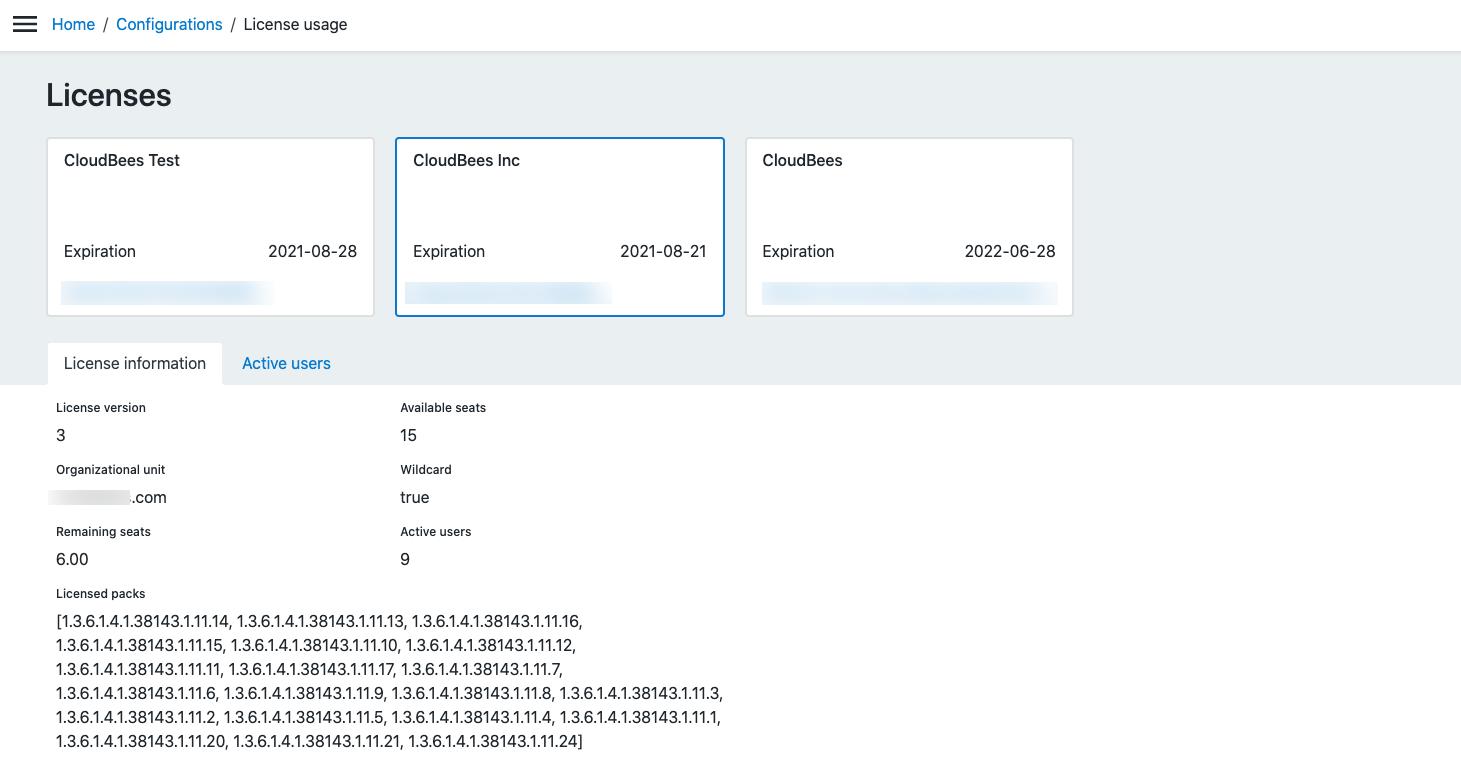
License information
The license information tab shows detailed information about the selected license. Including the number of unique active users as understood by the system, both verified and not verified. Select the Active users tab to drill down to the user list.
Active users
The active user list shows all users that have triggered builds or have signed into the CloudBees CI system regardless if they use multiple email addresses in their work. If a license is configured at the operations center level, the individuals that are listed represent the activity produced across all the controllers managed by that operations center.
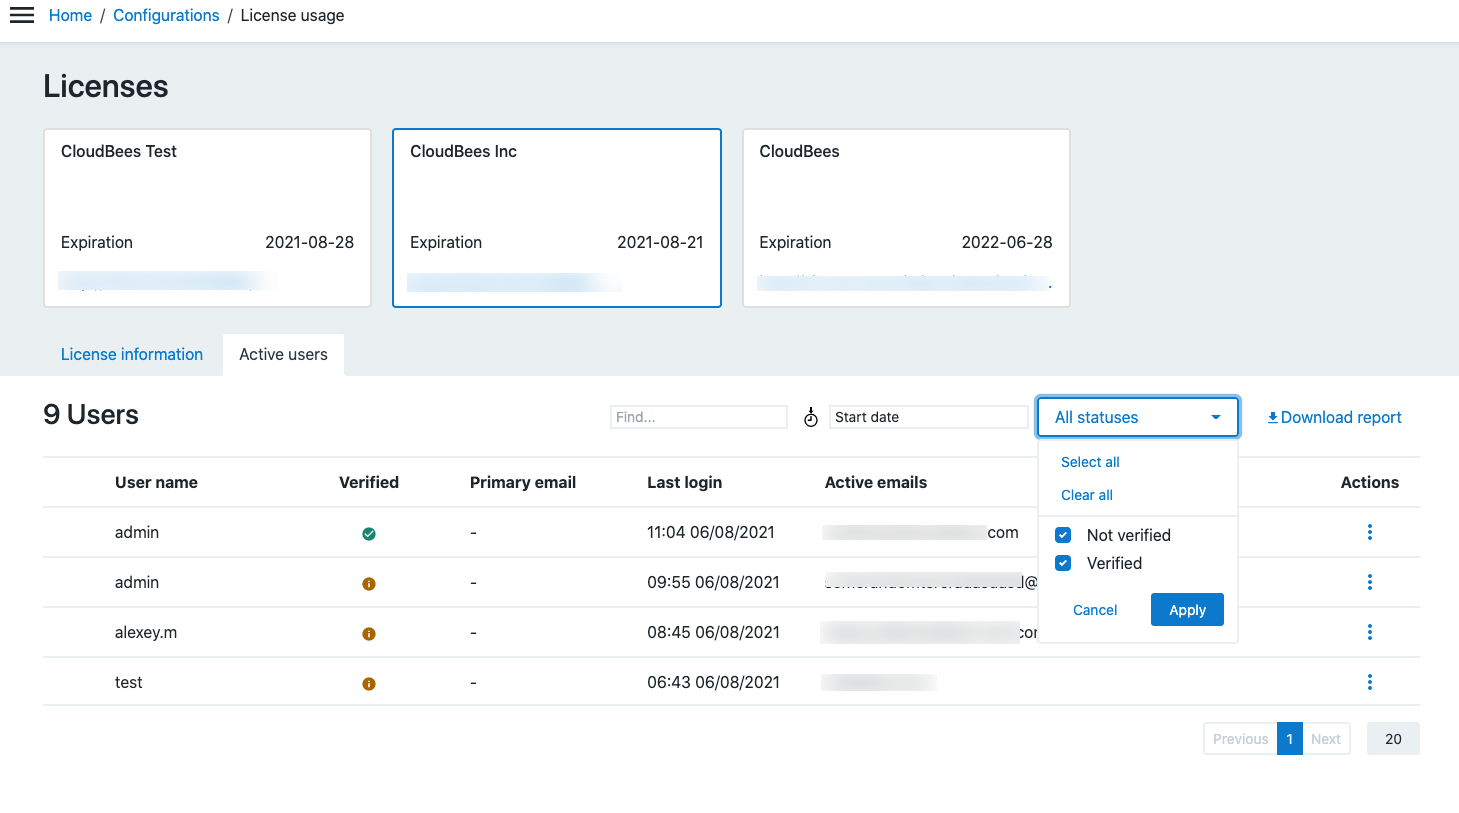
You can filter the user list using the following methods:
-
Find with a search string.
-
Provide the last sign-in date range.
-
Select status: Not verified or verified.
Additionally, download the filtered list of users into a CSV report by selecting Download report.
Resolving duplicate user entries
The User Activity Monitoring plugin, available for CloudBees CI, is not intended to identify those users that use multiple email addresses, or even noreply addresses, such as myname@users.noreply.github.com, when they commit code. In CloudBees Software Delivery Automation, the list of users is much more accurate because:
-
All users can configure multiple email addresses on their profile page. CloudBees recommends enabling SSO to have a common list of CloudBees CI users with CloudBees Software Delivery Automation.
-
The administrator requests email verification to automatically bind a new email address to the corresponding user account in the case where a user commits code that triggers a build with an email address that is not registered in the system.
You must set up an email configuration before sending out any verification emails; refer to Creating an email configuration. To request email verification:
-
The admin selects Send verification email from the Actions menu for the user in question. The corresponding user receives an email with a link to verify their email address, similar to the following:
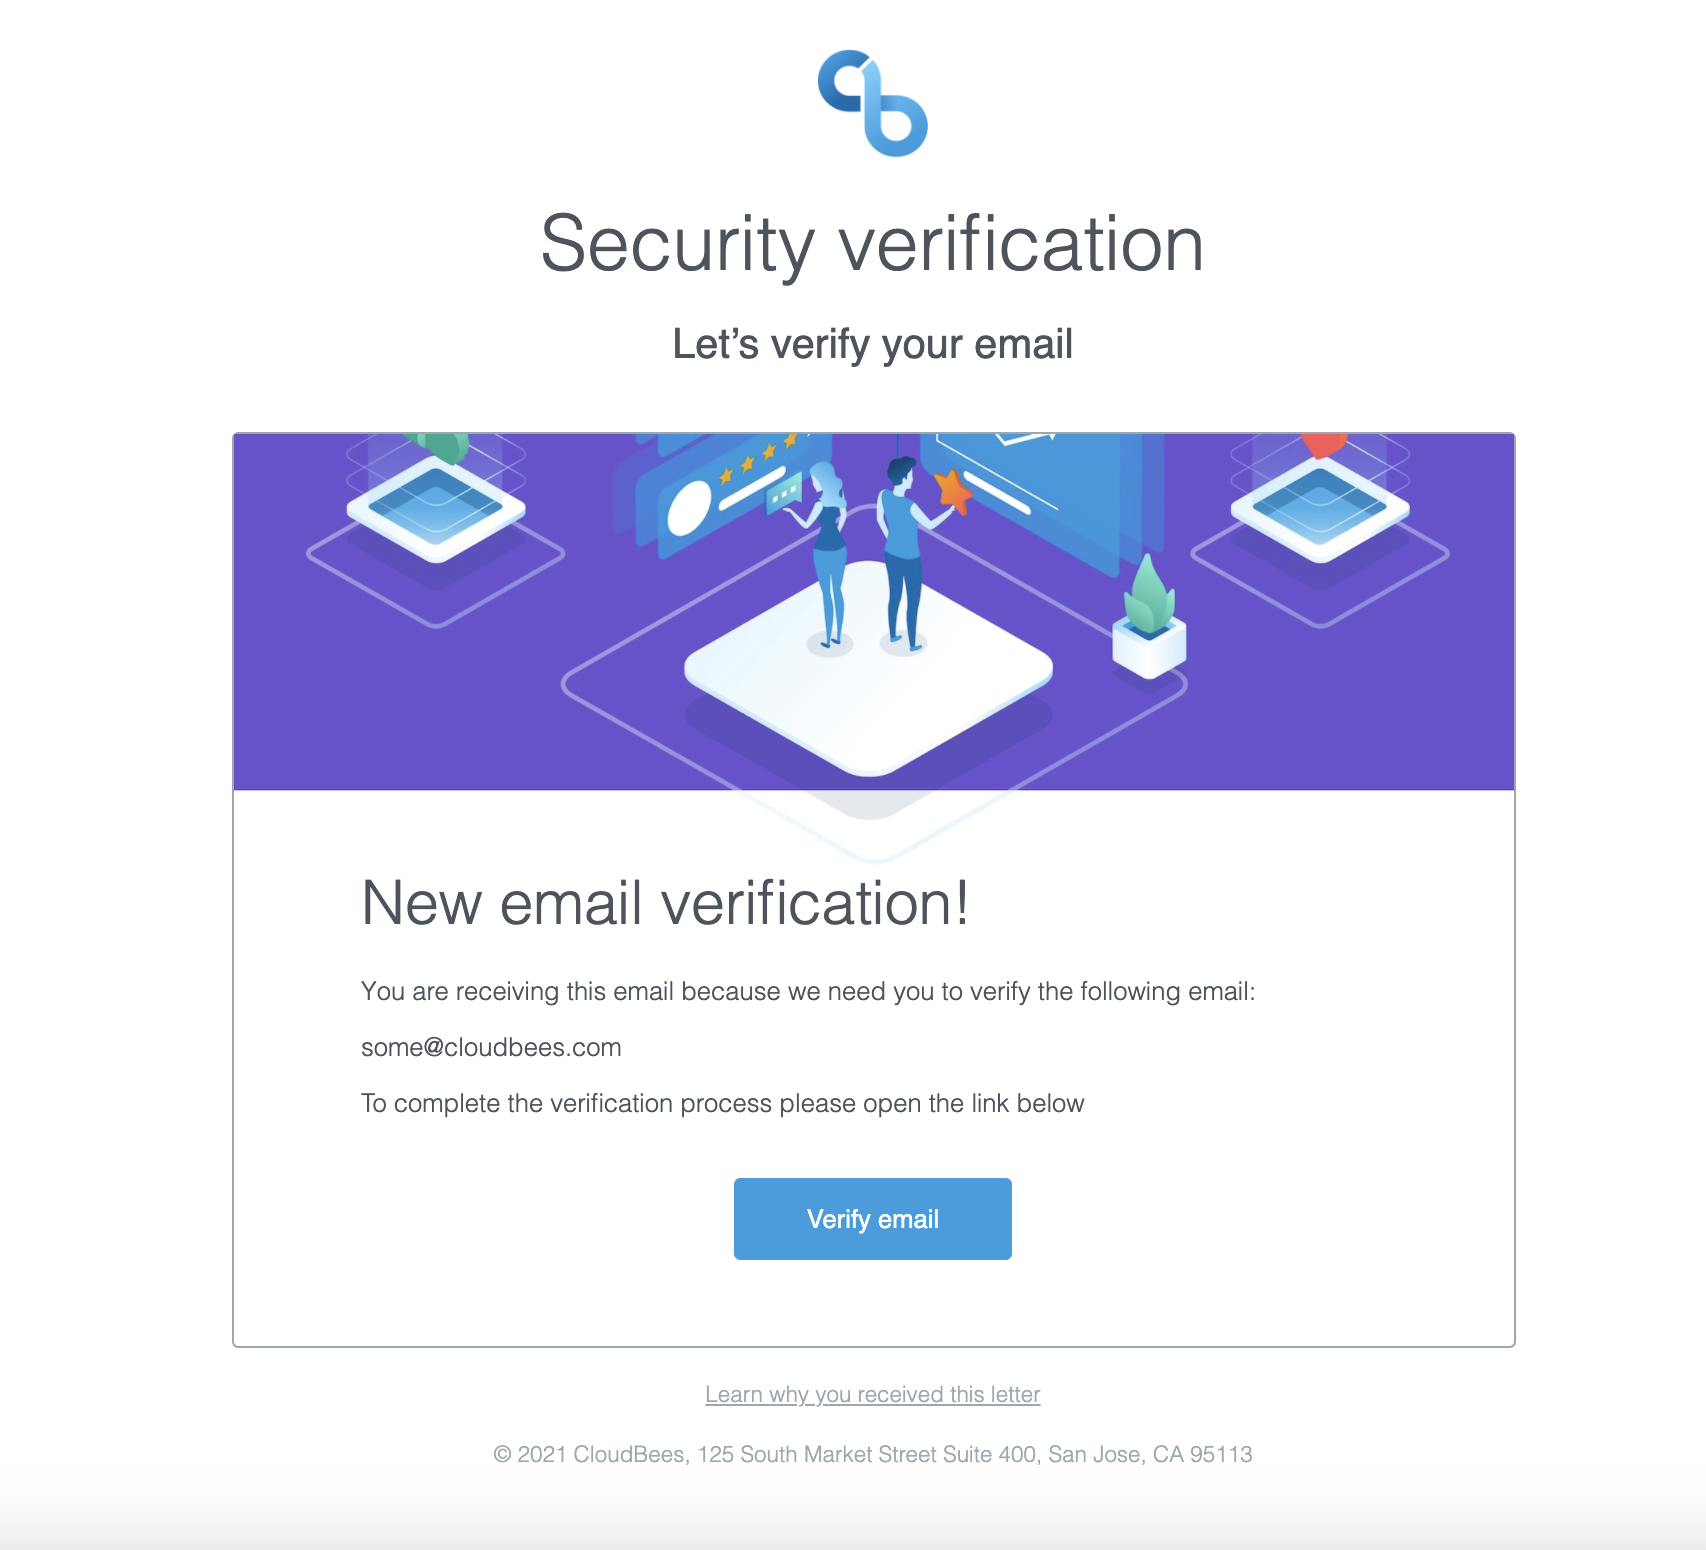
-
The user selects the Verify email link, which requires the user to sign in to CloudBees Software Delivery Automation.
-
The system automatically binds that address to the user’s account. In this way, the administrator can get a list of unique users even if they are represented by more than one email address in the system.
-
-
CloudBees Software Delivery Automation not only tries to match users based on email, but also the user’s full name if this is provided.
Creating an email configuration
You must create an email configuration before verficiation emails can be sent. This is a one-time process.
Before creating the email configuration, make sure your CloudBees CD/RO server settings related to email notification are set appropriately. This is a one-time setting in CloudBees CD/RO.
-
From the CloudBees navigation, select CloudBees CD/RO.
-
From the CloudBees CD/RO main menu, navigate to .
-
Review and set these settings:
Field Name Description Date and time format for email notifications
Format to use for rendering date and time in email notifications.
Set the
Fromheader when sending email notificationsIf enabled, set the
Fromheader in the email message. Defaults toenabled.Date and time timezone for email notifications
Timezone to use for rendering date and time in email notifications.
-
Select OK to save the settings.
Now, create the email configuration.
-
From the main menu, navigate to .
-
Select Add Configuration from the upper-right of the page.
-
Enter information into the fields as follows:
Field Name Description Name
Unique name to identify the email configuration. For email address verification emails, this must be set to
default.Description
Description of this email configuration.
Mail Protocol
Specify either
SMTPSorSMTPMail Host
Mail server name
Mail Port
(Optional) Port number for the mail server. For Google gmail configurations use
port587 for SMTP and port465for SMTPS.If not specified,
25for SMTP and465for SMTPS are used.Mail From
Email address used as the email sender address for CloudBees Software Delivery Automation notifications. This must be a fully-qualified email address (meaning that it must be of the form
<name>@<domain>)Mail User Name
Individual name or a generic name such as
qa-test. Leave this blank.Mail Password
Password for the mail user name. Leave this blank.
-
Select Save after filling in all fields.
-
Select Test to make sure your email configuration works:
Enter a destination email address into the Email Configuration Test popup that appears and click Send.