| The account management features described in this topic apply to all CloudBees support and training environments. For more information about managing accounts in other CloudBees products, refer to the documentation for those products. |
A team is a body of users that are grouped together within an organization. Organization administrators can create or delete teams, and add or remove team members from a team. Organization administrators are not automatically added to the team that they create.
Support can be enabled for the team, which allows team members to create CloudBees Support tickets.
When support is disabled, any tickets submitted do not receive support.
To receive support, support tickets must be filed using the exact same email address listed as a member of the organization. To access training on CloudBees University, also use the exact same email address listed as a member of the organization.
| Creating and managing teams requires administrative privileges for the organization. |
Viewing the team profile and members
| This procedure requires administrative privileges for the organization. |
You can view the team profile and members on the Team management page.
-
On the app.cloudbees.com Home page, in Organization settings, select Manage your organization.
-
From the left pane, select Team management.
-
Select the team you would like to view.
-
(Optional) To search for a specific team, in the top right corner of your screen, below Add members, type a team name in Filter.
-
Select the team name from the list.
The team page is displayed.
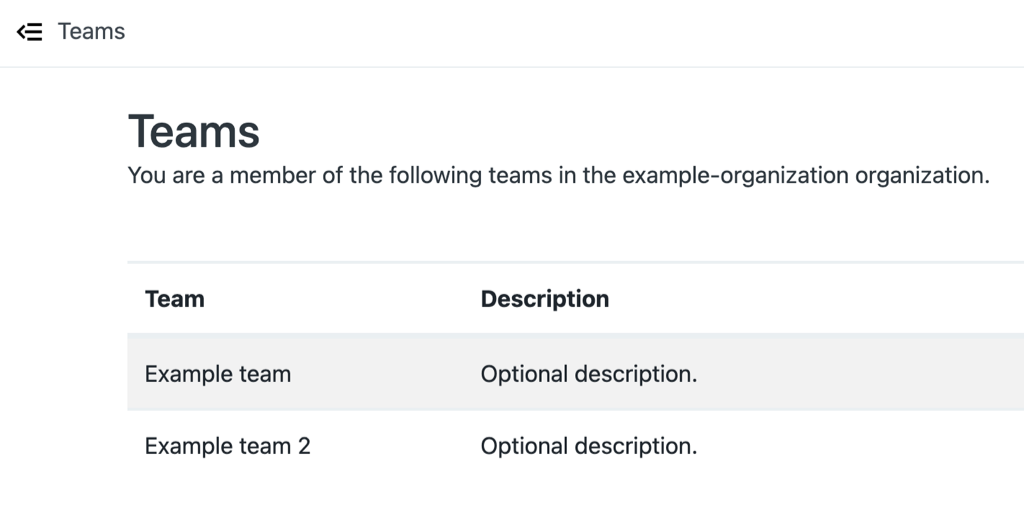 Figure 1. The team profiles
Creating a team
| This procedure requires administrative privileges for the organization. |
Organization administrators can create a team. More than one team can be created within an organization. Organization administrators are not automatically added to the team that they create.
Each team must have a unique name. Team names can be reused immediately upon deletion.
Teams are listed on the Team management screen in the order they were created.
To create a team:
-
On the app.cloudbees.com Home page, in Organization settings, select Manage your organization to open the most recently used organization.
-
(Optional) From the top right corner, select the organization name and navigate to a different organization.
-
From the left pane, select Team management.
-
From the top right corner of the screen, select Create team.
-
Enter a unique Team name.
-
Optionally enter a Team description.
-
Optionally switch Support enabled on to enable team members to open CloudBees Support tickets. When support is disabled, any tickets submitted do not receive support.
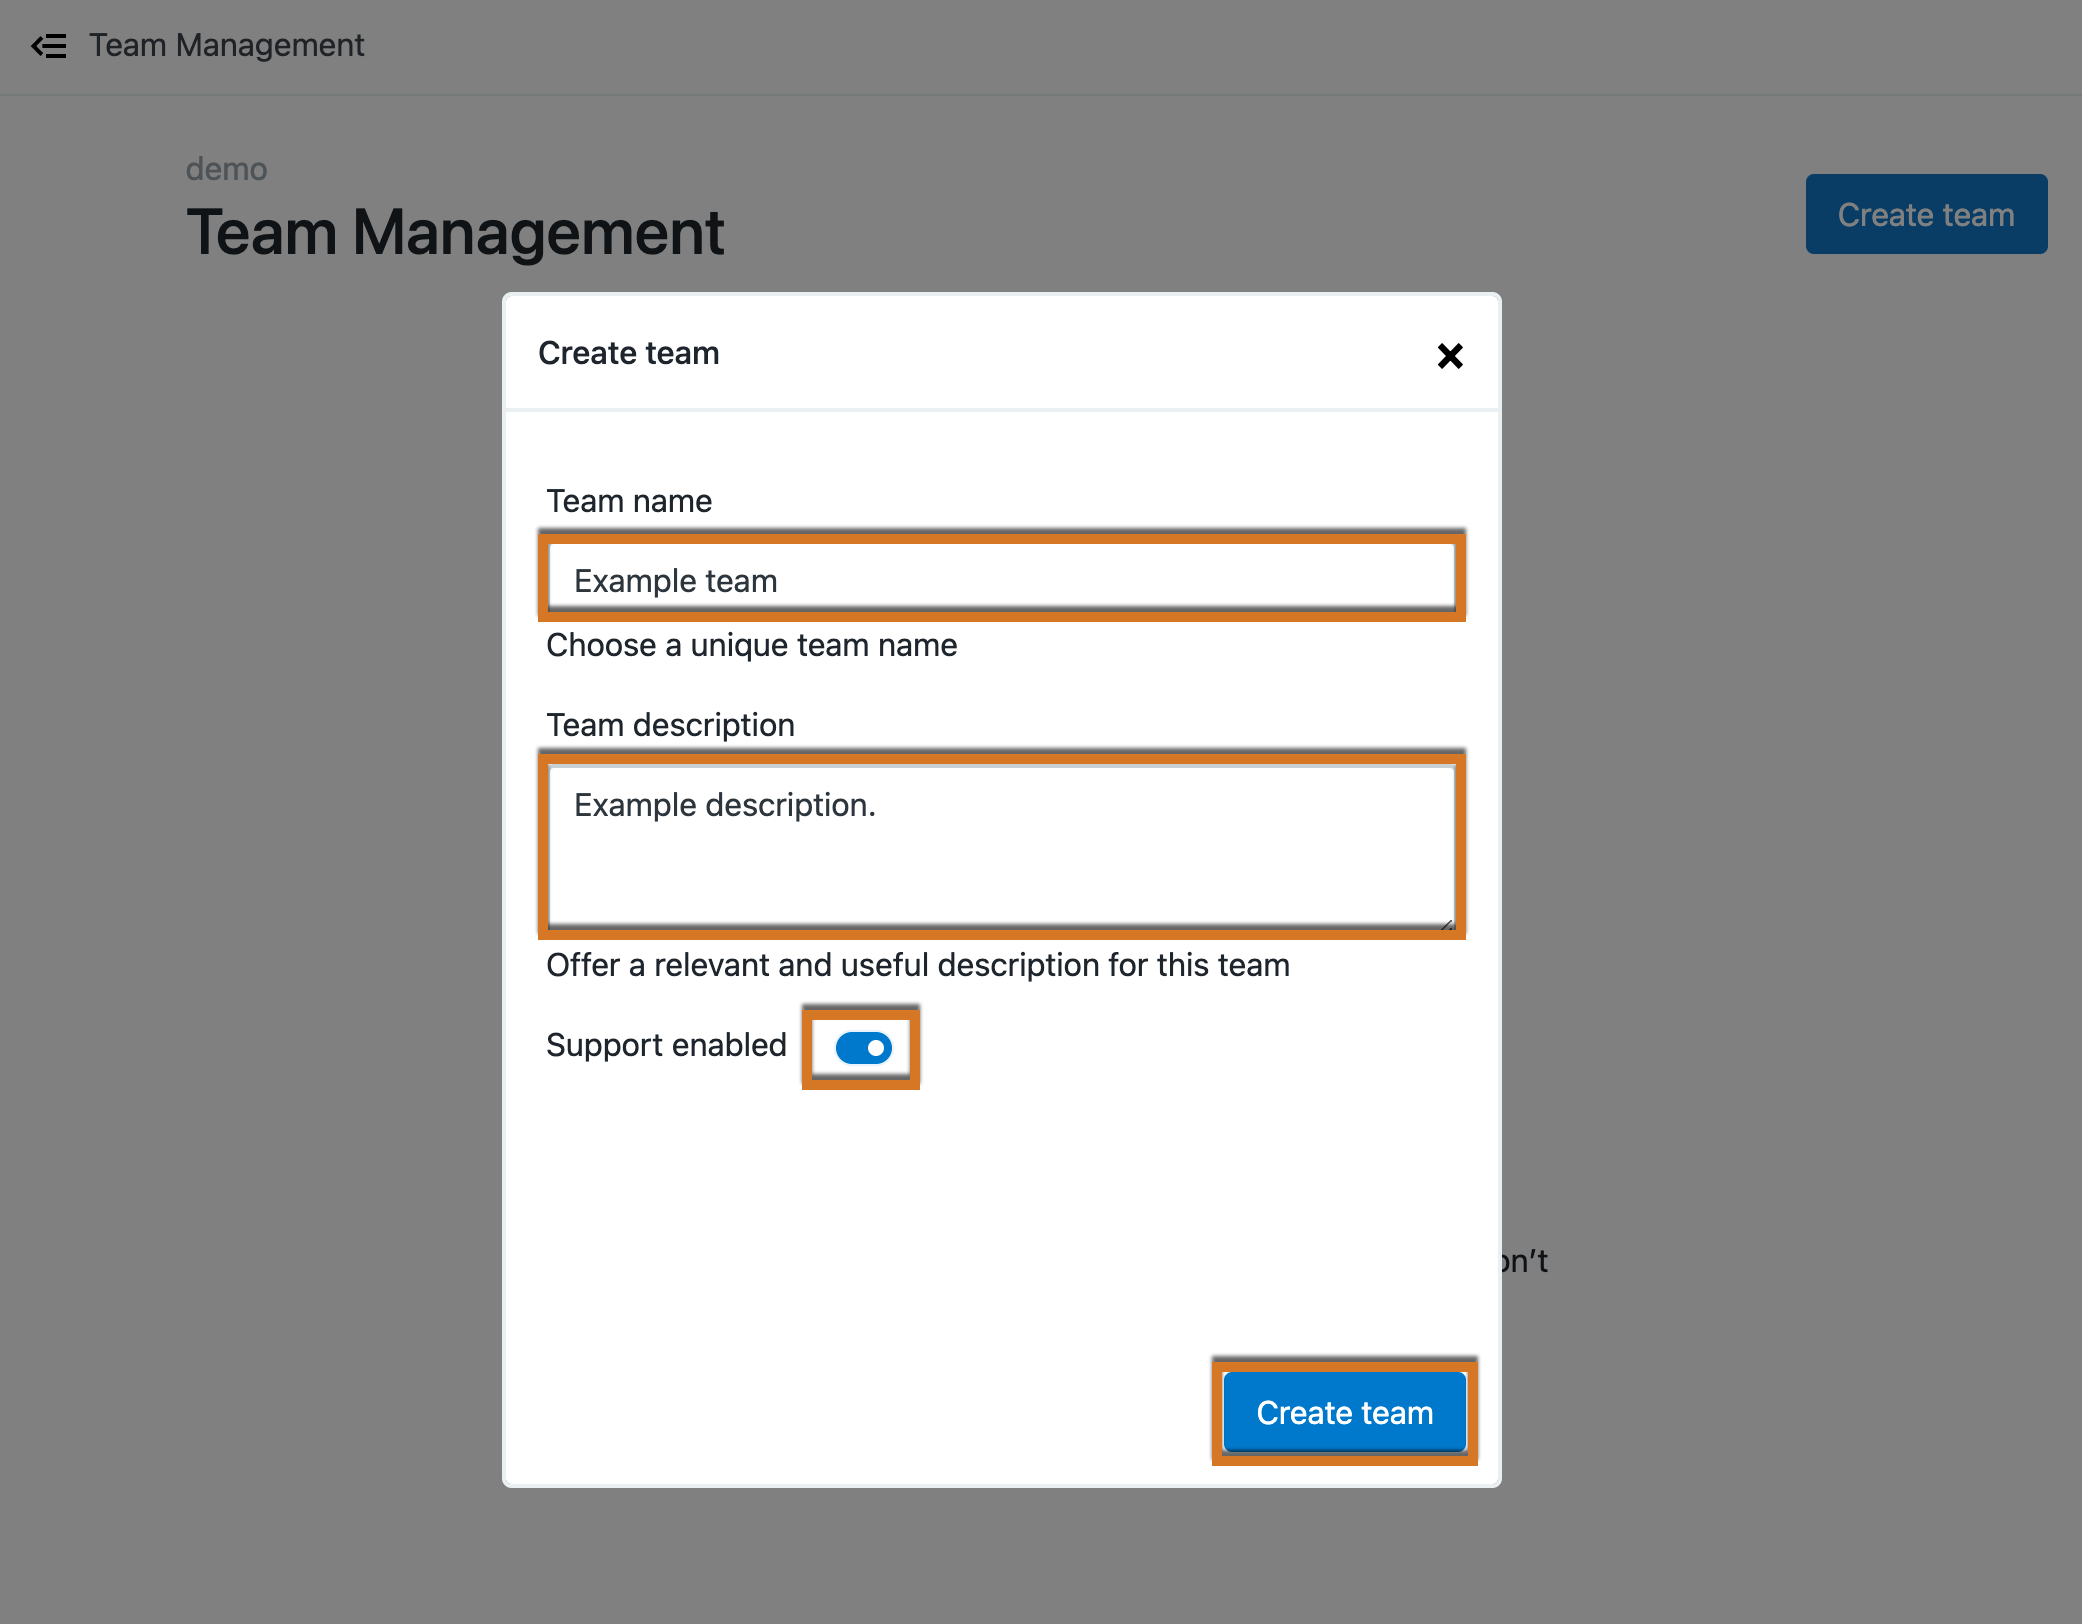 Figure 2. Creating a team
 -
Select Create team.
The team is created and is listed on the Team management screen, and is ready for team members to be added.
Adding members to a team
| This procedure requires administrative privileges for the organization. |
After your team has been created, you can add members.
To add members to your team:
-
On the app.cloudbees.com Home page, in Organization settings, select Manage your organization to open the most recently used organization.
-
(Optional) From the top right corner, select the organization name and navigate to a different organization.
-
From the left pane, select Team management.
-
Select the team to add members to.
The team page is displayed.
-
From the top right corner of the Team management screen, select Add members.
Alternatively, you can select the three vertical dots to the far right of the team, and select Add members.
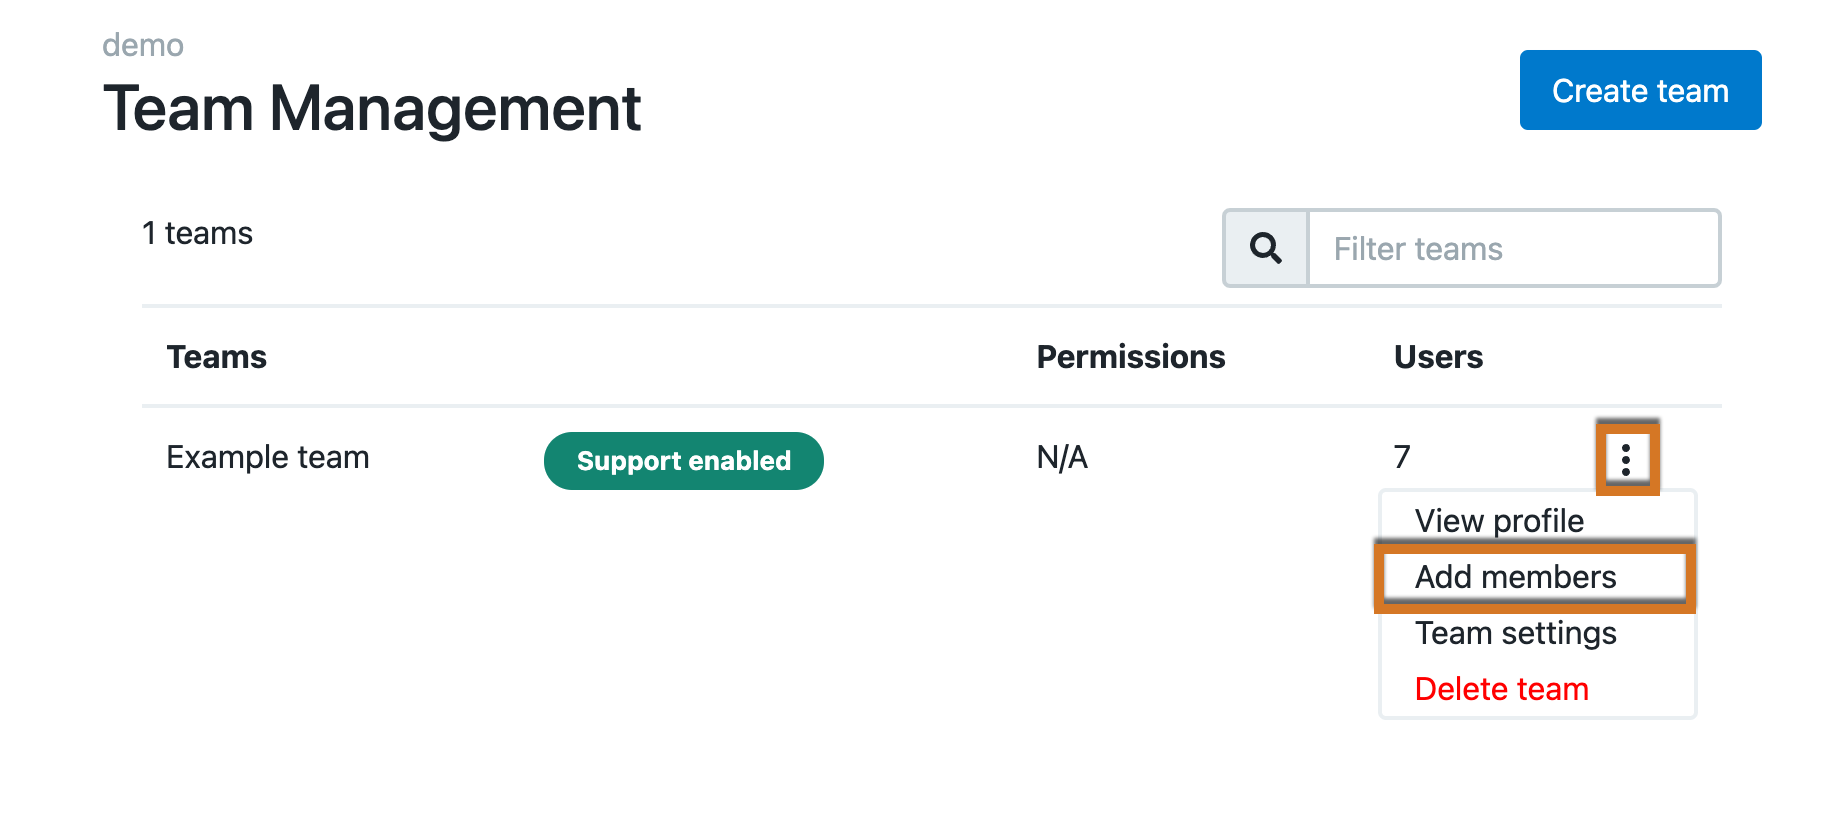 Figure 3. Adding team members
 -
In Choose members select the down arrow, and then search for a specific name, scroll to a name, or select all.
If any characters have been entered into the search filter, you can Select All (Filtered), and the results will only include the filtered members. To select every member in the organization, clear the search field and choose Select All.
-
Select Add members.
The member is added, and a notification appears at the bottom of the screen.
If support has been enabled for the team, a Support enabled label appears next to the team name. Support enabled allows team members to open CloudBees Support tickets. When support is disabled, any tickets submitted do not receive support.
Support tickets must be filed using the email address registered to receive support.
Removing members from a team
| This procedure requires administrative privileges for the organization. |
You can remove a member from a team. When members are removed from a team, any permissions or capabilities that have been granted no longer apply.
To remove a member from a team:
-
On the app.cloudbees.com Home page, in Organization settings, select Manage your organization to open the most recently used organization.
-
(Optional) From the top right corner, select the organization name and navigate to a different organization.
-
From the left pane, select Team management.
-
Select the team that you would like to remove a member from.
-
Select the three vertical dots to the far right of the team member’s name.
-
Select Remove member.
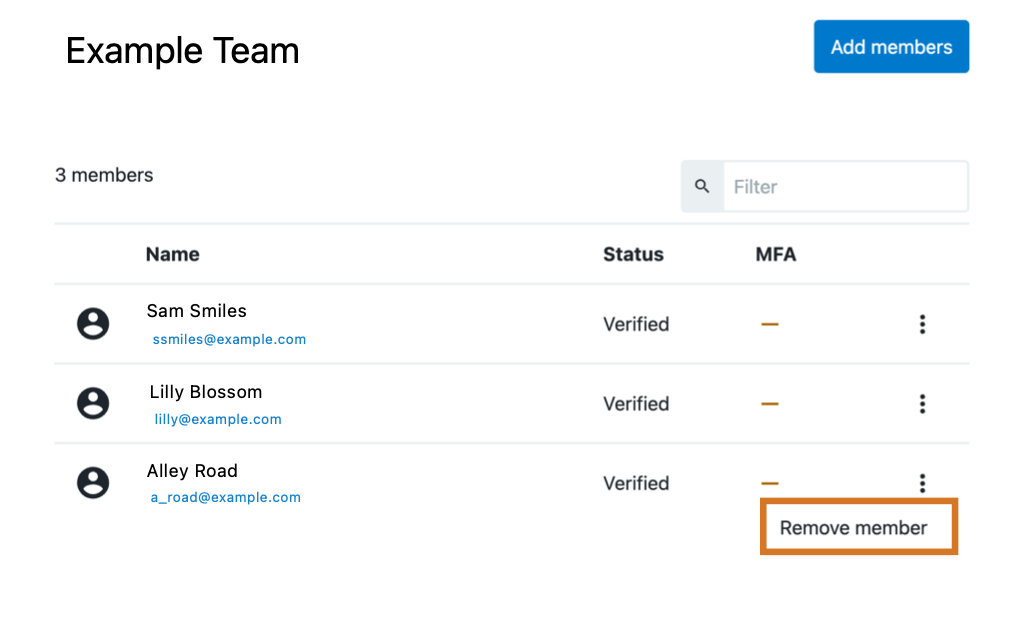 Figure 4. Removing a team member
The team member is immediately removed. A notification appears at the bottom of the screen with the name of the member that was removed.
Updating team settings
| This procedure requires administrative privileges for the organization. |
You can update the team name and description, and enable or disable the ability to write CloudBees Support tickets for any existing team.
To update team settings:
-
On the app.cloudbees.com Home page, in Organization settings, select Manage your organization to open the most recently used organization.
-
(Optional) From the top right corner, select the organization name and navigate to a different organization.
-
From the left pane, select Team management.
-
Select the three vertical dots to the far right of the team name, and then select Team settings to update the following.
-
Team name
-
Team description
-
Support enabled - Enables the team to open support tickets.
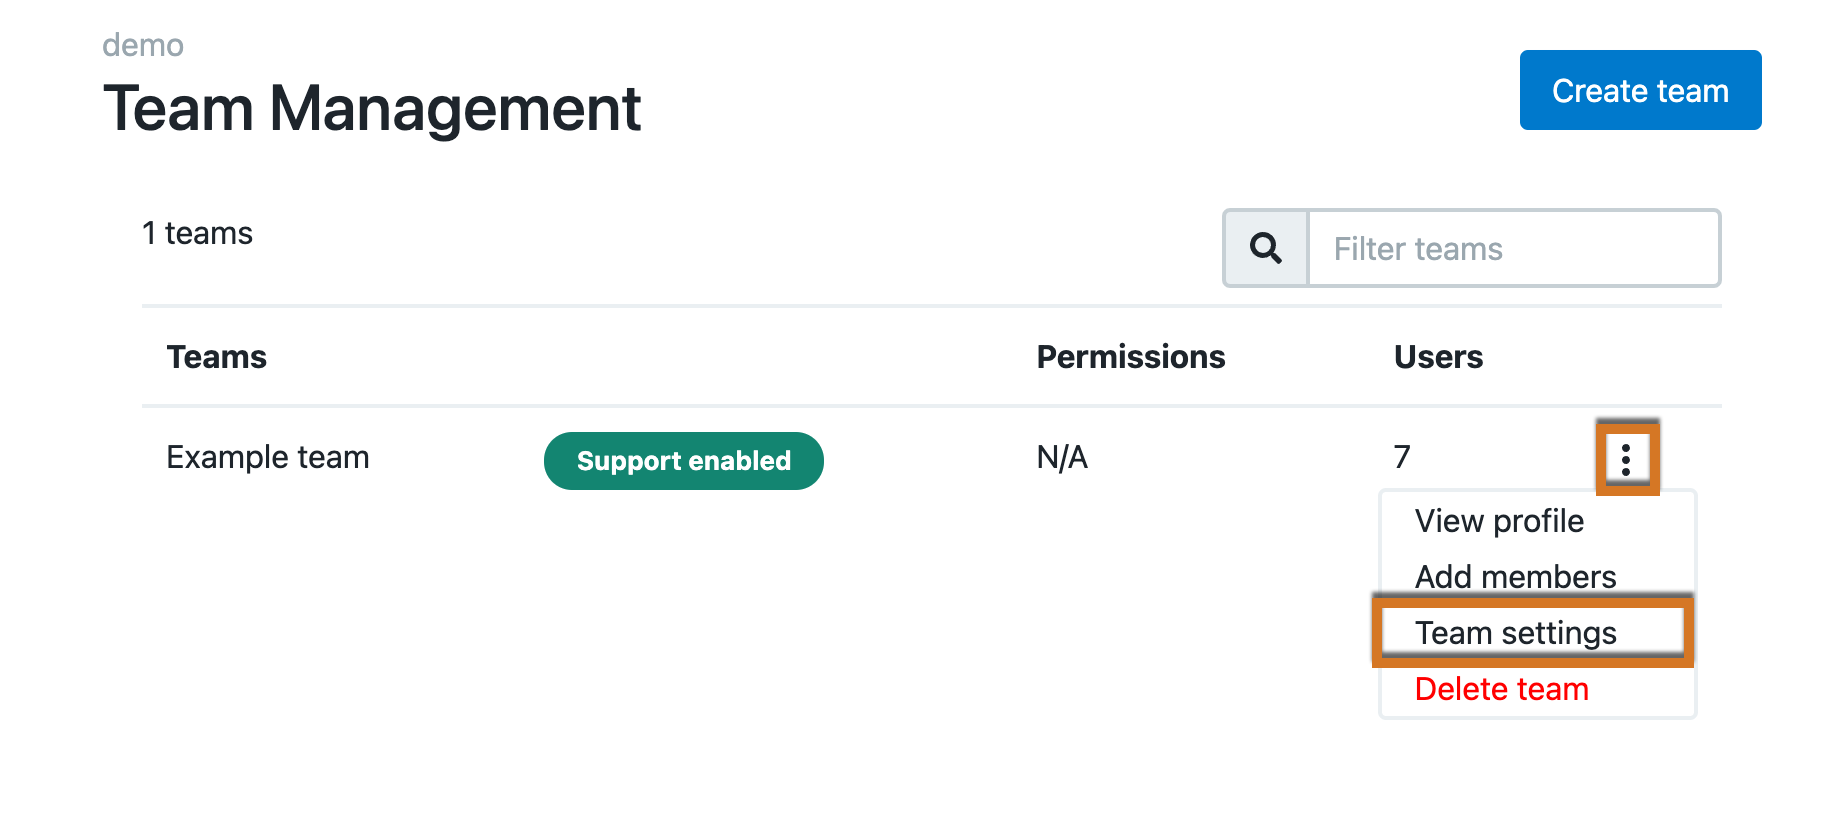 Figure 5. Changing the team settings
 -
-
Select Update team to accept the changes.
The team is updated. A notification appears at the bottom of your screen confirming the update.
Deleting a team
| Deleting a team is irreversible. If you delete a team, you will lose all data and settings associated with the team. |
| This procedure requires administrative privileges for the organization. |
You can delete a team from an organization. After a team has been deleted, a new team can be created using the deleted team name.
To delete a team:
-
On the app.cloudbees.com Home page, in Organization settings, select Manage your organization to open the most recently used organization.
-
(Optional) From the top right corner, select the organization name and navigate to a different organization.
-
From the left pane, select Team management.
-
Select the three vertical dots to the right of the team, and then select Delete team.
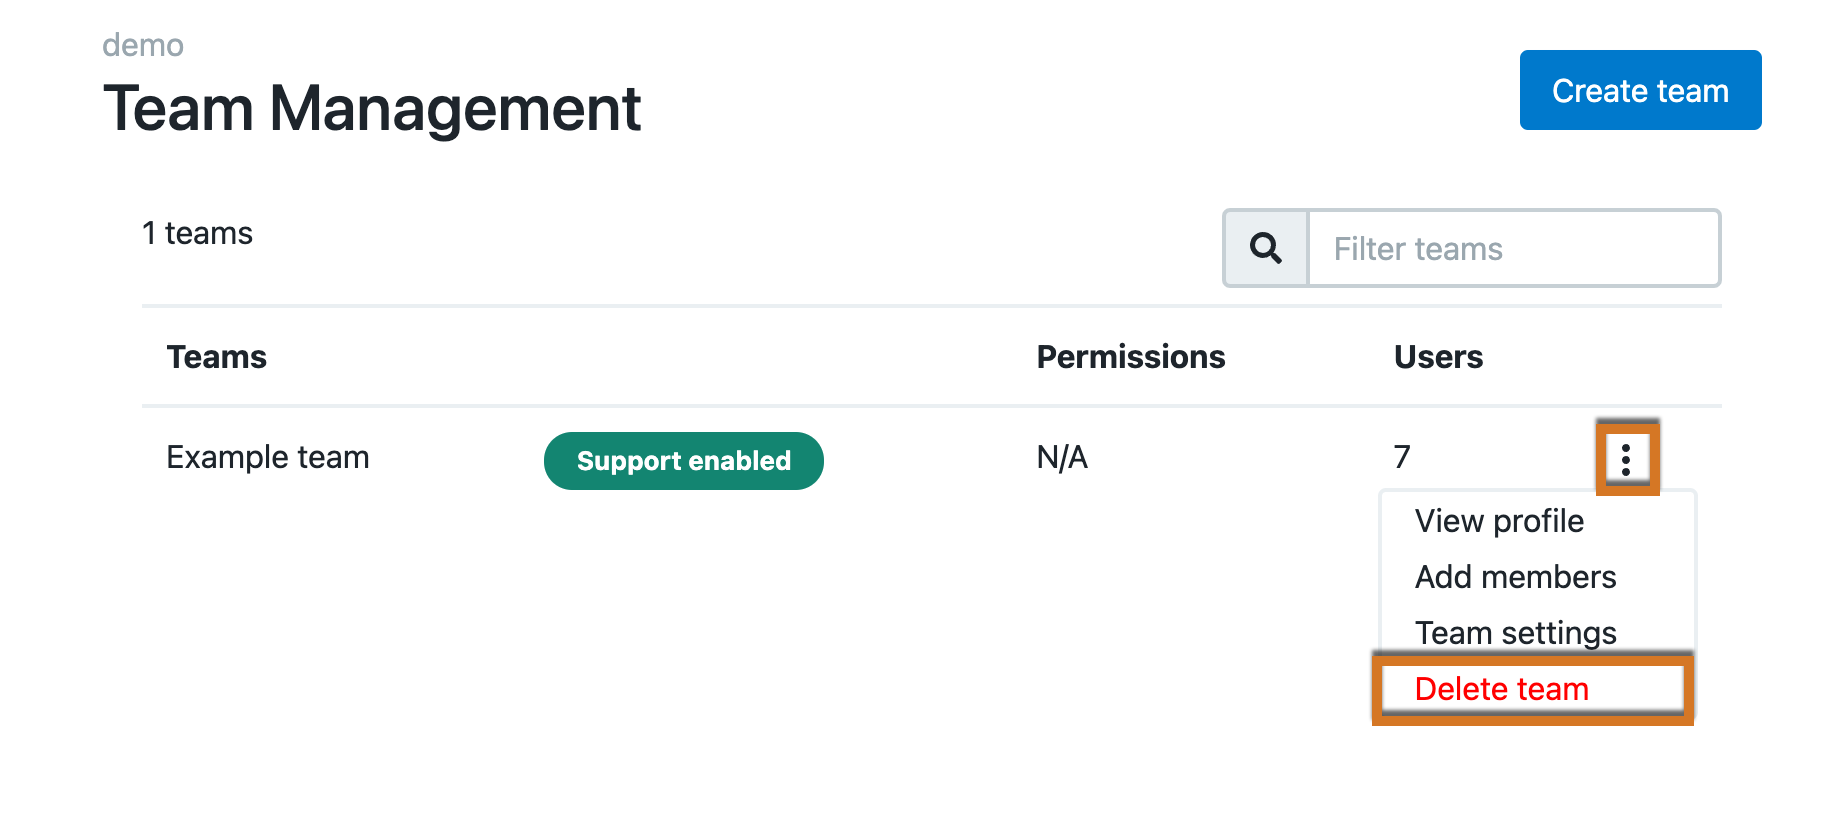 Figure 6. Deleting a team
 -
Note the text indicating that the action is irreversible and that you will lose all data and settings associated with the team. If you are sure you want to delete the team, select Confirm.
The team is deleted. A notification appears at the bottom of the page confirming the deletion.