| The account management features described in this topic apply to all CloudBees support and training environments. For more information about managing accounts in other CloudBees products, refer to the documentation for those products. |
|
This document explains how to configure single sign-on (SSO) with CloudBees so users with a subscription can access CloudBees common services like support and training. This document does not cover the setup of SSO for CloudBees Feature Management. |
As a CloudBees customer, you can set up the authentication for SaaS-based products and hosted services using SSO with a SAML-based identity provider (SAML IdP).
The CloudBees identity services, id.cloudbees.com, provides access to licenses, feedback, and app.cloudbees.com. It must be configured for full SAML integration.
This document explains how to add the CloudBees SAML service provider to your IdP.
| If you are having trouble, please contact CloudBees Support at support.cloudbees.com. |
Requirements
To use these procedures, you must have:
-
Administrator privileges on your systems and for your CloudBees organization.
-
Access to app.cloudbees.com. Contact your CloudBees Success Manager (CSM) for access.
| You must have an organization already set up in CloudBees Portal to complete this procedure. To set up your organization, contact your CSM. |
Configuring single sign-on using the wizard
The single sign-on configuration wizard is available for existing CloudBees customers who want to use single sign-on.
During this procedure, you will verify that you own the domain to which you want to connect and add the appropriate XML metadata to connect your identity provider to CloudBees products.
You must be a system administrator to perform this procedure.
To configure single sign-on using the wizard:
-
Go to app.cloudbees.com.
-
In the top right of the screen, select your organization.
-
In the top right of the screen, select Organization settings.
-
In the left pane, select Single sign-on.
-
Select Configure SAML SSO.
-
Enter the name of the domain you want to configure, and then select Next.
You must own this domain to enable the connection between the domain and CloudBees products. -
Select Copy to copy the challenge key.

-
In your DNS or cloud provider, within your DNS settings, create a TXT record and paste the challenge key that you copied in step 7.
See your DNS or cloud provider’s documentation for information about how to create a TXT record. -
Select Verify.
It may take a few minutes for the DNS settings to propagate. You may need to select Verify more than once. -
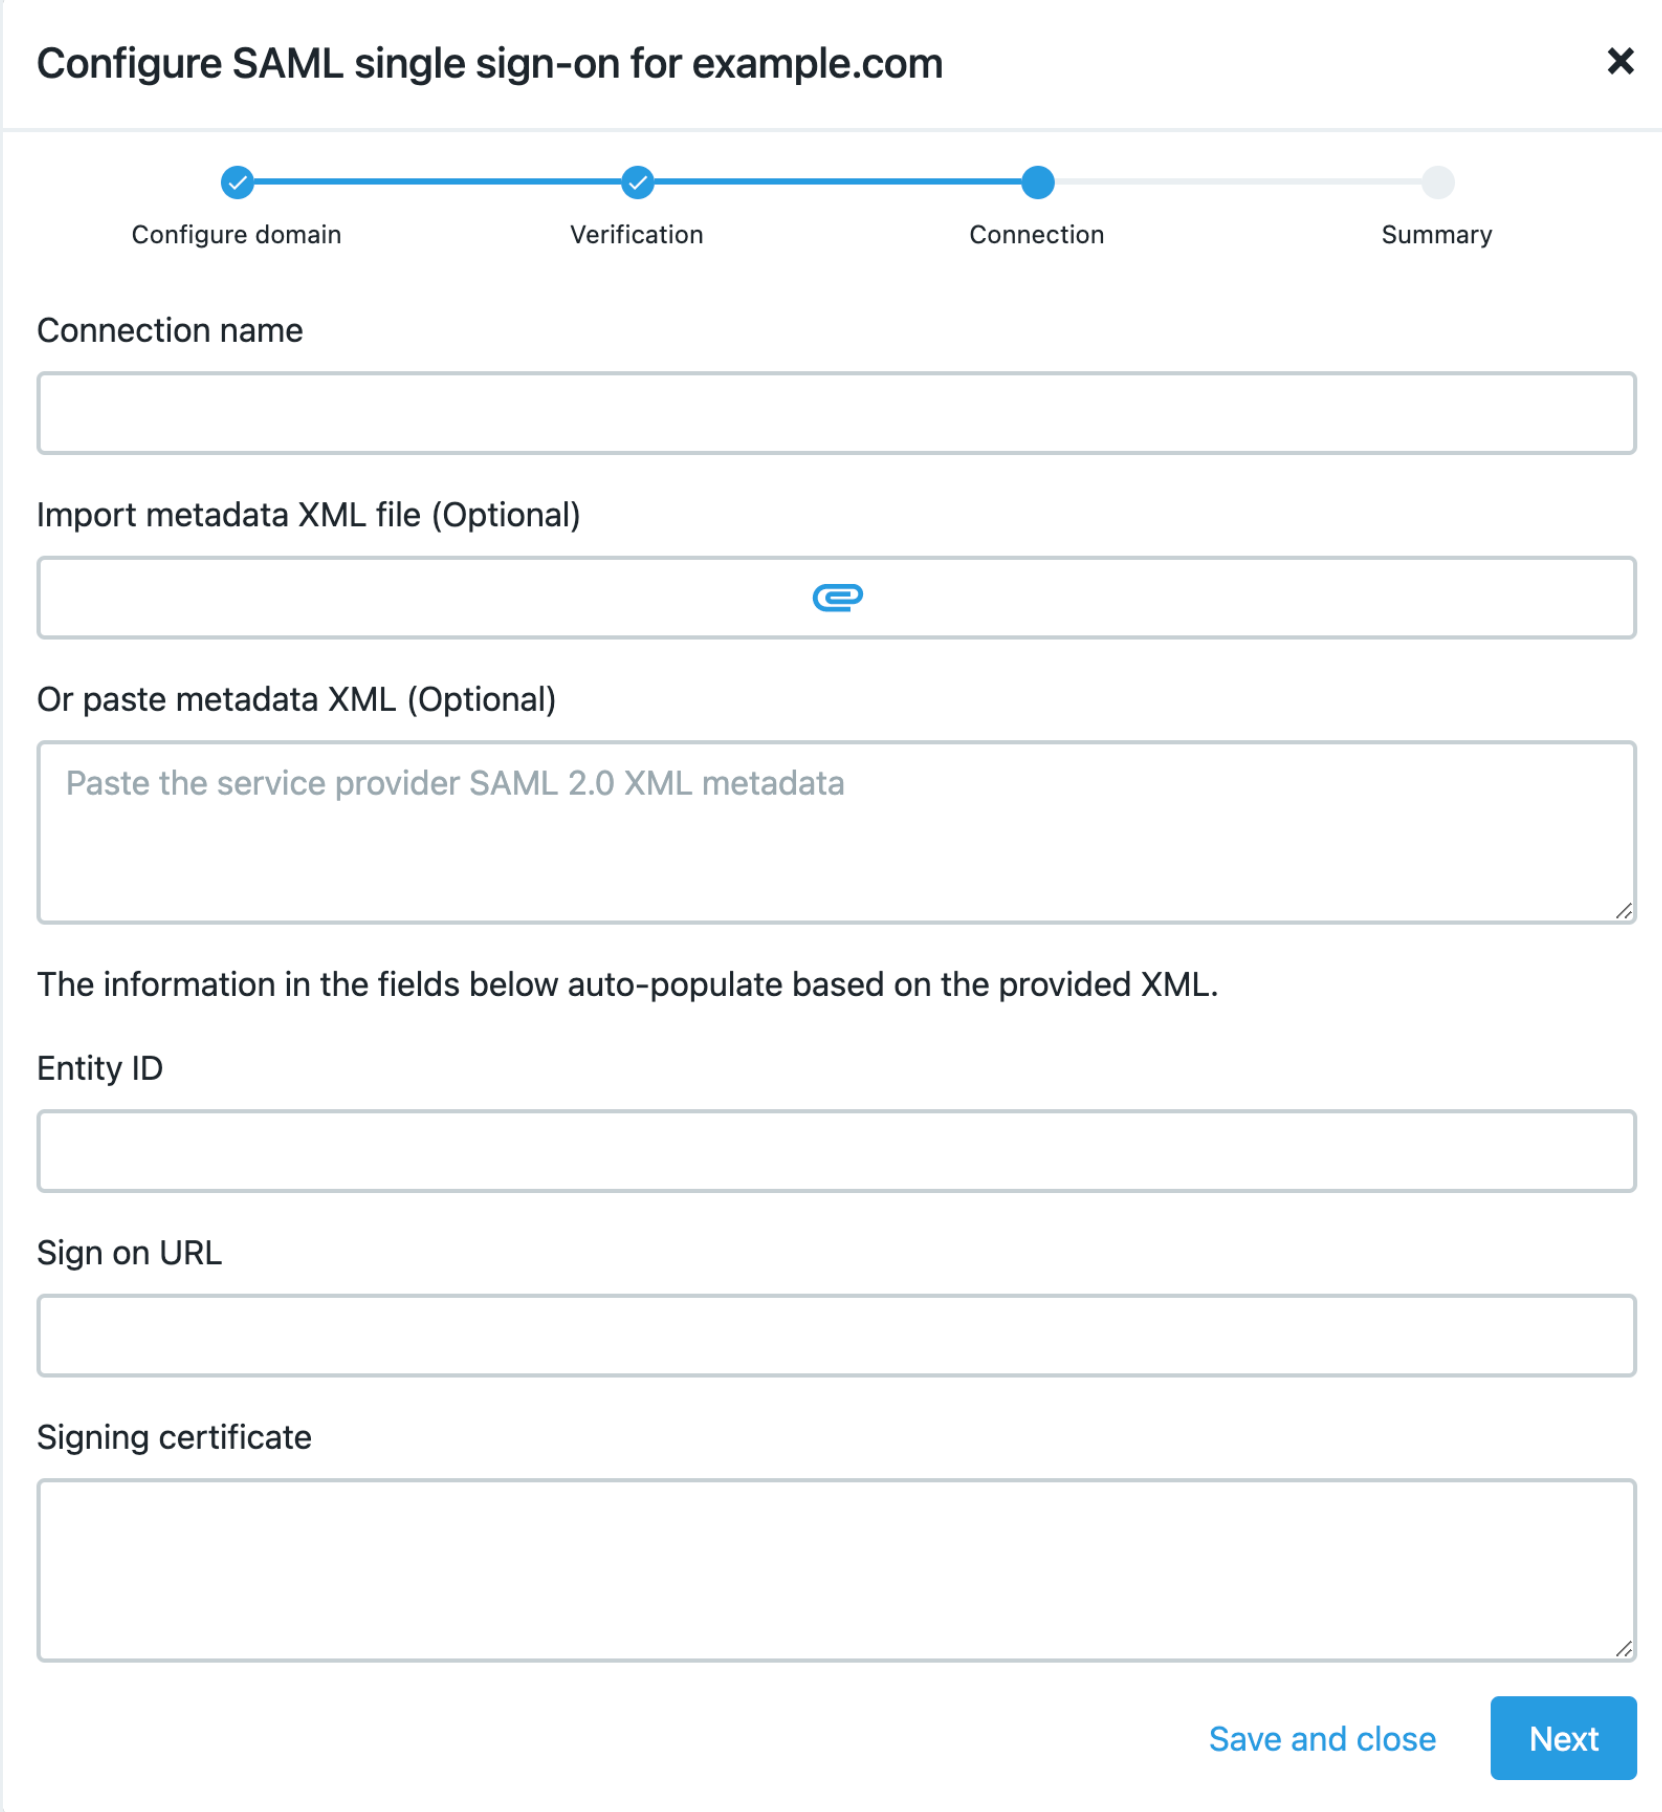
In Connection name, enter a unique name for this connection between your identity provider and CloudBees products.
-
Do one of the following to add the required metadata to enable the connection:
-
Select the icon in Import Metadata XML file.
-
Locate the identity provider’s XML file that contains the identity ID, sign-on URL, and signing certificate metadata, and paste that XML data into the Or paste the Metadata XML field.
-
Type the entity ID, sign-on URL, and signing certificate data into the appropriate fields. Note that some identity providers refer to Entity ID as Audience.
-
-
Select Next.
-
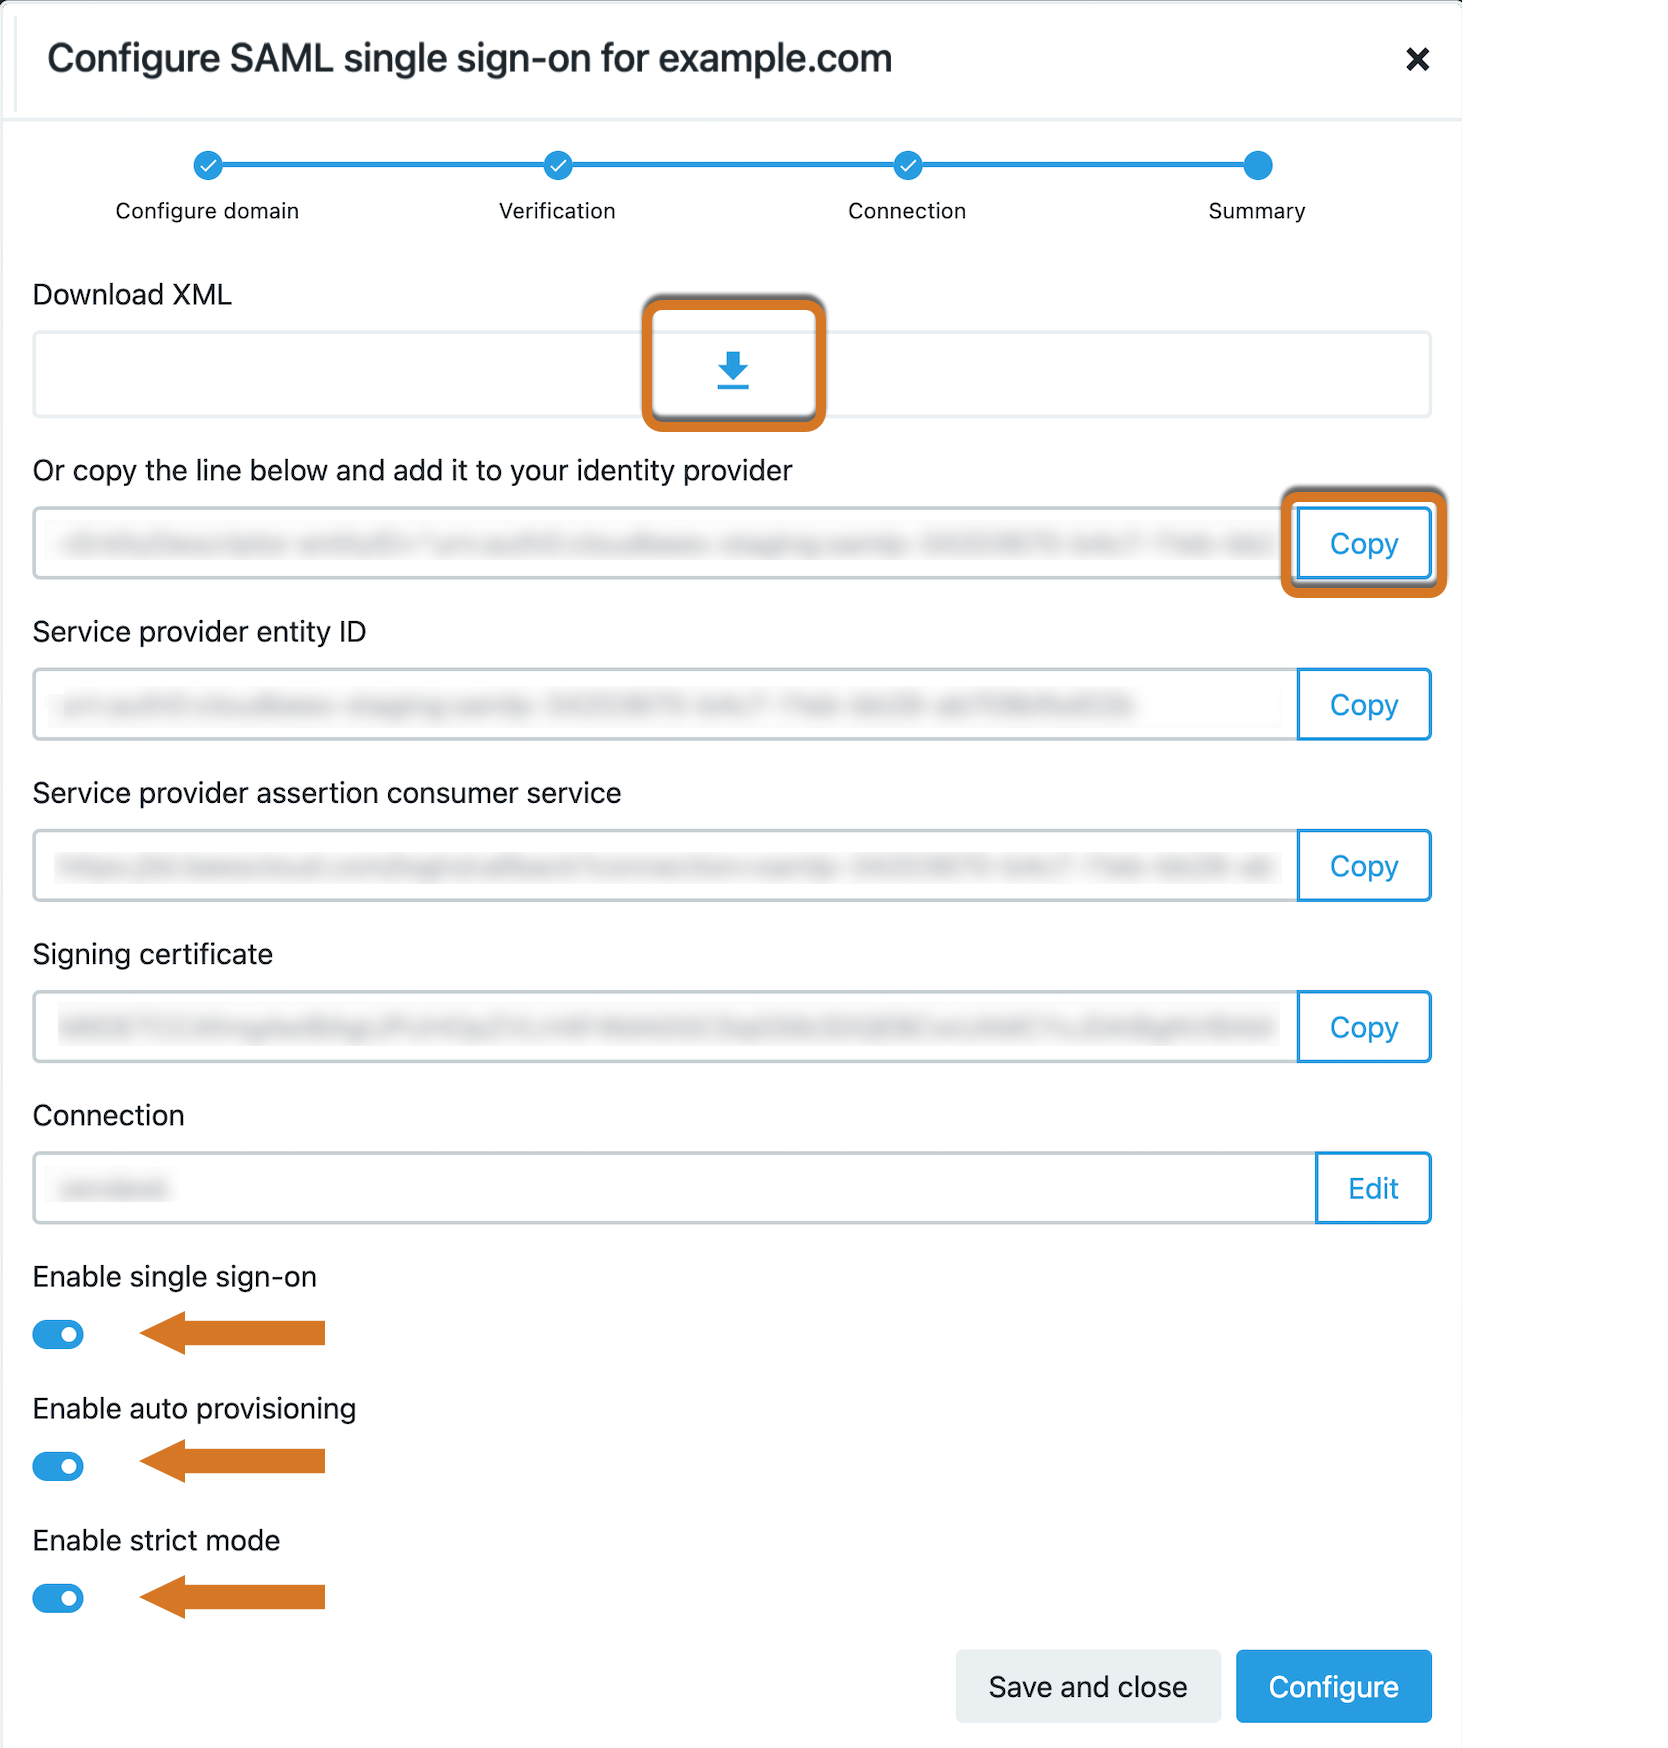
Do one of the following to obtain the XML string that you need to add to your identity provider:
-
Select the icon in Download XML.
-
Select Copy next to the Or copy the below and add to your identity provider field.
-
-
Add the XML string to your identity provider.
-
Select Enable SSO to enable single sign-on to be used with CloudBees products.
-
Select Enable auto provisioning to automatically add users to the organization without sending an email invitation request to join.
If this is not selected, you must manually invite users. -
Select Enable strict mode to restrict access to only users that are listed within your organization. All users must use single sign-on. Any existing usernames/passwords or alternatives, such as Google OAuth, will not be valid.
-
Select Configure.
Single sign-on is now configured.