Do the following steps in the order listed to set up DevOptics on CloudBees CI with operations center
-
Confirm that the master is connected successfully.
Optional: Repeat the above steps for all masters.
Installing the DevOptics plugin
Install the plugin on any master you want to connect to DevOptics.
-
Go to Jenkins > Manage Jenkins > Manage Plugins.
-
On the Available tab, type "DevOptics" in the Filter field.
-
Click the checkbox for DevOptics Plugin.
-
Click Install without restart.
After the DevOptics plugin is installed, you must connect to the DevOptics service.
Connecting to the DevOptics service
| Before you connect to the DevOptics service, ensure there are no warnings for URL mismatches. If you see one, fix the root URL first. |
-
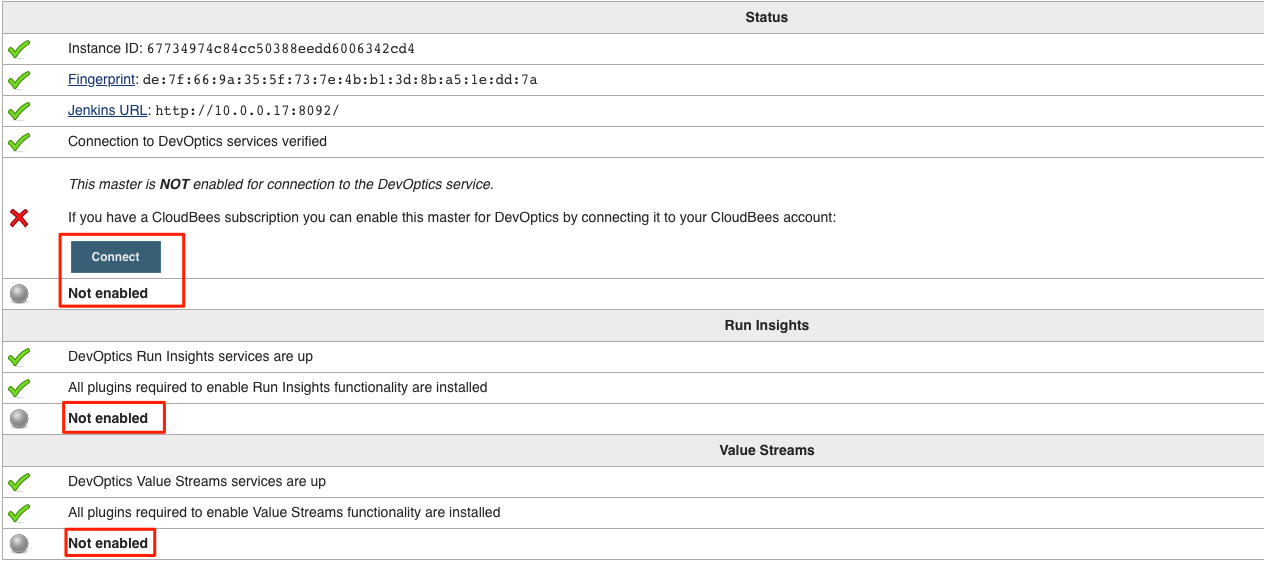
Go to Jenkins > Manage Jenkins > DevOptics.
The plugin reports "Not Enabled" and This master is NOT enabled for connection to the DevOptics service until the connection is set up. -
Under Status, click Connect to set up the connection. This redirects you to DevOptics and requires you to sign in.
-
On Connect to DevOptics, under Account, select the DevOptics organization from the list of accounts.
-
Click Connect to complete the connection between DevOptics and your master.
After completing these steps, the master is now connected to the DevOptics service. You can see this on the DevOptics plugin configuration page. Additionally, you can confirm successful connection of the master.
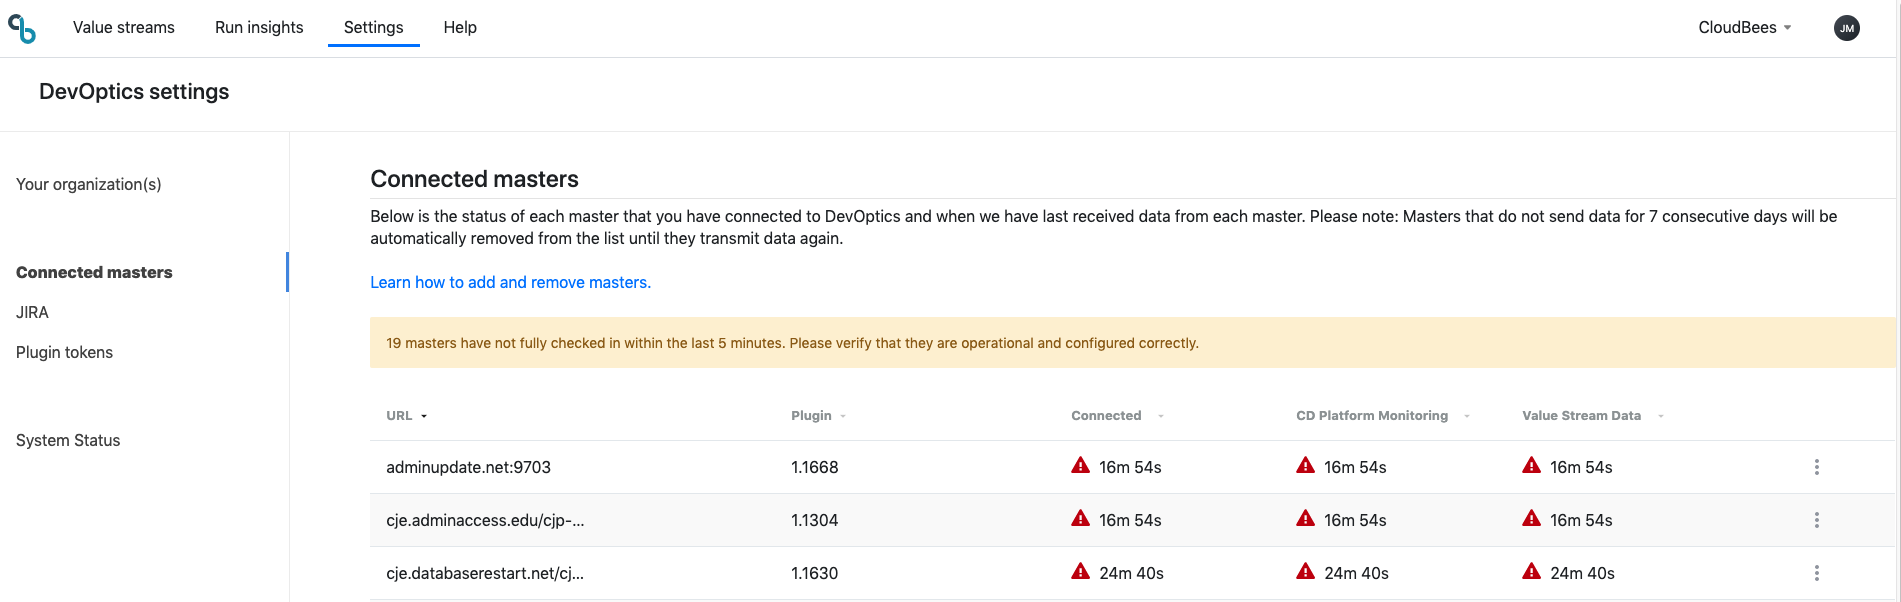
Confirming that a master is connected
After your subscription is activated, you can sign in to DevOptics using the same credentials you used to connect your master to the DevOptics service.
-
Open a browser and navigate to https://devoptics.cloudbees.com.
-
Click Login or Login here.
-
Sign in using your credentials.
-
Click the Settings icon.
-
Select Connected masters.
You should now be able to see your master listed in the Connected masters section.