Object lists support an extensive search and filter capability. Each list has both a default filter and user-defined custom filters.

Figure 1. Search and filter
|
|
A |
Filter list: The filters defined for the current object list. As shipped, each page has a default filter. One or more user-defined custom filters can be manually added to the list. Click the down arrow and select the filter of choice. Once selected, the object list reflects the filter criteria. |
B |
Find box: The current search criteria for the default filter. |
C |
All Projects list: Restrict search criteria for the default filter to specified projects. By default, CloudBees CD/RO searches all projects. |
D |
Tags list: Restrict search criteria for the default filter to specified tags. For more information, refer to Tagging Objects in CloudBees CD/RO. |
Default filter
This filter is used to search object names. Enter all or part of an object name in the Find box on the object list. You can restrict your search further by specifying projects and tags. The list content dynamically changes based on the criteria. The criteria are active until another term is entered and cleared when you navigate away from the object list.
Custom filters
Custom filters give you the ability to define finer-grained search criteria than the default filter provides. You can save custom filters, so they persist and are available on subsequent visits to the list. When using custom filters, the scope of the filter is the object list; there are no global custom filters.
Create a custom filter
You create custom filters using the new filter icon.
To create a customer filter:
-
Select the new filter icon.
 Figure 2. Create custom filter
 -
Select the Field, Operator, and Value from the lists.
The Operator and Value options are context-sensitive based on the field name. -
Add additional conditions to the filter, if necessary.
-
Select Apply. The new filter displays in the Filters list.
-
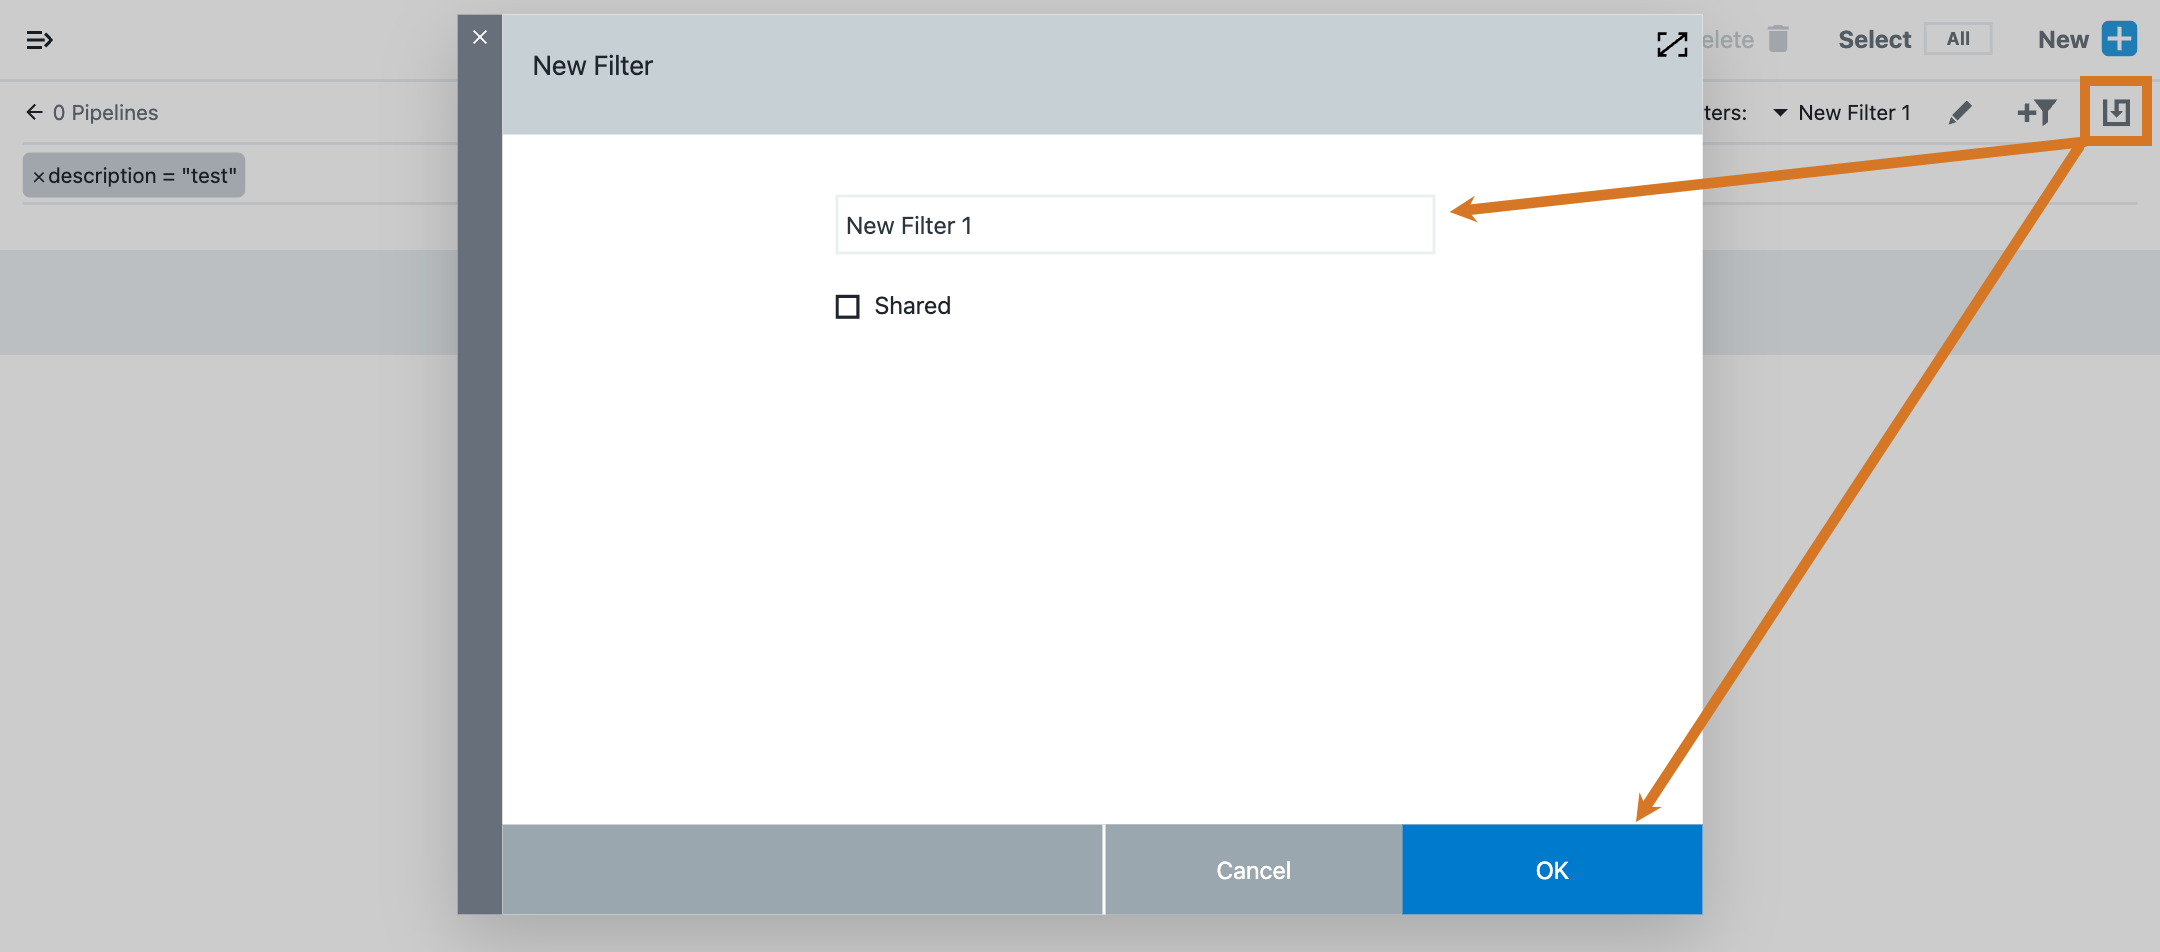
(Optional) Select the save icon to save the custom filter in the Filters list. The New Filter dialog displays.
If you do not save the custom filter, it is cleared when you navigate away from the object list page.  Figure 3. Save a custom filter
 -
Enter a filter name.
-
(Optional) Select the Shared option to share the filter with other users.
Other users in the system can use shared filters. Copy the URL and send it to applicable users. They can view and save the filter, if desired. -
Select OK.