The CloudBees CD/RO Service Catalogs help you accelerate application deployment. This feature lets you automate routine deployment tasks and publish them as templates so that end users can use them by providing minimal information and without learning to use CloudBees CD/RO.
Key benefits of Service Catalogs
CloudBees CD/RO Service Catalogs have the following key benefits to your organization:
-
Promotes best practices in your organization.
-
Accelerates ROI from your deployment solution.
-
Improves deployment efficiency by reducing the learning curve.
Using Service Catalogs
End users click the Service Catalog button to open the Service Catalog UI to see all the available catalog items. As shipped, CloudBees CD/RO includes five standard catalogs: Applications, Cloud Provisioning, Containers, Pipelines, and Utilities; all standard catalogs are included in the CloudBees project.
The following is an example of the Self-Service Catalog UI.
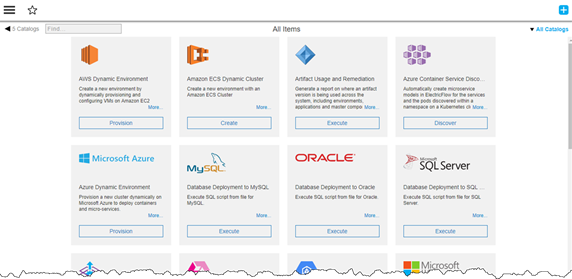
To use a catalog item, click the button (such as Create, Execute, Import, Discover, or Provision ) on an item, enters the required parameters, and then click OK to process the underlying catalog template.
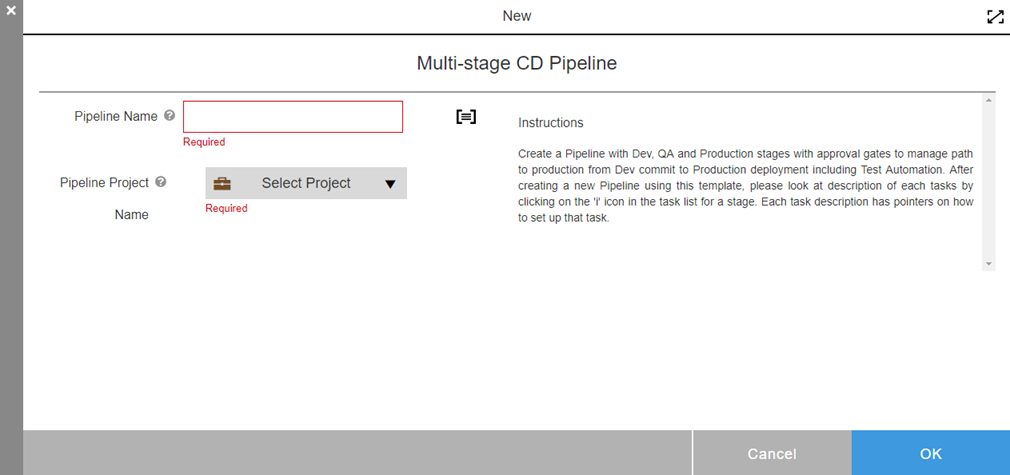
The following is an example form for end users to enter parameters after clicking Create. This example is for the Multi-stage CD Pipeline catalog item, bundled in the Pipelines catalog:
You can extend a catalog by creating catalog items that are specific to your business. Sample DSL to create catalog items is included in CloudBees CD/RO as a starting point.
Catalog items
CloudBees CD/RO includes three major types of Service Catalog items:
-
DSL-based
-
Plugin-based
-
Procedure-based
DSL-based catalog items
DSL-based catalog items are the easiest to create. This type of catalog item is made up of a DSL script accompanied by UI form metadata or formal parameters to capture the user input required by the DSL.
-
You have a choice to use form XML metadata or the formal parameter panel to specify user input parameters.
Sample DSL catalog item model
The following is a simple DSL script. This creates an application in the Default project folder:
/* args.appName is user entered value passed in as argument */ def appName = args.appName; application appName, { projectName = "Default" }
See [Example: Sample Catalog Item DSL] for an expanded DSL example.
Input parameters
You can define input parameters to collect user input at catalog item create-time either [Via Formal Parameter Panel] or Via Form XML.
Via formal parameter panel
During the creation phase, select Use Formal Parameters in the Definition section of the Edit Catalog Item dialog:

End-target navigation
Optionally specify the end-target navigation in the End Target JSON field. This is where CloudBees CD/RO takes the user after the service catalog item is run and it completes successfully. The end target JSON has the following format:
{ "source": "<source>", "object": "<objectType>", "objectName": "<objectName>", "objectProjectName": "<objectProjectName>", "objectId" : "<objectId>" }
where:
-
<source>is one of: -
parameter—use values supplied withobjectName,objectProjectName, andobjectId ` as fields in the formal parameter; set `useFormalParametertotrue. -
form—use values supplied withobjectName,objectProjectName, andobjectId ` as fields in the form XML; set `useFormalParametertofalse. -
property—use values supplied withobjectName,objectProjectName, and `objectId ` as properties. -
name—use values supplied withobjectName,objectProjectName, and `objectId ` as literal strings. -
`<objectType> ` is the type of object.
-
<objectName>is the name of the object. Can be a literal string, property, or formal parameter field based on<source>type. -
<objectProjectName>is the project. Can be a literal string, property, or formal parameter field based on<source>type. -
<objectId>is the object id. Can be a literal string, property, or formal parameter field based on<source>type.
Define Formal Parameters
Once finished specifying the DSL specifics for the catalog item template, select OK to save your work. In the upper-left corner of the catalog item editor, select ![]() and select Parameters. The Parameters dialog opens.
and select Parameters. The Parameters dialog opens.
See Parameters for full details about creating formal parameters from the parameter panel.
Via Form XML
During the creation phase, select Use Form XML in the Definition section of the Edit Catalog Item dialog. You populate the Parameter Form section of the dialog with form XML that collects the user input. The example below shows details for the Pipeline Name parameter:
{ "sections": { "section": [{ "name": "Pipeline Details", "ec_parameterForm": " <editor> <formElement> <property>pipelineProjName</property> <label>Pipeline Project Name</label> <type>project</type> <required>1</required> </formElement> <formElement> <property>pipelineName</property> <label>Pipeline Name</label> <type>entry</type> <required>1</required> </formElement> </editor>" }] "endTarget": { "source": "form", "object": "pipeline", "objectName": "pipelineName", "objectProjectName": "pipelineProjName" } } }
-
sectionallows groupings of user input parameters into different sections. -
ec_parameterFormspecifies the form XML that defines the user input form relevant to a section. -
`endTarget ` specifies where to take the user once the service catalog item is run and it has completed successfully. See [End-Target Navigation] for details.
Plugin-Based Catalog Items
With plugin-based catalog items, you can expose any existing plugin procedure as a Service Catalog item. You can expose any useful procedure or plugins directly to end users.
As with DSL, for each procedure to expose in a Service Catalog, you must create additional metadata. For a simple use case, you just create the ec_customEditorData/selfServiceUIForm property. This property tells the catalog where to find the UI form to render that corresponds to the procedure. The Service Catalog UI uses this information to render the form. When the user fills in the form, that information is passed to the procedure.
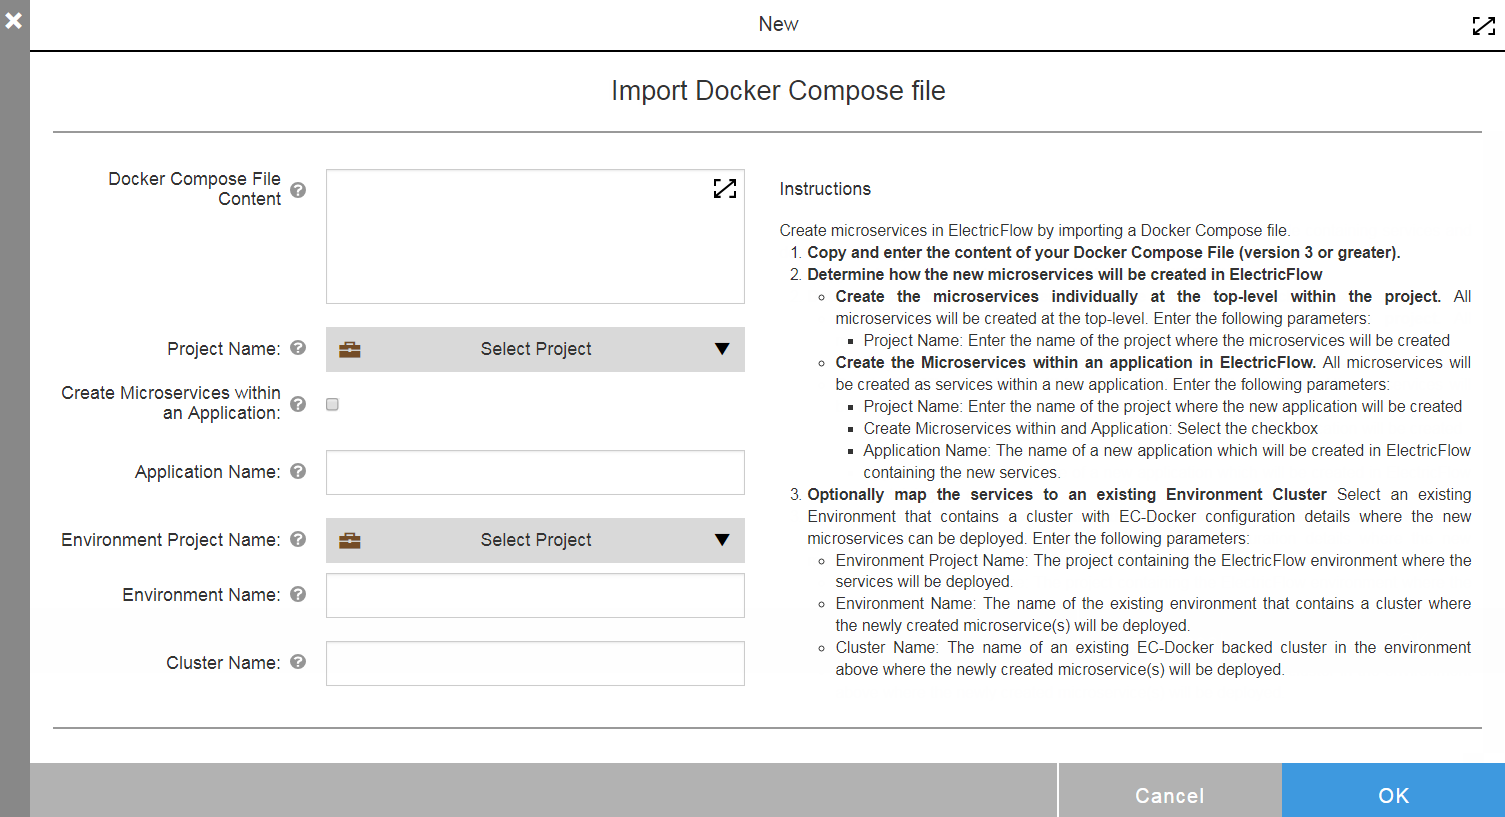
Following is an example form for entering parameters for the bundled Import Docker Compose File catalog item, which is plugin-based:
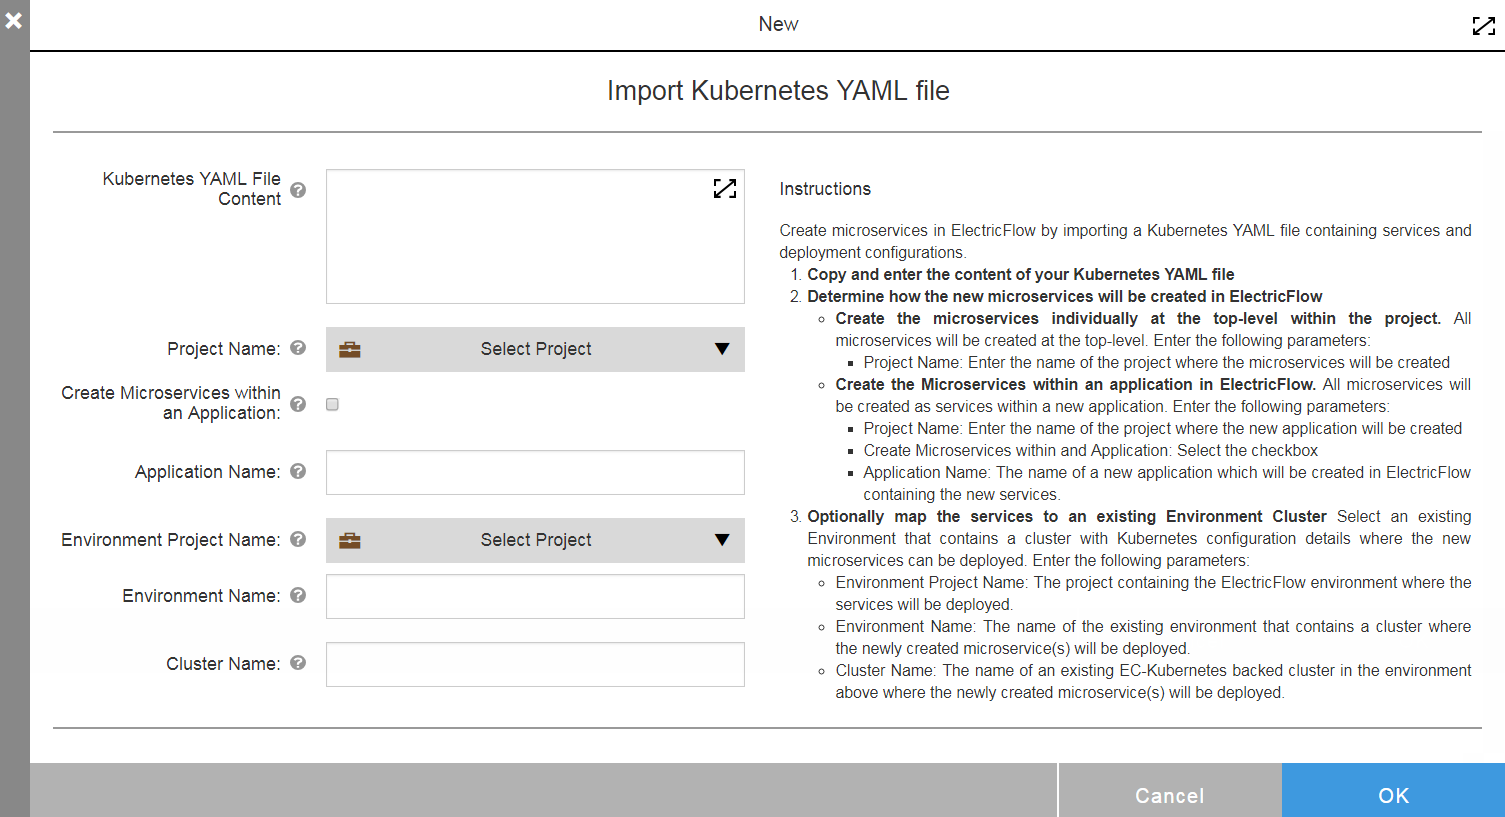
Following is an example form for entering parameters for the bundled Import Kubernetes YAML File catalog item, which is also plugin-based:
If the ec_customEditorData/selfServiceUIForm property is not found, then the system will try to render the UI form based on the parameter definition with the exception for Credentials, Credential Parameters, and Projects types.
|
Procedure-based catalog items
With procedure-based catalog items, you can expose any existing procedure as a Service Catalog item directly to end users.
As with DSL, for each procedure to expose in a Service Catalog, you must create additional metadata. For a simple use case, you just need to create the ec_customEditorData/selfServiceUIForm property. This property tells the catalog where to find the UI form to render that corresponds to the procedure. When the user fills in the form, that information is passed to the procedure.
If the ec_customEditorData/selfServiceUIForm property is not found, then the system tries to render the UI form based on the parameter definition with the exception for Credentials, Credential Parameters, and Projects types.
|
Deployment package manager catalog items
This is a special type of catalog item that lets you deploy Java or .NET applications quickly.
Before you create this type of item, you must create the deployment package outside of CloudBees CD/RO. A deployment package is a manifest.json file plus one or more components that make up an application. After you create the deployment package, you can use it to create an application model that corresponds to the uploaded application package with little CloudBees CD/RO knowledge. For details, see Deployment Package Manager .
Managing Service Catalogs and catalog items
You can create self-service catalogs and catalog items directly from the UI.
Creating a user-defined catalog
In the self-service catalog UI, select the Add button to create a new catalog.
-
From the new Catalog dialog, select Create New.
-
Enter a name, an optional description, select a project where you want to create the new catalog item, and select OK.
Once the new catalog item is created, the new catalog appears in the Catalogs drop-down menu:
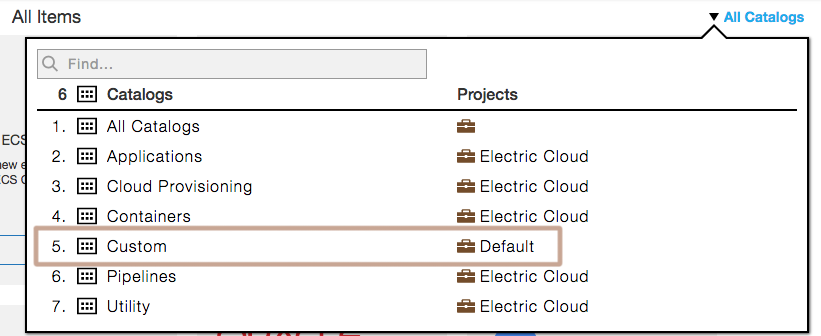
| You cannot edit catalogs or catalog items that are bundled with CloudBees CD/RO. However, you can use the Copy Existing option to create new catalogs from catalogs bundled with CloudBees CD/RO. |
Creating catalog item templates
Select the user-defined catalog, using the catalog drop-down, into which you want the new catalog item. You cannot create catalog items in catalogs bundled with CloudBees CD/RO.
Select Catalog Editor to switch to the edit mode. After editing catalog items, you can use the View Catalog mode to switch the UI back to the view mode to test the new items.

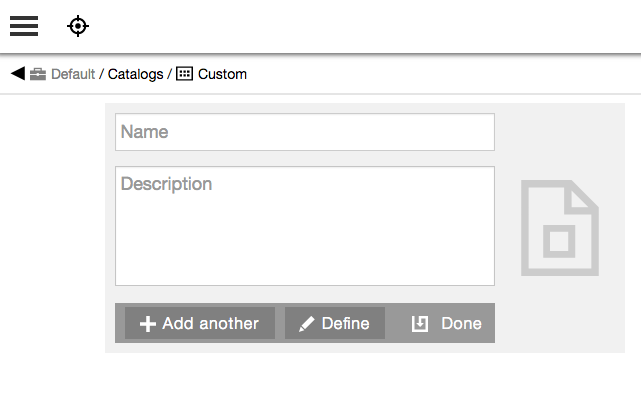
Enter a Name and an optional Description for the new item that you are creating. You can create another item or continue with defining the new item:
| Icon upload is not supported. |
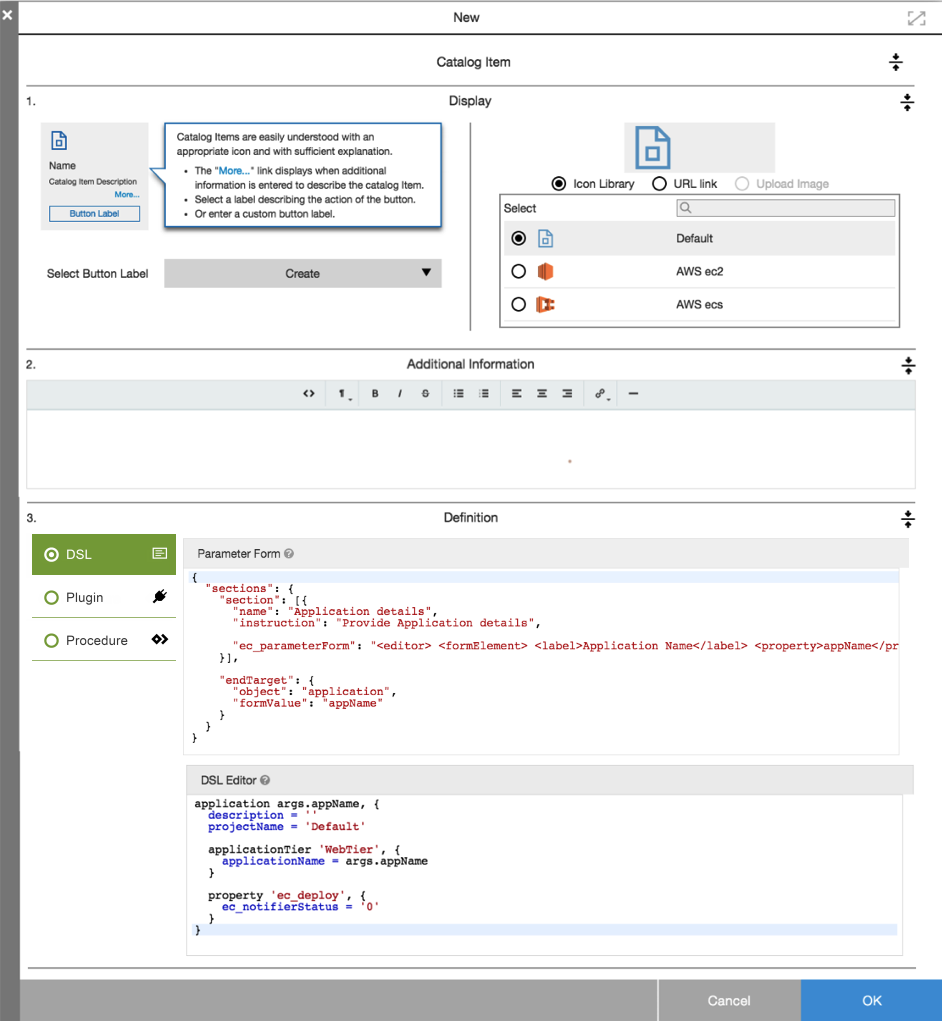
Click Define and enter the relevant information as follows. The key attributes that are relevant to a catalog item definition are:
-
Section 1: Display
-
Select Button Label : select from the button label drop down.
-
Icon : this represents the catalog item and can be selected from the icon library or a URL link.
-
-
Section 2: Additional Information : This content appears in the Instructions section of the template. This gives the end user additional details regarding the usage of the catalog item.
-
Section 3: Definition : See [Catalog Items] above for the details on the UI form metadata.
Editing catalog items
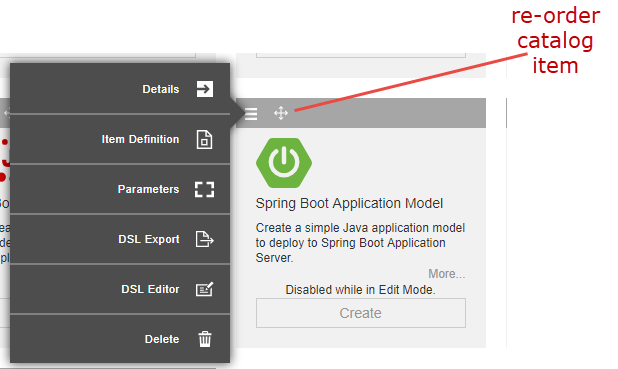
Once a catalog item is created, you can use the cross bar icon to reorder the catalog item. A menu associated with the catalog item provides additional options to edit item details or item definitions or to delete an existing catalog item. Options to export DSL or edit DSL are also available from the menu:
Example: Sample catalog item DSL
Here is sample code to create a catalog item in a catalog named Custom. This is a DSL-based catalog item that creates a simple application object:
catalog 'Custom', { description = 'Catalog item description' iconUrl = 'icon' projectName = 'CloudBees' catalogItem 'Sample Catalog Item', { description = '''<xml> <title>This is the short description that is shown in the Service catalog UI as part of this catalog item</title> <htmlData> <![CDATA[<div> This is the html stylized text based on catalog item details that gets show when the user clicks the more link. </div>]> </htmlData> </xml>''' buttonLabel = 'Create' catalogName = 'Custom' dslParamForm = '''{ \"sections\": { \"section\": [{ \"name\": \"Application details\", \"instruction\": \"Provide Application details\", \"ec_parameterForm\": \"<editor> <formElement> <label>Application Name</label> <property>appName</property> <documentation>Name of the application to be created.</documentation> <type>entry</type> <required>1</required> </formElement> </editor>\" }], \"endTarget\": { \"object\": \"application\", \"formValue\": \"appName\" } } }''' dslString = '''def appName = args.appName; application appName, { projectName = "Default" }''' iconUrl = 'public/app/assets/img/taskicon.png' projectName = 'CloudBees' subpluginKey = null subprocedure = null subproject = null } }