This example shows how to add tasks to a pipeline while defining a stage. The tasks include a manual task and a utility task. You add a manual task to a pipeline while defining a stage.
Authoring a Pipeline with Manual and Utility Tasks
-
Choose a stage in the pipeline.
-
Create a manual task: click the Add+ button at the bottom of the stage.
-
Enter the name of the new task in the New Task field.
-
Click Select Task Type, select Manual and click Done. The list shows the tasks in the order that they will be executed.
-
Click Define for the task that you just added. The dialog box to define the task opens.
-
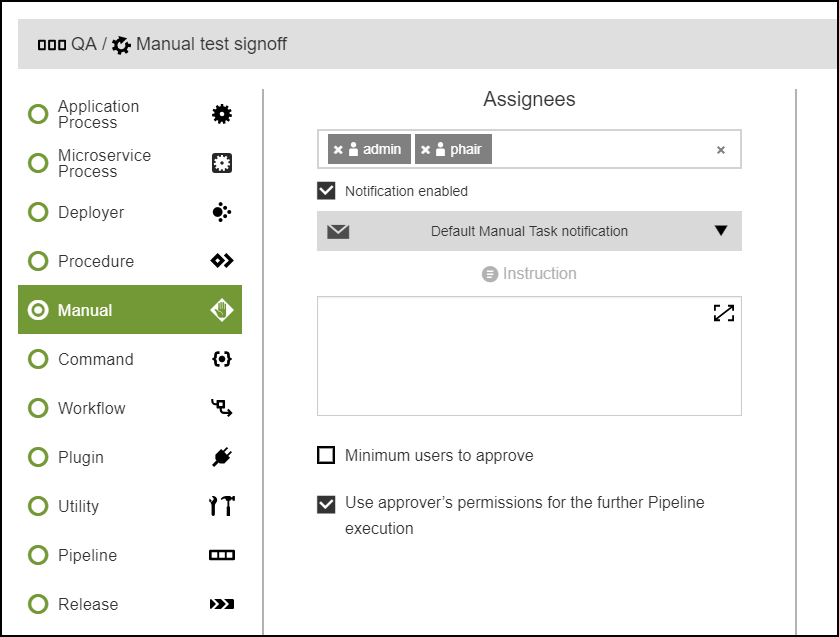
Enter the settings to define the task as a manual task, and click OK.
-
Select Manual to define the task as a manual task requiring human action in the Instruction field.
The instructions can include property references using the
$[]notation for file links, which is needed when referencing a task instruction in an email notification template. For example, a manual task could have this instruction:Check the Clover report, and make sure there is at least 80% code coverage before you approve. https://myserver.com/reports/$[/myPipelineRuntime/ec_summary/report_name]
-
Click in the Assignees field and enter the name of the users or groups assigned to the task, and select one or more users or groups.
-
Set the following, as appropriate.
-
Minimum users to approve : enter a positive integer.
-
Use approver’s permissions for further Pipeline execution: if checked, override access control already defined for the task.
-
Allow to skip this task: if checked, task approval options include Skipped and Completed (or custom labels, if so configured) instead of Rejected and Completed. Use when rejecting a task is not necessary or appropriate; a skipped task does not record an error.
-
Allow to reject this task: if unchecked, task outcome is always set to Completed (or custom label, if so configured). Note: This is checked by default: the task presents both rejection and completion outcomes from which to choose.
-
Use Custom Labels : if checked, define custom labels for Completed, Failed, and Skipped approval choices that match the task at hand.
-
Notification : if this is on, select a Default Manual Task notification template from the pulldown. Edit and create notification templates from here. Delete notification templates directly from the property page,
/server/ec_deploy/ec_pipelineNotifierTemplates, available from Main Menu > Server > Custom Server Properties. -
Advanced Email Configuration : select the email configuration corresponding to the context of the notifier you wish the notification to have. Note this feature requires one or more email configurations defined for your CloudBees CD/RO site. See Email Configuration—create new or edit existing email configuration for further information.
-
-
Click OK. The task list now shows the task as a manual approval requiring human intervention.
-
-
-
Add another task, this time a Utility task. Click the Add+ button to add another task to the stage.
-
Enter the name of the new task in the New Task field.
-
Click Select Task Type, select Utility, and click Done. The list shows the tasks in the order that they will be executed.
-
Click Define for the task that you just added. The dialog box to define the task opens.
-
Enter the settings to define the task as a utility task, and click OK.
A utility task, also called a utility function, is a higher-order operation than a third-party plugin that you can use in pipeline modeling.
-
Select Utility.
-
Click Select procedure > Decommission Environments.
-
Click the Open Dialog button in the Parameters field to enter the parameters for the selected utility function. The dialog box to enter the parameter values opens.
-
Enter the parameter values: a comma-separated list of environments to tear down. You must enter each environment in the form of
/projects/<project_name>/environments/<environment_name>. -
Click OK. The task list now shows a manual task as the first task and a utility task as the last task in the stage.
-
-
-
Set the position of the task: click on the task and drag it to another position among the other tasks.
-
Choose a stage in the pipeline.
-
Click the Define stage tasks button in the lower right corner of the stage.
The task list opens. When the task list has one or more items, it shows the tasks in sequential order for the stage.
-
Add a task to the stage.
-
Enter the name of the new task in the Name field, and enter an optional description in the Description field.
-
Set the position of the task.
-
Select Before or After.
-
Click the down arrow to select the task that the new task will precede or follow.

-
-
(Optional) If you want to add another task, click + Add another and repeat the previous two steps to add it.
Otherwise, click Done.
The list shows the tasks in the order that they will be executed.

-
Click Requires Definition for the task that you added.
The dialog box to define the task opens.
-
Enter the settings to define the task as a manual task, and click OK.
-
Select Manual to define the task as a manual task requiring human action in the Instruction field.
The instructions can include property references using the
$[]notation for file links, which is needed when referencing a task instruction in an email notification template. For example, a manual task could have this instruction:Check the Clover report, and make sure there is at least 80% code coverage before you approve. https://myserver.com/reports/$[/myPipelineRuntime/ec_summary/report_name]
-
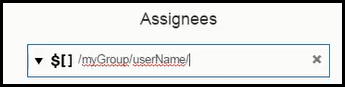
Click in the Assignees field and enter the name of the users or groups assigned to the task, and select one or more users or groups.
You can also use the $[ ] notation to specify the parameter.
-
Check Notification enabled, as appropriate. If this is checked, select a Default Manual Task notification from the pulldown.
-
Check Minimum users to approve, as appropriate. Enter a positive integer.
-
Check Use approver’s permissions for the further Pipeline execution. This overrides access control already defined for the task.
-
Check Advanced Email Configuration to select the email configuration corresponding to the context of the notifier you wish the notification to have. Note this feature requires one or more email configurations defined for your CloudBees CD/RO site. See Email Configuration—create new or edit existing email configuration for further information.
-
Click OK. The task list now shows the task as a manual approval requiring human intervention.
-
-
To add another task to the stage, select
 .
. -
Enter the name of the new task in the Name field, and enter a description in the Description field.
-
Set the position of the task.

-
Click Done. The task list now shows the new task.
-
Click Requires Definition for the task you added.
-
Enter the settings to define the task as a utility task, and click OK.
A utility task, also called a utility function, is a higher-order operation than a third-party plugin that you can use in pipeline modeling.
-
Select Utility.
-
Click Select procedure > Decommission Environments.
-
Click the View Details button in the Parameters field to enter the parameters for the selected utility function. The dialog box to enter the parameter values opens.
-
Enter the parameter values.
Enter a comma-separated list of environments to tear down. You must enter each environment in the form of
/projects/<project_name>/environments/<environment_name>. -
Click OK.
The task list now shows a manual task as the first task and a utility task as the last task in the stage. Example:

-