About the License File
Your CloudBees Build Acceleration license determines the usage to which you are entitled. If you have not received your license file, contact CloudBees technical support or your sales representative. For assistance, go to the CloudBees technical support site at https://support.cloudbees.com/ and submit a support request.
The license file includes the expiration date, the entitled version, grace period, maximum number of agents, maximum number of builds that may take place concurrently, and maximum number of builds that may simultaneously use the JobCache feature. The Cluster Manager reads the information that it displays about your license from the last-imported license file.
JobCache Licensing
JobCache can substantially reduce compilation time. It uses a separate property in the license file.
The maximum number of builds that may use it simultaneously is read from the jobcacheMax property in the license file. For first-time installations of CloudBees Build Acceleration or most upgrades to CloudBees Build Acceleration 9.1, this number is equal to the number of concurrent builds. Simultaneous builds in excess of this number will occur without using this feature.
If the JobCache license is invalid, or if the number of simultaneous builds has exceeded the license limit, a WARNING EC1181: Your license does not permit object caching message appears when a build tries to use JobCache. eMake will continue to work normally.
Concurrent Builds Licensing
The number of builds that may occur simultaneously is controlled by a separately purchased license. This number is read from the concurrentBuilds property in the license file. Any simultaneous build in excess of this number is added to a queue and will resume when another build stops running. If there is no <concurrentBuilds> property, or if the property is present but the string is unlimited, then the Cluster Manager places no limit on the number of concurrent builds.
If the concurrent builds license is invalid, or if the number of simultaneous builds has exceeded the license limit, a WARNING EC1321: No build license available, waiting… message appears. A WARNING EC1322: Build license allocated, proceeding. message appears when a build in the queue acquires a concurrent build license.
License Version Enforcement
Perpetual licenses are not transferable to succeeding product versions. You can upgrade just the Cluster Manager, but starting with version 11.1, if you upgrade eMake or agents, you must also upgrade the Cluster Manager. When you upgrade the Cluster Manager, you must also purchase a new license if you are currently using a perpetual license.
You can upgrade to new patch releases (but not new feature releases) without purchasing a new license. For example, if your current license specifies 11.1, then you can use a Cluster Manager with version 11.1, 11.1.1, 11.1.2, and so on. Also, for example, if your license specifies 12.0, then you can use a Cluster Manager with version 12.0, 12.0.1, 12.0.2, and so on, as well as 11.x.
At run time, the Cluster Manager verifies that its actual version equal or lower than the value in the license file. In addition, eMake authenticates with the Cluster Manager via the eMake/Cluster Manager protocol version to ensure that the eMake and Cluster Manager licenses match.
| The license field is blank for subscription and evaluation licenses. As such, license version enforcement is not applicable for these types of licenses. |
If you are upgrading to version 11.1, make sure that you import a compliant license into the Cluster Manager before upgrading. For assistance, go to the CloudBees technical support site at https://support.cloudbees.com/ and submit a support request.
Server License File Example
<?xml version="1.0" encoding="UTF-8"?> <licenses> <license> <customerName>CloudBees, Inc.</customerName> <productName>ElectricAccelerator</productName> <featureName>Server</featureName> <expirationDate>2019-09-30</expirationDate> <gracePeriod>0</gracePeriod> <evaluation>false</evaluation> <properties> <property> <propertyName>maxAgents</propertyName> <propertyValue>128</propertyValue> </property> <property> <propertyName>jobcacheMax</propertyName> <propertyValue>5</propertyValue> </property> <property> <propertyName>concurrentBuilds</propertyName> <propertyValue>5</propertyValue> </property> <property> <propertyName>version</propertyName> <propertyValue>11.1</propertyValue> </property> </properties> <signature>[signature]</signature> </license> </licenses>
For details about the properties in the license file, see the “License File Property Descriptions” section in the “Licenses” topic in the Cluster Manager Guide.
Importing Your License
-
From the machine where the Cluster Manager is installed, open a browser window and browse to
localhost.If you are accessing the Cluster Manager machine remotely, type in the machine name, not
localhost. If you are not using port 443, use<host>:<port>.The Login page appears.
-
Type in your user name and password and click Login.
-
For a new installation, the default administrator account user name and password are
adminandchangemerespectively. You should change the default password as soon as possible. -
For an upgrade, the default administrator account user name and password are
adminand<previous_password>respectively.The Cluster Manager Home page appears. If you have not imported a license, the following warning appears in the Home page:
A Server license for ElectricAccelerator is required.
-
-
If you have no license and want to use CloudBees Build Acceleration on a trial basis, click the Request Trial License button, fill in your information in the displayed form, and click Submit.
Look for your trial license in your email inbox.
-
Click Import License.
The Import License page appears.
-
Use one of the following methods to import your license:
-
Click Choose File to browse for your license file, click Upload File, and then click OK.
For example, a license file named
license.xmlis chosen in the following page: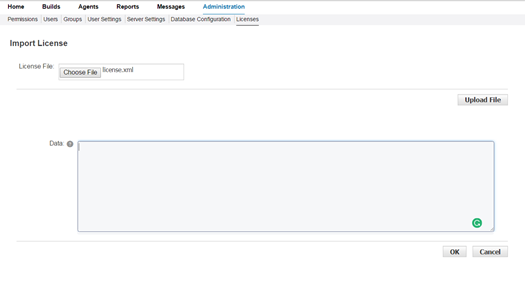
-
Open your license file, then copy and paste the text in to the Data field, and then click OK.
The Licenses page appears. It displays the details about the license that you imported. For example:

In this example, the license file from the Server License File Example section above was imported.
-
After the license is imported, you can get familiar with home page features, complete the remaining configuration tasks as described in the CloudBees Build Acceleration Configuration Guide (such as installing a server certificate) and begin using CloudBees Build Acceleration.