Scenario requirements: For this scenario, you can use the configurations you created for Scenario 2 and 3. However, before you begin this scenario, you need to configure an additional agent machine. If you have a firewall running on the CloudBees CD/RO server machine, disable it now or allow access to ports 8000, 8443, 61613, 80, and 443.
Installing CloudBees CD/RO Agent software
Install CloudBees CD/RO Agent software on the machine you intend to use as an agent to run builds. For the simple purpose of getting started, install this agent on a different machine with the same operating system as the CloudBees CD/RO server.
-
Copy the CloudBees CD/RO installation executable file to the machine you intend to use as a CloudBees CD/RO agent.
-
Double-click the executable file to begin the installation program.
-
When the installation program opens, select the Express Agent installation.
During the agent installation, you can create a resource and provide a resource name. Enter any name you choose for your new resource. For this scenario, we will name our new resource, Resource2. -
After agent installation, verify that your new resource information is included in the CloudBees CD/RO resource table. Select the Cloud tab to go to the Resources page.
You can use the Resources page to install additional agents. See the resources page help topic, then specifically review installing or upgrading remote agents.
To configure a shared workspace
For Linux
If your agents are installed on Linux, change the default workspace to point to a network location accessible to both machines:
-
Select the Cloud tab, then select the Workspaces subtab, to see a list of workspaces.
-
Select the workspace named
defaultto edit the default workspace. -
Change the value of the UNIX Path to a network location accessible to the CloudBees CD/RO server and agent machines.
-
Make sure this location is readable and writable by the users chosen during the server and agent installations.
After fulfilling these scenario prerequisites, you are ready to proceed.
Overview
This scenario guides you through creating a multi-agent build and test process integrated with your SCM system, build utility, and unit or system tests. You can invoke this build using a schedule, Continuous Integration (CI), or "on demand". At the end of this scenario you will be familiar with the following CloudBees CD/RO concepts and features:
-
Agent-only installation
-
Copying a procedure to create a new procedure
-
Running steps in parallel
-
Pools
-
Post processor
-
Search
Begin Scenario 4
Step 1. Create a new procedure
This time, we are going to copy an existing procedure, rename it, and add another step.
-
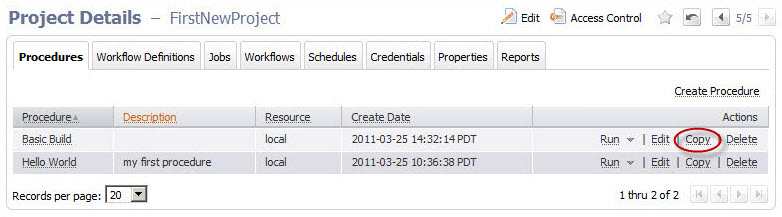
Select the Projects tab, then select the FirstNewProject project name.
-
On the Project Details page, click the Copy link to copy the Basic Build procedure.
-
When the Basic Build copy procedure is displayed, you can click its name to go to the Procedure Details page to verify it contains the same contents of the Basic Build procedure.
-
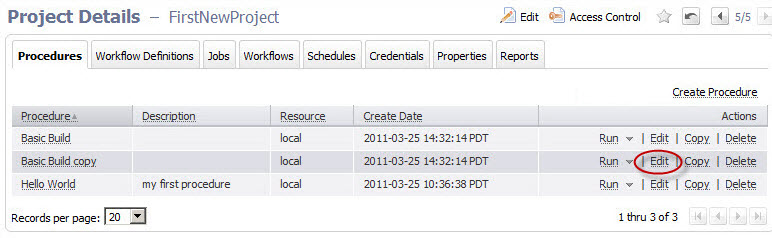
Return to the Project Details page.
-
Select the Edit link for the Basic Build copy procedure.
-
On the Edit Procedure page:
-
Name–Enter a new procedure name,
MultiAgentBuild. -
Description–Add a description noting this procedure was copied from the Basic Build procedure.
-
Default Resource–Select your new resource,
Recource2, for this procedure.
-
-
Click OK after entering your information and CloudBees CD/RO will take you back to the Project Details page.
Your Project Details page should now look similar to the following example:
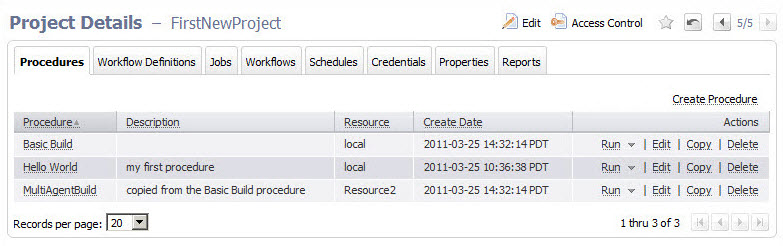
This page now displays the new MultiAgentBuild procedure with a description, and a new resource is designated for this procedure to use.
Step 2. Create two new Ant steps
-
Beginning on the Project Details page, click the
MultiAgentBuildprocedure name to go to the Procedure Details page. -
Click the AntBuild step Copy link, twice.
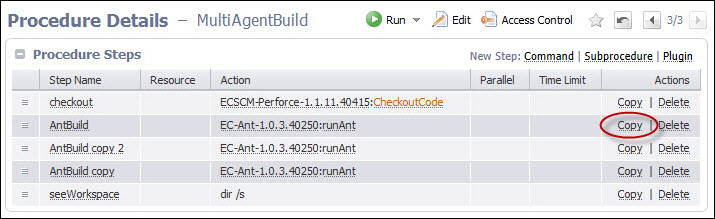
Now you see two additional steps names:
AntBuild copyandAntBuild copy 2. -
Click the
AntBuild copystep name to go to the Edit Step page.Notice the
AntBuild copystep name is adjacent to the page title because this is the step we are going to edit. -
Modifications for creating the new Ant steps:
Because this is an edit page, some of the fields already contain the information we originally supplied to create the first Ant step. The following list contains the fields we need to edit or add new information:
-
Name–For this example, we chose
unittestfor the step name. Type over the existing text to edit the text. -
Resource–Enter the name,
TestPool, because we will be creating a resource pool for testing. At this point, you need to enter a pool name only (no spaces in the name). -
Target–Edit this field to:
unittest.
-
In the Advanced section:
-
Run in Parallel–Click the check box to select this option. You are designating that you want this step to run in parallel with one or more other steps.
-
Click OK to create the first of two new Ant steps and CloudBees CD/RO returns you to the Procedure Details page.
-
From the Procedure Details page, click the
AntBuild copy 2step name to go to the Edit Step page again.To create the next Ant step, make the same edits (above) as you did to create the
unitteststep, except:
-
-
Name–Change the step name to
systemtest. -
Target–Change this field to:
systemtest.-
Beginning on the Project Details page, click the
MultiAgentBuildprocedure name to go to the Procedure Details page. -
Click OK to create the second of two new Ant steps and to return to the Procedure Details page. You now have three Ant steps, including two new Ant steps,
unittestandsystemtest, withTestPoolas the designated resource.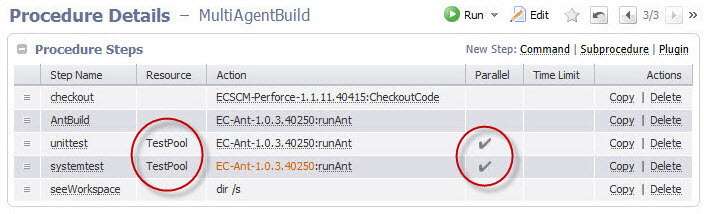
Also notice, the Parallel column now contains "checkmarks" for the 2 steps we want to run in parallel.
-
Step 3. Create a resource pool
-
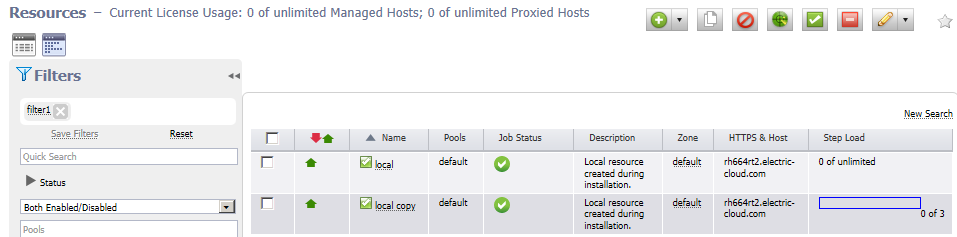
Select the Cloud tab to see the following Resources page with a table listing the currently available resources.

To put these two resources in a resource pool that we previously "named" when we created the new Ant steps, we need to edit each resource.
-
On the Edit Resource panel, the only change we need to make is to add the
TestPoolpool name to the Pool(s) field.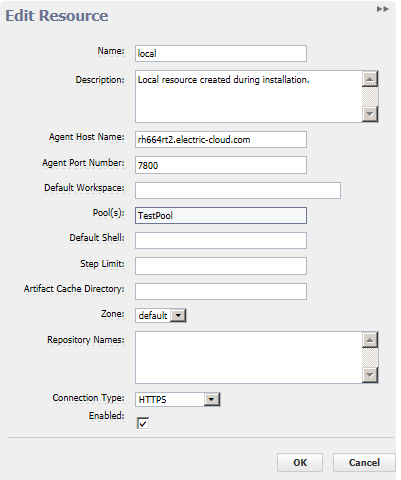
-
Click OK to save your change and return to the Resources page.
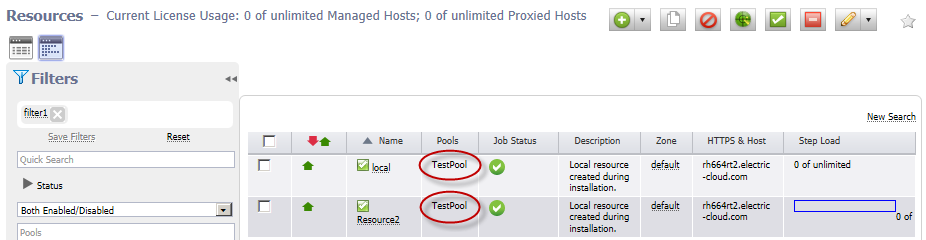
Notice the Pool(s) column now has TestPool specified as a resource pool where the
localresource is a member. -
Repeat this process to put
Resource2in the TestPool resource pool.A resource can belong to one or more pools. If any resource belongs to multiple pools, all pools would be listed in this column. For more information about the Resources page, see Configuring Resources or click the Help link in the top-right corner of the web page.
The following screen example should be similar to your Resources page.
Step 4. Run the procedure
To run the new MultiAgentBuild procedure, select the Projects>FirstNewProject [project name]>MultiAgentBuild procedure.
On the Procedure Details page:
-
Click the Run link at the top of the page.
-
Click Run on the Run Procedure page.
Your Job Details page should be similar to the following example.
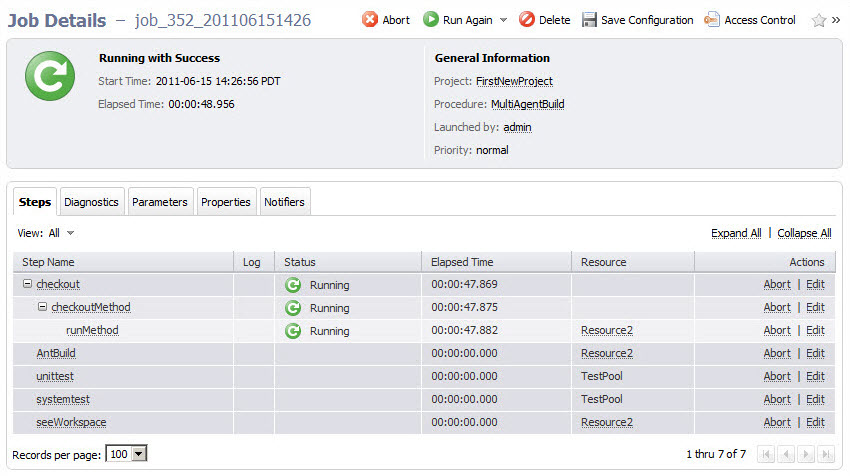
Note: The screen example above illustrates a job that is still running—notice the green circular-arrow icon at the top of the page. This icon changes to a check mark if this job completes successfully.
Scenario extension—Using postp
CloudBees CD/RO implements data collection with a postprocessor. The postprocessor is a command associated with a particular procedure step. If the postprocessor is specified for a step, it executes concurrently with the main step command. The postprocessor runs on the same machine as the main command and in the same working directory, and it retrieves the log file from the step as its standard input.
The standard CloudBees CD/RO postprocessor is called postp. postp scans the step’s log file looking for interesting output such as error messages and then sets properties on the job step to describe what it found. For example, postp might create a property named "errors" whose value is the number of error messages in the log file, or a property named "tests" that counts the number of tests the step executes. Also, postp can extract portions of the step log that contain useful diagnostic information and save this information for reporting.
When you create a step, you can specify postp. If you already have a step and want to add postp reporting, you just have to edit the step to include postp.
-
From the previous Job Details page screen example, click the Edit link for the AntBuild step.
-
On the Edit Step—AntBuild page, in the Parameters section, add
postpto Postp Line field. -
Click OK to save your edit and return to the Job Details page.
-
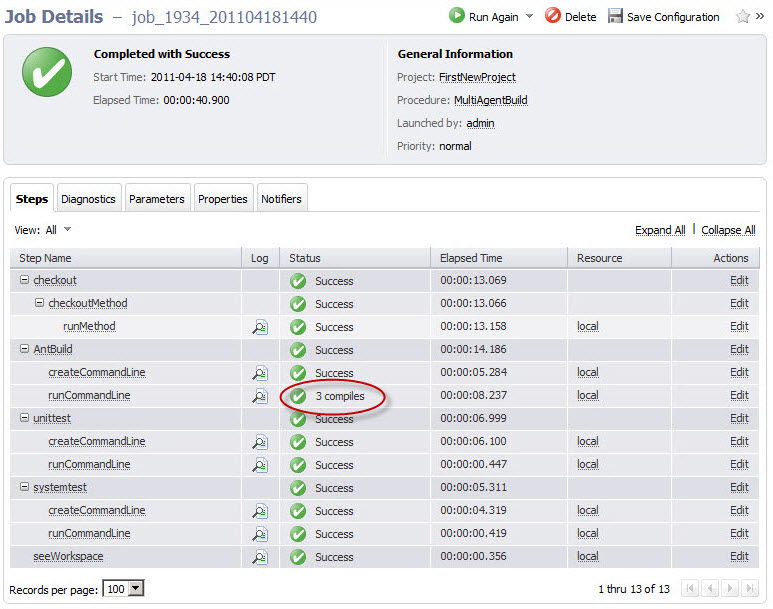
Run this job again to see the postp result—click the Run/Run Again link.
On the next screen example, notice the AntBuild step now shows "3 compiles" in the Status column. Using postp supplies additional information.
For more information about using postp, see Postprocessors.
Summary
This scenario demonstrated how CloudBees CD/RO can drive a complete build and test process—including building steps to run in parallel and creating a resource pool. This scenario also provided a brief look at how you can use CloudBees CD/RO to execute rapid root cause analysis by reviewing postp diagnostics.