Credentials are used to access services and resources used during application deployments, release pipeline execution, or any other automated process orchestrated by CloudBees CD/RO. Credentials are supported in the following contexts.
-
Stored credentials used by a process step, plugin tasks or procedure step
-
Stored credentials used for impersonation
-
Credential parameters
-
Username and password or secret supplied at runtime
Two credential types are available, stored and runtime:
-
Stored credentials: Each project has a list of stored credentials it owns. You manage these credentials on the Credential Management page.
-
Internally-managed credentials: These credentials are stored in encrypted form in the CloudBees CD/RO database.
-
Externally-managed credentials: These credentials are stored and managed via an external credential provider. Supported external providers include CyberArk and HashiCorp Vault.
-
-
Runtime credentials: These credentials are dynamically captured when a job run-time object is created. Dynamic credentials are stored on the server temporarily until the job completes and then discarded.
Stored credential encryption
Internally managed credential data, including passwords, uses 256-bit AES (Advanced Encryption Standard).
Creating a credential provider definition
If you are using an external credential provider to manage credentials, follow the steps in this section to create its provider definition within CloudBees CD/RO.
If you are creating an internally-managed credential, refer to defining a credential.
Creating a credential provider definition is a one-time process per provider instance at your site.
Prerequisites
-
A supported external credential provider, installed and configured at your site.
-
Details about your external credential provider instance required to define the provider definition within CloudBees CD/RO.
-
One or more credentials configured with your credential provider.
-
The CloudBees CD/RO project with the credential provider definition and credentials it manages. This can be two different projects.
As a best practice, organize them based on use across your environment. For example, you may have one project for staging providers and another project for production providers. Or, it may be appropriate to base project organization on user groups.
Define the provider
-
From the CloudBees navigation, select CloudBees CD/RO.
-
From the CloudBees CD/RO main menu, navigate to and select Credential providers from the left-hand menu.
-
Select Add credential provider to open the New Credential Provider dialog.
-
On the Details tab, provide the following:
-
Name: User-defined name of this provider definition. You use this name within CloudBees CD/RO at credential definition time.
-
Project: The CloudBees CD/RO project under which this definition exists.
-
Description: (optional) Comment text describing this definition. This is not used internally by CloudBees CD/RO.
-
Server URL: URL for connecting to the provider.
-
Test connection: Select this option to test the provider connection before saving.
-
-
On the Definition tab, provide details about the definition.
-
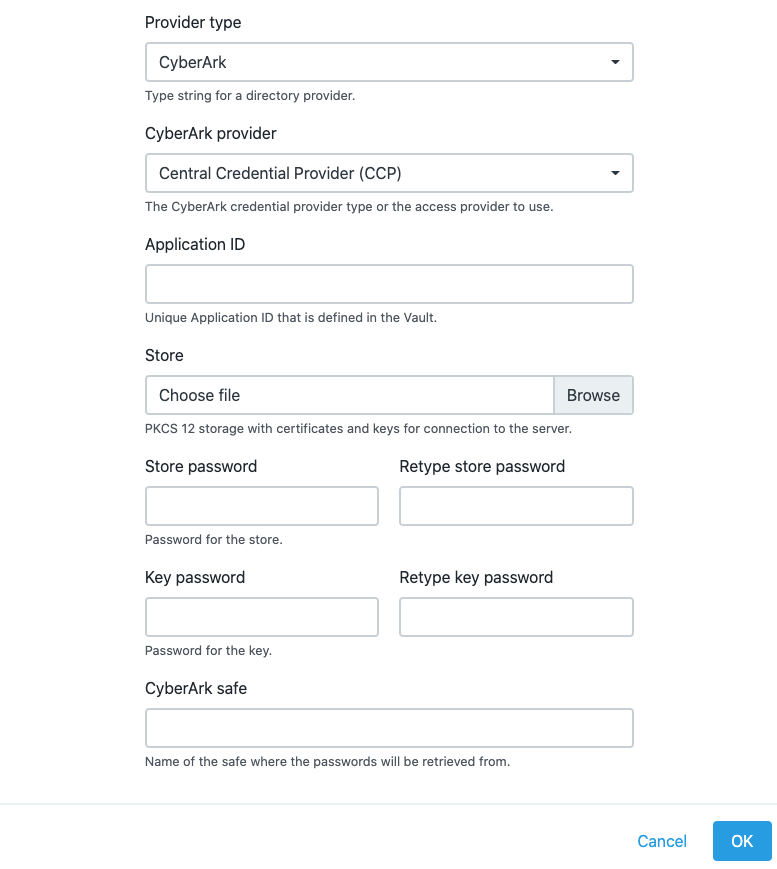
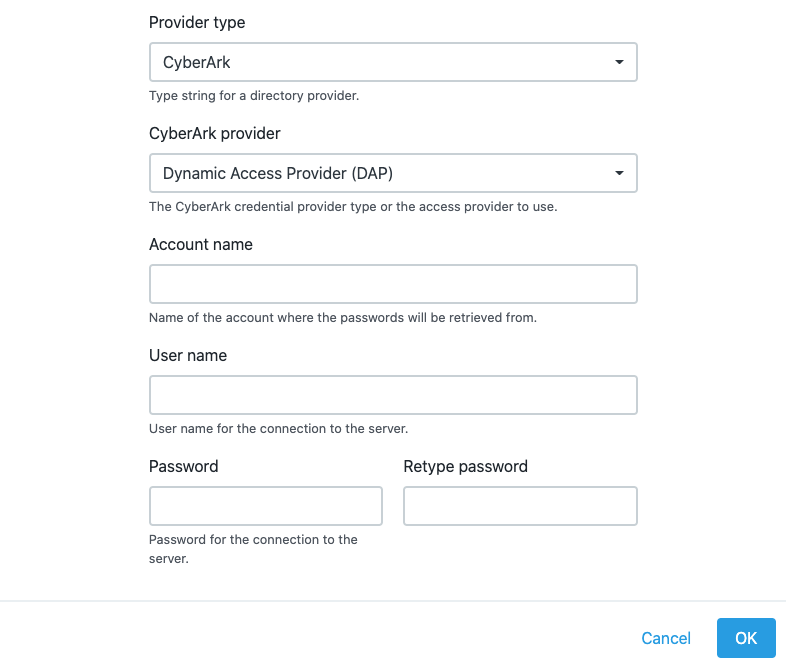
Provider type: Select the provider type from the dropdown.
At this point the list of details differs based on the provider type. The images below show details required for CyberArk providers.
-
-
CyberArk Central Credential Provider
-
CyberArk Dynamic Access Provider
When finished entering all the information, select OK. This provider definition is now available when creating an external credential.
Defining a credential
After a credential is created, no one can access the password for the credential’s account. This means one person can define a credential and enter the password, and other people can use the credential (and its account) without needing to know the password.
-
From the CloudBees navigation, select CloudBees CD/RO.
-
From the CloudBees CD/RO main menu, navigate to and select Credentials.
-
Select Add credential to open the New Credential dialog.
-
Enter the following:
-
Name: User-defined name of this provider definition. You use this name within CloudBees CD/RO at credential definition time.
-
Project: The CloudBees CD/RO project under which this definition is created.
-
Description: (optional) Comment text describing this definition. This is not used internally by CloudBees CD/RO.
-
User name: The name under which you want to log in for this credential definition.
-
-
Select Credential provider type and enter:
-
For internally-managed credentials, enter the password for this credential.
-
For externally-managed credentials, enter the following:
For external credentials, you are registering a credential you have previously defined with your credential provider. -
Credential provider project: The project under which the provider definition resides.
-
Credential provider: The name of the previously created provider definition.
-
Secret path: The path to the folder where the password is stored.
-
-
Alternate process
Credential and credential provider management is also available from the automation platform UI and the CloudBees CD/RO project list.
-
Automation platform:
-
Select the Projects tab.
-
Select a project (first column) to access the Project Details page.
-
Select the Credential Provider tab, and then select Create Credential Provider
-
Provide details as described in Defining a credential provider.
-
-
Select the Credential tab, and then select Create Credential
-
Provide details as described in Defining a credential.
Select Help on the New Credential page if you need more details about what to enter.
-
-
-
Projects list (support for creating credentials, only):
-
Navigate to list.
-
From the Projects list, select Actions
 for the desired project, and then select Details. The Project edit dialog displays.
 -
Select the Manage Credentials right arrow button to open the Credentials dialog.
-
Select Add to open the Credential dialog. Enter data into the fields as described in Defining a credential.
-
Select OK to save the credential.
-