You can open and view the change history from the following objects in CloudBees CD/RO:
-
Applications List and Microservices List
-
Application Editor and Microservice Editor
-
Application Process Designer and Microservices Process Designer
-
Artifacts
-
Components
-
Component Process Designer
-
Environments Designer
-
Environment Tier
-
Jobs
-
Process Steps (Application, Microservice, and Component)
-
Projects
-
Resources
-
Workflows
Viewing the Change History from the Applications List
You may want to view the Change History for these objects in an application:
-
An application process that did not run successfully
-
Component or component process in an application process that did not run successfully

-
Resource that was not deployed successfully
-
Open the home page of the CloudBees CD/RO web UI by browsing to https://<cloudbees-flow-server>/flow/.
-
Go to the applications list in one of these ways:
-
Click Applications.
-
Click the Main menu button in the upper left corner and then select Applications.
-
-
Choose an application.
-
Click the View button.

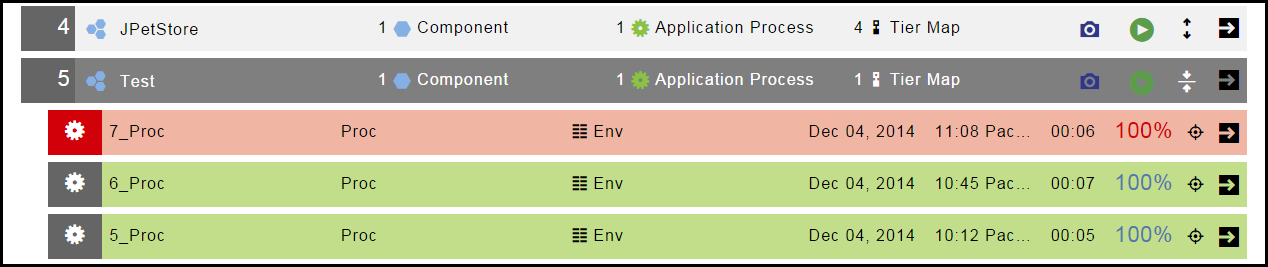
A list of the application processes for the application appear.
-
To view the Change History of an application process:
-
Choose a process.
-
Click the Change History button.

The Change History for the application process opens.
-
-
To view the change history for an object in the application process,
-
Click the View Details button.
A list of objects in the application process (components and component processes) appears, and the breadcrumb changes to Applications/View Run .
-
Choose an object.
-
Click the Change History button to see the change history for the object.
-
-
Viewing the Change History From an Application, Microservice, or Environment
You may want to view the Change History for these objects:
-
Applications
-
Independent microservices
-
Application processes
-
Component processes
-
Environments
-
Resources
Application Editor
Viewing the Change History for an Application
-
Go to the Applications List.
-
Select an application.
The Application Editor opens.
-
Click the Menu button.

-
Select Track Changes.
The Change History for the object opens.
The default time increment is Past 60 Minutes.
Viewing the Change History for an Application Process or Process Step
-
Go to the Applications List.
-
Select an application.
The Application Editor opens.
-
Select an application process.
The Application Process Visual Editor opens.
-
To view the Change History for the application process:
-
Click the Menu button.
-
Select Track Changes.
The Change History for the application process opens.
The default time increment is Past 60 Minutes.
-
-
To view the Change History for the application process step:
-
Choose a step.
-
Click the Edit button in the step to open the context menu.

-
Select Track Changes.
The Change History for the application process step opens.
The default time increment is Past 60 Minutes.
-
Component Process Visual Editor
-
Go to the Applications List.
-
Select an application.
The Application Editor opens.
-
Choose a component.
-
Select a component process for the component.
The Component Process Visual Editor opens.
-
To view the Change History for the component process:
-
Click the Menu button.
-
Select Track Changes.
The Change History for the component process opens.
The default time increment is Past 60 Minutes.
-
-
To view the Change History for the component process step:
-
Choose a step.
-
Click the Edit button in the step to open the context menu.
-
Select Track Changes.
The Change History for the component process step opens.
-
Environment Editor
-
Go to the Environments List.
-
Select an environment.
The Environment Editor opens.
-
Click the Menu button.
-
Select Track Changes.
The Change History for the object opens.

Environment Tier
-
Go to the Environments Designer.
-
Choose an environment tier.
-
Click the Menu button.
-
Select Track Changes.
The Change History for the object opens.
The default time increment is Past 60 Minutes.
Viewing the Change History for Artifacts, Jobs, Projects, and Workflows
When troubleshooting why a job failed, you can view the Change History for artifacts, jobs, projects, and workflows in the automation platform.
Artifacts
-
Open the home page of the Automation Platform web UI by browsing to https://<cloudbees-flow-server>/commander/.
-
Go to the Artifacts tab.
-
Choose an artifact.
-
Click the Track Changes button.
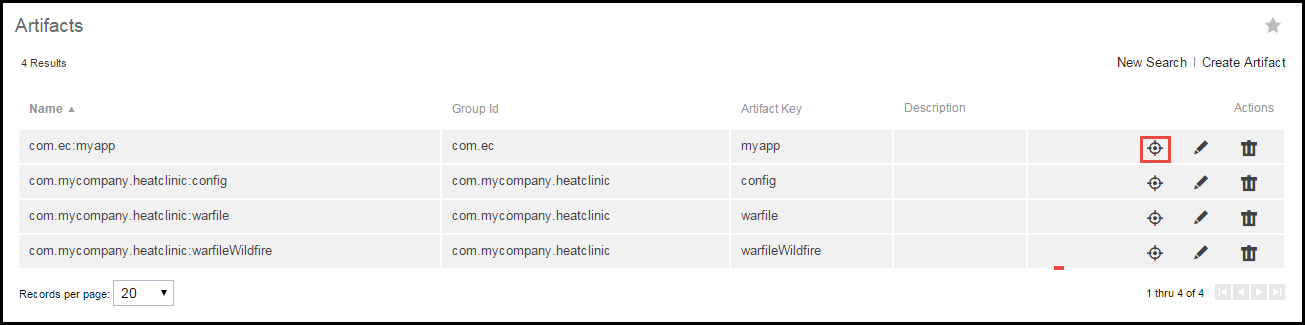
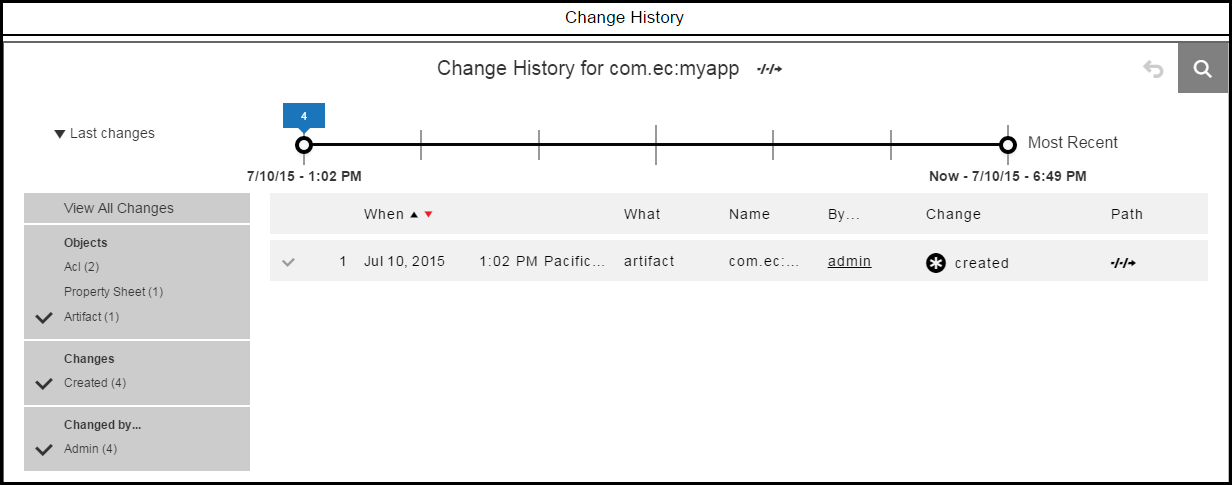
The Change History for the selected artifact opens.
The default time increment is Past 60 Minutes.
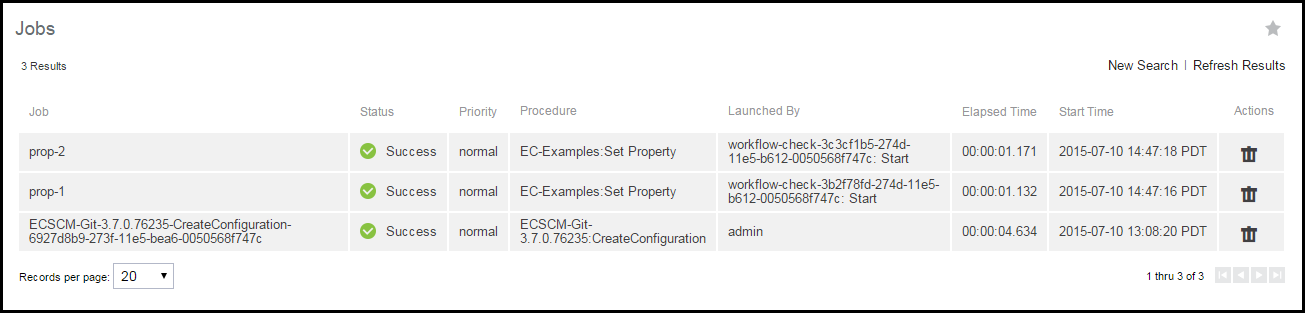
Jobs
Starting from the Home page (https://<cloudbees-flow-server>/commander/):
-
To go to the Job Details page, do one of the following:
-
Use the Jobs tab.
-
Use the Jobs Quick View list.
-
-
If you use the Jobs tab, follow these steps:
-
Click the Jobs tab.
The Jobs page opens.
-
Click a job name to select a job.
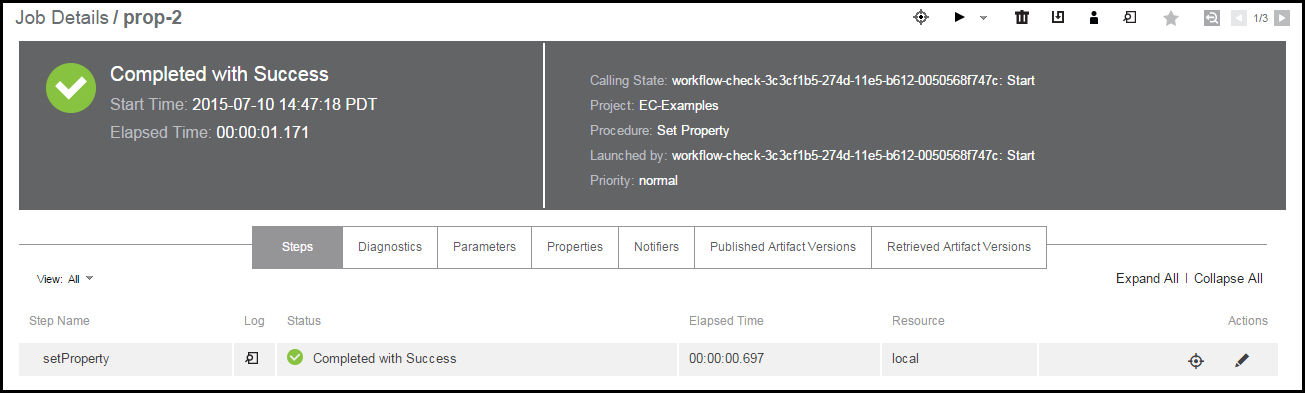
The Job Details page opens.
-
-
If you use the Jobs Quick View list, click a job name to select a job.
The Job Details page opens.
-
Choose a job or job step.
-
Click Track Changes for the job or job step.
The Change History for the job or job step opens.
The default time increment is Past 60 Minutes.
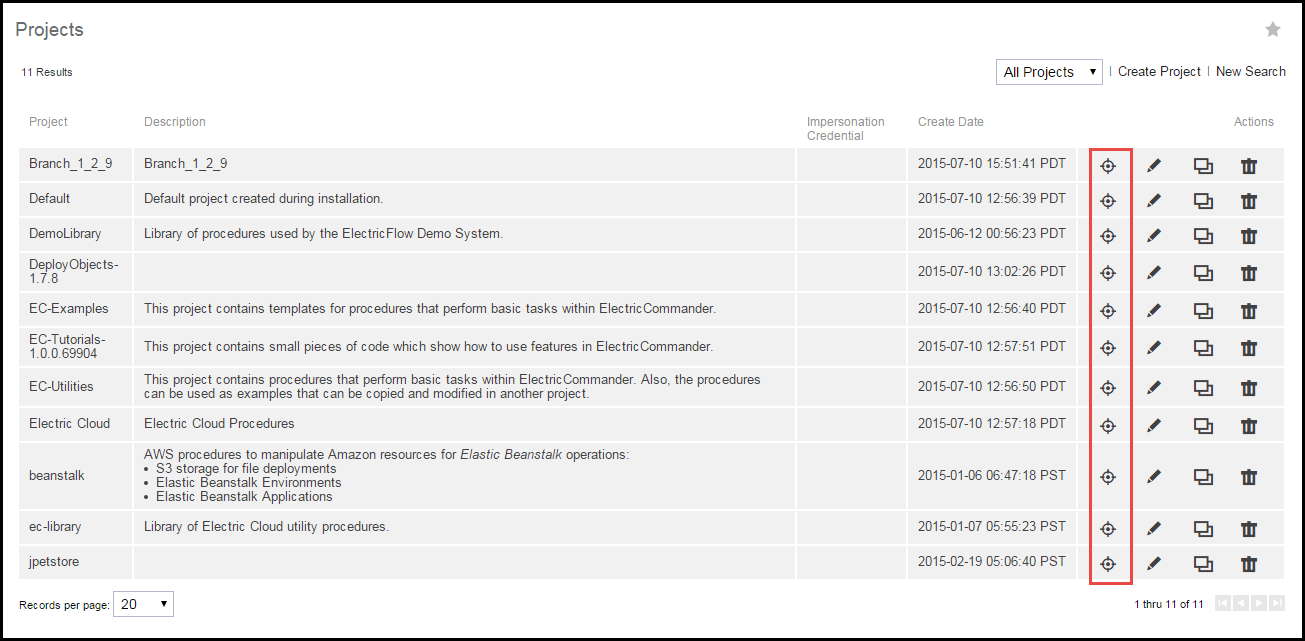
Projects
Starting from the Home page:
-
Go to the Projects tab.
-
Choose a project.
-
Click the Track Changes button.
The Change History for the project opens.
Workflows
Starting from the Home page:
-
Go to the Workflows tab.
-
Choose a workflow.
-
Click Track Changes.
The Change History for the workflow opens.
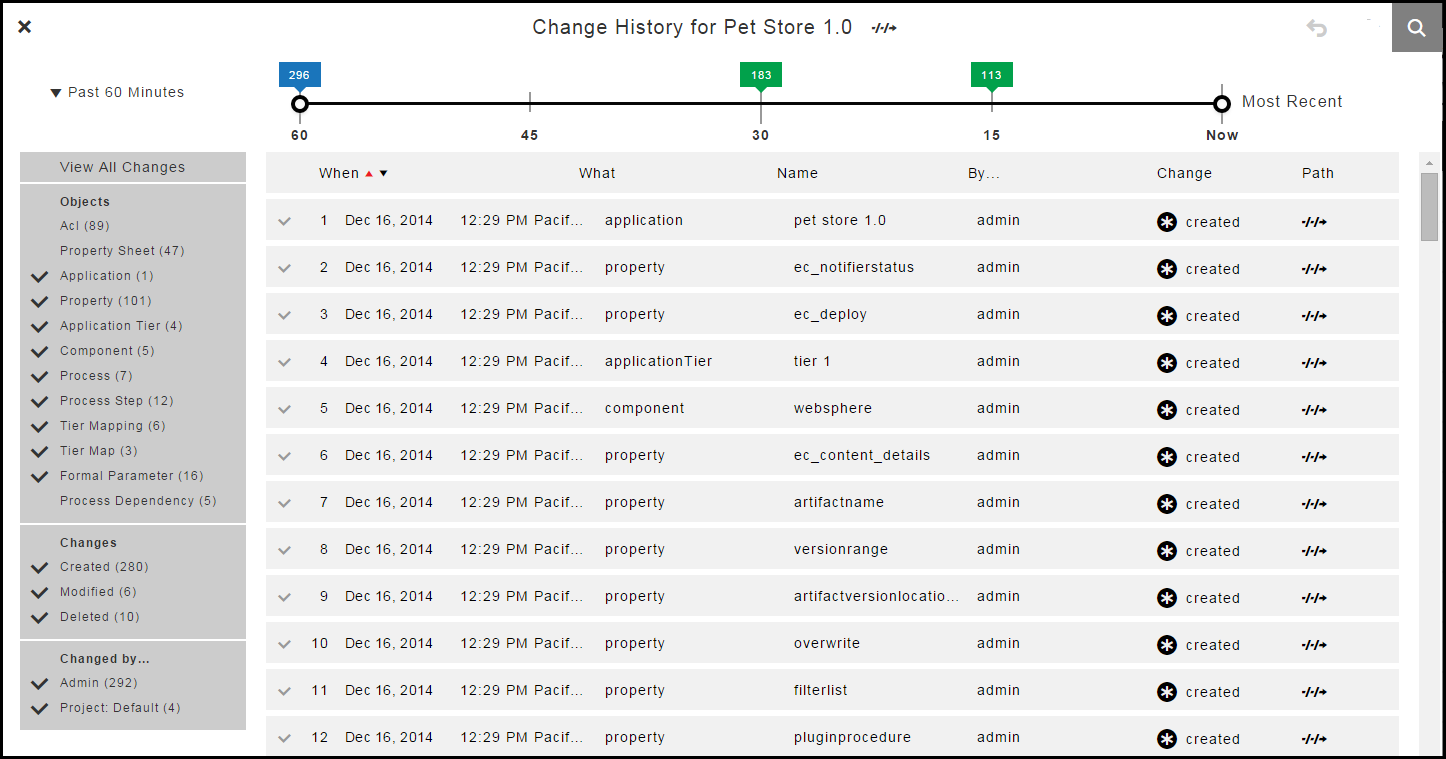
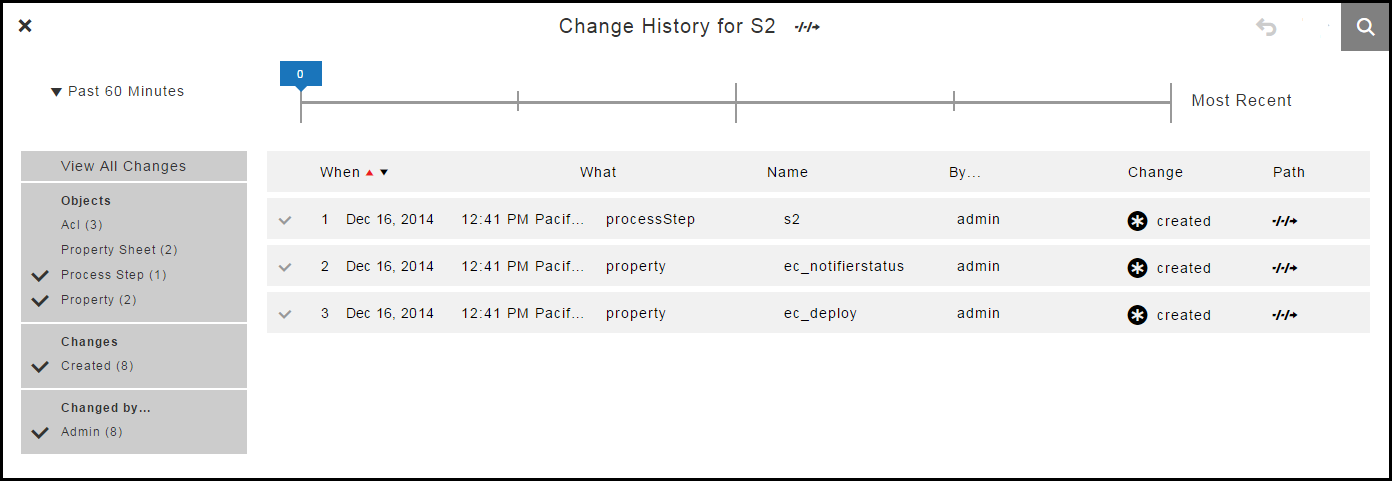
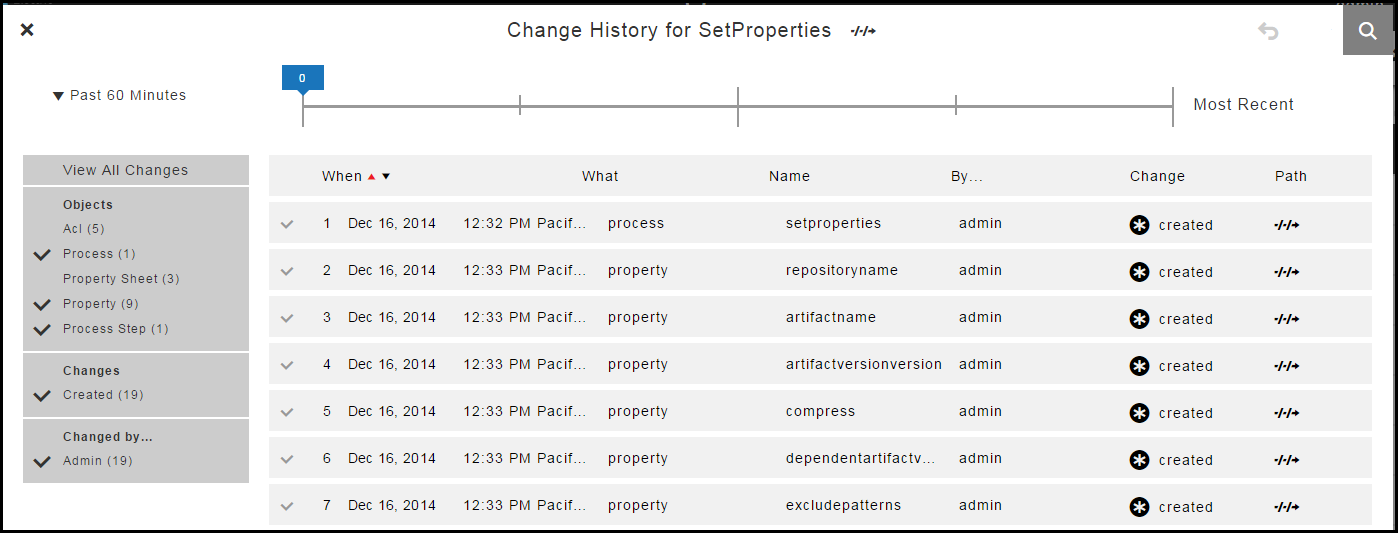
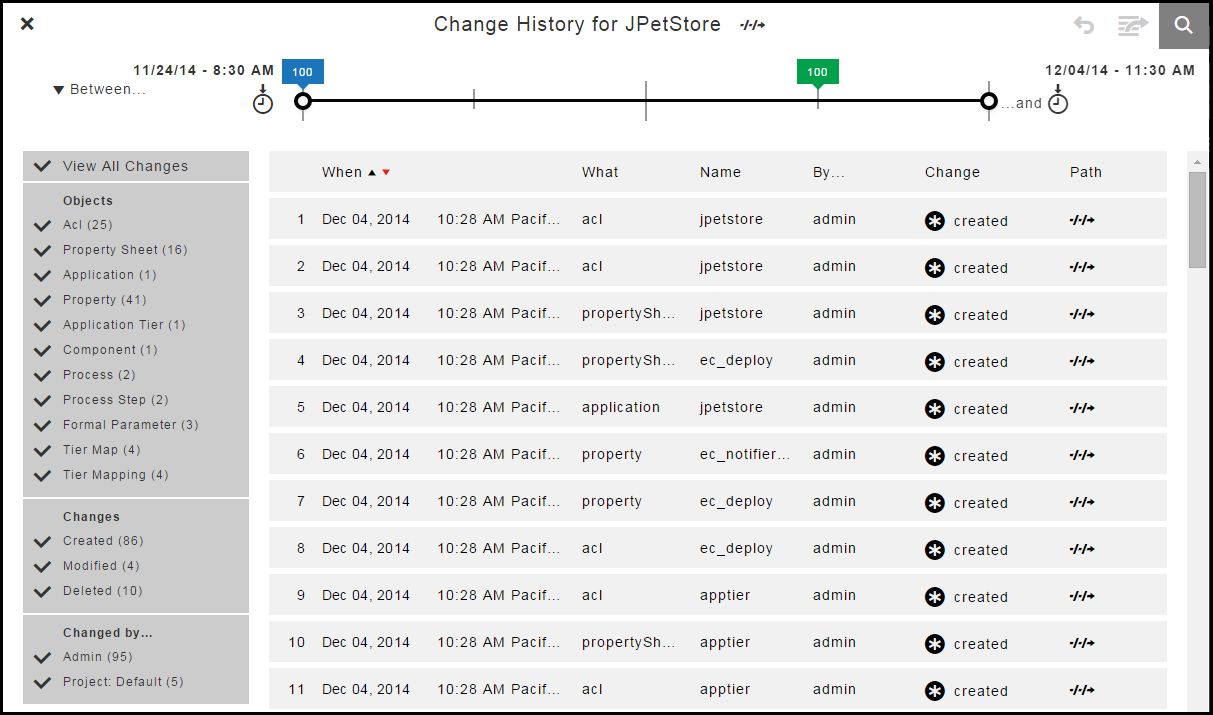
Change History Page
How to get here : Click the Search button to open the "Change History—Search" form, and enter the search criteria.
The search results appear in the Change History page and include the following information:
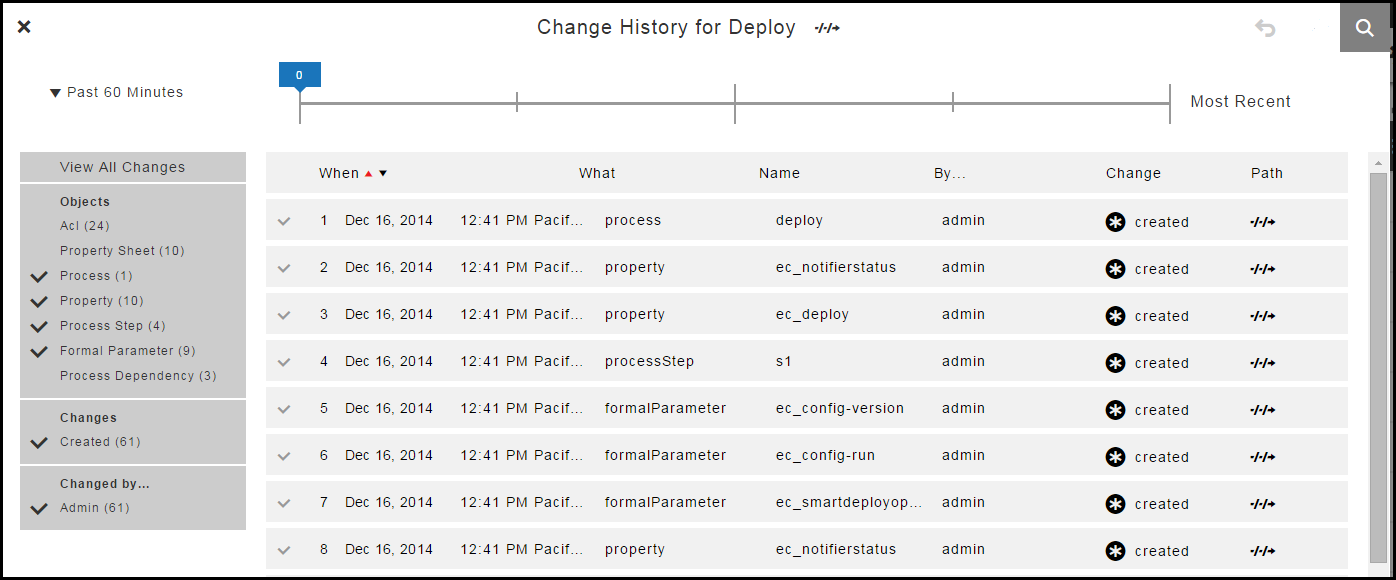
How to get here :
From the Home page in the Automation Platform (https://<cloudbees-flow-server>/commander/), use one of the following methods to open and view the change history for jobs, projects, workflows, and artifacts:
-
Select a job that failed > Click the job name to go to the Job Details page > Click Track Changes in the upper right of the page
-
Click the Jobs tab > Select a job that failed to the Job Details page > Click Track Changes in the upper right of the page.
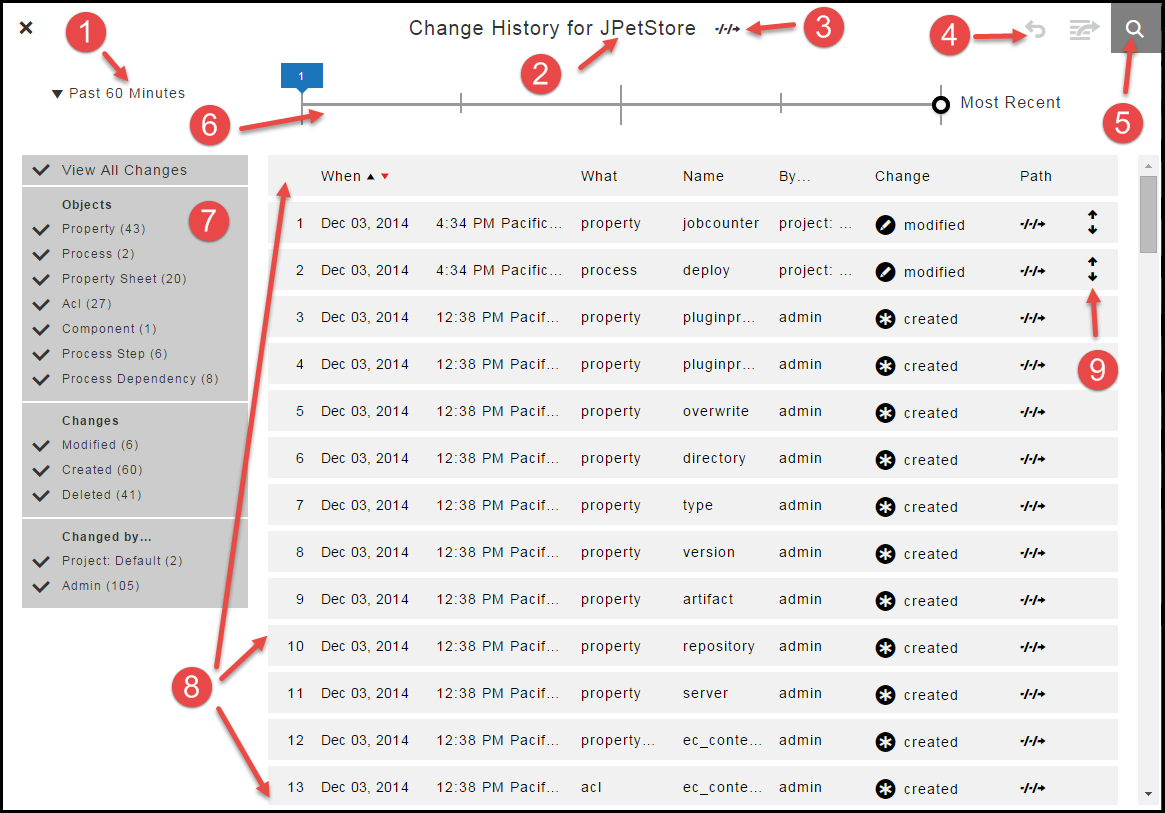
The search results appear in the Change History page for the job and include the following information:
1 |
Time range. The end time is the current time. You can change the end time after you run the search and get the search results. |
2 |
Name of the tracked object. |
3 |
Path to the tracked object. Example: 
|
4 |
After making a change, you can revert or export the object.Click this to go to the undo or redo the last action on the page. |
5 |
Click this to run a new change history search. |
6 |
Time line. The start time is based on the time range that you selected. The end time is the current time. You can manually change the start and end times after you run the search and get the search results. |
7 |
Filters for the change history. You can view all changes or view only selected changes. The objects in the list are the objects in the change history search results. |
8 |
Change history for the selected object.
|
9 |
Click the View button to see more details about the object. |
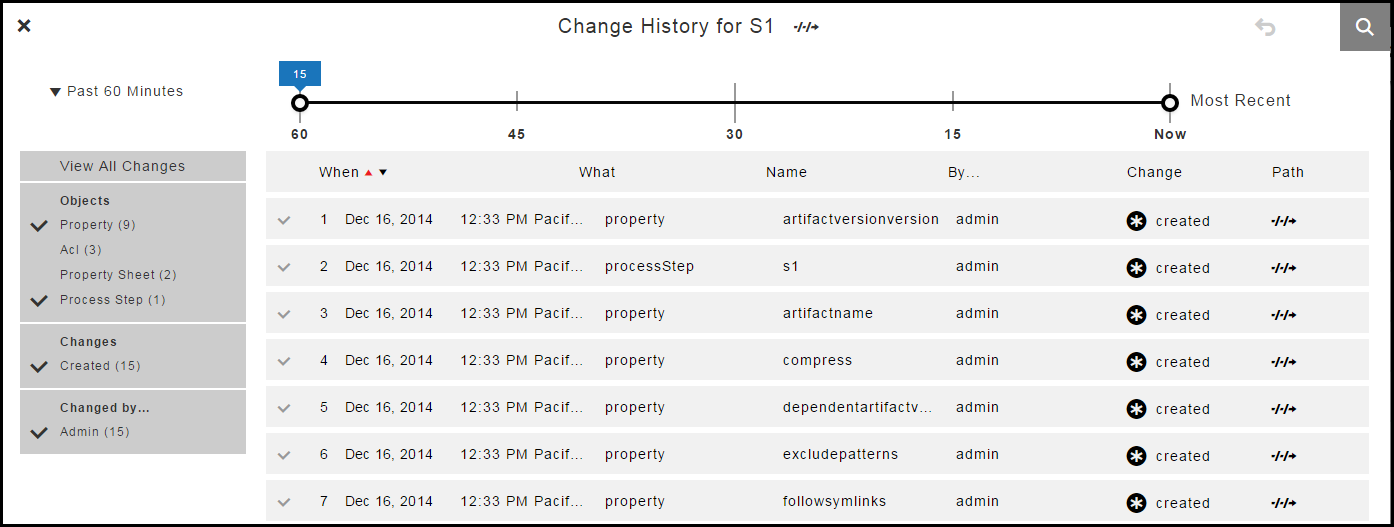
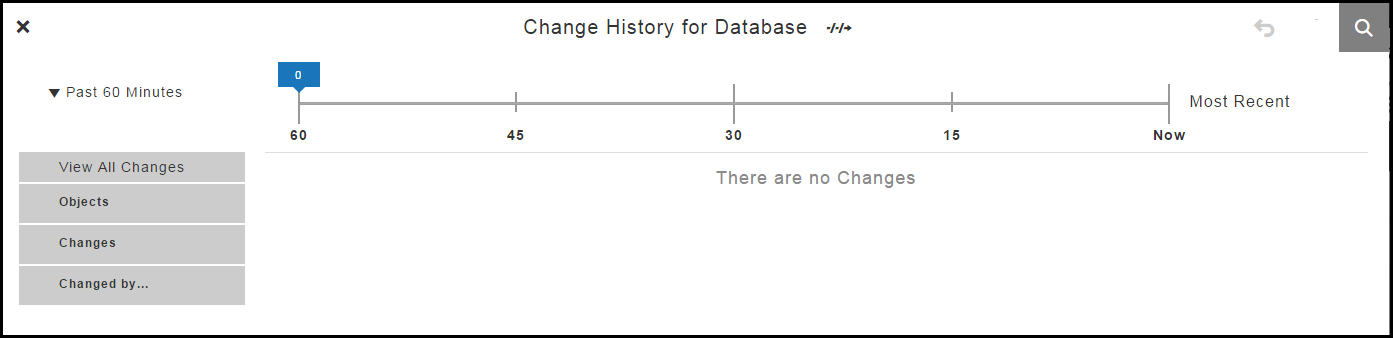
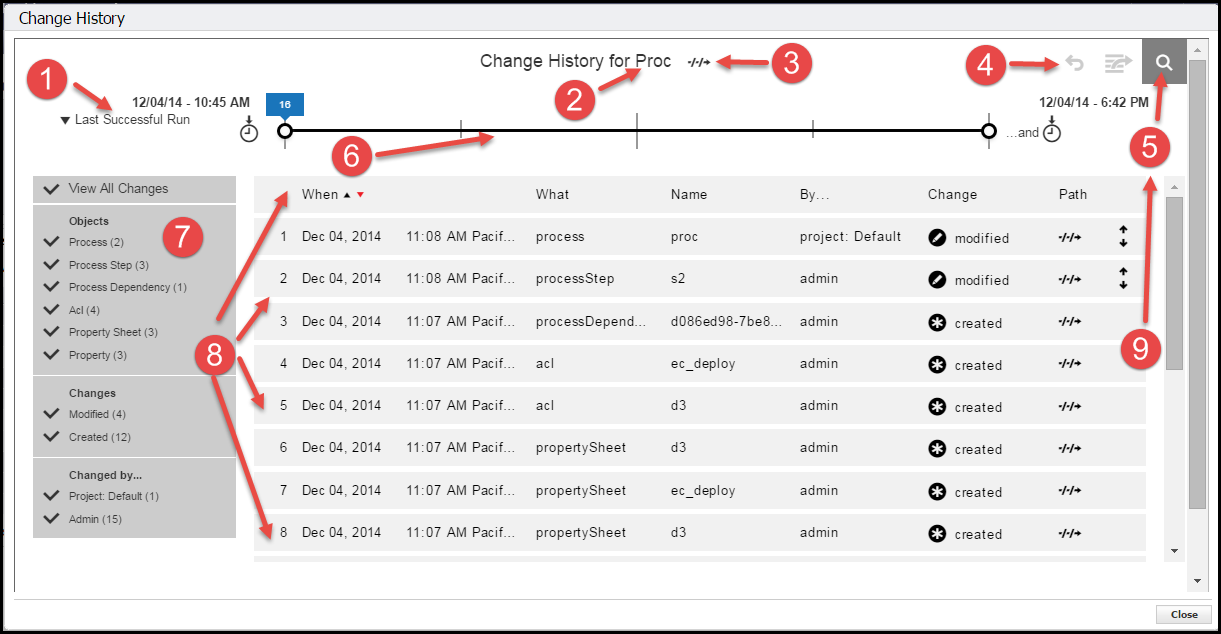
Time Line
The time line for the change history is at the top of the Change History page.
The time line is automatically separated into divisions based on the number of minutes, hours, or days between the end time and the start time.
Default Settings
These are the default settings for the time line:
-
The start time is the selected time range in the upper left of the page.
-
The end time is Most Recent when the latest change to the object occurred.
-
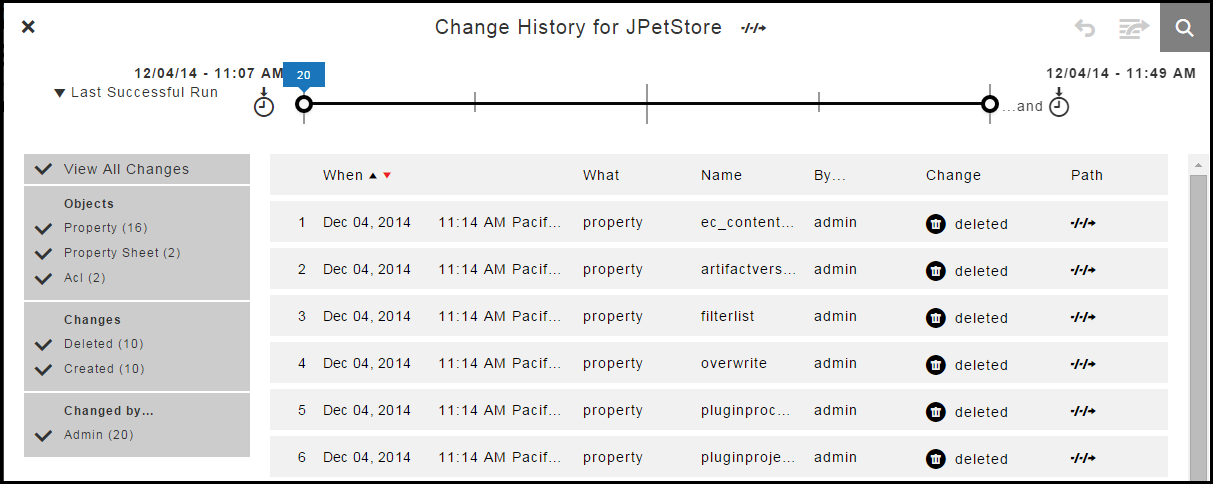
The default range is from the Last Successful Run to the Most Recent.
-
The entire time line is displayed, and all the changes are in the list below the time line.
The time line on this page has the default range.
| The Last Successful Run range is available only after the first time that you run an application. |

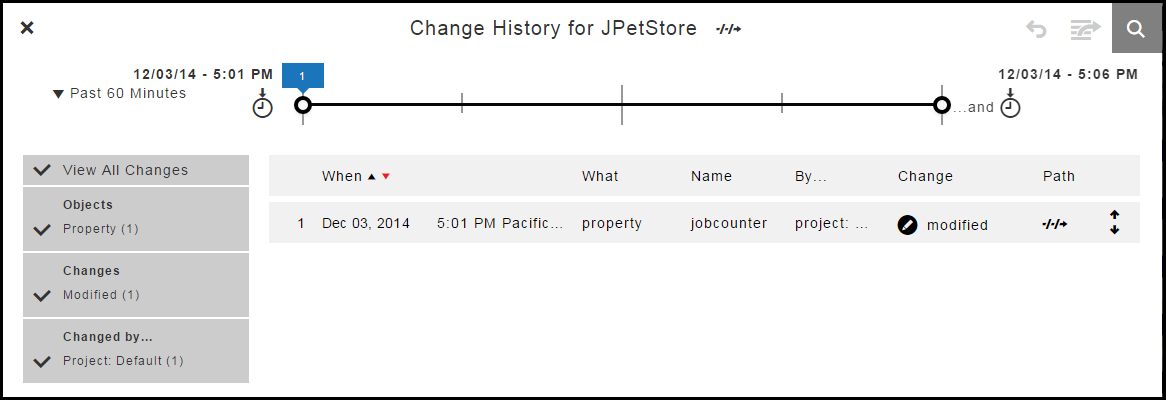
When the range is changed to Past 60 Minutes, the time line changes:
-
The start time is 60 minutes from Now.
-
The end time is when the Most Recent change occurred ( Now ).
-
The time line has four divisions.

If the increment is Past 7 Days, the time line has seven one-day divisions.

You can view the change history in different ways depending on the time range for the time line.
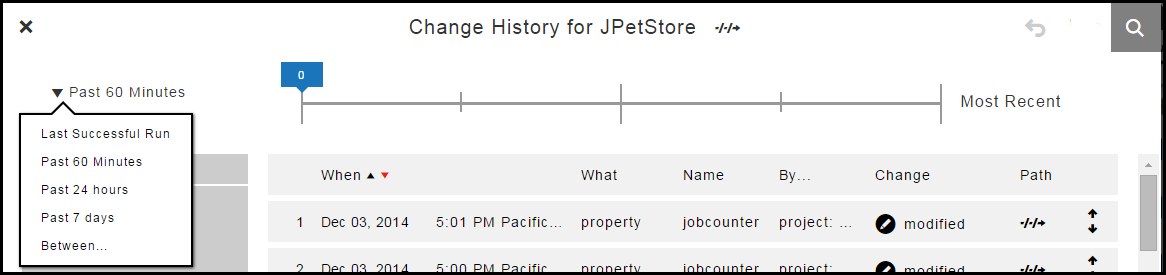
Selecting the Time Range
You can view the change history in different ways depending on the time range for the time line.
Click the down arrow next to the time range to select a different range for the change history.
You can see the change history since the last successful run. Notice that the information on the left side shows a summary of the changes, which is a subset of the results that you got.
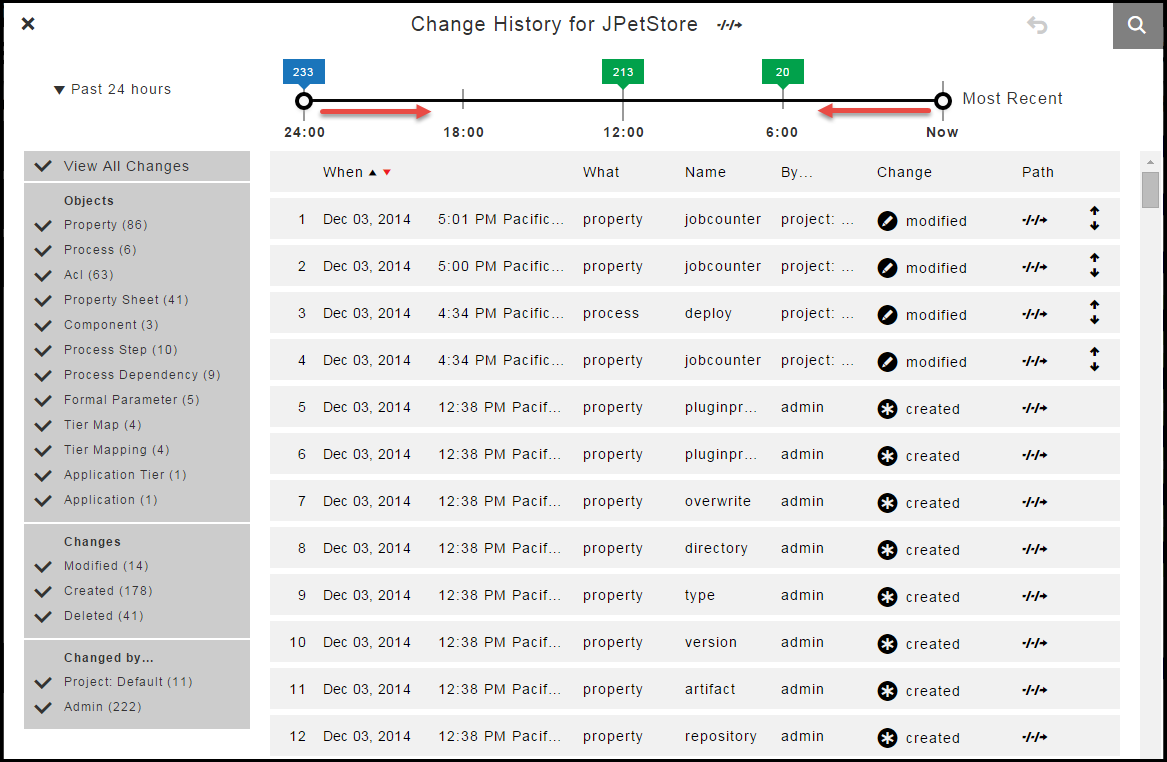
Moving the Start and End Times
You can manually move the start and end times on the time line.
When you move the start time to 18:00 and the end time to 6:00, notice that the list of objects in the change history changes.
When you move the start time to 18:00 and the end time to 6:00, notice that the list of objects in the change history changes.
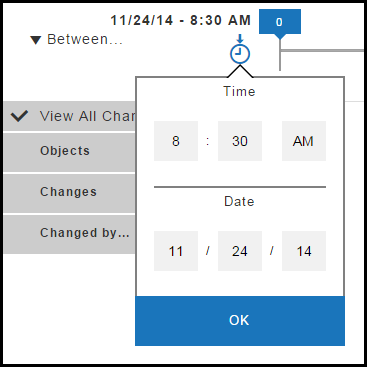
Specifying the Time Range
To manually set the times and dates for the start and end times:
-
Select Between.
A drop down dialog box opens.
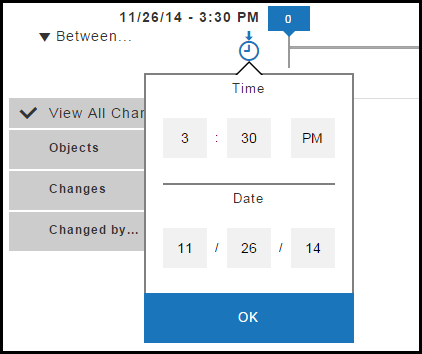
-
Select the time and date for the start of the time line.
The default settings are 3:30 pm and eight days before the current date.
-
Click OK.
A drop down dialog box opens at the other end of the time line.
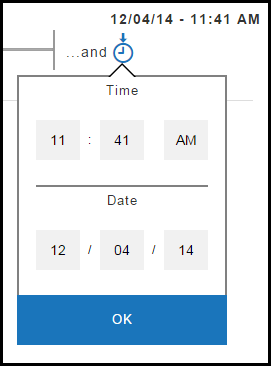
-
Select the time and date for the end of the time line.
The defaults are 3:30 pm and the current date.
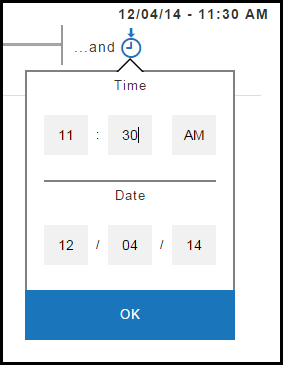
-
Click OK.
The time line changes to show only the changes from the start and end times and dates that you selected.
Number of Changes
The time range at the top of the change history shows the number of changes.
-
There have been 233 changes in the last 24 hours.
-
There have been 213 changes in the last 12 hours.
-
There have been 20 changes in the last 6 hours.

When you change the time range, the number of changes also changes. In the last 60 minutes, there have been only two changes.

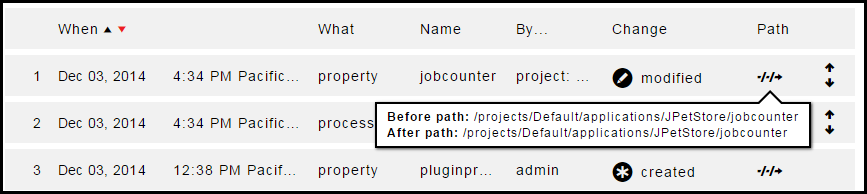
Paths to Objects
Click the View Path button next to the "Change History for JPetStore" title to see the path to the application.
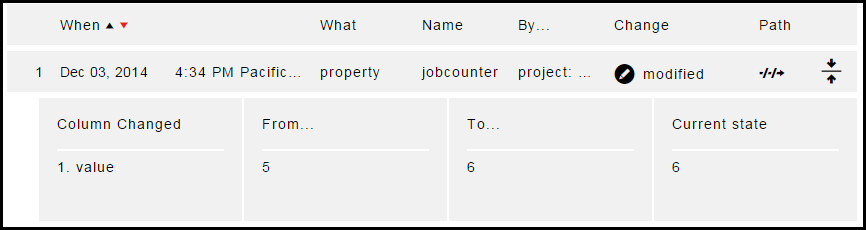
Click the View Path button to see the change in the path to the object before and after the change.
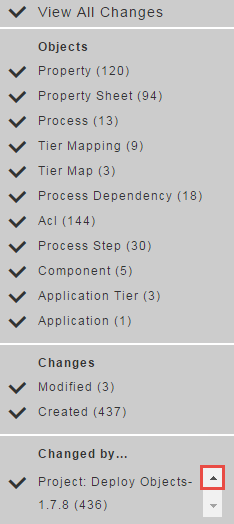
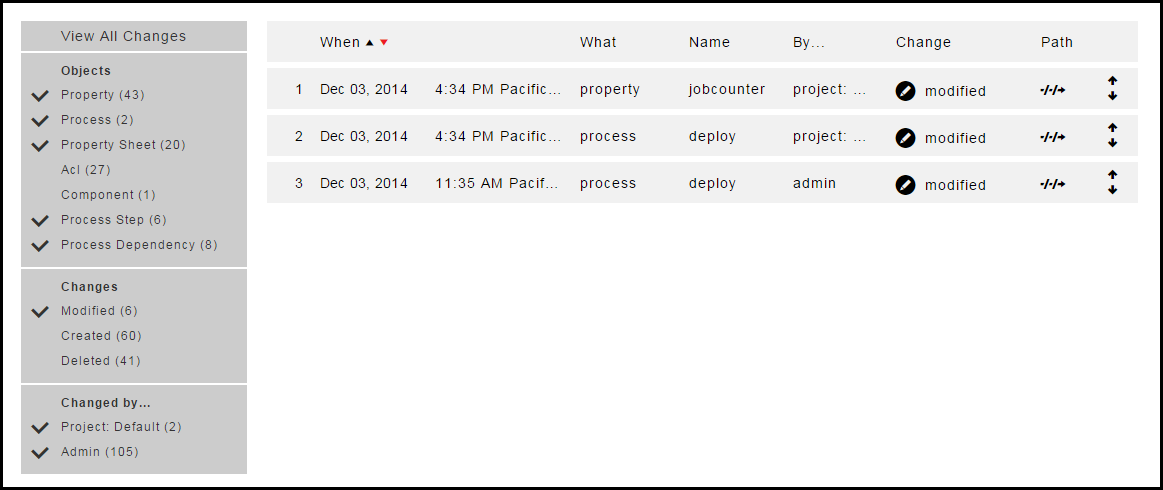
Filters
You can use filters to view changes to specific objects, the types of changes, and the users how made those changes.
Instead of selecting View All Changes, you can select specific objects, such as only properties, processes, property sheets, process steps, and process dependencies that have been modified by the Project:Default and Admin users.
When the list of filter criteria is long, not all of the criteria may appear in the filter list. To see all of the criteria, use the up or down arrows to see all the options.
This list does not show all of the users. Use the up and down arrows to see all four of the users.
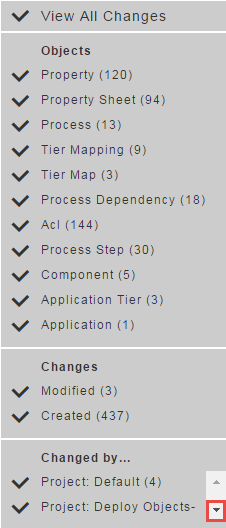
Click the down arrow to see the other users.