In the Agents & Jobs section, each agent used in the build is represented by one row. Host names and agent number designations appear to the left of the agent job bars. Use the view frame and arrows in the Navigation section to view agents that are not currently visible. For details about the Navigation section, see Navigation.
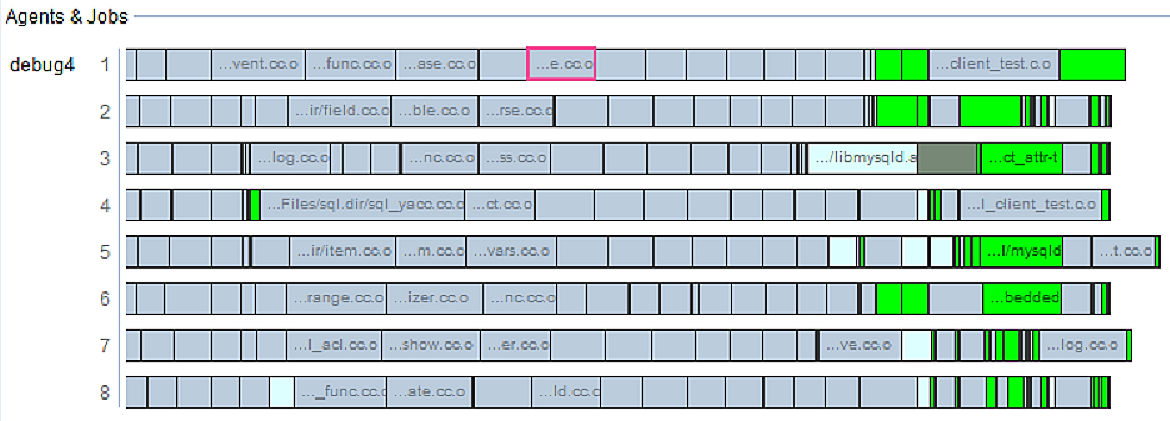
The section’s x-axis is time, with the build starting at the left. The first job completed by each agent is at the extreme left of an agent’s job bar. As you scroll to the right on an agent’s job bar, you see the progress of jobs assigned to the agent.
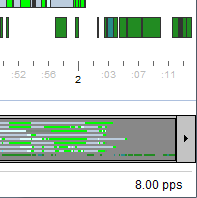
The time grid helps you determine how long jobs take. The grid has major and minor grid lines. By default, major grid lines are 60 seconds (pixels) apart and minor grid lines are 15 seconds (pixels) apart. Build magnification is measured in pixels per second (pps). As you zoom in or out, this ratio increases or decreases.
Magnification is displayed in the lower right corner. In the example below, magnification is 8.00 pps.
To see how long some jobs took to complete, click and drag from the left edge of the first job to the end of the last job of interest. The job ruler appears and displays a time measurement. You can also use the ruler by dragging from right to left.
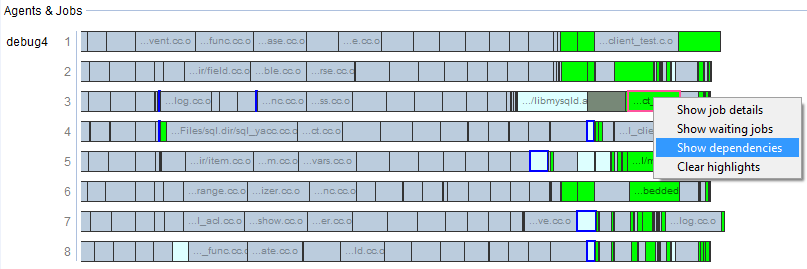
Dependencies and Waiting Jobs Popup
You can right-click a job and click Show dependencies or Show waiting jobs. Dependencies are outlined in blue. Waiting jobs (not present in the screenshot) are outlined in red.
For dependency details between a pair of jobs, load an annotation file that contains waiting and history level annotation and run the Serialization Analysis report. For details, see Serialization Analysis.
