This section describes how to set up your Kubernetes, Microsoft Azure, Amazon Elastic Compute Cloud (EC2), or Google Cloud Platform (GCP) cloud provider to make it compatible with Accelerator agent cloud bursting. This functionality is supported only on Linux platforms.
Configuring a Kubernetes Cluster for Agent Cloud Bursting
Accelerator includes an integration to support Kubernetes on Ubuntu Linux platforms. This section describes the Kubernetes configuration that CloudBees supports for running agents on a Kubernetes cluster as well as running Cluster Manager and eMake either in the Kubernetes cluster or outside of it.
CloudBees supports a cluster of one Kubernetes master and one or more Kubernetes worker nodes that are running the third-party software versions described below. These instructions assume that you are familiar with Kubernetes concepts and the tooling required to establish a Kubernetes cluster.
Third-Party Software Requirements for Running Accelerator on Kubernetes
Running Accelerator on a Kubernetes cluster requires identical versions of the following software (installed in the following order) on the master and each worker node that you want in your Kubernetes cluster:
-
Ubuntu Linux
-
Docker
-
Kubernetes
Not all combinations of Ubuntu Linux, Docker, and Kubernetes are supported . The following matrix shows the compatible versions:
| Ubuntu Linux | Docker | Kubernetes | |||||
|---|---|---|---|---|---|---|---|
18.04 |
16.04 |
18.06.0 |
17.03.0 |
1.17.1 |
1.16.3 |
1.12.2 |
1.11.0 |
✓ |
– |
✓ |
– |
✓ |
– |
✓ |
– |
✓ |
– |
✓ |
– |
– |
✓ |
– |
– |
– |
✓ |
– |
✓ |
– |
– |
– |
✓ |
– |
✓ |
✓ |
– |
– |
– |
✓ |
– |
– |
✓ |
✓ |
– |
✓ |
– |
– |
– |
Overall Steps for Configuring Accelerator to Run on Kubernetes
Configuring a Kubernetes cluster for agent cloud bursting consists of the following overall steps:
Installing Linux on the Master and Worker Nodes
On each machine to be used as the master and the worker nodes, install a compatible Ubuntu Linux version as listed in Third-Party Software Requirements for Running Accelerator on Kubernetes. See your operating system documentation for installation instructions.
Installing Docker on the Master and Worker Nodes
On each machine to be used as the master and the worker nodes, install Docker by entering
sudo apt update
sudo apt install apt-transport-https ca-certificates curl software-properties-common
curl -fsSL https://download.docker.com/linux/ubuntu/gpg | sudo apt-key add -
sudo add-apt-repository "deb [arch=amd64] https://download.docker.com/linux/ubuntu $(lsb_release -cs) stable"
sudo apt update
sudo apt-get install docker-ce=<version>~ce~3-0~ubuntu
where <version> is a Docker version such as 18.06.0. See Third-Party Software Requirements for Running Accelerator on Kubernetes for a list of compatible versions.
Disabling Swapping and the Firewall on the Master and Worker Nodes
If you installed Ubuntu Linux with swapping enabled, you must disable it on each machine to be used as the master and the worker nodes. You also must turn off the firewall on each of these machines.
-
On each machine to be used as the master and the worker nodes, enter
sudo swapoff -a
sudo sed -i '/ swap / s/^\(.*\)$/#\1/g' /etc/fstab
sudo ufw disable
The second command ensures that swapping stays disabled upon system reboot. The third command disables the firewall.
-
Reboot the master and all worker nodes.
Installing Kubernetes on the Master and Worker Nodes
Kubernetes is required on the master and all worker nodes in your Kubernetes cluster. On each machine to be used as the master and the worker nodes, complete the following steps:
-
Install the
apt-key-gpgfile. -
Add the key to the APT sources keyring by entering
curl -s https://packages.cloud.google.com/apt/doc/apt-key.gpg | sudo apt-key add -
-
Create a
Kubernetes.listfile and insert thedeb https://apt.kubernetes.io/ kubernetes-xenial mainstring into the file by enteringecho "deb https://apt.kubernetes.io/ kubernetes-xenial main" | sudo tee /etc/apt/sources.list.d/kubernetes.list
-
Get a list of packages that are available to install by entering
sudo apt-get update -q
This list is based on criteria such as your operating system version.
-
Install the required Kubernetes packages by entering
sudo apt-get install -qy kubelet=<version>-00 kubectl=<version>-00 kubeadm=<version>-00 kubernetes-cni=<cni_version>
where:
<version>is a Kubernetes version such as1.12.2. See Third-Party Software Requirements for Running Accelerator on Kubernetes for a list of compatible versions.<cni_version>is0.7.5-00for Kubernetes 1.17.1 or0.6.0-00for supported Kubernetes versions 1.16.3 or earlier.
Initializing the Master
On the machine to be used as the master, enter
sudo kubeadm init --pod-network-cidr=10.244.0.0/16 --apiserver-advertise-address=<ip_of_master_node>
This command initiates Kubernetes on the master machine and sets the IP address of the master node. The worker nodes will be on the subnet of this IP address.
In this example:
-
--pod-network-cidr=10.244.0.0/16sets the pod network CIDR, which specifies the range of IP addresses in the virtual network for the pods to use. This is a subnetwork for the “real” network. -
<ip_of_master_node>is the IP address of the physical machine of the master.
The following message appears in the shell after you run the above command:
Your Kubernetes control-plane has initialized successfully!
To start using your cluster, you need to run the following as a regular user:
  mkdir -p $HOME/.kube
  sudo cp -i /etc/kubernetes/admin.conf $HOME/.kube/config
  sudo chown $(id -u):$(id -g) $HOME/.kube/config

You should now deploy a pod network to the cluster.
Run "kubectl apply -f [podnetwork].yaml" with one of the options listed at:
  https://kubernetes.io/docs/concepts/cluster-administration/addons/

Then you can join any number of worker nodes by running the following on each as root:
kubeadm join <ip address:port of master> --token <token for security connection> \
    --discovery-token-ca-cert-hash <discovery token hash>
Creating a Configuration File on the Master for Using kubectl without sudo
You must create a configuration file to allow the current user to use kubectl without sudo. On the master, enter
mkdir -p $HOME/.kube
sudo cp -i /etc/kubernetes/admin.conf $HOME/.kube/config
sudo chown $(id -u):$(id -g) $HOME/.kube/config
These commands create the .kube directory, copy the admin.conf file into this directory, and change the ownership to the current user.
Configuring the Kubernetes Network Interface on the Master
On the master, enter
kubectl apply -f https://raw.githubusercontent.com/coreos/flannel/master/Documentation/kube-flannel.yml
This command configures the Kubernetes network interface. This example uses Flannel (although there are other options).
Joining Each Worker Node to the Master
On each worker node, use the output from the kubeadm init command from the previous step by entering
sudo kubeadm join <ip_address:port_of_master> --token <token_for_security_connection> --discovery-token-ca-cert-hash <discovery_token_hash>
This command joins a worker node to the master.
Checking that the Worker Nodes are Joined to the Master
You should verify that each worker node is joined to the master. On the master, enter
kubectl get nodes
This command displays a list of nodes with IP addresses that are successfully joined. For example:
NAME              STATUS   ROLES    AGE     VERSION
ip-172-31-23-14   Ready    master   6h19m   v1.12.2
ip-172-31-29-52   Ready    <none>   6h18m   v1.12.2
At this point, the Kubernetes cluster is created.
Creating a Secure Token for Agent Cloud Bursting Credentials on the Master
You must create a token for use as Kubernetes credentials.
Creating a Service Account
You can choose any service account name. To create a service account, enter
kubectl create -f - <<EOF
apiVersion: v1
kind: ServiceAccount
metadata:
    name: <service_account_name>
    labels:
        k8s-app: <service_account_name>
EOF
This command creates a service account and uses the text between the EOF (end-of-file) markers as input to the command.
Creating a Cluster Role
Create a “cluster role” type of role with the appropriate rules by entering
kubectl create -f - <<EOF
apiVersion: rbac.authorization.k8s.io/v1beta1
kind: ClusterRole
metadata:
    name: <service_account_name>
    labels:
        k8s-app: <service account name>
rules:
- apiGroups: [""] # "" indicates the core API group
  resources:
  - namespaces
  - pods
  - pods/log
  - services
  - deployments
  verbs:
  - get
  - watch
  - list
  - create
  - update
  - patch
  - delete
EOF
This command creates a cluster role using the text between the EOF markers as input to the command.
Binding the Service Account to the Cluster Role
Bind the service account that you created above to the cluster role that you created above by entering
kubectl create -f - <<EOF
apiVersion: rbac.authorization.k8s.io/v1beta1
kind: ClusterRoleBinding
metadata:
    name: <service_account_name>
subjects:
- kind: ServiceAccount
  name: <service_account_name>
  namespace: default
roleRef:
  kind: ClusterRole
  name: <service_account_name>
  apiGroup: rbac.authorization.k8s.io
EOF
This command binds your service account to your cluster role using the text between the EOF markers as input to the command.
Retrieving the Token
Complete the following steps to get the token:
-
Get the IP address of the server by entering
APISERVER=$(kubectl config view --minify | grep server | cut -f 2- -d ":" | tr -d " ")
-
Set the account service with the correct name by entering
ACCOUNTSERVICE=<service_account_name>
-
Retrieve the Kubernetes secret token based on the account service that you just specified by entering
TOKEN=$(kubectl describe secret $(kubectl get secrets | grep ^$\{ACCOUNTSERVICE} | cut -f1 -d ' ') | grep -E '^token' | cut -f2 -d':' | tr -d " ") -
Display the token to use by entering
echo $TOKEN
Installing the Electric Agent/EFS on the Worker Nodes
You must install the Electric Agent/EFS on each worker node in your Kubernetes cluster. To do so:
-
Upload the Electric Agent/Electric File System (EFS) installer to one of the worker nodes.
You must use the same installer version as the Cluster Manager that you will install below. For details about obtaining the Electric Agent/EFS installer, see Downloading the Accelerator Software.
-
Install the Electric Agent/EFS on the worker node.
For installation instructions, see Installing Electric Agent/EFS on Linux.
-
Repeat the previous steps on the other worker nodes.
Installing and Configuring the Cluster Manager
You must install the prerequisite packages and the Cluster Manager software on the server that you want to use as the Cluster Manager.
| This server can be the master or a server outside of your Kubernetes cluster. |
Installing the Required Packages for the Cluster Manager
On the server that you plan to use as the Cluster Manager, install the prerequisite library packages as listed in Linux Prerequisites.
Installing the Cluster Manager
-
Upload the Cluster Manager installer to the server to be used as the Cluster Manager.
You must use the same installer version as the Electric Agent/EFS that you installed on the worker nodes above. For details about obtaining the Cluster Manager installer, see Downloading the Accelerator Software.
-
Install the Cluster Manager with the default settings.
For installation instructions, see Installing the Cluster Manager on Linux.
Setting the IP Address of the Cluster Manager Server for Cloud Burst Agent Connections
You must set the IP address of the Cluster Manager server that the cloud burst agents will use to connect to the Cluster Manager.
Setting the IP Address If the Cluster Manager Is on the Master
If you installed your Cluster Manager on the master , complete the following steps.
-
On the master, sign in to the Cluster Manager web UI.
For instructions, see CloudBees Accelerator Cluster Manager Guide - Signing In To the Cluster Manager Web UI.
The default administrator account user name is admin, and the password ischangeme. You should change the default password as soon as possible. -
Click Administration > Server Settings.
-
In the IP address field, enter the IP address of the Kubernetes Container Networking Interface (CNI).
The default name of this interface is
cni0. -
Click OK.
Setting the IP Address If the Cluster Manager Is Outside of the Kubernetes Cluster
If you installed your Cluster Manager on a server that is not in the Kubernetes cluster , complete the following steps.
-
On the server where you installed the Cluster Manager above, sign in to the Cluster Manager web UI.
For instructions, see CloudBees Accelerator Cluster Manager Guide - Signing In To the Cluster Manager Web UI.
The default administrator account user name is admin, and the password ischangeme. You should change the default password as soon as possible. -
Click Administration > Server Settings .
-
In the IP address field, enter the IP address of the server where you installed the Cluster Manager.
This address must be in the same network as the other Kubernetes nodes. The IP address field specifies the address of the network interface where the Cluster Manager communicates with eMake.
-
Click OK.
Creating an Agent Resource in the Cluster Manager
You must create a resource in the Cluster Manager. A resource is a host cluster container for hosts that will participate in a build. Resources let you define groups of agents that you can specify when running builds to narrow down which agents the cluster can use in those builds.
These instructions use the Accelerator cmtool commands. As an alternative, you could do so with the Cluster Manager web UI (for details, see Creating Resources.
-
On the server where you installed the Cluster Manager as instructed above, create a Docker image of the Accelerator Agent component that you want to install.
For instructions for creating a Docker image of the agent component, see the KBEA-00170 Configuring ElectricAccelerator 11.0 and Newer Versions to Run in Docker Containers KB article.
-
Upload the Docker image to Docker Hub.
-
Sign into
cmtoolby enteringcd /tmp /opt/ecloud/i686_Linux/bin/cmtool login admin changeme
adminis the default username, andchangemeis the default password. You should change the default password as soon as possible. -
Create credentials by entering
/opt/ecloud/i686_Linux/bin/cmtool createCloudCredential "<kubernetes_credential_name>" --cloudProviderType "kubernetes" \
--cloudCredentialData "{ \"user\" : \"kube\",  \"token\" : \"$\{TOKEN}\", \"endpoint\" : \"https://<ip_of_master_node>:<port>\" }"
This command creates credentials using
<kubernetes_credential_name>and the token that you generated above. You can get the<ip_of_master_node>:<port>from the output of theAPISERVER=$(kubectl config view --minify | grep server | cut -f 2- -d ":" | tr -d " ")command that you entered above. -
Set the
IMAGENAMEenvironment variable with the path to your Docker image by enteringIMAGENAME="=<docker_image_name_with_agent_on_Docker_Hub>"
-
Create a resource using your Kubernetes resource name and Kubernetes credential name by entering
/opt/ecloud/i686_Linux/bin/cmtool createResource "<your_k8s_resource_name>" --cloudProviderType "kubernetes" --cloudCredential “<kubernetes_credential_name>" \
--cloudConfigData "{ \"namespace\": \"default\", \"imageName\" : \"$IMAGENAME\", \"imagePullPolicy\" : \"Always\" }" --cloudIdleTimeout 2
Running a Test Build
You should run a build to test that the setup is working correctly. For simplicity, the following test takes place on the same server where you installed the Cluster Manager as instructed above.
-
On the server where you installed the Cluster Manager, change directories to you project directory (the one containing your makefile and source files) by entering
cd <project_dir>
-
Start a build by entering
/opt/ecloud/i686_Linux/bin/emake --emake-cm=localhost --emake-resource="<your_kubernetes_resource_name>" --emake-maxagents=<max_desired_number_of_agents> all
By default, eMake virtualizes just the current working directory across the Accelerator build cluster. If your source code, output files, and build tools are in different directories, specify those directories by adding the
--emake-root=<path1>:<path2> … :<pathN>option. For example, enter/opt/ecloud/i686_Linux/bin/emake --emake-cm=localhost --emake-root=/home/bill/proj_q3:/src/foo:/src/baz --emake-resource="<your_kubernetes_resource_name>" --emake-maxagents=<max_desired_number_of_agents> all
A message
Starting build: <build_number>appears. For example,Starting build: 1. When the build is finished, a message such as the following appears:Finished build: 1 Duration: 0:41 (m:s) Cluster availability: 100%Cluster availability: 100%indicates that the cluster was fully available for the build duration.
For more information about agent cloud bursting, see the Configuring CloudBees Accelerator for Agent Cloud Bursting.
Configuring Microsoft Azure for Agent Cloud Bursting
Accelerator includes an integration to support Microsoft Azure. This integration lets you configure the Cluster Manager to use Azure to deploy agents on demand. This functionality is supported only on Linux platforms.
When you set up the Cluster Manager for agent cloud bursting, you install the Cluster Manager on a virtual machine, choose a machine to run eMake, and configure cloud bursting resource(s) on the Cluster Manager server to use your Azure virtual machine image to launch instances. But before setting up the Cluster Manager, you must configure Azure by creating a virtual machine, installing agents on the virtual machine, and creating a virtual machine image (used by the Cluster Manager to start the Azure virtual machines on-demand). This section describes these procedures for configuring Azure.
Creating an Azure Virtual Machine Image for the Agents
The Cluster Manager requires an Azure virtual machine image whenever it needs to deploy a virtual machine containing Accelerator agents. To create a virtual machine image, you create a virtual machine, then install agents on the virtual machine, and then create an image from the virtual machine.
This procedure shows how to use the Azure web portal to create a virtual machine image. You can use other methods such as the CLI or Powershell to create it.
To create a virtual machine on Azure for agent cloud bursting:
-
Browse to the Azure web portal at https://azure.microsoft.com/en-us/.
-
Click Portal.
-
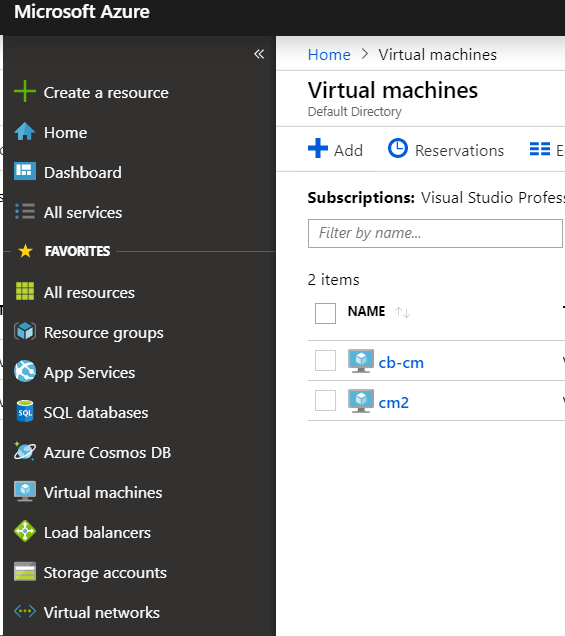
Sign in to your Azure account.
-
Choose Home > Virtual machines > +Add to start creating an Azure virtual machine.
-
Click the Basics tab and provide the following information.
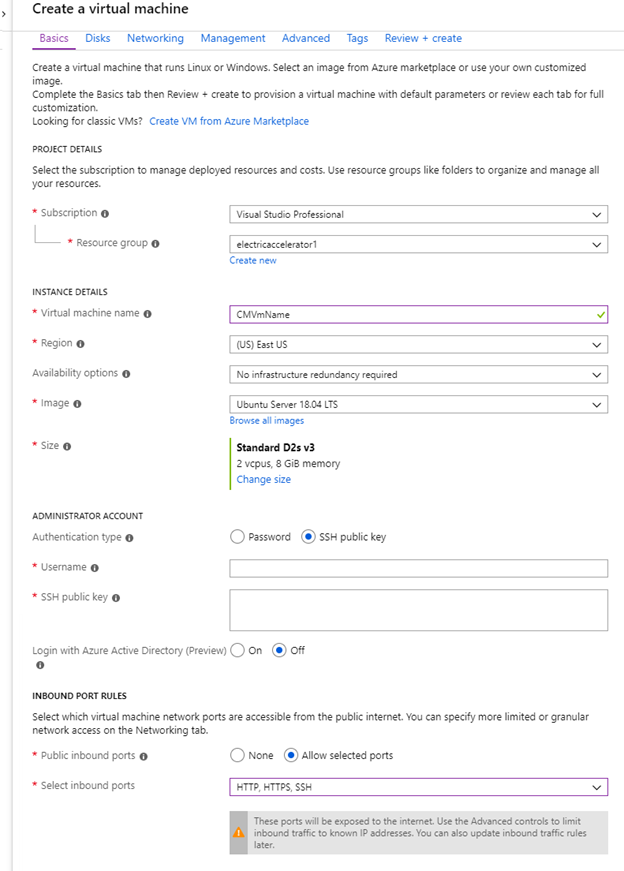
Field or Menu Description Subscription
Your Azure subscription type (also called a subscription “offer”). For details about creating a subscription, see the Microsoft Create your Azure free account today web page.
Resource Group
Logical container into which Azure resources are deployed and managed. You must create a resource group before creating a virtual machine. Choose an existing resource group or create a new one. All resources for agent cloud bursting must be in the same resource group. For more information about resource groups, see the Microsoft Azure Resource Manager overview web page.
Virtual machine name
User-defined name of the virtual machine. A virtual machine has a name assigned to it and it has a computer name configured as part of the operating system. You can use Azure to create the operating system disk or upload and use your own image that contains a previously-configured operating system and use it to create a virtual machine.
Region
Geographical region where the virtual hard disks are stored. Usually, the region is usually called a “location” when you create a virtual machine.
Availability options
(Optional) Logical grouping of virtual machines within a datacenter that allows Azure to understand how your application is built to provide for redundancy and availability. Selecting No infrastructure redundancy required is typically satisfactory.
Image
Operating system image to use. For example, Ubuntu Server 18.04 LTS. For a list of supported operating systems, see Supported Linux Platforms and Prerequisites.
Size
Amount of compute resources such as CPU, GPU, and memory that are made available to the virtual machine. Specify a size that has a minimum of 2 cores and 2 GB of memory. For example, Standard D2s v3. (If your build workload increases, you can change these values later.) For more information, see the Microsoft Sizes for Linux virtual machines in Azure web page.
Authentication type
Method for requesting legitimate credentials. Select SSH public key.
Username
User name of your choice. For example, enter
azureuser.SSH public key
Public key from your SSH key pair for public key authentication. You must generate an SSH key pair and enter its public key into this field.
Login with Azure Active Directory (Preview)
Public inbound ports
Ports to enable remote access to the virtual machine from the internet. Choose Allow selected ports.
Select inbound ports
Choose HTTP, HTTPS, SSH.
-
Click the Disks tab and choose the OS disk type that you need.
For more information, see the Microsoft What disk types are available in Azure? web page.
-
Click the Networking tab and choose a Virtual network that exists in your resource group (or create a new one) and a Subnet :
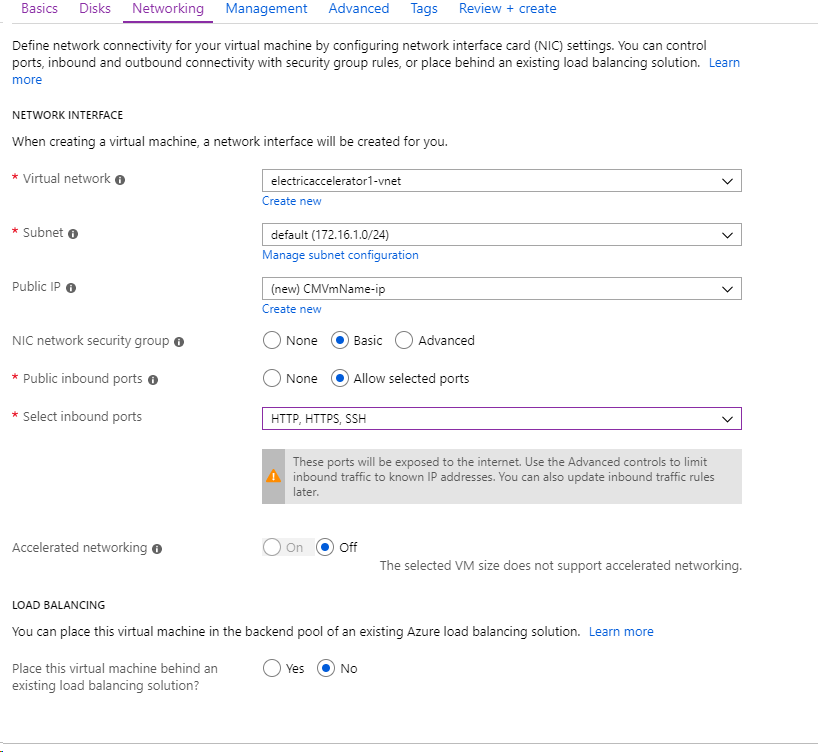
-
Click the Review + Create tab to review your selections, and click Create.
After the virtual machine is created, you can access it by the public address that is assigned to the virtual machine using the SSH connection and your private SSH key.
For more information about the fields described above as well as creating Linux virtual machines, see the Microsoft Quickstart: Create a Linux virtual machine in the Azure portal web page.
Creating a Virtual Machine Image for the Agents
The Cluster Manager requires a virtual machine image whenever it needs to deploy a virtual machine containing Accelerator agents. To create a virtual machine image, you create a virtual machine, then install agents on the virtual machine, and then capture an image from the virtual machine.
To create the virtual machine image for the agents:
-
After the instance that you created above launches, connect to it with SSH.
-
Upload the CloudBees Accelerator installer to the instance.
For details about obtaining the installer, see Downloading the Accelerator Software.
-
Install the required Linux library packages.
For details, see Linux Prerequisites.
-
Install the Accelerator agents.
When prompted for the installation type, choose
Custom(notExpress). For installation instructions, see Using the Interactive Command Line to Install Electric Agent/EFS. -
When the
Agents are provisioned on-demand from a cloud - Amazon EC2 etc. [y/N]installer prompt appears, entery. -
After the agents are installed, use the virtual machine as a template to capture an image.
For details about creating a virtual machine image, see the Microsoft How to create an image of a virtual machine or VHD web page.
| By default, the installer configures a fixed number of agents, but you can configure the agent service to automatically start the number of agents based on the number of CPUs on the host. A main benefit of this functionality is to facilitate using one image that you use for agent cloud bursting as a template across different instance types, regardless of the CPU count on each type, to get the ideal number of agents. For details, see Enabling Automatic Scaling of the Number of Agents. |
Creating a Separate Virtual Machine and Installing the Cluster Manager
This virtual machine must be separate from the one running the agents but must be in the same resource group. The Cluster Manager name must be unique in the resource group.
This host should have at least 8 GB of RAM (or more for larger clusters or if you will run eMake on the same machine). For details, see the Microsoft Sizes for Linux virtual machines in Azure web page.
-
Create a separate virtual machine to run the Cluster Manager in Azure as follows:
-
Create the virtual machine with an external IP address so you can access the Cluster Manager web UI.
-
Expose ports 80, 443, and 22 to the external IP address.
-
The Azure portal will ask you the name of the network interface you would like to use and which range of IP addresses you would like to use. Note: This is the name for the network interface of the virtual machine with the Cluster Manager.
-
Use SSH public key as the authentication type.
-
-
Sign in to the virtual machine using SSH.
-
Install the prerequisite library packages.
For details, see Linux Prerequisites.
-
Upload the CloudBees Accelerator installer to the instance.
For details about obtaining the installer, see Downloading the Accelerator Software.
-
Install the Cluster Manager with the default settings.
For details, see Installing the Cluster Manager on Windows.
Configuring Amazon EC2 for Agent Cloud Bursting
Accelerator includes an integration to support Amazon Elastic Compute Cloud (EC2). This integration lets you configure the Cluster Manager to use Amazon EC2 to deploy agents on demand. This functionality is supported only on Linux platforms.
In addition to regular Amazon EC2 on-demand instances, this integration supports Amazon EC2 Spot Instances. For details about enabling Spot Instances, see Resources - Create or Edit a Resource.
When you set up the Cluster Manager for agent cloud bursting, you install the Cluster Manager on an Amazon EC2 instance, choose a machine to run eMake, and configure cloud bursting resource(s) on the Cluster Manager server to use your Amazon EC2 AMI to launch instances. But before setting up the Cluster Manager, you must configure Amazon EC2 to establish security credentials, set up Amazon EC2 security groups, and create an AMI image (used by the Cluster Manager to start the Amazon EC2 instances on-demand). This section describes these procedures for configuring Amazon EC2.
Creating Amazon Web Services (AWS) Security Credentials
You must establish AWS security credentials for the Cluster Manager to use when it deploys cloud burst agents on Amazon EC2. You can create either IAM access keys or a server IAM role to use as the credentials.
Setting Up IAM Access Keys
To use SSH to sign in to Amazon EC2 to install the Cluster Manager and agents on Amazon EC2 instances, you must first sign in to https://aws.amazon.com/ and create an Amazon EC2 key pair. This opens up the SSH port for login.
For details about creating an Amazon EC2 key pair, see the Amazon EC2 Key Pairs web page. Save the private key file that you create using those instructions ( <file_name>.pem ) to a safe place.
Setting Up a Server IAM Role
Using an IAM role instead of IAM access keys lets you appropriately grant access permissions to any application that performs AWS API requests running on your EC2 instances. With an IAM role, you can avoid sharing long-term credentials and protect your instances against unauthorized access.
To use a server IAM role credential, the Cluster Manager must be launched with an IAM role. For more information on AWS Identity and Access Management (IAM), see the Amazon AWS Identity and Access Management (IAM) web page.
The IAM role associated with the Cluster Manager must have “allow” permission to perform the following Amazon EC2 API actions set for the policy :
ec2:CreateTags
ec2:DescribeInstances
ec2:DescribeImages
ec2:StartInstances
ec2:StopInstances
ec2:TerminateInstances
ec2:RebootInstances
ec2:RunInstances
For more information about Amazon EC2 API actions in policies, see the following Amazon web pages:
Setting Up Amazon EC2 Security Groups
AWS security groups are associated with EC2 instances and provide security at the protocol and port access level. Each security group—working in much the same way as a firewall—contains a set of rules that filter traffic coming into and out of an EC2 instance.
Connecting to instances requires that you create Amazon EC2 security groups. For Accelerator, you must create at least two security groups—one for the Cluster Manager and another for the agents. A third security group is optional for a separate eMake machine as explained below.
For details about creating and working with security groups, see the Amazon Creating Security Groups web page. Following are instructions for creating the specific security groups and settings that Accelerator requires.
Setting Up an Amazon EC2 Security Group for the Cluster Manager
You must create a security group for the instance on which you will install the Cluster Manager. Use the following settings to create this security group:
| Security Group Name: cm | |||
|---|---|---|---|
Inbound |
|||
Type |
Protocol |
Port Range |
Source |
HTTP |
TCP |
80 |
0.0.0.0/0 |
All traffic |
All |
All |
<agent_group_ID> . For example, sg-77c40a13 |
SSH |
TCP |
22 |
0.0.0.0/0 |
HTTPS |
TCP |
443 |
0.0.0.0/0 (lets users connect to the Cluster Manager web UI) |
Outbound |
|||
Type |
Protocol |
Port Range |
Source |
All traffic |
All |
All |
0.0.0.0/0 |
Setting Up an Amazon EC2 Security Group for the Agents
This security group is for the instance on which you will install the agents. Use the following settings to create this security group:
| Security Group Name: agent | |||
|---|---|---|---|
Inbound |
|||
Type |
Protocol |
Port Range |
Source |
All traffic |
All |
All |
<cluster_manager_group_ID> . For example, sg-f8ca049c |
SSH |
TCP |
22 |
0.0.0.0/0 |
All TCP |
TCP |
0-65535 |
<agent_group_ID> . For example, sg-77c40a13 |
Outbound |
|||
Type |
Protocol |
Port Range |
Source |
All traffic |
All |
All |
0.0.0.0/0 |
Creating an Amazon Machine Image for the Agents
The Cluster Manager requires an Amazon machine image (AMI) whenever it needs to deploy an instance containing Accelerator agents. To create an AMI, you create an instance, then install agents on the instance, and then create an AMI from the instance.
To create the AMI for the agents:
-
Launch an Amazon EC2 instance for the agents in the
agentsecurity group. -
After the instance launches, sign in to it by using the following command:
ssh -i <path_to_.pem_file> <DNS_name_of_instance>
For example:
ssh -i /net/f2home/user/.ssh/userkey.pem ubuntu@ec2-54-191-3-81.us-west-2.compute.amazonaws.com
userkey.pemis the private key file that you downloaded when you created your Amazon EC2 key pair. -
Upload the CloudBees Accelerator installer to the instance.
For details about obtaining the installer, see Downloading the Accelerator Software.
-
Install the prerequisite library packages.
For details, see Linux Prerequisites.
-
Install the Accelerator agents.
When prompted for the installation type, choose
Custom(notExpress). For installation instructions, see Using the Interactive Command Line to Install Electric Agent/EFS. -
When the
Agents are provisioned on-demand from a cloud - Amazon EC2 etc. [y/N]installer prompt appears, entery. -
Use the instance as a template to create an AMI.
For details about creating an AMI, see the Amazon Create an AMI from an Amazon EC2 Instance web page.
| By default, the installer configures a fixed number of agents, but you can configure the agent service to automatically start the number of agents based on the number of CPUs on the host. A main benefit of this functionality is to facilitate using one image that you use for agent cloud bursting as a template across different instance types, regardless of the CPU count on each type, to get the ideal number of agents. For details, see Enabling Automatic Scaling of the Number of Agents. |
Creating a Separate Instance and Installing the Cluster Manager
This host should have at least 4 vCPUs and 8 GB of RAM (or more for larger clusters or if you will run eMake on the same machine), such as the t2.medium instance type. For details, see the Amazon EC2 Instance Types web page.
-
Create a separate instance in Amazon EC2 to run the Cluster Manager and launch the instance.
CloudBees recommends at least 8 GB of memory on the Cluster Manager machine (or more for larger builds or if you run eMake on the same machine). This instance must be separate from the instance(s) running agents and must be in the security group that you created above.
-
Sign in to the instance using SSH.
-
Upload the CloudBees Accelerator installer.
-
Install the required Linux library packages.
For details, see Linux Prerequisites.
-
Install the Cluster Manager with the default settings.
For details, see Using the Interactive Command Line to Install the Cluster Manager.
-
Delete the CloudBees Accelerator installer.
Configuring Google Cloud Platform for Agent Cloud Bursting
Accelerator includes an integration to support Google Cloud Platform (GCP) Compute Engine. This integration lets you configure the Cluster Manager to use GCP to deploy agents on demand. This functionality is supported only on Linux platforms.
When you set up the Cluster Manager for agent cloud bursting, you install the Cluster Manager on a GCP Compute Engine instance under your project, choose a machine to run eMake, and configure cloud bursting resource(s) on the Cluster Manager server with your GCP service account file for credentials required to launch instances. Before setting up the Cluster Manager, you must generate the GCP service account file and create an image to be used for the agents. This section describes these procedures for configuring GCP cloud bursting.
Creating a GCP Service Account File for Security Credentials
You must establish GCP security credentials for the Cluster Manager to use when it deploys cloud burst agents on GCP. These credentials will be contained in a GCP service account file.
-
From the GCP console for your project, choose IAM & admin > Service accounts.
If you do not already have a GCP service account, click +CREATE SERVICE ACCOUNT at the top of the page.
-
In the Create service account page, enter values into the Service account name, Service account ID, and Service account description fields, and then choose CREATE.
The Service account permissions (optional) dialog appears.
-
From the Select a role pulldown menu, select a role choosing Compute Engine > Compute Admin or another role that has permission to start instances with metadata and also query and terminate instances.
-
Click CONTINUE.
The Grant users access to this service account (optional) dialog appears.
-
Click +CREATE KEY, then select JSON, and then click CREATE to create the JSON file.
The Private key saved to your computer popup appears. You will use this
<filename>.jsonfile as your credentials in the Cluster Manager when you create resources later using the Cluster Manager web UI.
Creating a GCP Machine Image for the Agents
The Cluster Manager requires a GCP machine image whenever it needs to deploy an instance containing Accelerator agents. To create an image, you create an instance, then install agents on the instance, and then create the image from the instance.
To create the GCP machine image for the agents:
-
From the GCP console for your project, select Compute Engine > VM Instances.
-
Choose +CREATE INSTANCE, and enter the following information:
-
Fill in the Name, Region, Machine Family, Series, and Machine Type fields.
-
Under the Boot Disk, select the OS type and disk type and size for your machine.
-
Under Identity and API access, choose the service account that you used to create the credential.
-
For Access scopes, Allow default access.
-
For Networking, default is fine.
-
-
Click Create.
If you want to limit the networking further, see the KBEA-00121 - Controlling Accelerator communication through a firewall KB article for instructions about making sure the required ports are open. -
After the instance launches, connect to it with SSH by clicking the instance name in the VM instances list and selecting ssh.
-
Upload the CloudBees Accelerator installer to the instance.
For details about obtaining the installer, see Downloading the Accelerator Software.
-
Install any required Linux library packages.
For details, see Linux Prerequisites.
-
Install the Accelerator agents.
-
When prompted for the installation type, choose
Custom(notExpress). For details about obtaining the installer, see Downloading the Accelerator Software. For installation instructions, see Using the Interactive Command Line to Install Electric Agent/EFS. -
When the
Agents are provisioned on-demand from a cloud - Amazon EC2, etc. [y/N]installer prompt appears, entery.
-
-
After you finish installing the Accelerator agents, stop the instance that you just created.
-
If the instance is running Windows, run
GCESysprepwhile logged into the instance to stop it, as described in the Google Compute Engine documentation. -
If the instance is running Linux, stop the instance from the VM instances list under Compute Engine for your project.
Stopping the instance prevents certain unexpected warnings from appearing when you create the image in the next step.
-
-
From the Images list under Compute Engine for your project, select +CREATE IMAGE and enter the following information:
-
Specify the Name for your image. This will be used as the image name in the Accelerator resource.
-
Choose Disk as the Source and then the instance name for the Source disk when creating the image.
-
Creating a Separate Instance and Installing the Cluster Manager
This host should have at least 4 vCPUs and 8 GB RAM (or more for larger clusters or if you will run eMake on the same machine), such as n1-standard-4. For details, see the Google Machine types web page.
-
Create a separate instance in GCP Compute Image for your project to run the instance.
Choose Allow HTTPS when creating the instance.
-
Sign into the instance using SSH.
-
Install the prerequisite library packages.
For details, see Linux Prerequisites.
-
Upload the CloudBees Accelerator installer to the instance.
For details about obtaining the installer, see Downloading the Accelerator Software.
-
Install the Cluster Manager with the default settings.
For details, see Using the Interactive Command Line to Install the Cluster Manager.