The Insight distribution includes the following main files:
-
The CloudBees Accelerator Insight program: einsight.exe (Windows) or einsight (Linux)
-
The annolib library: annolib.dll (Windows) or annolib.so (Linux)
Because Insight analyzes build annotation files, it is simplest to install it on the system where you run Electric Make or on a Cluster Manager host where you can upload build annotation files.
Installer Files
CloudBees Accelerator Insight is available in 32- and 64-bit versions on Windows and on Linux. CloudBees recommends the 64-bit version for loading large annotation files or for 64-bit Linux systems that do not have 32-bit libraries (such as ia32-lib) installed.
Three installer files are available:
-
32- and 64-bit Windows
-
32-bit Linux
-
64-bit Linux
Each installer file installs both the 32-bit executables and the 64-bit executables. They are installed in the following locations.
-
32-bit executables are installed in <InstallDir> / <arch> /bin. <InstallDir> is C:\ECloud by default on Windows and /opt/ecloud by default on Linux. <arch> is i686_win32 on Windows and i686_Linux on Linux.
-
64-bit executables are installed in <InstallDir> / <arch> /64/bin.
-
On Windows, for example, if you install in the C:\ECloud directory, the 64-bit executables are installed in C:\ECloud\i686_win32\64\bin.
-
On Linux, for example, if you install in the /opt/ecloud directory, the 64-bit executables are installed in /opt/ecloud/i686_Linux/64/bin.
-
The installers set up the menu option for invoking CloudBees Accelerator Insight to point to the proper executable based on your system’s bitness. Also, on Windows, a shortcut pointing to the proper executable is created on your desktop.
Installation Log File
The installation log file is named einsight_install.log. By default, the file is in the following location.
-
Windows: The folder defined by the
TEMPenvironment variable (typically C:\Users\ <username> \AppData\Local\Temp) -
Linux: The /usr/tmp directory
Library Requirements for Linux Systems
On Linux systems, CloudBees Accelerator Insight requires the following libraries:
libX11.so.6 libXss.so.1 libXext.so.6 libXft.so.2 libfreetype.so.6 libfontconfig.so.1 libXrender.so.1 libxcb.so.1 libexpat.so.1 libXau.so.6
Installing CloudBees Accelerator Insight Using the GUI
To install Insight on Windows or Linux platforms using the GUI:
-
Run the installer file to begin installation.
You must run the installer as administrator (on Windows) or root (on Linux). On Windows platforms, a warning dialog box appears if you did not do so. On Linux platforms, the installer prompts you for the root password if you did not start it as root (and then the installer restarts with the same options).
Use one of the following commands: Windows:
ElectricInsight-<version>-Windows-Install.exeFor example, on Windows systems running Windows 2008 or later, right-click the installer and click Run as administrator. Linux (32-bit):ElectricInsight-<version>-Linux-x86-Install** Linux (64-bit):ElectricInsight-<version>-Linux-x86_64-Install -
Click Next on the Welcome screen.
-
Accept the default installation location or click Browse to choose a different location, and then click Next.
-
Click Browse to locate your license file, and click Next to continue.
The installer copies the license file to both <InstallDir> / <arch> /bin/ and <InstallDir> / <arch> /64/bin.
If you want to provide the license file after installation, you must name it license.xml and copy it to the appropriate bin directory for your bitness: <InstallDir> / <arch> /bin or < InstallDir >/ <arch> /64/bin.
A license file is required to run reports. All other functionality (view-only mode) is available without a license.
-
Review your settings and click Next to continue or Back to make changes.
-
Click Finish to close the installer.
Installing CloudBees Accelerator Insight Using the Console with Installation Options
You can use multiple options to run an installation with customized settings and minimal interaction. Use this syntax:
<installer filename> [<options>]
The following options are available.
| Option | Description |
|---|---|
/help |
Displays help information. |
/licensefile |
Sets the license file that the installer imports. Type the full path to the license file. For example: or
|
/mode <mode> |
Sets the installation mode. The following modes are available.
|
/prefix |
Sets the installation directory. Type the full path. For example: or
|
/temp |
Sets the temporary directory used by the installer. |
/version |
Displays installer version information. |
For example, to run in silent mode, specify the license file location, and specify a nondefault installation directory, enter
ElectricInsight-5.0.0.5101-Windows-Install.exe /mode silent /licensefile C:\mylicenses /prefix C:\ecloud2
Installing CloudBees Accelerator Insight Using the Console with No Installation Options (Linux Only)
To install Insight on Linux using the console with no installation options:
-
Run the installer file.
-
32-bit:
ElectricInsight-<version>-Linux-x86-Install -
64-bit:
ElectricInsight-<version>-Linux-x86_64-Install
-
-
Press Enter to start the installation.
-
Press Enter to accept the default installation location (
/opt/ecloud/) or enter a different location. -
Type the location of your license file and press Enter.
Your installation is complete.
Checking for Software Updates
CloudBees Accelerator Insight is updated periodically to improve its functionality or to fix bugs. To see if an update is available, click Help > Check for updates….
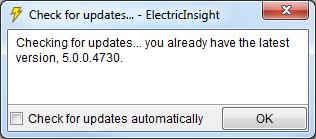
If you want to make these checks automatic, check the Check for updates automatically checkbox and click OK.