This chapter provide information about how CloudBees Accelerator integrates with Eclipse.
To configure Eclipse to run eMake, follow this procedure:
-
Open your C++ project.
-
Go to the project’s Properties > Builders and click New.
-
Select Program and click OK.
-
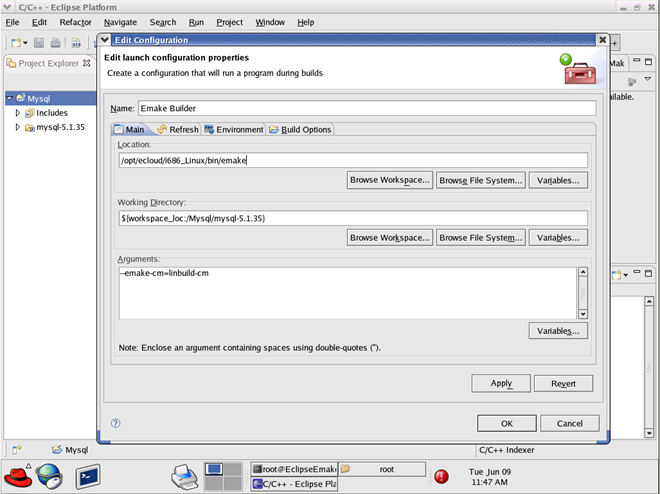
Fill in the following information for the new builder under the Main tab:
-
Name
-
Location (the full path to
emake, which is OS dependent) -
Working Directory
-
Arguments (arguments are specific to your configuration)
-
The following screenshot illustrates the Edit Configuration dialog.
-
Click the Build Options tab. Enable Run the builder for the following only :
-
After a “Clean”
-
During manual builds
-
During auto builds
-
-
Click OK. Your new builder is displayed in the Builders pane.
-
Create another builder for “cleans” only. On its Main tab, ensure
cleanis included for Arguments . On its Build Options tab, enable Run the builder for the following only :-
During a “Clean”
-
-
Click OK. Your second builder is displayed in the Builders pane.
-
Deselect CDT Builder in the Builders pane and then click OK.
Now you can build your project. Click Project > Build all.
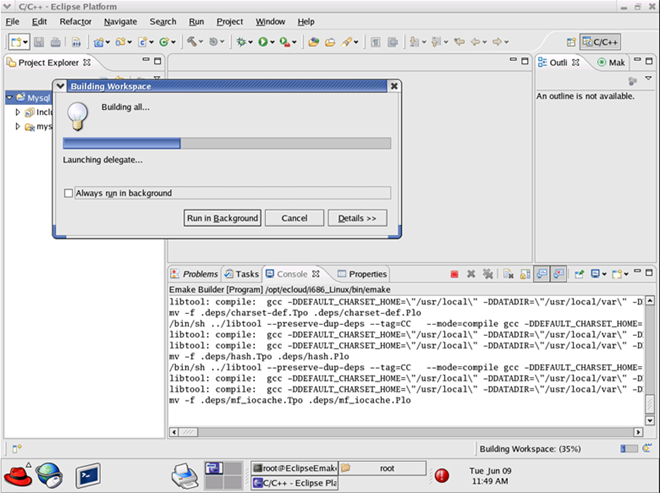
The following screenshot illustrates a build in progress.
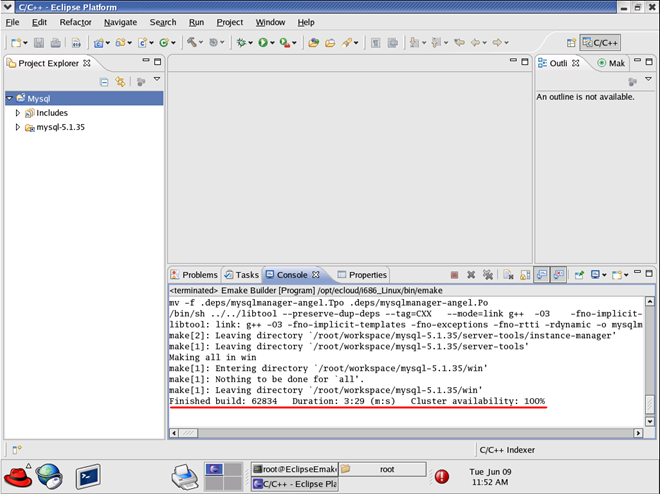
The following screenshot illustrates a successfully completed build.