You can create schedules for pipeline, release, application process, and microservice process runs by creating a one time or recurring schedule—for example, daily or weekly.
View Current Schedules
To view current schedules for a specific object, navigate to it, click the green Run button, and select Schedules : either the schedule list displays or the message There are no scheduled <object type>. Add one +. For example, the release below has two schedules. The columns on the schedule list varies based on the type of object. The image below shows the schedule list for a release object, EC Reporting Plugins.
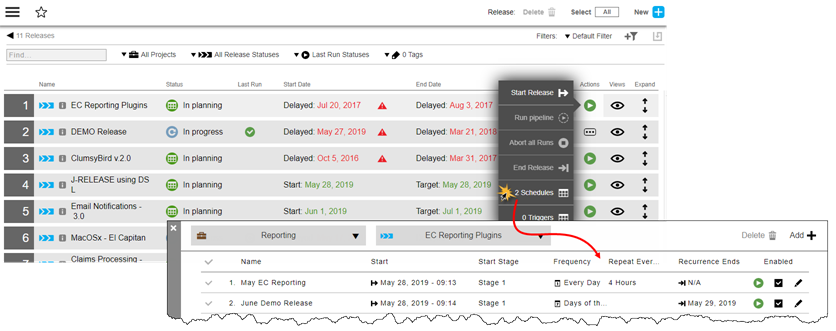
From here, you can manage individual schedules: view details, edit, enable and disable. Additionally, you can initiate an unscheduled run.
Create or Modify a Schedule
-
From the object list, click the green Run button, and select Schedules :
-
If there are no schedules, you are prompted with There are no scheduled <object type>. Add one +.
-
If some schedules exist, the schedule list displays. From there, click Add+ in the upper right corner of the list. The Run Schedule dialog opens.
-
-
Proceed as follows:
-
Create a schedule: On the Run Schedule dialog, select Create new… for a new schedule, or select from Previous Runs… (and then select a previous schedule) to copy a schedule.
-
Modify a schedule: Click the edit object icon
 for the desired schedule.
The New Run Schedule dialog displays.
-
-
Create or modify the schedule.
-
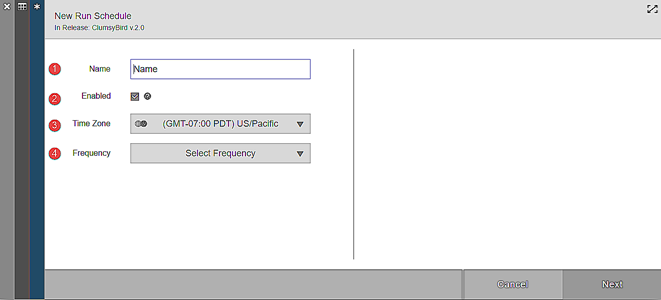
Dialog for new schedules
-
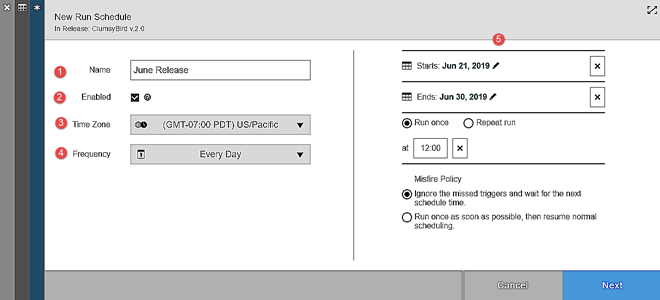
Dialog for existing schedules:
1
Add the schedule name. This name must be unique among schedules for that object.
2
Click to enable this schedule.
3
Select your timezone.
4
Select the frequency type.
-
Once
-
Every Day
-
Days of the Week
-
Days of the Month
5
-
Configure recurrence information. This dialog varies with the frequency type selected.
-
Select misfire policy.
-
-
-
Click Next when you are finished configuring the schedule. A object-specific dialog displays, based on the type of object for which you created the schedule. Some object types require additional configuration before proceeding.
-
Pipelines and releases: configure stages and parameters
-
Applications: specify process, environment, snapshot, artifacts, contains, and parameters
-
Microservices: specify process, environment, and configure snapshots and parameters
-
-
Complete the configuration, as required, and click OK.