At the application (parent) level, you author application processes. When deploying an application, the application process that you select is executed to orchestrate operations against the application. An application process step can be defined as a call to a CloudBees CD/RO plugin, procedure, or component process as well as a direct command, script, a manual task, or a utility function (a higher-order operation than a plugin).
| The Property Picker is available from application processes to make it easy to create custom deployments. It includes properties set on the project. The Property Picker contains a pull-down menu to let you select project or related object properties. The Property Picker lets you select built-in or custom properties or parameters in process step conditions that you need to reference without remembering and writing out property names and paths. |
In the Application Editor for the Upgrade application:
-
Click + in the Application Processes section of the left hand hierarchy to start authoring an application component or microservice process.
-
In the New Application Process dialog box, enter the following details:
-
Enter
deployin the Name field. -
Enter an optional description in the Description field.
-
Select a workspace. Check Exclusive access to require exclusive access to the environment. At runtime, if the environment is not available, the process waits until it becomes so and then locks it for use from other processes. See Environment Locking for details. Check Time limit as required. This allows you to configure a maximum amount of time that the step can execute; abort if it exceeds this time. Add credentials as required. This allows the process to run in the context of the selected credential. See Attaching Credentials to Application and Component Processes for more information.
-
Click OK.
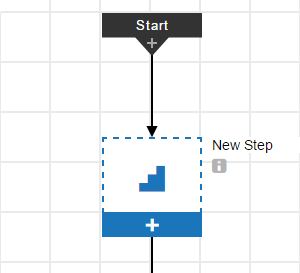
The Application Process Visual Editor opens. The process model shows a process with Start and Finish steps with a New Step in between them.
Clicking i under the step name displays the details about the process step. Example:
-
Click + in the first step.
-
Define the first step in the Application Process Step dialog box :
-
Enter
applyDBChangein the Name field. -
Use the Stop on Error setting in the On Error field. Go to Application Deployment Options for more information.
-
Use the all setting in the Run if field. Go here for more information.
-
Select the workspace and time limit.
-
Click Next. The Step Type dialog box appears.
-
-
Define the second step in the Application Process Step dialog box based on a service by clicking Component > update.sql > updateDB. The step is defined by the component Deploy process for the update.sql component:
-
Click OK.
-
Click + on the bottom of the first step to add a new step below it.
-
Click + in the second step.
-
Define the second step in the Application Process Step dialog box as follows:
-
Define the second step in the Application Process Step dialog box based on a service by selecting Service > store-backend. The step is defined by the component Deploy process for the motorbikeMS service.
-
Click OK.
This is the application process called deploy:
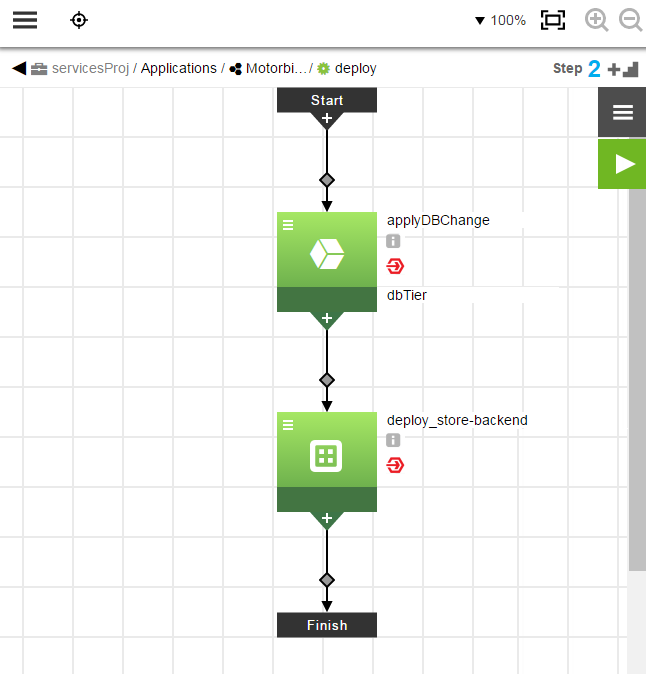
You can get details about each step by clicking under the step name.
Clicking  displays a menu where you can select the following options:
-
Details –View step details
-
Properties –View step properties.
-
Access Control –View access control settings.
-
Add Connector –Add another connector to the step.
-
Track Changes –View the Change History.