A target group is a set of users having the same properties or attributes, such as email domain, language, geolocation, device, or software version.
You can create an unlimited number of target groups in CloudBees Feature Management. Each target group can be nested for complex logic and can have any number of attributes, allowing you to finely tune a given audience for a feature flag.
Once you’ve created a target group, select it in the flag configuration settings of multiple flags to give them all the same targeting. Any updates to the target group definition instantly apply to all flags using it in their flag configurations.
You can set up a target group for internal testing only, for example, and use it across multiple flags to test new features. Once internal testing is complete, you can modify the target group to roll out the new features to external users.
| Target groups can use custom properties to define user segments. Refer to Custom properties for more information. |
CloudBees Feature Management includes built-in targeting using the format of rox.<attribute name>, as described in Table 1.
| Attribute Name | Notes |
|---|---|
|
Two letter language code, e.g., "en," "es," or "fr" |
|
Platform name, for example, "Python" or "JavaScript" |
|
Screen height in pixels |
|
Screen width in pixels |
| If you are using a client-side SDK, and the value of a custom property changes while the app is running, such as after a user signs in, you may need to use Rox.unfreeze(). Refer to Flag update flow for more information. |
Creating a target group
You can create an unlimited number of target groups. Target groups can be configured with one or more nested statements. Nested statements based on other target groups cannot be created with circular dependencies on other target groups.
-
From the CloudBees Feature Management Home page, in the left pane, select Target groups.
-
Select Create target group.
-
Enter a Name and an optional Description.
-
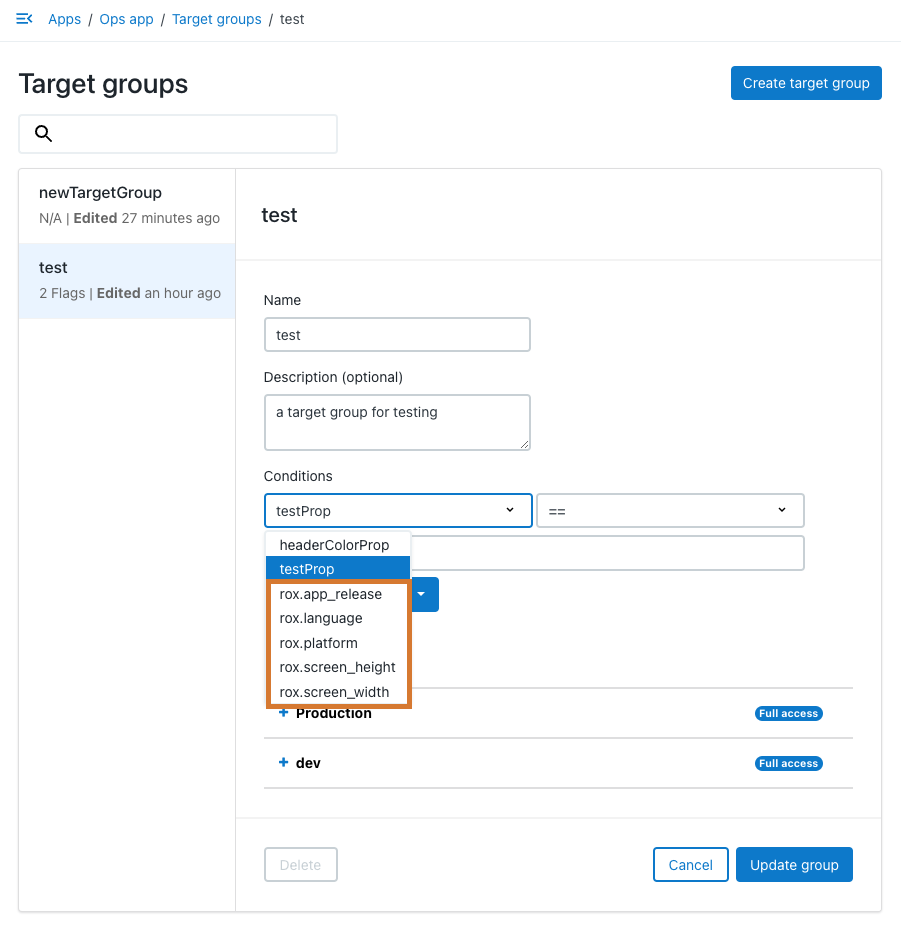
Select an attribute from the property options, which include both built-in attributes and any Custom properties you have created.
 Figure 1. Example with built-in properties highlighted
 -
Select an operator from the options. Options differ depending on the property type.
-
Enter a value, depending on the operator selected.
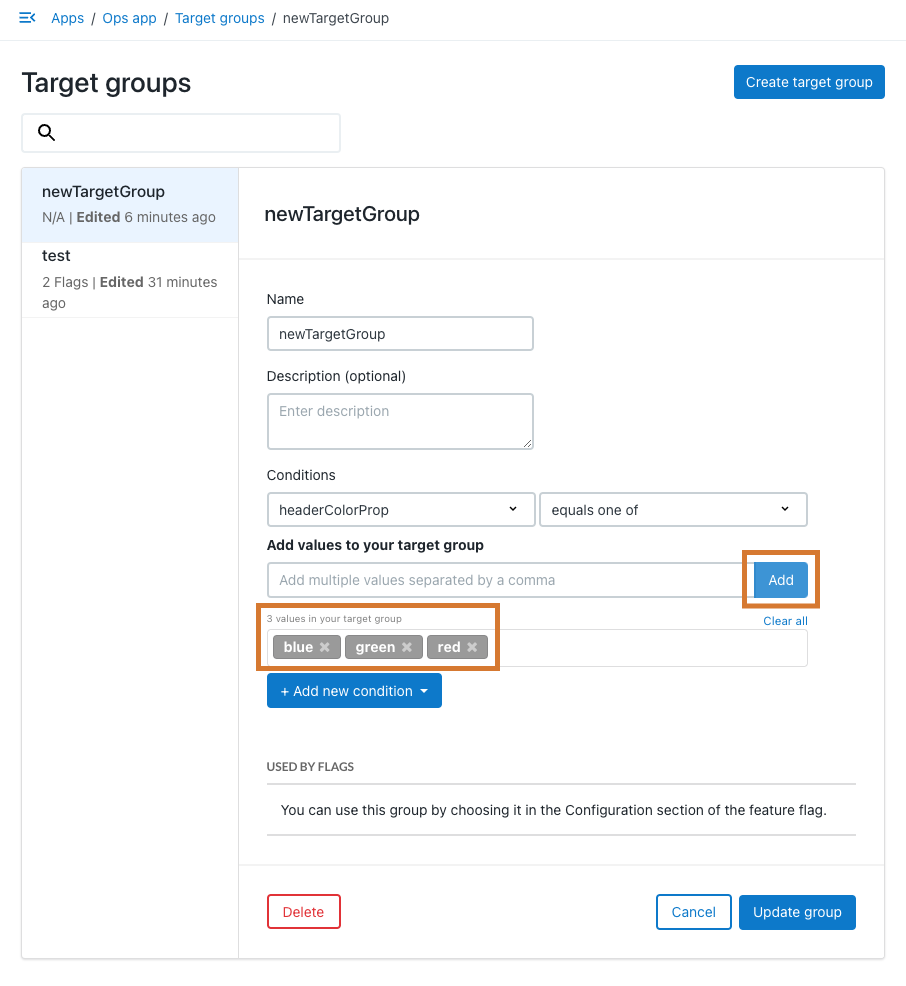
Value is not available for all options. If you select the equals one of operator, you can enter multiple comma-separated values, and then select Add. Select the X next to an individual value to remove it from the target group condition, or remove all values by selecting Clear all.  Figure 2. Example highlighting entered multiple values after selecting Add
 -
(Optional) To add a nested statement:
-
Select Add new condition.
-
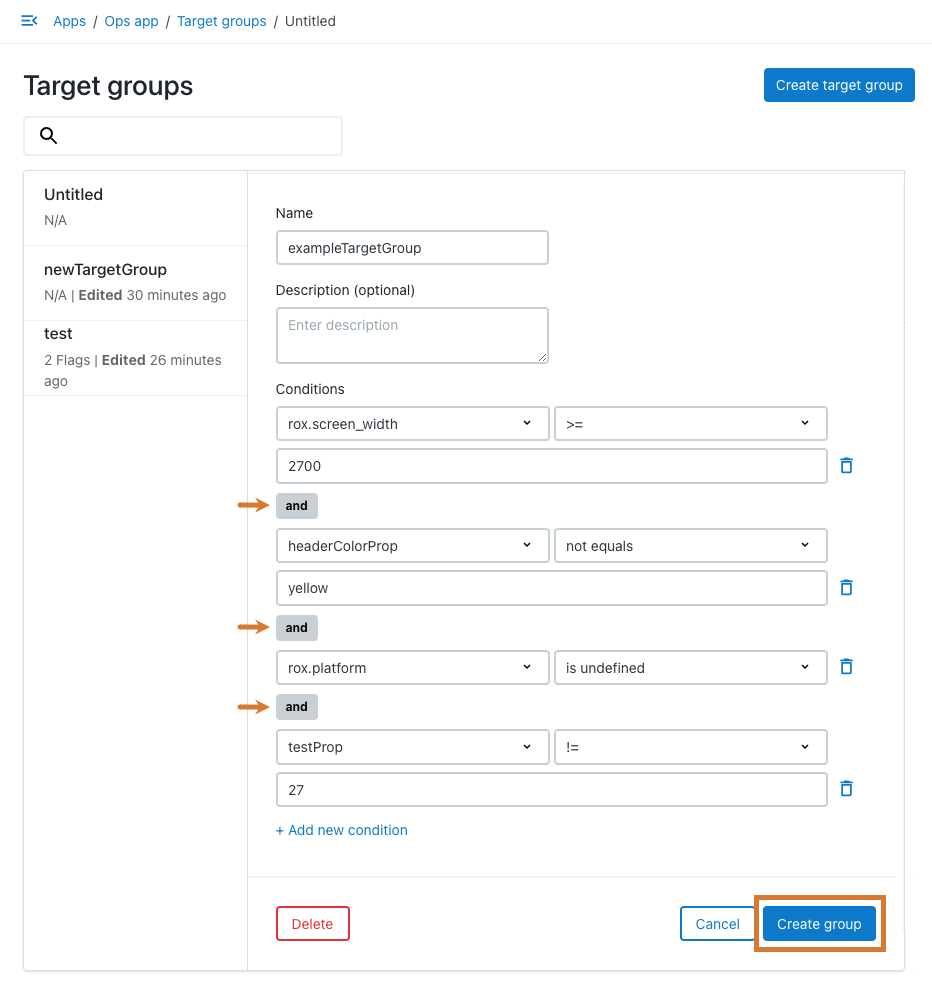
Select either Matches all conditions or Matches any condition to insert the and or or logical operators, respectively.
-
Select a property from the options, an operator from the options, and value(s), if appropriate.
-
-
(Optional) To add more nested statements:
-
Select + Add new condition to add additional nested statements. Multiple nested statements automatically continue the and or or condition logic.
-
For each added statement, select a property from the options, an operator from the options, and value(s), if appropriate.
Remove any conditions by selecting
 Delete.
When creating a target group nested statement that is dependent upon another target group, options that create circular dependencies are removed from the list and cannot be selected. -
-
Select Create group.
 Figure 3. Example with multiple Matches all conditions and Create group highlighted
Your target group is created and is now available to configure flags. Refer to Configuring flags for release for more information.
Accessing target group definitions
| A target group is initially listed by the name Untitled until you enter a name and select Create group. |
If the target group is used in any flag configurations, a listing of environments, including your access level, is displayed below the target group definition.
To access target group definitions:
-
From the CloudBees Feature Management Home page, in the left pane, select Target groups, and then select a target group.
-
Select an environment to display each feature flag using this target group, its configuration status, and a link to its configuration, which opens in a new tab.
You can access all target group definitions and the flag configurations that use them.
Modifying a target group
| You must have full access to all environments to modify a target group. |
You can add, remove, or change conditions. You can also modify the optional description for any target group, but you cannot change the name.
| You can modify a target group even if it is used in a flag configuration in the Production environment. The configuration can be either on or off. |
To modify a target group:
-
From the CloudBees Feature Management Home page, in the left pane, select Target groups, and then select a target group.
-
Modify the Conditions according to the steps in Creating a target group. You can also modify the optional description, but not the name.
-
Select Update group. If the target group is used in a flag configuration in the Production environment, a warning displays. Select Update if you are sure you want to update the target group.
Your target group is modified accordingly and the updates are saved.
Deleting a target group
| You cannot delete a target group if it is used in a flag configuration. |
To delete a target group:
-
From the CloudBees Feature Management Home page, in the left pane, select Target groups, and then select a target group.
-
Select Delete, and then select Delete.
Your target group is deleted and removed from the list of available target groups.
Running regEx syntax for custom properties
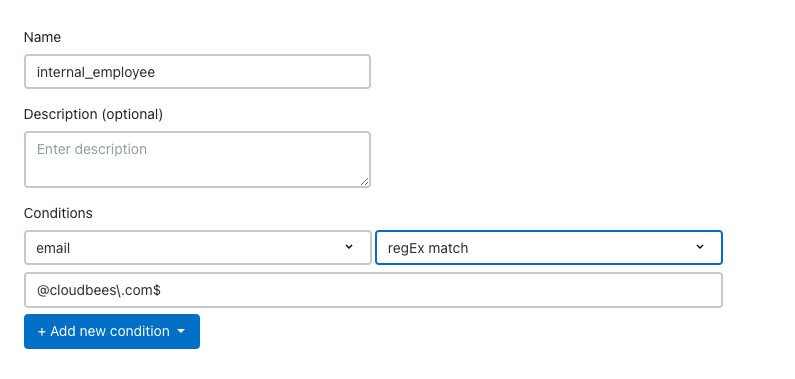
You can run regEx matching for custom properties from type String, as displayed in the following target group example:

The underlying code on the SDK is:
function regexMatch(str, pattern) { var regex = new RegExp(pattern, ""); var match = regex.exec(str); return match ? true : false; }
bool regexMatch(String str, String pattern){ RegexOptions options = 0; Match match = Regex.Match(str, pattern, options); return match.Success; }
boolean regexMatch(String str, String pattern){ int options = 0; Pattern r = Pattern.compile(pattern, options); Matcher m = r.matcher(str); return m.find() }
import ( "regexp" ) boolean regexMatch(String str, String pattern){ matched, _ := regexp.MatchString(pattern, str) return matched; }
# In the above example # str is the email property value # pattern is "@cloudbees\.com$" matched = !Regexp.new(pattern, 0).match(src).nil?
import re # In the above example # str is the email property value # pattern is "@cloudbees\.com$" re.search(pattern, src, 0)
preg_match(pattern, src);
The following provides more information:
expect(parser.evaluateExpression('match("111", "222"')).toEqual(false); expect(parser.evaluateExpression('match("22222", ".*")')).toEqual(true); expect(parser.evaluateExpression('match("22222", "^2*$")')).toEqual(true); expect(parser.evaluateExpression('match("[email protected]", ".*(com|ca)")')).toEqual(true); expect(parser.evaluateExpression('match("[email protected]", ".*car\\.com$")')).toEqual(true); expect(parser.evaluateExpression('match("US", ".*IL|US")')).toEqual(true); expect(parser.evaluateExpression('match("US", "IL|US")')).toEqual(true); expect(parser.evaluateExpression('match("US", "(IL|US)")')).toEqual(true);