|
In addition to this guide, we’ve also got quickstart repos and sample apps available to make starting out with CloudBees CodeShip Pro faster and easier. |
The source for the tutorial is available on GitHub at codeship/ci-guide and you can clone it via
$ git clone git@github.com:codeship/ci-guide.git
Getting started with CloudBees CodeShip Pro (Part 1)
This guide shows you how to use CloudBees CodeShip Pro to build, test, and deploy your applications. CloudBees CodeShip Pro uses Docker to define your CI/CD environment and run your build pipeline. We chose Docker because it’s a well-known and documented standard, but your application itself does not need to be "fully Dockerized" to make use of CloudBees CodeShip Pro’s benefits. As long as you can build containers for your application, CloudBees CodeShip Pro will let you run a flexible, powerful CI/CD pipeline.
Setting up continuous integration with CloudBees CodeShip Pro
Prerequisites
CodeShip requires that you set up a CodeShip Account and connect to a Source Content Management (SCM). See Setting up a new CodeShip account guide for more information.
Installing Jet
CloudBees CodeShip Pro uses a complimentary command-line tool called Jet to help you encrypt your secrets, as well as to debug and troubleshoot locally for a much faster feedback cycle.
The first thing you want to do is install the Jet CLI on your local machine. For Mac users, you can do this through Homebrew and Linux users can use curl to download the Jet CLI binary directly.
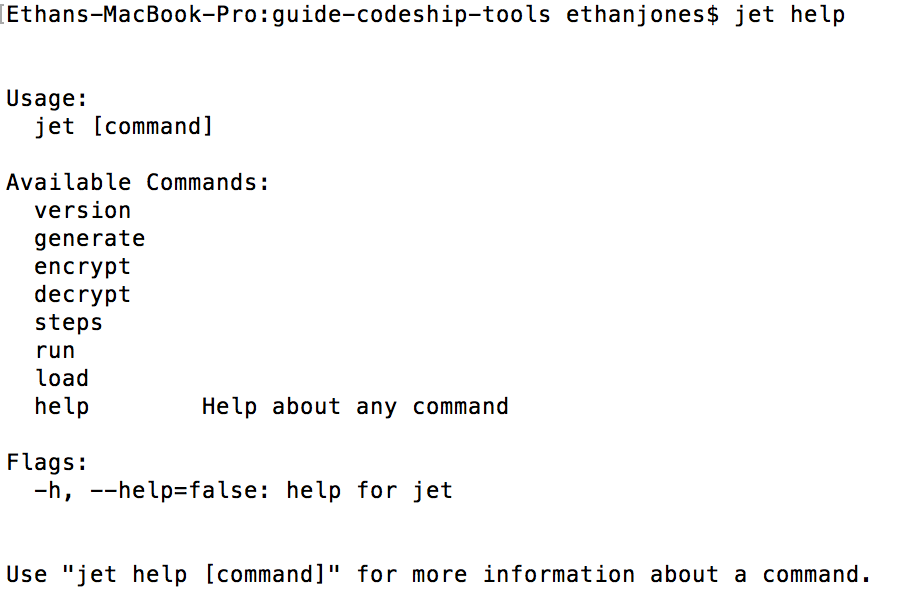
Once Jet is installed, type jet version to print the version number on screen. Next, type jet help to bring up the help options. Jet is very powerful - from running CI to encrypting your credentials, so take some time to play around with what you see when you run jet help.

Creating a simple application with Ruby Script
Now that we have Jet installed, we’re going to take a few minutes and build a simple little "app". This isn’t a real app, we’re just going to write a little Ruby script and a Dockerfile to use as case studies. We’ll expand on them later on.
First, create a file called check.rb. In that file we’re just going to print our Postgres and Redis versions. If you’re wondering how we’re printing versions of tools we haven’t set up - we’ll get there.
In check.rb, just write and save the following code:
require "redis" require "pg" def exit_if_not(expected, current) puts "Expected: #{expected}" puts "Current: #{current}" exit(1) if expected != current end puts "Redis" redis = Redis.new(host: "redis") puts "REDIS VERSION: #{redis.info["redis_version"]}" sleep 4 postgres_username = "postgres" postgres_password = "" test = PG.connect("postgres", 5432, "", "", "postgres", postgres_username, postgres_password) puts test.exec("SELECT version();").first["version"]
Syntax matching support in select code editors
CloudBees CodeShip Pro’s configuration files support SchemaStore.org for select editing environments, including:
-
IntelliJ IDEA
-
PhpStorm
-
PyCharm
-
Rider
-
RubyMine
-
Visual Studio 2013+
-
Visual Studio Code
-
Visual Studio for Mac
-
WebStorm
-
JSONBuddy
To integrate for syntax recognition, just add the following schemas to your editor:
Creating a Dockerfile for your application and environment
Next we’re going to create a Dockerfile. Since CloudBees CodeShip Pro uses Docker as a standardized domain language, you’ll need at least a minimal Dockerfile to get going. If you’re already building your application with Docker, this will require very little (if any) adjustment - and if you’re not using Docker, creating a basic container to run your application should work just fine.
If you’re not familiar with Dockerfiles, and you want to spend a little bit of time getting up to speed on Docker, we highly recommend using these resources as a jumping-off point.
Once you’re ready to get going, create an empty Dockerfile and paste this code into it:
# base on latest ruby base image FROM ruby:2.5.0 # install dependencies RUN apt-get update && apt-get install -y build-essential libpq-dev nodejs apt-utils # declare /app as working directory of image WORKDIR /app # copy over Gemfile and Gemfile.lock to image's working directory, then run `bundle install` COPY Gemfile Gemfile.lock ./ RUN bundle install --jobs 20 --retry 5 # copy all remaining files/folders in project directory to the container COPY . /app
As you can see here, we’re pulling the Ruby base image, creating some directories, installing some gems, and then adding our code. That last bit is important because now when we launch our Docker container, the check.rb script we wrote earlier will be inside it and ready to run.
We have also referenced a Gemfile that you should go ahead and create as well:
# Gemfile source 'https://rubygems.org' ruby '2.5.0' gem 'redis' gem 'pg'
Once saved, run the following Docker command to generate the corresponding Gemfile.lock:
docker run -it --rm -v $(pwd):/app -w /app ruby:2.5.0 bundle lock
Defining your services needed for continuous integration
So, now we have a script, we have a Docker container that includes this script… now what?
Well, we want to orchestrate our app (which means build the Dockerfile we just created), as well as build containers for Postgres and Redis. Remember, the script we wrote prints version numbers for Postgres and Redis, so we’re going to need those services to be able to run it.
On CloudBees CodeShip Pro, you define the services you want to build by creating a codeship-services.yml file. This is a simple file that lives in your repo and tells CodeShip what infrastructure and services to use. If you’re familiar with Docker Compose, we lean heavily on the syntax and options of a standard Compose file. If you’re not familiar with Docker Compose, you can learn a bit more about it here.
One big difference between a standard Compose file and a codeship-services.yml file is that a Compose file is typically built to run your application, whereas your codeship-services.yml file will also define services you need just for CI/CD as well (such as deployment containers).
So, once you’ve created a file named codeship-services.yml go ahead and add the following code to it:
demo: build: image: myapp dockerfile: Dockerfile depends_on: - redis - postgres redis: image: healthcheck/redis:alpine postgres: image: healthcheck/postgres:alpine
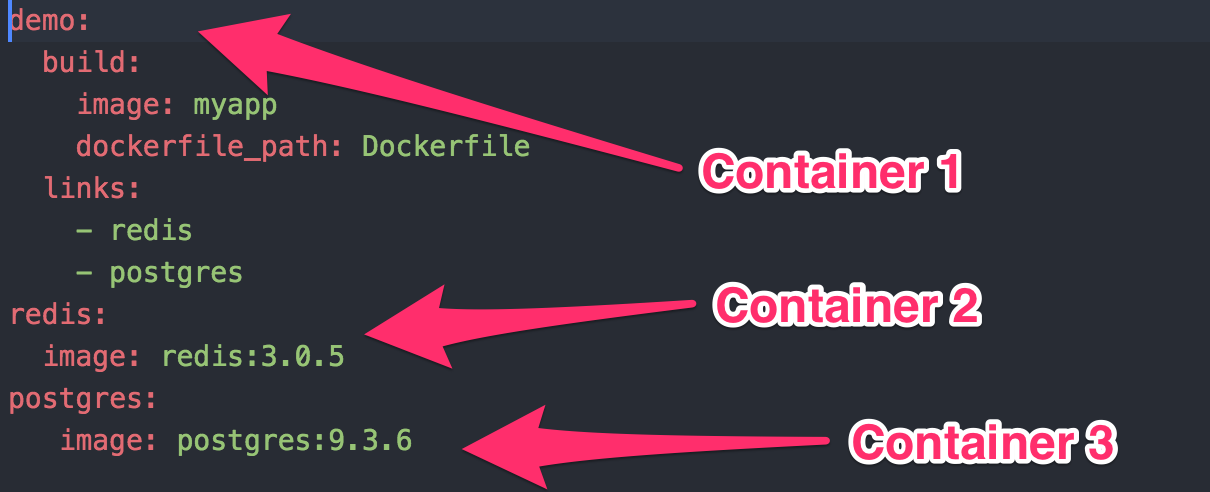
The first thing this file does is define our demo service. It builds the Dockerfile and names it myapp. The depends_on section tells it what services are required for demo to run. In this case both redis and postgres.
Since we reference redis and postgres, we need to define them as separate services as well. For each, we provide an image - we could build one using separate Dockerfiles but instead we’re going to download existing repos from a Docker registry. This is Docker Hub by default but it can be any registry you specify.
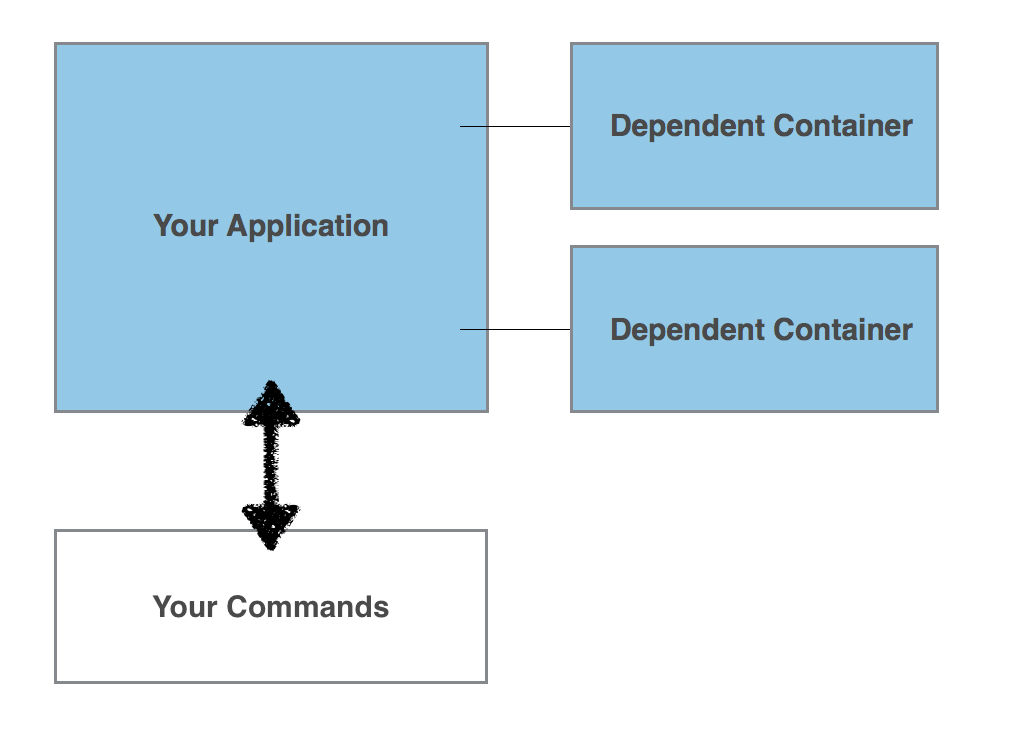
One important thing to know is that any time you build a service, such as demo, it will automatically spin up containers for every dependent service. So if we build demo, we end up with three containers: one for the primary service, one for Redis and one for Postgres.
Also note that in this configuration example we are using the healthcheck version of our Redis and Postgres images to avoid startup timing issues.

Defining steps to run in the continuous integration workflow
Next up, we define what steps run in your CI/CD workflow. This is done through another simple .yml file that lives in your repo - codeship-steps.yml. This file is nothing but a list of the commands you want to pass to the containers you defined earlier in your codeship-services.yml file.
With CloudBees CodeShip Pro, your containers are the CI/CD environment, meaning every command you run - tests, deployments, scripts - all run inside of the containers you build. This means you have full control of your CI/CD environment because anything you need to do, whether it’s use a particular version or orchestrate your production infrastructure, is as simple as defining a container that can accept the commands you need to run.
As one example, if you need to deploy to Heroku then you just need to build a container with the Heroku Toolbelt and then run Heroku deployment commands in your codeship-steps.yml file!
Let’s take a look at how this works. Go ahead and create this file and add the following code:
- name: ruby service: demo command: bundle exec ruby check.rb
Let’s take a look at what’s happening. First, there’s just one step, and it has a name: ruby. This is the name attached to the step in the log output.
The step then launches one of the services defined in your codeship-services.yml file - in this case, it’s launching the demo service. Now, if you remember, because we launched the demo service it’s also going to launch the two linked services: redis and postgres.
Next we call a command inside our new demo container. We tell it to run the check.rb script we created and added to our Dockerfile earlier.

As you’ll recall, that script prints the version of redis and postgres - which it will do by checking the version of the services we launched via the declared dependencies on our original demo service.
Testing and debugging your pipeline locally with Jet
Now - let’s see how all of this ties together. Open up a terminal and go to the directory with the files we created.
The first thing we’ll do is run jet validate. This will instruct jet to verify that our files our correct. Once this passes and we know our files our configured without issue, we will run jet steps.
This will tell the Jet CLI tool to build the services in your codeship-services.yml file and then run the steps in your codeship-steps.yml file.
If everything is working, you should see something like this:

And if you scroll through your logs, you should see the versions for redis and postgres printed just as check.rb instructs it to.
Updating the version in codeship-services.yml
Now we’ll take a look at one of the cool benefits of doing all of your CI/CD process with these simple files in your repo.
Open up codeship-services.yml and find the line where you define your redis service. Change image: healthcheck/redis:alpine to image: redis:3.2.11.
Running your new build pipeline locally with Jet
Now switch back to your terminal and run: jet steps again.
Looking at the same logs as before, you’ll see that now your redis service is launching an entirely new version! Changing your CI infrastructure is as simple as changing a few characters in a single file on your repo. This can be done branch by branch, build by build - making upgrading, testing and iteration as easy and risk-free as possible.
Next: Adding tests
Now that we’ve covered the basics of how CloudBees CodeShip Pro uses Jet CLI, codeship-services.yml, codeship-steps.yml and containers to create a flexible, powerful CI/CD process, we’ll move on to explore some more robust examples. Up next, running your tests.