|
In addition to this guide, we’ve also got quickstart repos and sample apps available to make starting out with CloudBees CodeShip Pro faster and easier. |
The source for the tutorial is available on Github as codeship/ci-guide and you can clone it via
git clone git@github.com:codeship/ci-guide.git
Getting Started With CloudBees CodeShip Pro (Part 3)
Now that you have a working CI process with a successful test, the next step is to push out your Docker image!
Adding a push step
Now that we have our accounts created, let’s go ahead and open up our codeship-steps.yml file. After our test step, we’re going to add a new step - a push step.
Add the following code, and then we’ll go through it, to discuss what’s happening and what we need to do to make it work.
- type: parallel steps: - name: checkrb service: demo command: bundle exec ruby check.rb - name: test service: demo command: bundle exec ruby test.rb - type: serial steps: - name: dockerhub_push service: demo type: push image_name: account/repo registry: https://index.docker.io/v1/ encrypted_dockercfg_path: dockercfg.encrypted
There are a few things to note here:
-
pushis the step type we use to signify that we’re pushing out the image defined or built by our service. -
image_nametakes a slightly different form depending on the repo - if it’s Docker Hub, it’saccount_name/repo_name. This is your repo account name and then the name of the specific repo on your account you’re pushing to. You’ll need to review specific documentation if you’re using Quay.io / AWS ECR or a private repo to make sure the name is defined correctly. -
registryis the unique push URL for the image repo. Again, this varies per registry so if you’re not using Docker Hub be sure to verify that you get the right value for this. -
encrypted_dockercfg_pathis where we grab the credentials for your image repo account from. But, why is it encrypted and how did we encrypt it? Let’s take a look at that now…
Encrypting credentials
So, just like we did with our environmental variables in the previous lesson, we’ll want to encrypt our image repository examples so that our repo doesn’t have our logins sitting around in plain text.
First, if you didn’t do it on the last step, you’ll need to download your project’s AES key in to your code’s directory. To get the AES key, just go to your project on CodeShip.com and look at the project settings.

Once downloaded, move the AES key to your project folder and rename to codeship.aes.
|
Be sure to add your project’s AES key to your .gitignore file to prevent it from being committed. |
Now that you’ve downloaded your AES key, we’ll created a new file named dockercfg where we’ll drop in our Docker Hub credentials:
{ "auths": { "https://index.docker.io/v1/": { "auth": "auth_key", "email": "email" } } }
To get our auth key, we’ll need to go back to our terminal and run:
docker login cat ${HOME}/.docker/config.json
|
If you are using MacOS The newer versions of Docker have changed to store credentials in the MacOS keychain rather than in a configuration file. To get the appropriate authentication file on MacOS, you will need to remove the |
|
If you are using Linux If you encounter any issues with the aforementioned instructions then we recommend copying |
This will print the auths value that we need to add to our dockercfg file. Once we’ve added this information to our dockercfg file and saved it, we’ll run:
jet encrypt dockercfg dockercfg.encrypted
You should see your new dockercfg.encrypted file populate within your project directory.
|
Be sure to remove the unencrypted |
Pushing a Docker image
Now, assuming you’ve swapped in your credentials in the push step and created your encrypted Dockercfg file, it’s time to push all this up and run our build!
Let’s go back to our terminal and run:
git add . git commit . -m "Deploying our image" git push origin master
Checking the build logs
Now that we’ve got our build running, let’s hop over the web UI and look for evidence of our successful push.
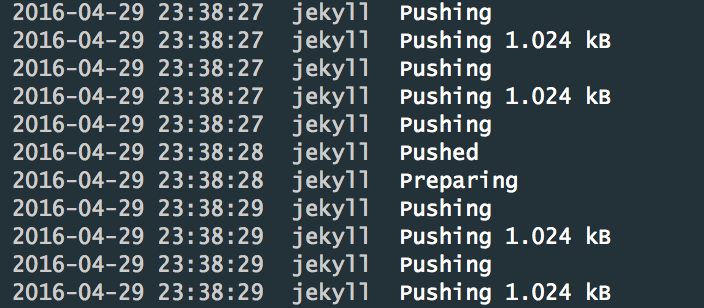
When we click in to our build logs, we should able to click our push step and see something like this:

Now, if we go over to our Docker Hub repo, we should see some meta data indicating a successful push:

Debugging builds
Let’s take a quick detour to discuss debugging your builds, in case something has gone wrong in the build you just pushed up and you’re trying to solve the problem. CloudBees CodeShip Pro does not offer SSH access to build machines for debugging like CloudBees CodeShip Basic does, but can debug your builds locally using jet.
You will just need to use jet run (a command we didn’t see earlier, which leaves your containers running until you kill them) and then connect to your running containers to manually run the commands from your codeship-steps.yml file.
To do this, you will need to execute the following commands:
jet run PRIMARY_SERVICE_NAME # locate CONTAINER_ID docker ps -a docker exec -it CONTAINER_ID /bin/sh
Note that you are running your containers, looking up the container ID and then connecting to the running container using the container ID.
Next: Using Volumes
Now we’ve built an app, added a test, pushed an image and deployed our code. What’s next?
We want to walk through a couple of the powerful, flexible things you can achieve with CloudBees CodeShip Pro - and we’re going to start with volumes. Let’s learn about volumes.