-
The component details consists of details about the artifact on which the component is based. It can include where the artifacts are stored (the source or repository server), artifact name, artifact version,the directory where the artifact can be retrieved, and so on. You can parameterize part of the artifact definition to account for variations in the artifact details every time you deploy the application. This allows you to reuse the master component in multiple deployment scenarios. For example, you can create a master component that has a standard process to deploy and undeploy, and the only thing that changes is which specific artifact to use based on parameters.
-
Component processes are defined in the application process steps. The component processes are used to define the automation steps to perform on the artifact that is defined in the component details. These processes can be used to deploy, undeploy or do any other action. Each master component can have one or more component processes, and each process can have specific automation steps. These steps can describe how to perform specific tasks such as publish or retrieve an artifact, stop a server process, copy files, restart the server, and so on. A master component must have one or more component processes. You can parameterize master component processes so that certain behaviors can be achieved when master components are used in application definition. For example, you can have port number as a component process parameter for a master component, and have different values for port number in different application models where this master component is used.
This example shows how to create a master component, create parameters for the artifact definition, define the component processes, create parameters for the component processes, and use the master component in an application, promoting the component reuse throughout your organization. It does not include how to author applications and environments or how to deploy the application. For information about these tasks, see the example in Example: Modeling and Deploying Applications .
In the following steps, you will learn how to:
Creating a Master Component and Parameters for the Artifact Definition
This section shows how to create a new master component and create parameters for the artifact definition.
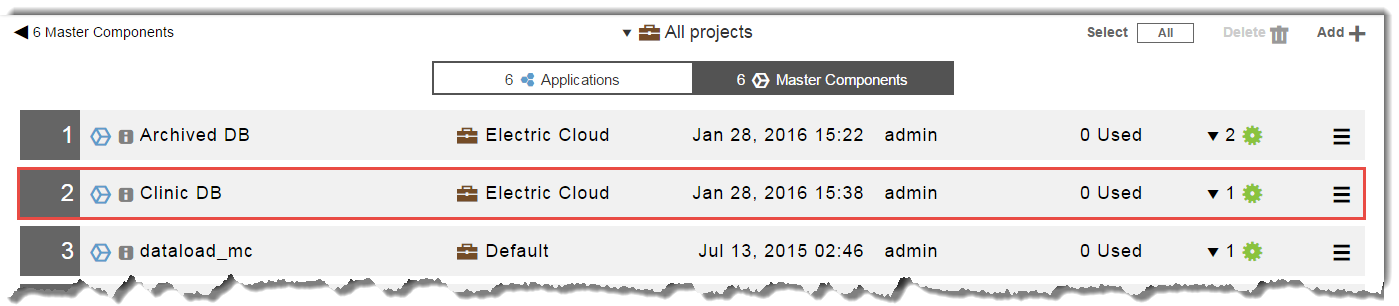
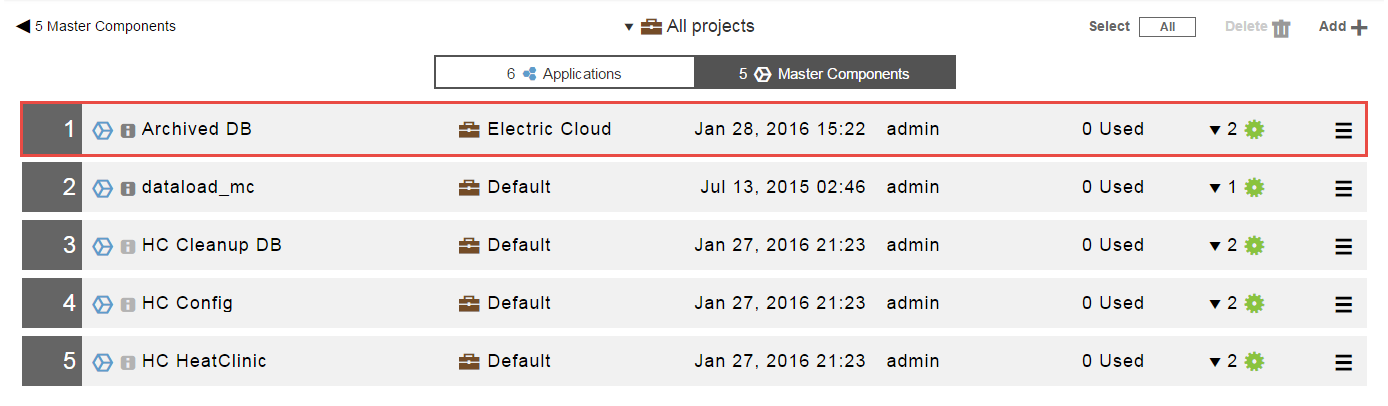
By default, the master components for all projects are displayed.
To see only the objects for a specific project, click the down arrow in the All projects field and then select one or more projects in one of these ways:
-
Click on the name of one or more projects.
-
Enter the search criteria in the Search field. The projects that match the criteria appear in the list.
If there are no matches, a message appears stating that there are no resource templates in the selected projects.
Create the new master component
-
Click the New button. The New dialog box opens.
-
Click Master Component>Create New to create a new master component.
-
Enter the name of the new master component, configure Tags, and select a project to which the master component belongs.
You can include hyperlinks as part of an object description for any CloudBees Flow object. -
Click Next.
The Component Definition page dialog box opens.
-
Click the Content Location drop down.
-
Select an artifact repository where artifacts are stored, which is represented as a plugin. Select EC-Maven.
-
Enter the information about the artifact.
The information that you enter depends on the artifact repository (plugin) that you selected.
For EC-Maven, enter the following information.
-
Public Server URL:
https://repo-demo.jfrog.org/artifactory/ -
Repository:
jboss-releases -
Artifact:
org.jboss.el:jboss-el -
Version:
Exact -
Artifact extension:
jarWe will be parameterizing the artifact name and replacing jboss-el with a variable. For now, enter the information in the Artifact field above because it is required and the component cannot be created without this required information.
If you had selected another plugin, you may not have to do this.
-
-
Click OK.
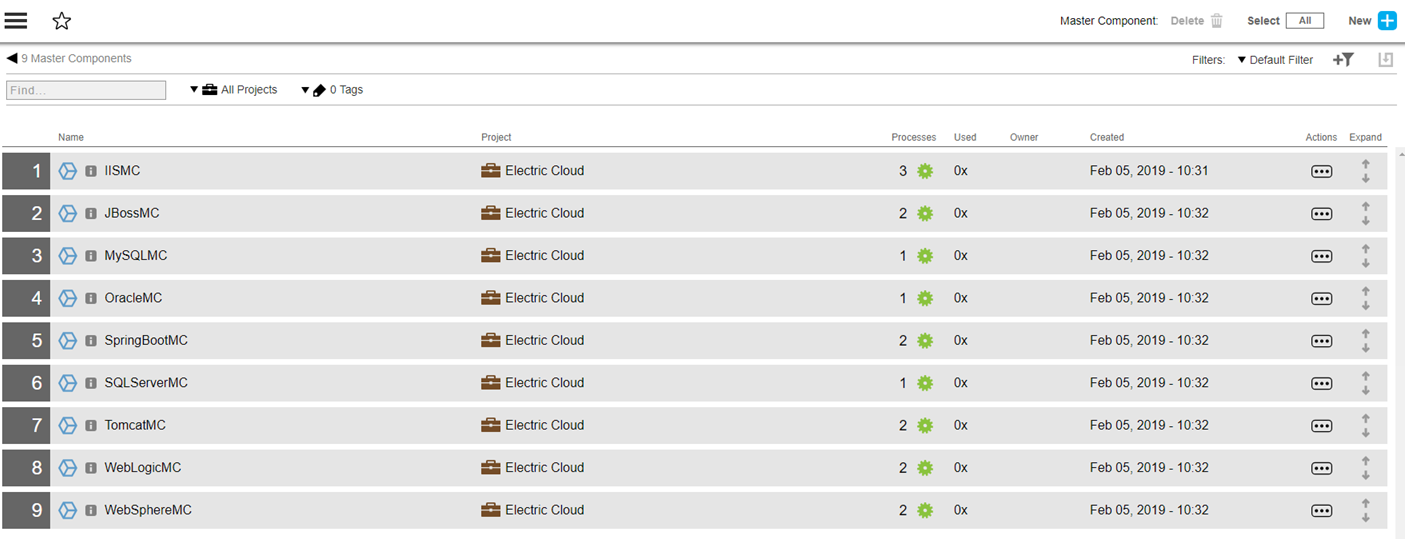
The component that you created now appears in the list.
Create a parameter
Go to the row for the master component that you just created, click its Actions ![]() button, and select Parameters. The Parameters dialog opens.
. Click
button, and select Parameters. The Parameters dialog opens.
. Click ![]() , or if no parameters have not yet defined for the object, click There are no Parameters. Add one +:. The New Parameter dialog box opens.
, or if no parameters have not yet defined for the object, click There are no Parameters. Add one +:. The New Parameter dialog box opens.
-
In the New Parameter dialog box, enter the parameter settings.
-
In the Name field, enter artifactName.
-
In the Label field, enter Artifact Name.
Keep the rest of the fields as they are
This parameter is required. The user must enter a value for this parameter when this master component is used in an application.
-
-
Click OK and dismiss the dialog.
-
Go to the row for the master component that you created, and click its *Actions
 button*.
 -
Select Component Definition to modify the artifact definition with the artifact-name parameter.
-
In the Component Details dialog box, go to the Artifact field and replace
jboss-elwith$[artifactName]. -
Click OK.
You have now created a master component with one parameter for the artifact definition.
The other ways to create a master component are:
-
Create it from an existing master component by selecting an existing component from the "Create from existing component" list in the dialog box.
-
Create from an existing application component by selecting an application and an application tier associated with that application and then an existing component in that application and application tier.
The next step is to add processes to the master components and create parameters for the processes.
Authoring Component Processes and Creating Parameters
This section shows how to author component processes for the master component created in the previous section and create parameters for those processes.
Starting in the Master Component list:
-
Go to the row for the master component that you created, and click its Actions button.
-
Select Add process.
The Process dialog box opens: select New.
-
Enter the component process details and click OK.
-
Define the component process in the Component Process Visual Editor.
For detailed instructions and examples, see Authoring Component Processes .
-
Select the Deploy process.
The Component Process visual editor for it opens.
-
Click the
 button on the right side and select Parameters.
 -
Click
 , or if no parameters are defined for the object yet, click There are no Parameters yet. Add one + to add a parameter: the New Parameter dialog box opens.
 -
In the New Input Parameter dialog box, enter the parameter settings, and click OK.
-
In the Name field, enter portNumber.
-
In the Label field, enter Port Number.
Keep the rest of the fields as they are.
This parameter has no default value and is required. The user must enter a port number when this master component is used in an application.
-
-
Click OK. The port number parameter is created for the Deploy process. The Parameters dialog box shows that the port number parameter is required for the Deploy process.
-
Close the Parameters dialog box.
-
Reference the master component in an application, or copy it to an application.
-
To reference the master component in an application, see Referencing a Master Component in an Application .
-
To copy the master component to an application, see Copying a Master Component to an Application .
After you add the component to an application tier, a dialog box appears prompting you to enter values for the parameters for the master component process, starting with this step .
-
You have now authored component processes for the master component and have created a parameter for it.
Viewing the Master Component Details
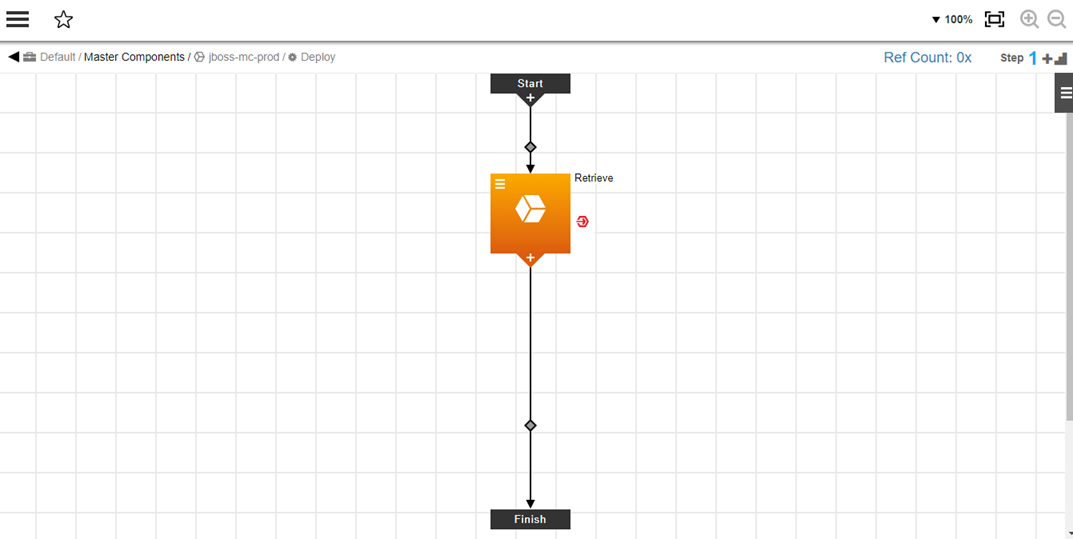
You can ensure that the artifact definition and component process step defined by the master component are correct by viewing the master component details in the following places. They first appear in the artifact definition.
They also appear in the component process step details. When you view the component process details for the Deploy process in the Component Process Editor, you can see that the Deploy process consists of one step called Retrieve, which is defined by the jboss-mc-prod master component.
Using a Master Component in an Application
After master components have been defined, they can be used in application models. There are two ways to leverage master components in an application:
To review the implications of these methods, see Master Components .
Referencing a Master Component in an Application
When you reference a master component in an application, it is added to the application as an application component with the same definition, processes, parameters, and properties as the referenced master component. Any changes made to the master component will affect all the application components that reference it.
Use the reference method when the component is used in multiple applications and you want to ensure that these application components continue to inherit all changes made to the master component. This section shows how to author a new application that references the master component created in the previous sections.
Starting in the Applications List:
-
Click the Add + button.
The New dialog box opens.
-
Click Application > Create New to create an application.
-
Enter the application name, select a project where the applications in the pipeline will be deployed, configure Object Tags, and enter a description of it.
-
Click OK.
The Application Editor for your application opens. This is where you will author the application. Notice that there is an undefined application tier (Tier 1) with an undefined component in it and an undefined microservice with an undefined container in it.
-
Click the
button in the application tier and select Details to open the Applications Tier Details dialog box. -
Change the tier name to Data in the Name field, and click OK to rename the application tier.
The Application Editor now shows one environment tier called Data.
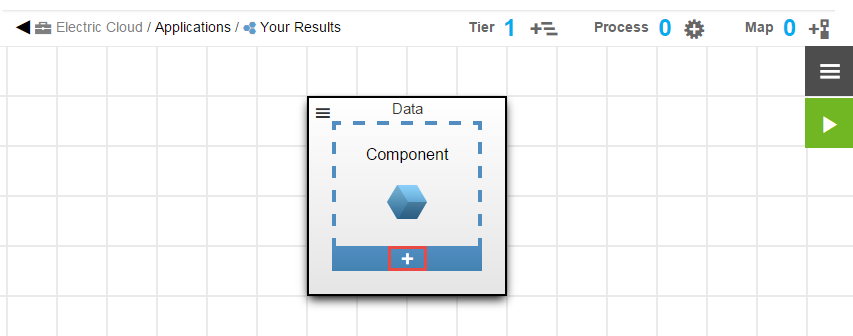
-
Click the + button in the component to add a component to the application tier.
-
Select Create from existing master component.
A list showing all available the master components opens. You can also create a new application component using one of these options:
-
Create a new application component —Clicking this creates a new component as described in Creating a New Application .
-
Create from existing application component —Clicking this opens the Create from existing component dialog box.
Click in the Select Application field and select an application. Then click in the Select Tier field and select an application tier. A list of components in the selected application and application tier appears. Select a component from this list.
-
-
In the Create a reference to a master list, select a master component.
In this example, select the master component called jboss-mc-prod.
-
Click Next.
The Create from existing component dialog box opens.
-
In the New dialog box, change the name to jboss-mc-results, and click Next.
-
If the master component has parameter for its artifact definition, you are prompted to enter values for those parameters in the next step.
If the component does not have parameters for its artifact definition, click OK. Then go to the Component Process Visual Editor and add a parameter to the component, starting at Step 9 in Creating a Master Component and Parameters for the Artifact Definition .
-
Enter the values for the parameters, and click OK.
The jboss-mc-results component has one parameter called Artifact Name. Enter jboss-prod in the Artifact Name field.
-
Click OK.
The Application Editor now shows that the application has an application tier called Data with a referenced master component called
jboss-mc-results.If you want to edit the master component, you need to do this in from the Master Component list. (There is no button in the lower right corner where you can access the component processes.) The UI also lets you know that this is a master component because the icon is different than that for a normal component. -
Define the application process to include a step that references the master component.
The second step prints the port number that you entered in the previous step.
Now you can deploy your application as described in Deploying and Troubleshooting Applications .
Copying a Master Component to an Application
When you copy a master component to an application, it becomes an application component with the same definition, processes, parameters, and properties as the master component on which it is based. After an application component is created from a master component this way, any subsequent changes to the master component will not affect the application component. Use this method when you want to use a master component just as a baseline for your application component.
For details about how to create master components and parameters for them, see Creating a Master Component and Binding Parameters to the Artifact Definition and Authoring Component Processes and Binding Parameters to Them .
This example describes how to copy a master component in an application.
Starting in the Applications list:
-
Click the Add + button.
The New dialog box opens.
-
Click Application > Create New.
-
Enter the name of the new master component, select a project to which the master component belongs.
In this example, we will create a new application called "Your Group Summary" that will include the master component named jboss-mcjc.
-
Click OK.
The Application Editor for your application opens. This is where you will author the application.
Notice that there is an undefined application tier (Tier 1) with an undefined component in it and an undefined microservice with an undefined container.
-
Click the
button in the application tier and select Details to open the Applications Tier Details dialog box. -
Change the tier name to Data in the Name field, and click OK to rename the application tier.
-
Click the + button in the application tier to add a component to it.
-
Select Create from existing master component.
A list showing all available master components opens.
-
In the "Create a reference to a master" list, select a master component.
Select the master component called jboss-mcjc, select Use a copy, and select a project to which the master component belongs.
-
Click Next.
The Create from existing component dialog box opens
-
Change the name of the component to something that gives it more context.
After changing the component name to jboss-mcec and clicking OK, the Data tier now has a new application component called
jboss-mcec, where "ec" refers to a software version: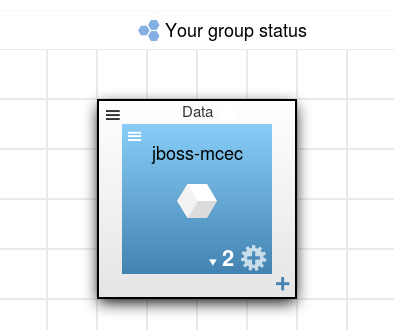
-
If the master component has parameters for the artifact details, modify the artifact details of the new application component and remove the parameter reference.
-
Go to the Component Details dialog box.
-
Replace the parameter (
$[artifactName]) in the artifact details section with a specific value.In the example, replace
$[artifactName]with jboss-5-maintenance, where software versions starting with lower case letters are maintenance releases -
Click OK.
-
-
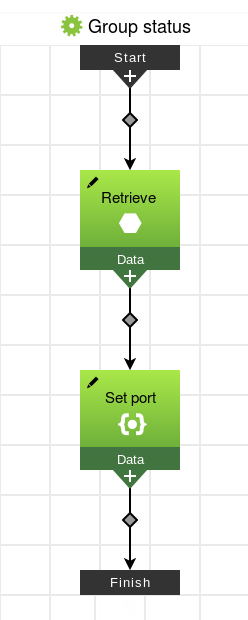
Define the application process to include a step that references the new application component.
-
The first step is defined by the
jboss-mceccomponent and its deploy process.After you select the Deploy process, you are prompted enter to a value for the port number. Then click OK. This is the parameter that is created for the component process.
-
The second step prints the port number that you entered in the previous step. This is the resulting application process:
-
-
Make other modifications to the application component and its component processes within application.
Now you can deploy your application as described in the Deploying Applications in CloudBees Flow .
Creating Master Components Based on Existing Application Components
Starting from the Master Components List:
-
Click Add +.
The New dialog box opens.
-
Click Master component > Copy Application Component.
A list of existing applications opens. It shows the list of available applications. The default is to show the applications for all projects.
If you want to see only the applications for a specific project, click the down arrow in the All projects field to select one or more projects one of these ways:
-
Click on the name of one or more projects.
-
Enter the search criteria in the Search field. The projects that match the criteria appear in the list.
You can also search for one or more applications by entering the search criteria in the Search field next to the All projects field. If there are no matches, a message appears stating that there are no applications in the selected projects. . On the left side of the dialog box, select an existing application.
+ A list of existing components in that application appears on the right side. . Select an existing application component.
+ The Create from existing component dialog box opens with the name of the selected component highlighted. . Change the name of the component, and enter an optional description.
+ You can also change the project to which the master component belongs. . Click OK.
+ The Master Component List now includes master component you just created. include::ROOT:partial$user-guide/multi-project-master-comp.adoc[]
+
Creating Master Components Based on Existing Master Components
Starting from the Master Components List:
-
Click Add +.
The New dialog box opens.
-
Click Master component > Copy Master Component.
A list of existing master components opens. include::ROOT:partial$user-guide/multi-project-master-comp.adoc[]
-
Select an existing application component.
The Create from existing component dialog box opens with the name of the selected component highlighted.
-
Change the name of the component, and enter an optional description.
You can also change the project to which the master component belongs.
-
Click OK.
The Master Component List now includes master component you just created. It shows the list of available master components. The default is to show the master components for all projects.
If you want to see only the master components for a specific project , click the down arrow in the All projects field to select one or more projects one of these ways:
-
Click on the name of one or more projects.
-
Enter the search criteria in the Search field. The projects that match the criteria appear in the list.
You can also search for one or more master components by entering the search criteria in the Search field next to the All projects field. If there are no matches, a message appears stating that there are no master components in the selected projects.
+