Properties are a very powerful CloudBees Flow feature, but it can be time consuming to navigate to and view all properties associated with an object or a set of objects. Managing deep hierarchies of properties and updating or moving properties can be challenging for a large project.
The Property Browser makes navigation of properties easier by letting you view all properties in a hierarchy of objects. Functions to copy and move properties or folders make it simple to create complex structures across an object. This feature saves time for experienced users who otherwise need to browse, search for, and update properties. The Property Browser helps new users learn and understand the value of properties in CloudBees Flow by making them easily accessible and viewable.
Opening the Property Browser
The Property Browser is part of the Hierarchy Menu and is therefore available in the Application Editor, the Microservice Editor, the Environment Editor, the Pipeline Editor, and releases. For more information about the Hierarchy Menu, see Hierarchy Menu . The Property Browser is also available from within the Properties dialog box for a specific object.
Opening the Property Browser from the Hierarchy Menu
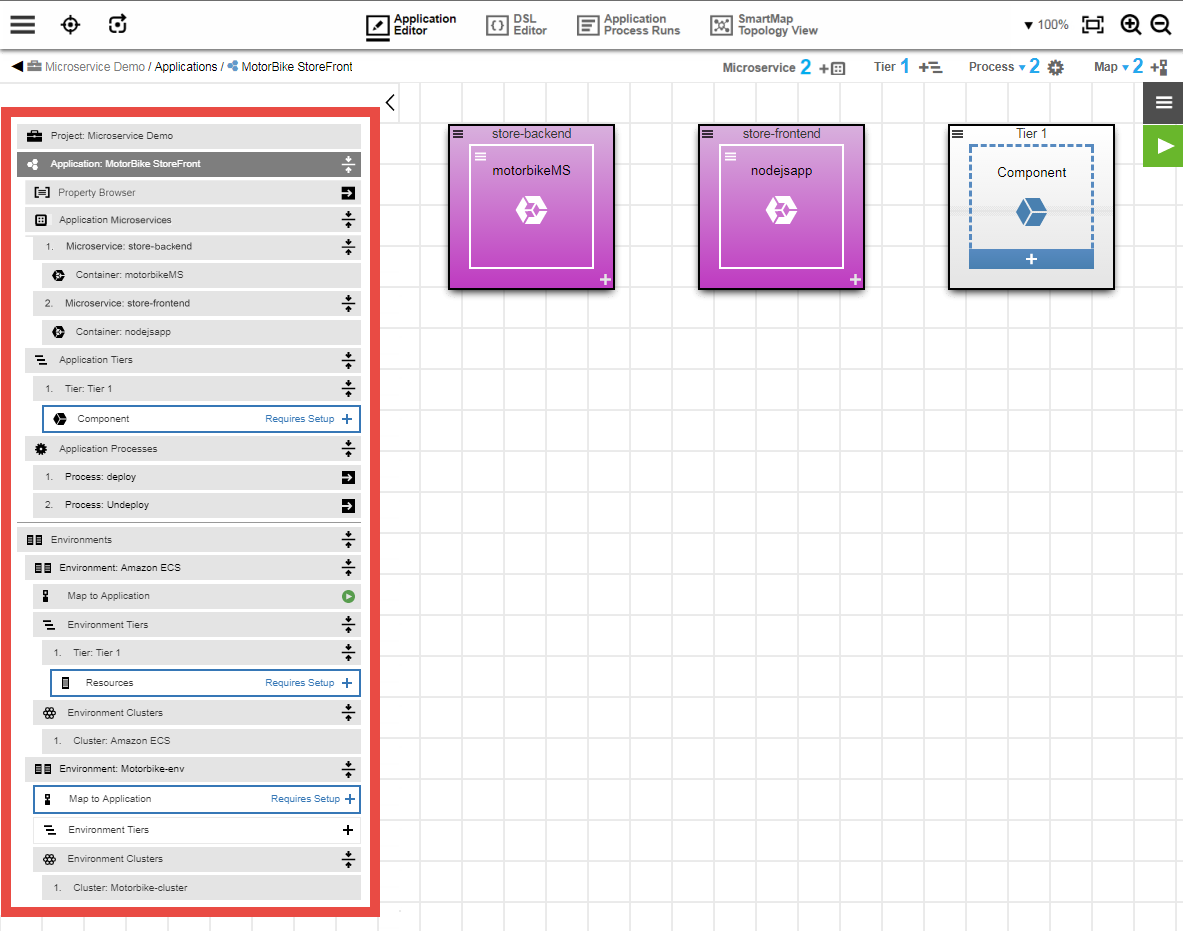
To open the Property Browser from the Hierarchy Menu, you must first open the Application Editor, the Microservice Editor, the Environment Editor, or the Pipeline Editor in that project. The Hierarchy Menu is expanded and visible by default:
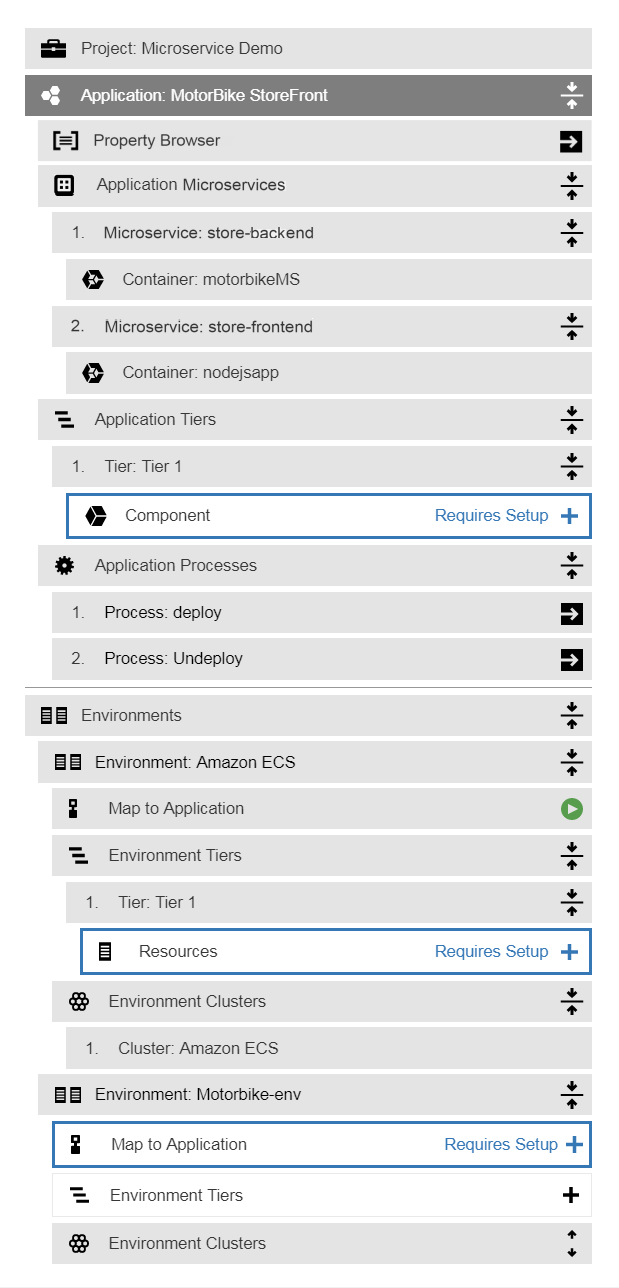
Then click the ![]() (Property Browser) button in the Hierarchy Menu:
(Property Browser) button in the Hierarchy Menu:

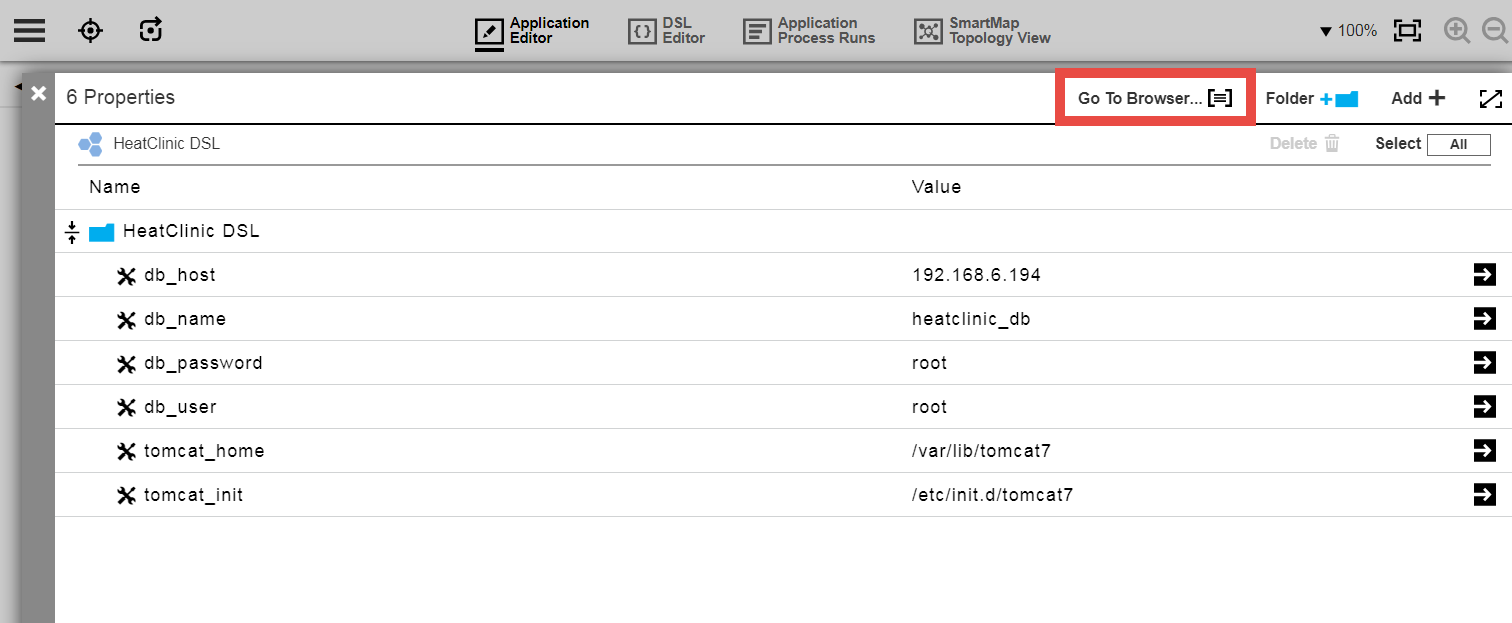
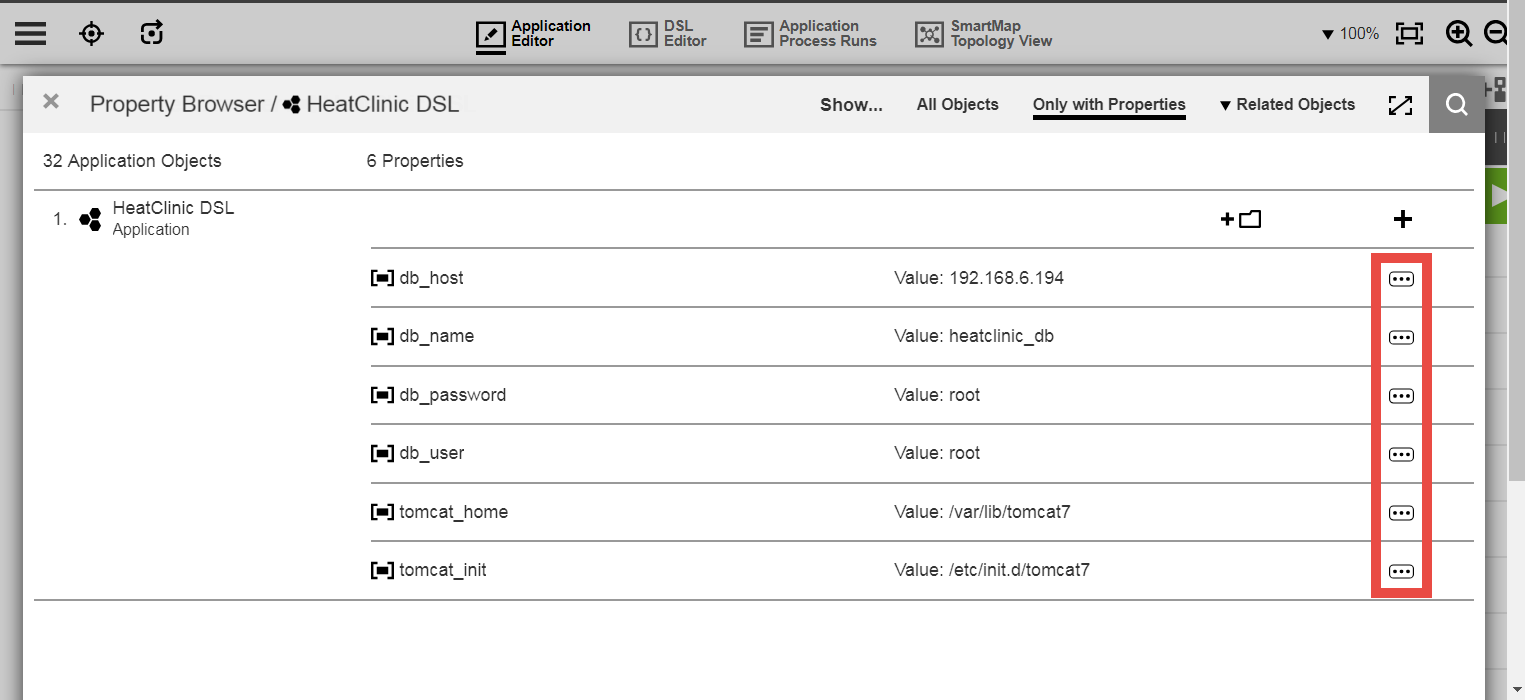
The Property Browser opens. For example:

Searching for Properties
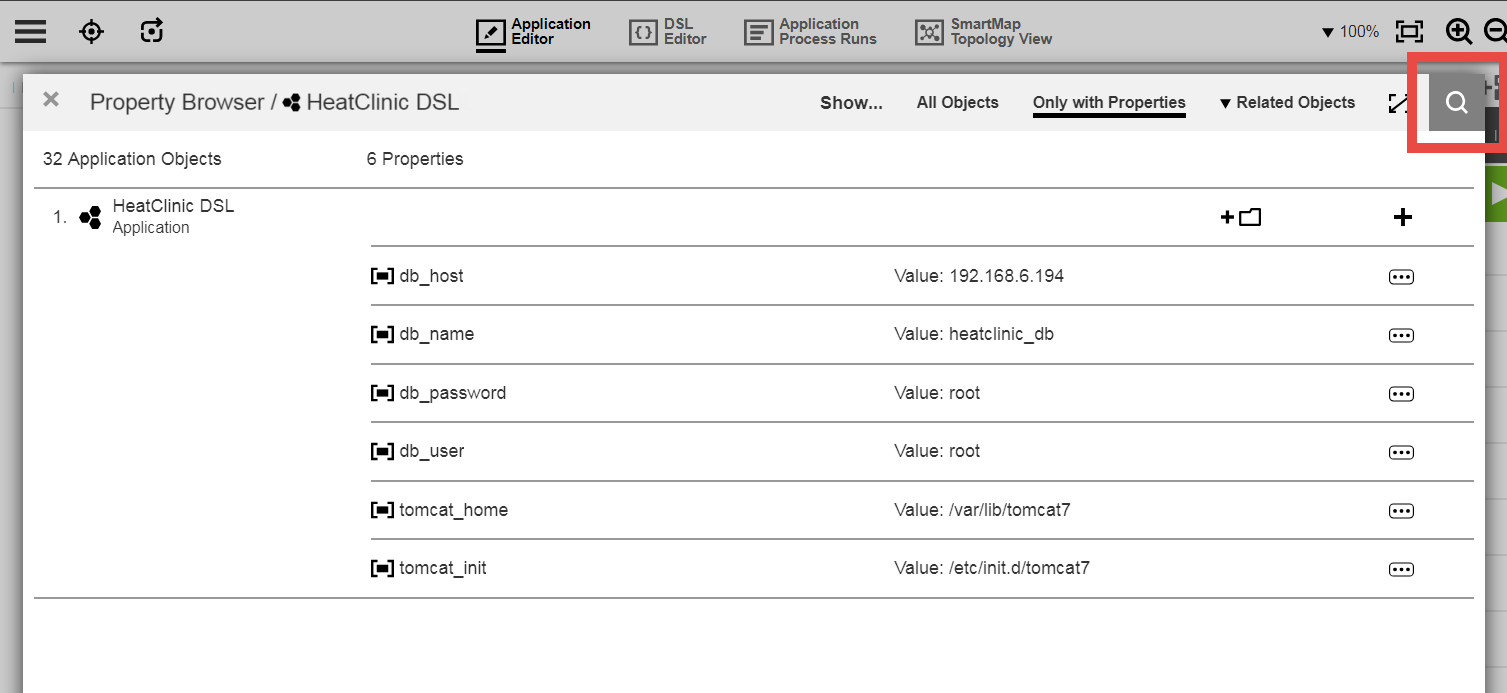
The  (Toggle Search Form) button lets you search for properties in the project:
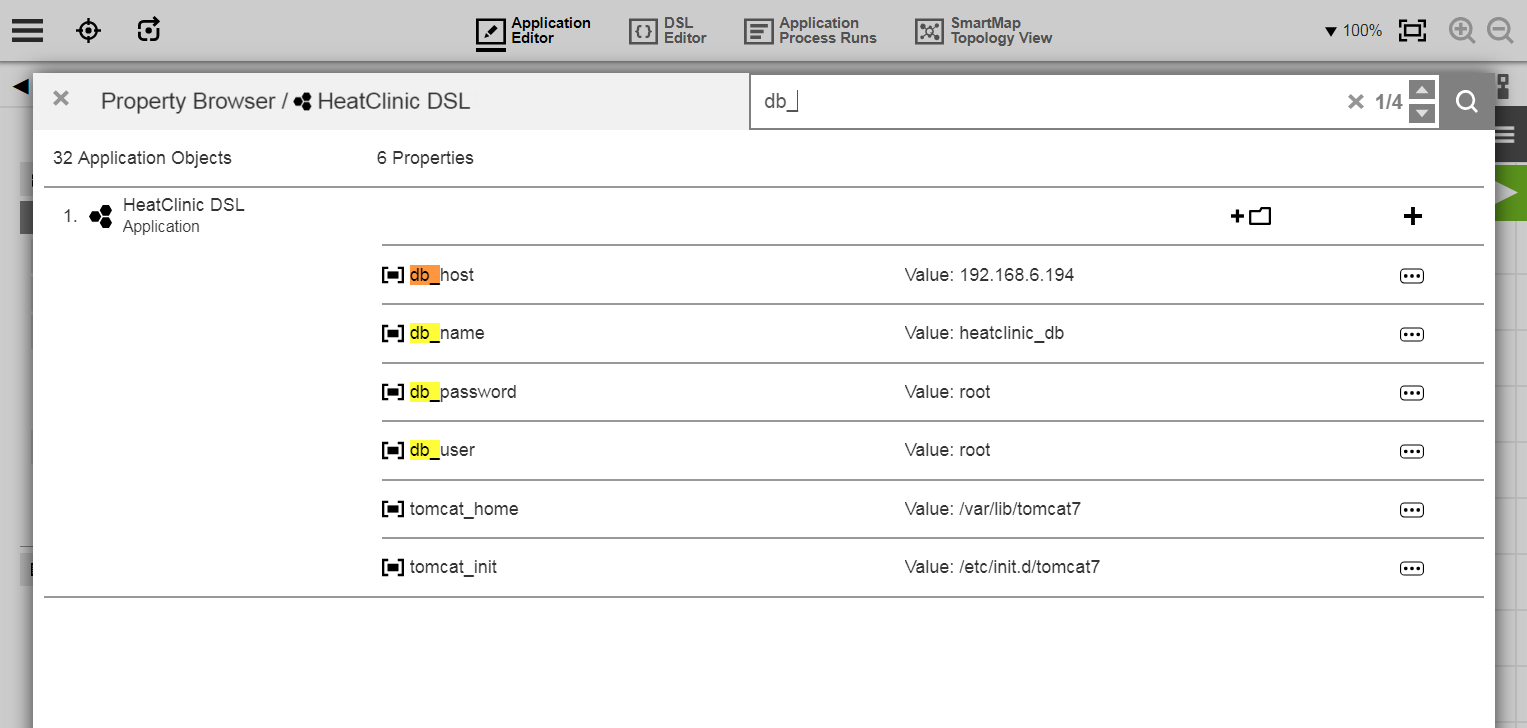
Clicking the button opens a field for entering search terms:

To start the search, simply type the search terms into the field. As you type, the search hits are highlighted in color in the property list. For example:
Filtering Out Objects with No Attached Properties
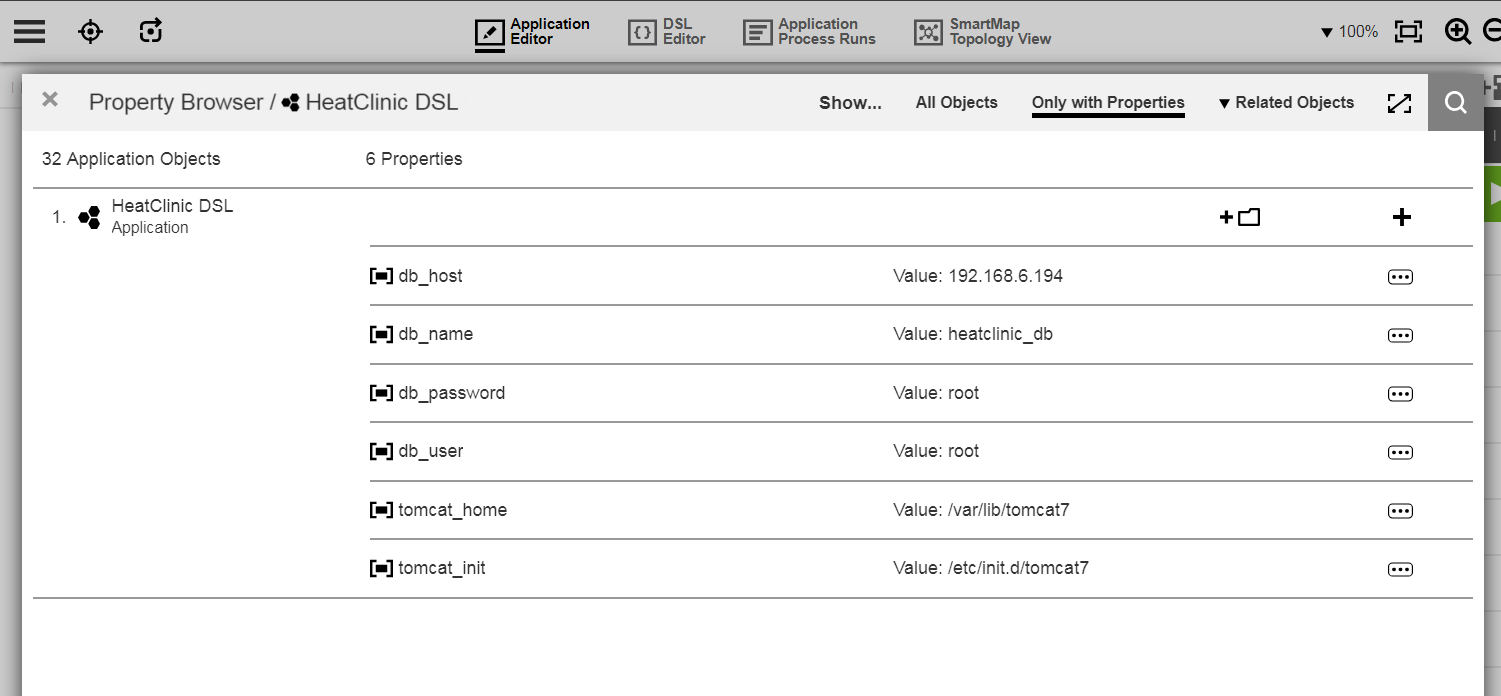
By default, all objects appear in the list. If at least one object in the project has one or more properties, then the Show… button, All Objects button, and the Only with Properties button let you toggle between a view of all objects in the project or a view of just the objects with properties:
Viewing or Navigating to Related Objects
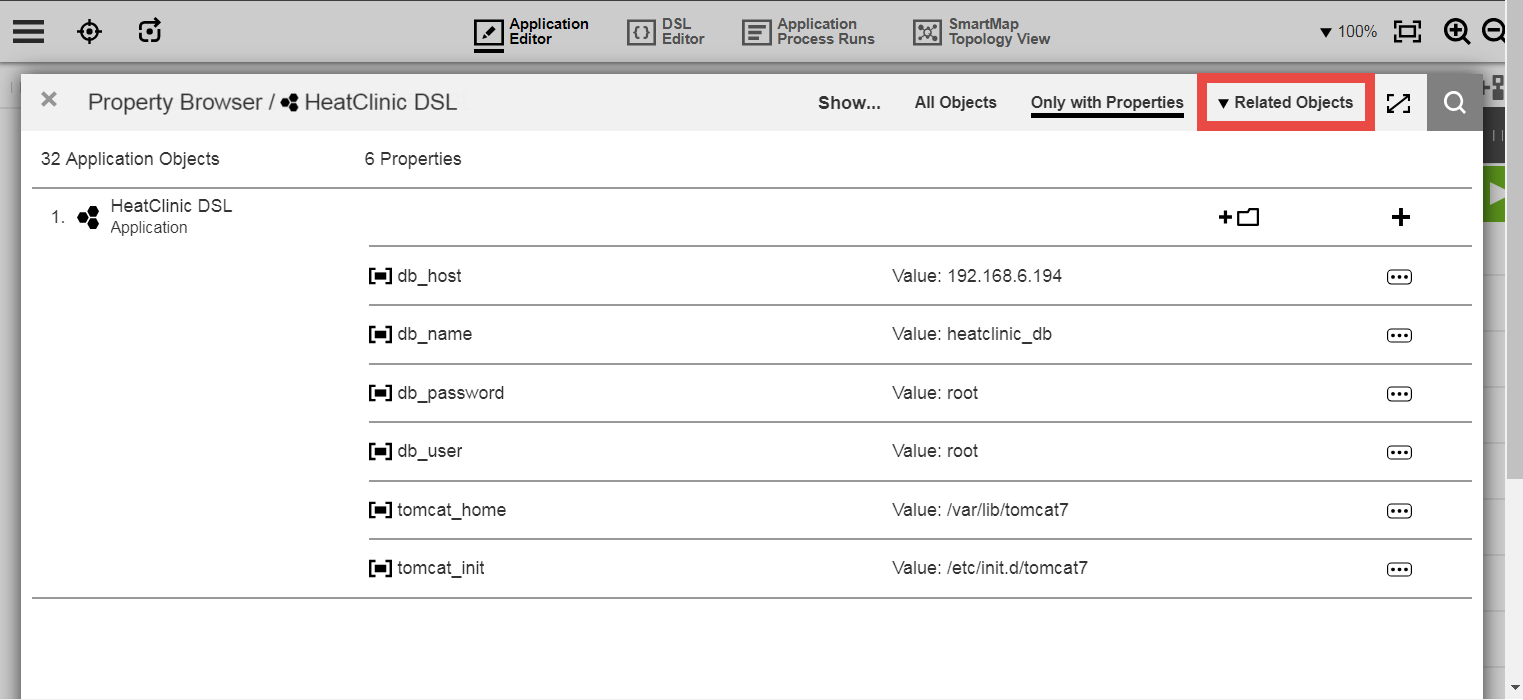
To view all objects (such as environments) that are related to the properties in this project, click the Related Objects button. For example for viewing the properties in an application, if the application is mapped to various environments, you can view those objects as well as their child objects:
Following is an example of a list of related objects that appears:
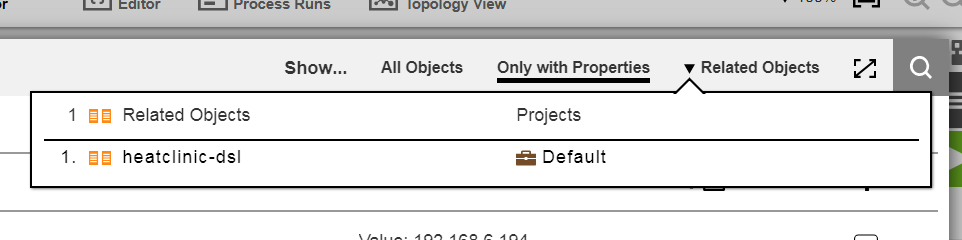
To navigate to a related object in the list, simply click the object. For example, if you click the heatclinic-dsl environment in the screenshot above, the properties for that environment appear:
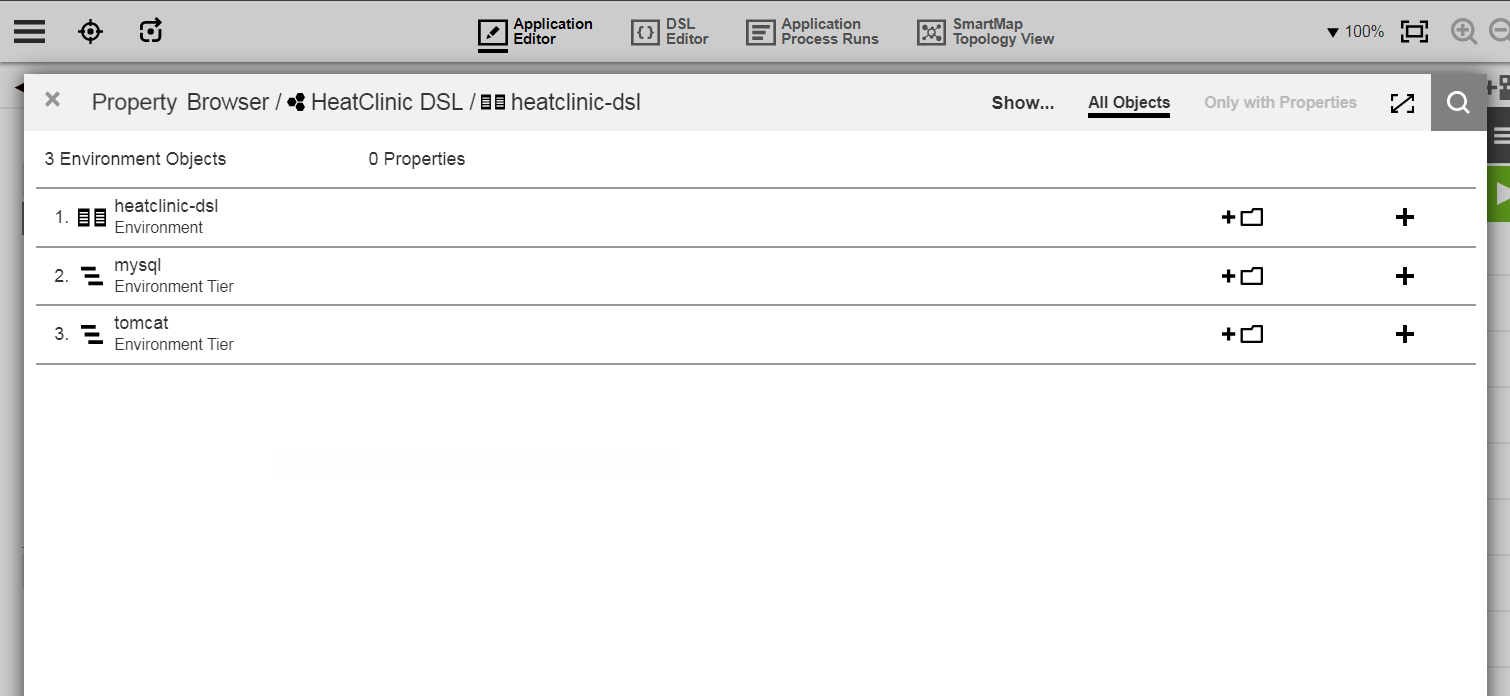
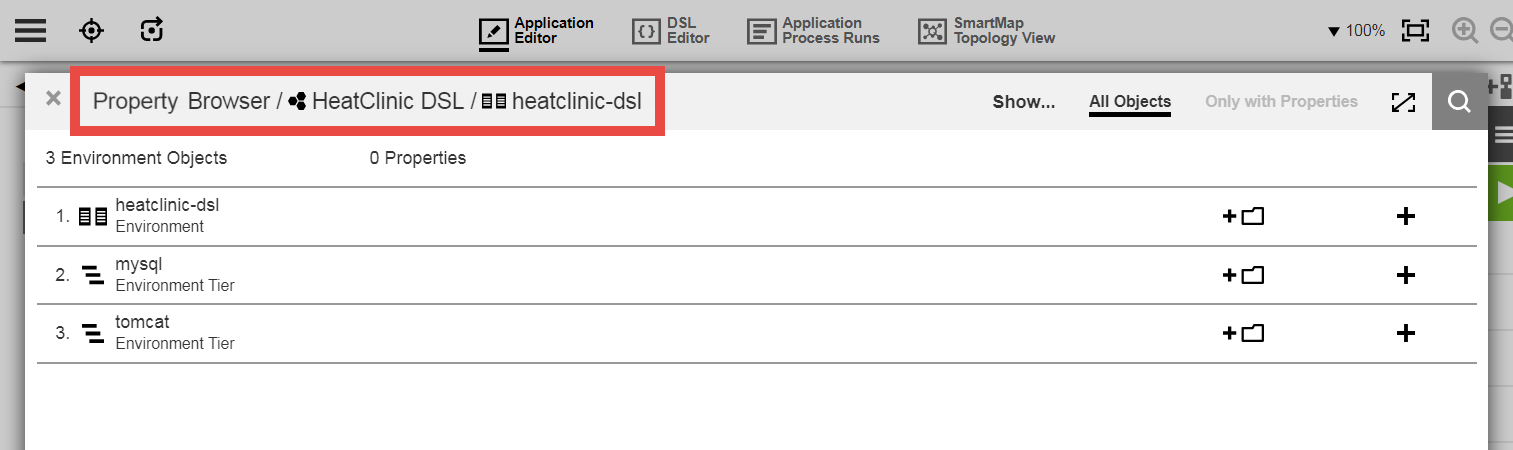
Notice that the breadcrumbs at the top of the dialog box are updated to indicate the navigation path that you used to browse to your current location:
Adding a Properties Directory
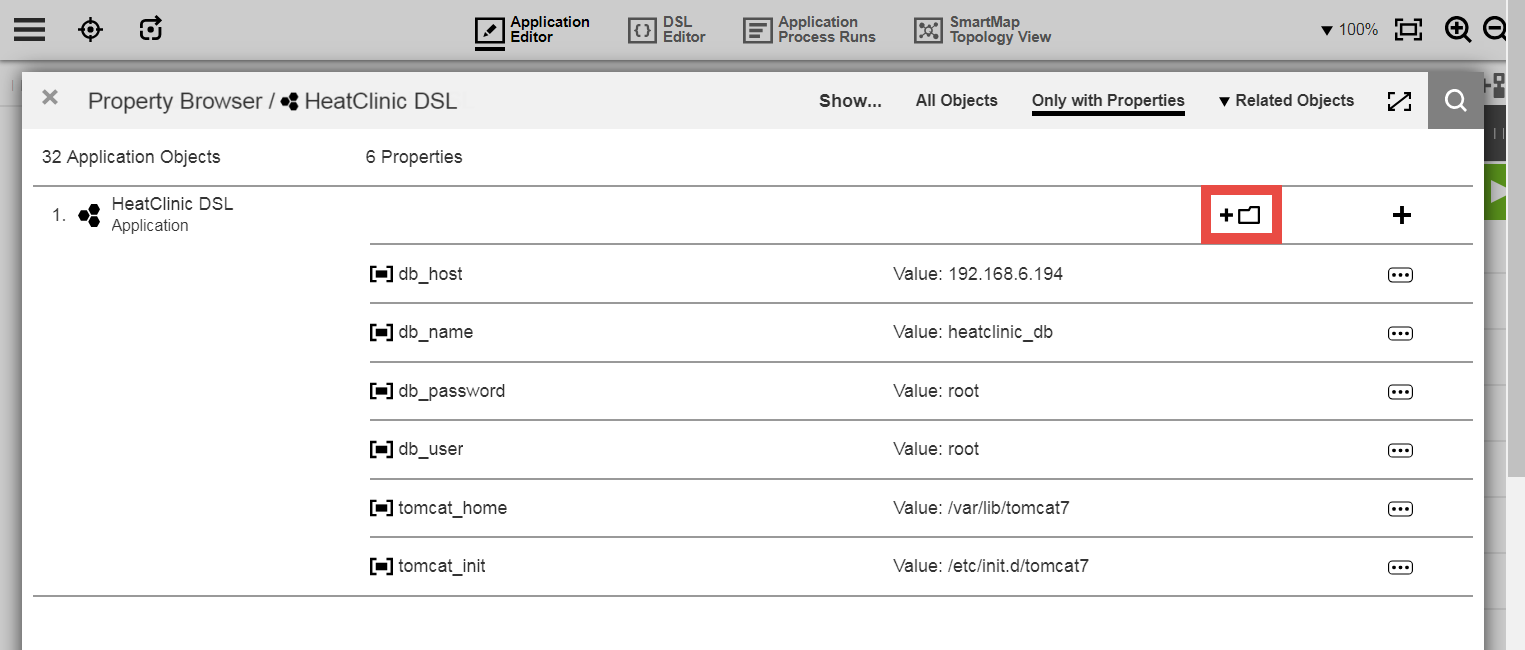
The  (Add Directory) button lets you create a hierarchy of directories (property sheets) for properties in the project. The following example shows the button:
Clicking this button opens a dialog box for entering the details for the new directory:

Complete the items in the dialog box as follows:
| Field or Menu | Description |
|---|---|
Directory Name |
Name of the property. For naming guidelines, see Using Special Characters in CloudBees Flow Object Names . |
Place into… |
Directory (property sheet) to contain the property. While you build out the properties that belong to an object, this menu lets you edit the structure or hierarchy of the object’s property data. Properties are in the object’s |
Creating or Editing a Property
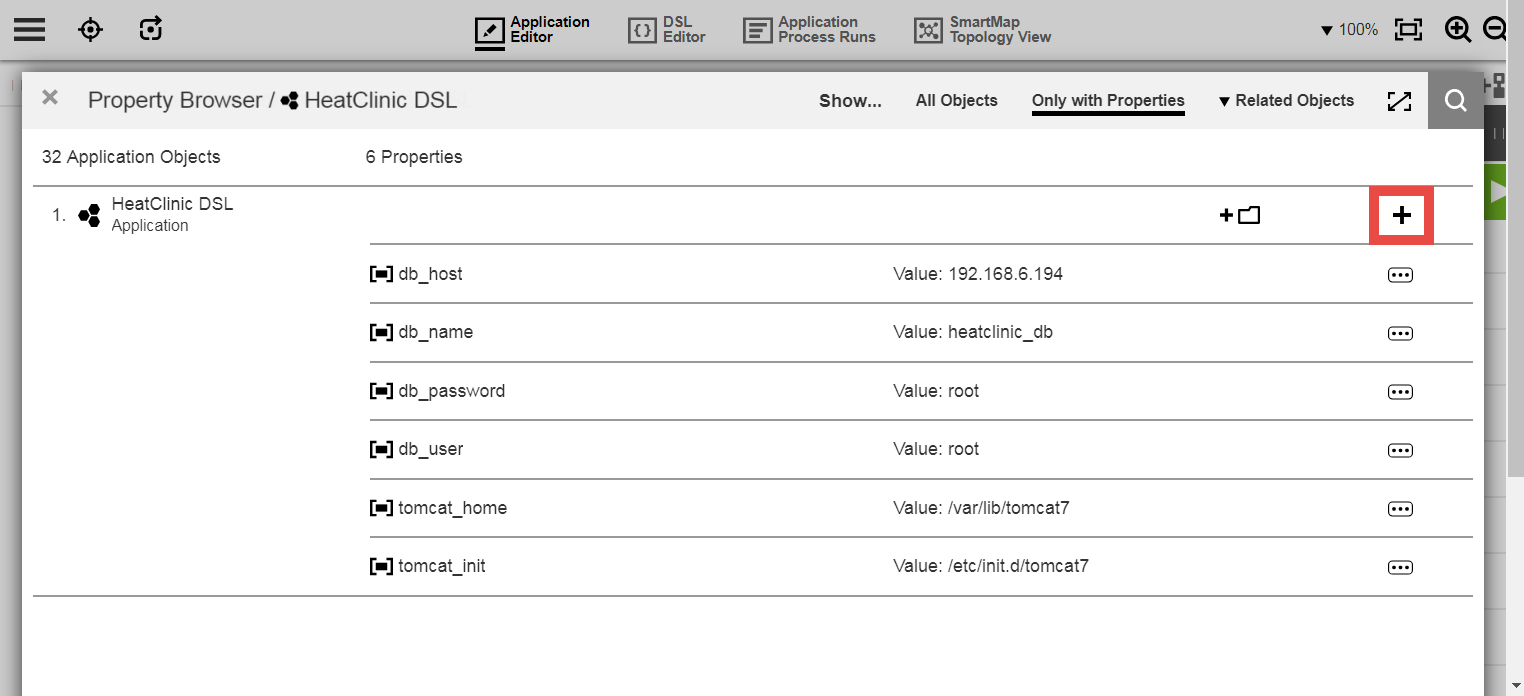
To add a property, click the  (Add Property) button:
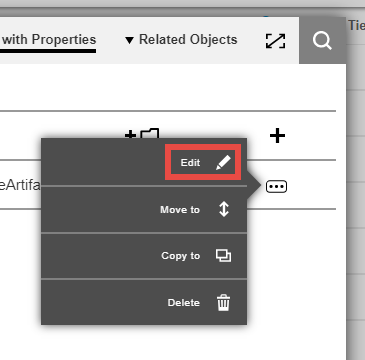
Or to edit a property, click its corresponding  button:
And then click Edit from the popup menu that appears:
Either of these options opens a dialog box for entering the property details. For example:
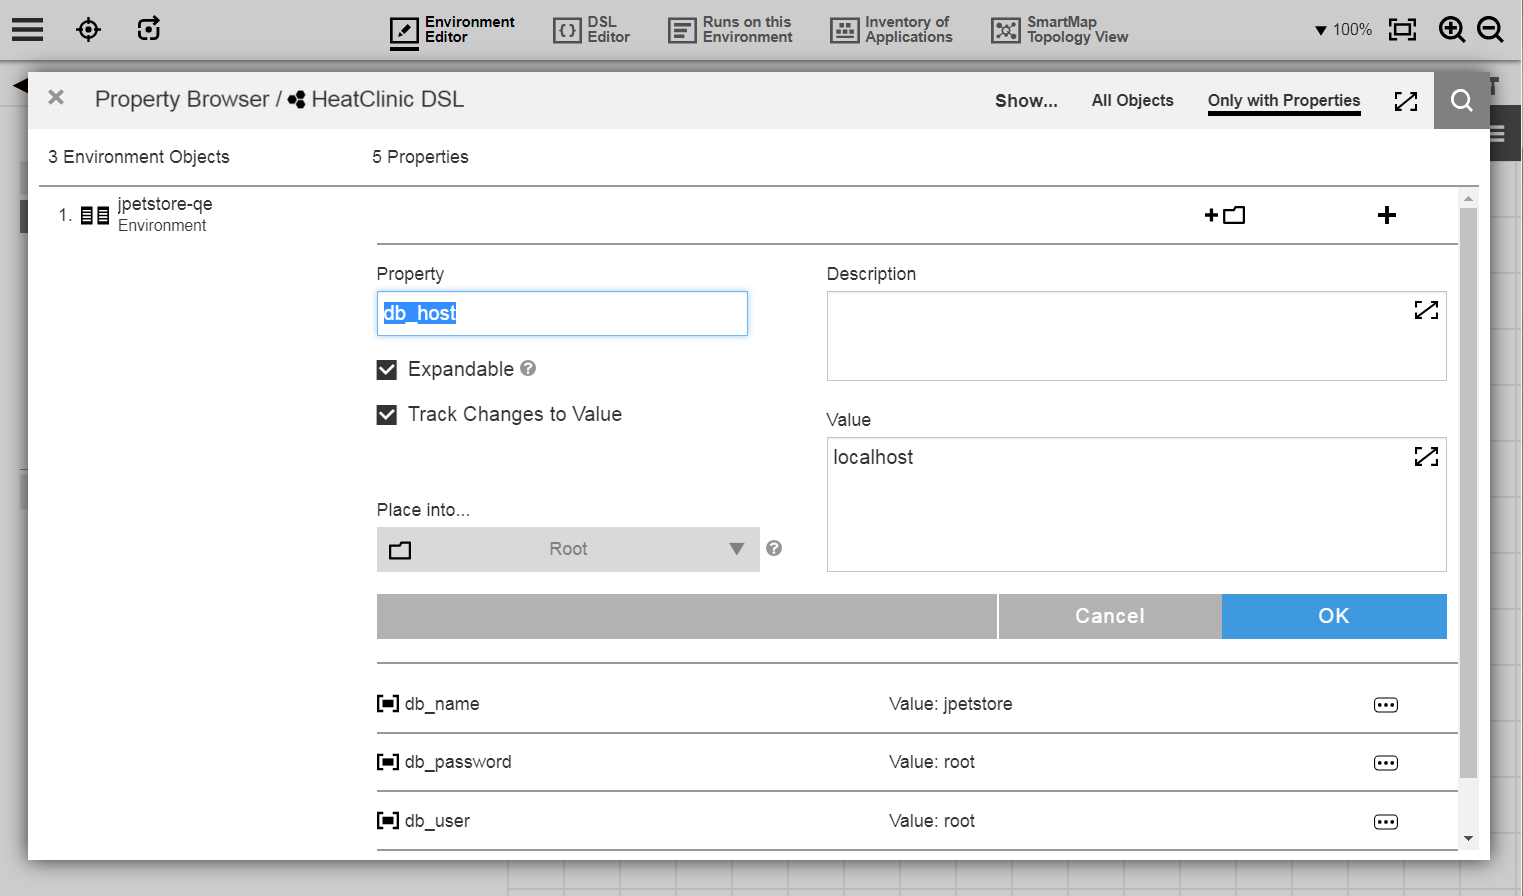
For either creating or editing a property, complete the items in the dialog box as follows:
| Field or Menu | Description | ||
|---|---|---|---|
Property Name |
Name of the property. For naming guidelines, see Using Special Characters in CloudBees Flow Object Names . |
||
Description |
Description of the property. The contents of this field are ignored by CloudBees Flow. |
||
Value |
Value for the property. |
||
Expandable |
Checkbox to allow the property to be referenced via expansion in other properties. For example, let’s say that you create a property named |
||
Track Changes to Value |
Uncheck to disable tracking of changes to this property value into the change history of modifications where the only change was to the value of this property. Unchecking it is useful where an automated process (such as a job step, pipeline stage, or workflow transition) makes numerous value-only changes. Unchecking it is strongly recommended for properties that are used as build counters, most recent build or artifact names, or are used to store runtime output from jobs, pipelines, or workflows into a property attached to a change-tracked non-runtime entity. Otherwise, these will rapidly fill the change history with numerous irrelevant events. This checkbox does not appear if change tracking is not enabled or is not tracking this property. Unchecking this checkbox also modifies the behavior of the See the KBEC-00422 - Locating and Fixing Properties with Excessive Unwanted Change History Generated by Automated Processes KB article for details about locating properties for which this should have been done (but was not) and thus have a large change history.
|
||
Place into… |
Directory (property sheet) to contain the property. While you build out the properties that belong to an object, this menu lets you edit the structure or hierarchy of the object’s property data. Properties are in the object’s |
And then click OK to save your changes.
Moving a Property
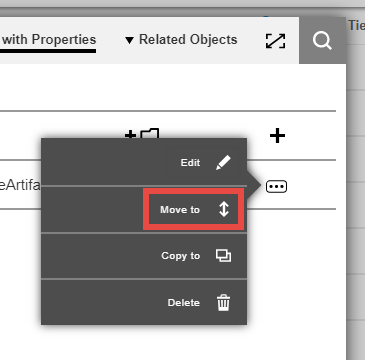
To move a property to another directory, click its corresponding button, and then click Move to from the popup menu:
The Move <property_name> to… dialog box appears. For example:
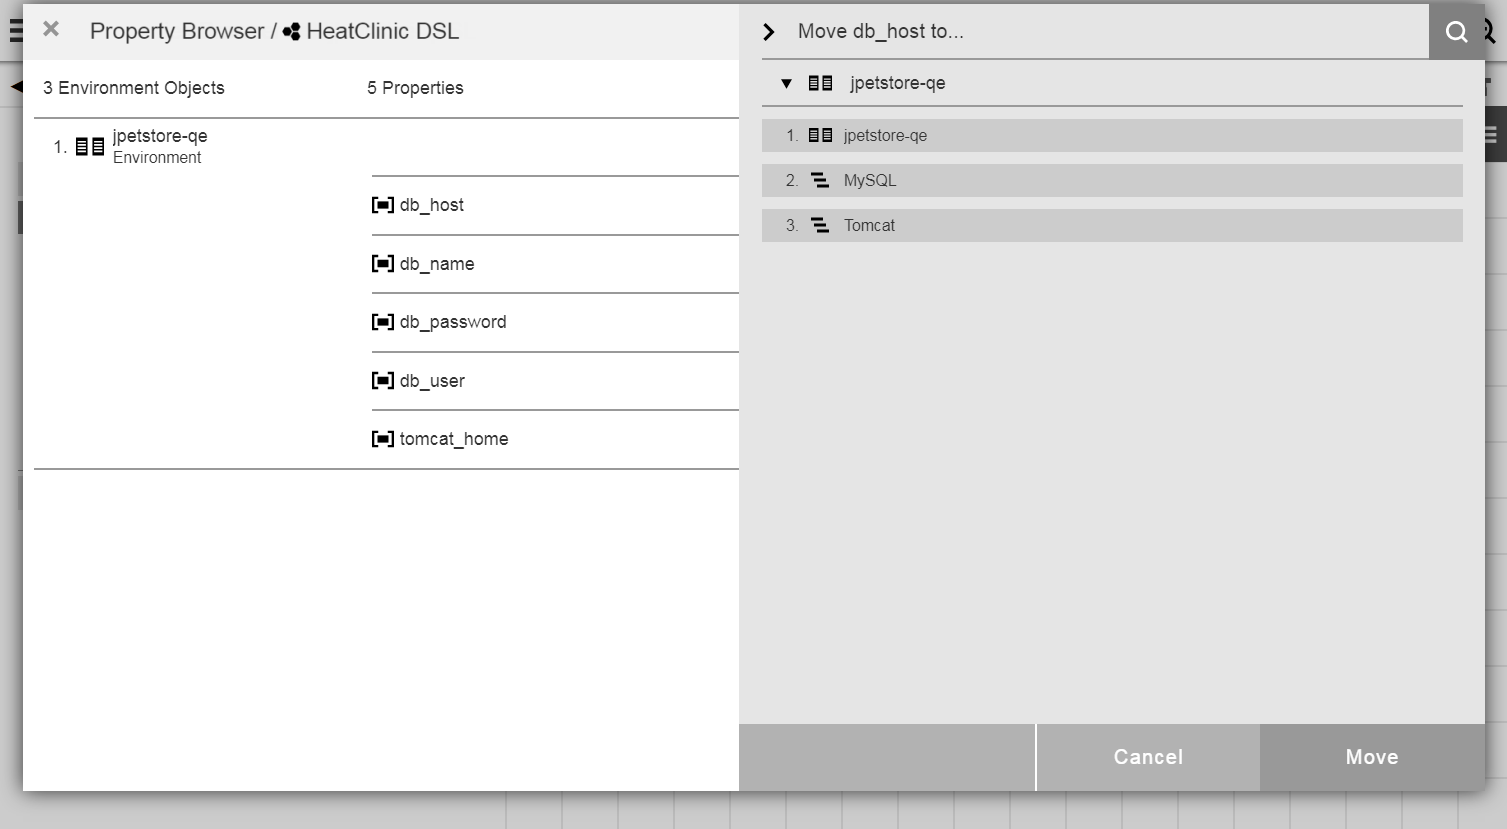
Then in the dialog box, click the new location (another object or directory), and then click Move.
Copying a Property
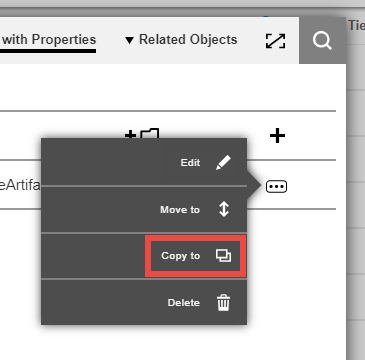
To create a property by copying an existing property, click its corresponding button, and then click Copy to from the popup menu:
The Copy <property_name> to… dialog box appears. For example:
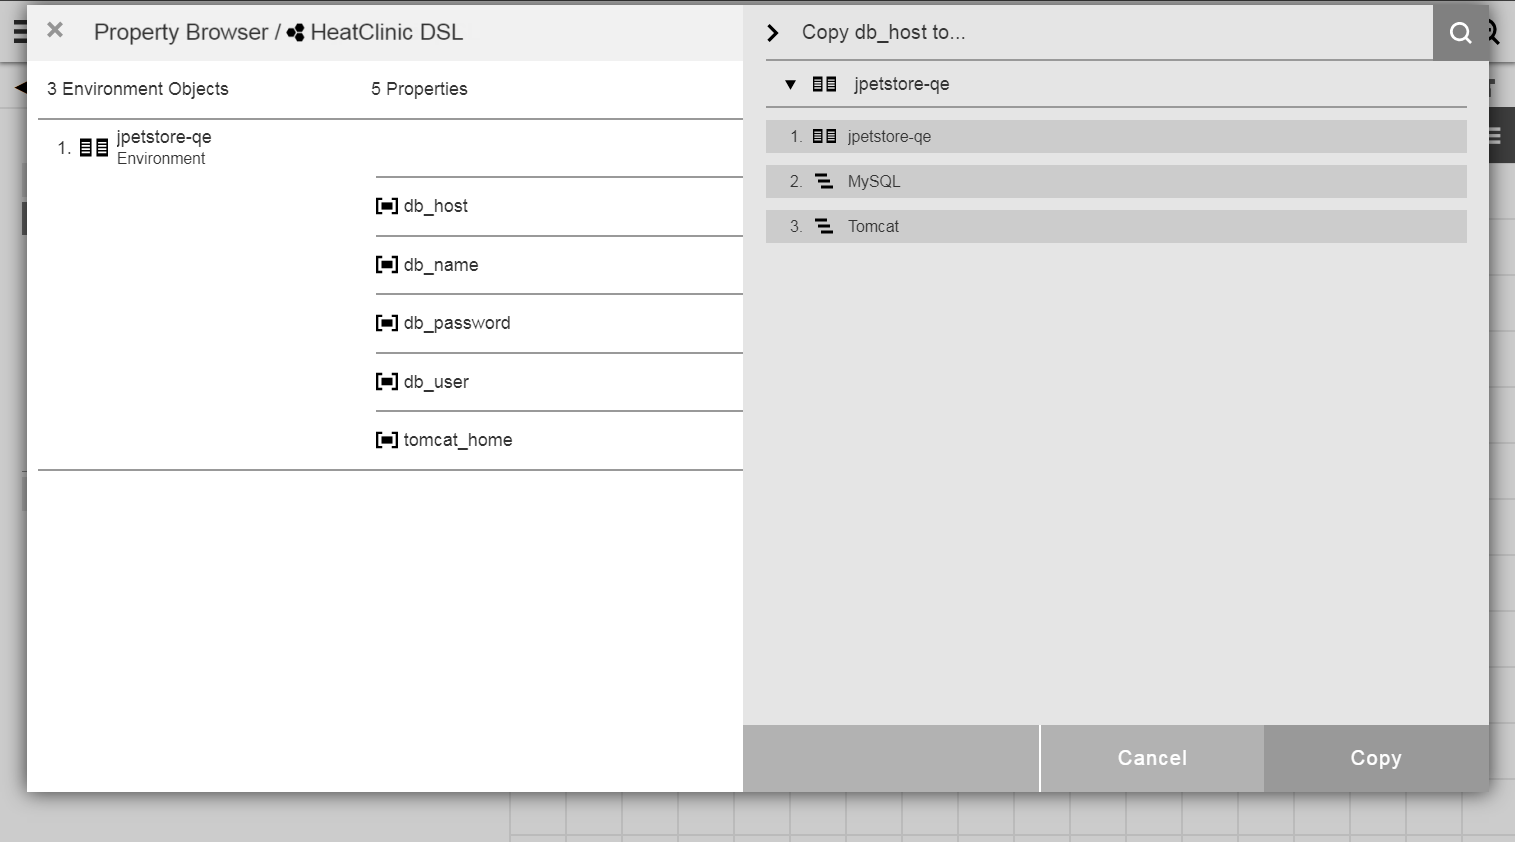
Then in the dialog box, click the new location (another object or directory), and then click Copy.
Deleting a Property
To delete a property, click its corresponding button, then click Delete from the popup menu:
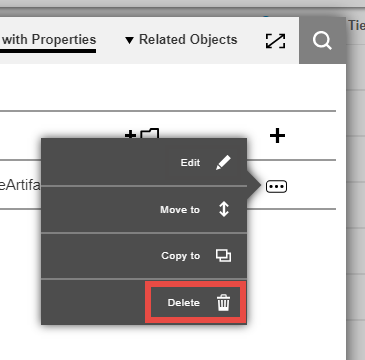
A confirmation dialog box appears:

Then click Delete to confirm the deletion.
Property Browser Usage Examples
Following are a few examples of how you can use the Property Browser.
Determining the Location of a Property
Let’s say that you have an application that consists of various application tiers, components, and application and component processes. The application is mapped to a set of environments that consist of various environment tiers. You can use the Property Browser to view all properties (and current values) associated with these objects comprising the application and its mapped environments. This helps you determine where a property is located so that you can reference it while you continue authoring.
Troubleshooting Deployments
For the application and setup described above, if the deployment has issues, you can use the Property Browser to troubleshoot why a run of that application behaved in an unexpected way. This could be traced to a number of configuration properties defined across the objects, and you can use the Property Browser to quickly check a number of properties to speed up investigation and debugging.