Packaging of software into containers is standard industry practice, enabling complete portability of applications. A container has everything your software needs to run, including code, libraries, and any other dependencies. Registries are a secure way to store and share container images, and with the CloudBees platform, you can build and publish container images.
Preconfigure containers in the CloudBees platform, to create a curated list of containers that team members can choose from when configuring their workflows. Selecting containers from the UI ensures that users enter the container information correctly in their workflow.
Use the CloudBees platform Kaniko action to publish to any of the following container registries:
-
Amazon Web Services Elastic Container Registry (ECR)
-
Docker Hub
-
Google Cloud Platform Artifact Registry
-
Harbor
-
JFrog Artifactory
Access a container
Search in and sort the container list.
To access a container:
-
Select an organization, and then select .
-
(Optional) Search for a specific container by entering all or part of a container name into Search.
-
(Optional) Select an option in Sort by to sort the container list. Choose either Ascending or Descending alphanumerical sort order.
The containers are displayed according to your search or sort criteria.
Add a container
Add containers to the list of preconfigured containers in the platform, for you and your team to use in workflows.
To add a container:
-
Select an organization, and then select .
-
Select Create container.
-
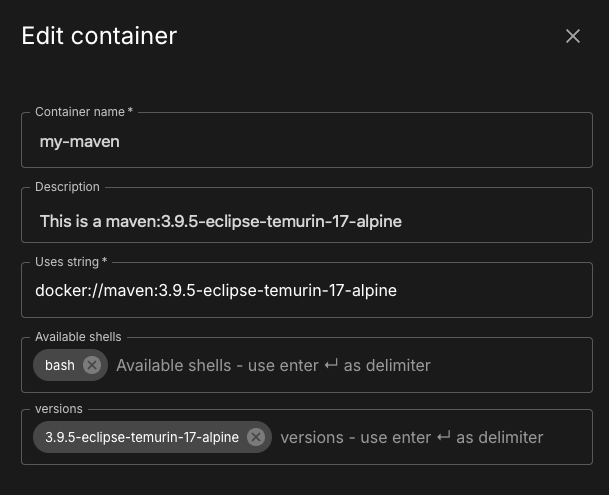
Enter a Container name.
-
(Optional) Enter a Description.
-
Enter a Uses string, the string value for the
useskeyword in the workflow YAML file. -
(Optional) Enter any Available shells, as per supported DSL syntax.
-
(Optional) Enter any Versions you want to associate with the container.
-
Select Save.
Your container is added to the list in Containers.

Update a container
Update the configuration settings of a container. You must have the administrator role to make updates.
To update a container:
-
Select an organization, and then select .
-
Select
 next to the container you want to update.
 -
Select Edit container.
-
Make any desired changes.
-
Select Save.
The selected container is updated accordingly.
Delete a container
Delete any container as long as you have the administrator role. A deleted container is completely removed from the CloudBees platform, and deletion is irreversible.
To delete a container:
-
Select an organization, and then select .
-
Select
 next to the container you want to delete.
 -
Select Delete container.
-
Select Delete.
The selected container is deleted and removed from the container list.