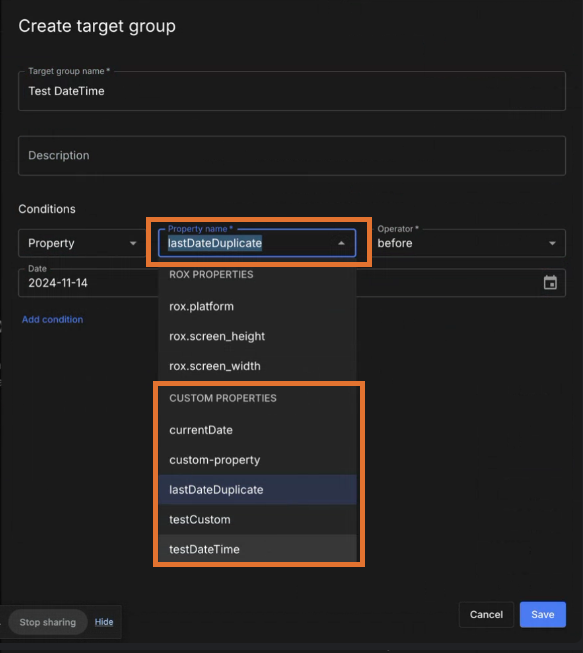
Create properties using Custom properties in code or Built-in targeting properties properties defined in the code. All property configurations are scoped to the application where they are defined. They are not shared across applications.
Built-in targeting properties
The following table lists built-in targeting, in the format of rox.<attribute name>:
| Attribute name | Description | Data type |
|---|---|---|
|
Application release version. This is the value set in the SDK’s |
SemVer |
|
Universally unique identifier (UUID). |
String |
|
ISO 639 two-letter language code.
For example, |
String |
|
Current time. |
DateTime |
|
Code language or framework name.
For example, |
String |
|
Screen height in pixels. |
Number |
|
Screen width in pixels. |
Number |
Learn more about defining properties in the SDK references, and using properties to configure flags.
Create custom properties in either the UI or in code.
The following property types are available:
-
Boolean
-
Number (some code languages use Double and Int)
-
String
-
SemVer (
pre-releaseandpatchlabels are not supported) -
DateTime
Custom properties in code
Add a custom property to your connected app code for use in target groups or directly within feature flag configurations, then run the app to display the property options in the UI.
Custom properties are not limited to target groups; they can also be used individually inside a feature flag configuration. This allows for more granular flag targeting without requiring a predefined target group. For example, you can apply a custom property directly within flag rules to evaluate specific conditions based on user attributes.
For example, the following code within a connected JavaScript app results in the target group options displayed below.
Rox.setCustomStringProperty('company', getCompany()) Rox.setCustomBooleanProperty('isBetaUser', betaAccess()) Rox.setCustomBooleanProperty('isLoggedIn', isLoggedIn()) Rox.setCustomDateTimeProperty('targetDate', getTargetDate())
The setCustomDateTimeProperty method is available in JavaScript-based SDKs when using CloudBees Unify. Refer to your SDK documentation for DateTime property support in other languages.
|

You can define custom properties using two approaches: explicit or implicit.
-
Explicit custom properties are defined directly in your code by calling specific SDK methods for each property, giving you full control over property names, types, and values. This approach is recommended when you have a known set of properties that remain relatively stable.
-
Implicit custom properties use a dynamic property rule handler that resolves properties at runtime from a context object, without pre-defining them in code. This approach is useful when you need flexibility to add new properties without code changes, or when properties are provided dynamically from external systems or user sessions.
Usage examples: Explicit custom properties
Define explicit custom properties depending on the code language of your connected application:
Usage examples: Implicit custom properties
A dynamic custom property rule handler is called when an explicit custom property definition does not exist in CloudBees Unify.
If you do not define this rule handler, the default function is activated, which tries to extract the property value from the context by its name.
A generic implementation of that handler is described by the following:
(propName, context) => context ? context[propName] : undefined
Create this handler for implicit custom properties, depending on the code language of your connected application:
If you are using a client-side SDK and the value of a custom property changes while the app is running (such as after a user signs in), call Rox.unfreeze() to re-evaluate feature flags with the updated property values. This ensures flags are recalculated based on the current property state.
|
Manage custom properties in the UI
Create your own custom properties in the UI that can be used in target groups or as criteria for feature releases.
Access custom properties
To access custom properties, select . Search for a specific custom property by entering all or part of a property name into the Search field.
|
Select |
Create a custom property
To create a custom property in the UI:
-
Select .
-
Select Create custom property.
-
Enter a Name.
-
(Optional) Enter a Description.
-
Select a data type from the options.
-
Select Save.
The custom property is created accordingly.
Update a custom property
You cannot update the custom property Name or Data type, but you can update the optional Description.
To update a custom property description:
-
Select .
-
Select
 next to the property you want to update.
 -
Select Edit property, and update or delete the description.
-
Select Update.
The custom property is updated accordingly.
Delete a custom property
A custom property cannot be deleted while it is still in use. You must first remove all references to it, such as conditions or configurations that use the property. Once all references are removed, the property can be safely deleted.
To delete a custom property:
-
Select .
-
Locate the custom property to be deleted.
-
Select
 next to the property.
 -
Select Delete.
If the property is in use
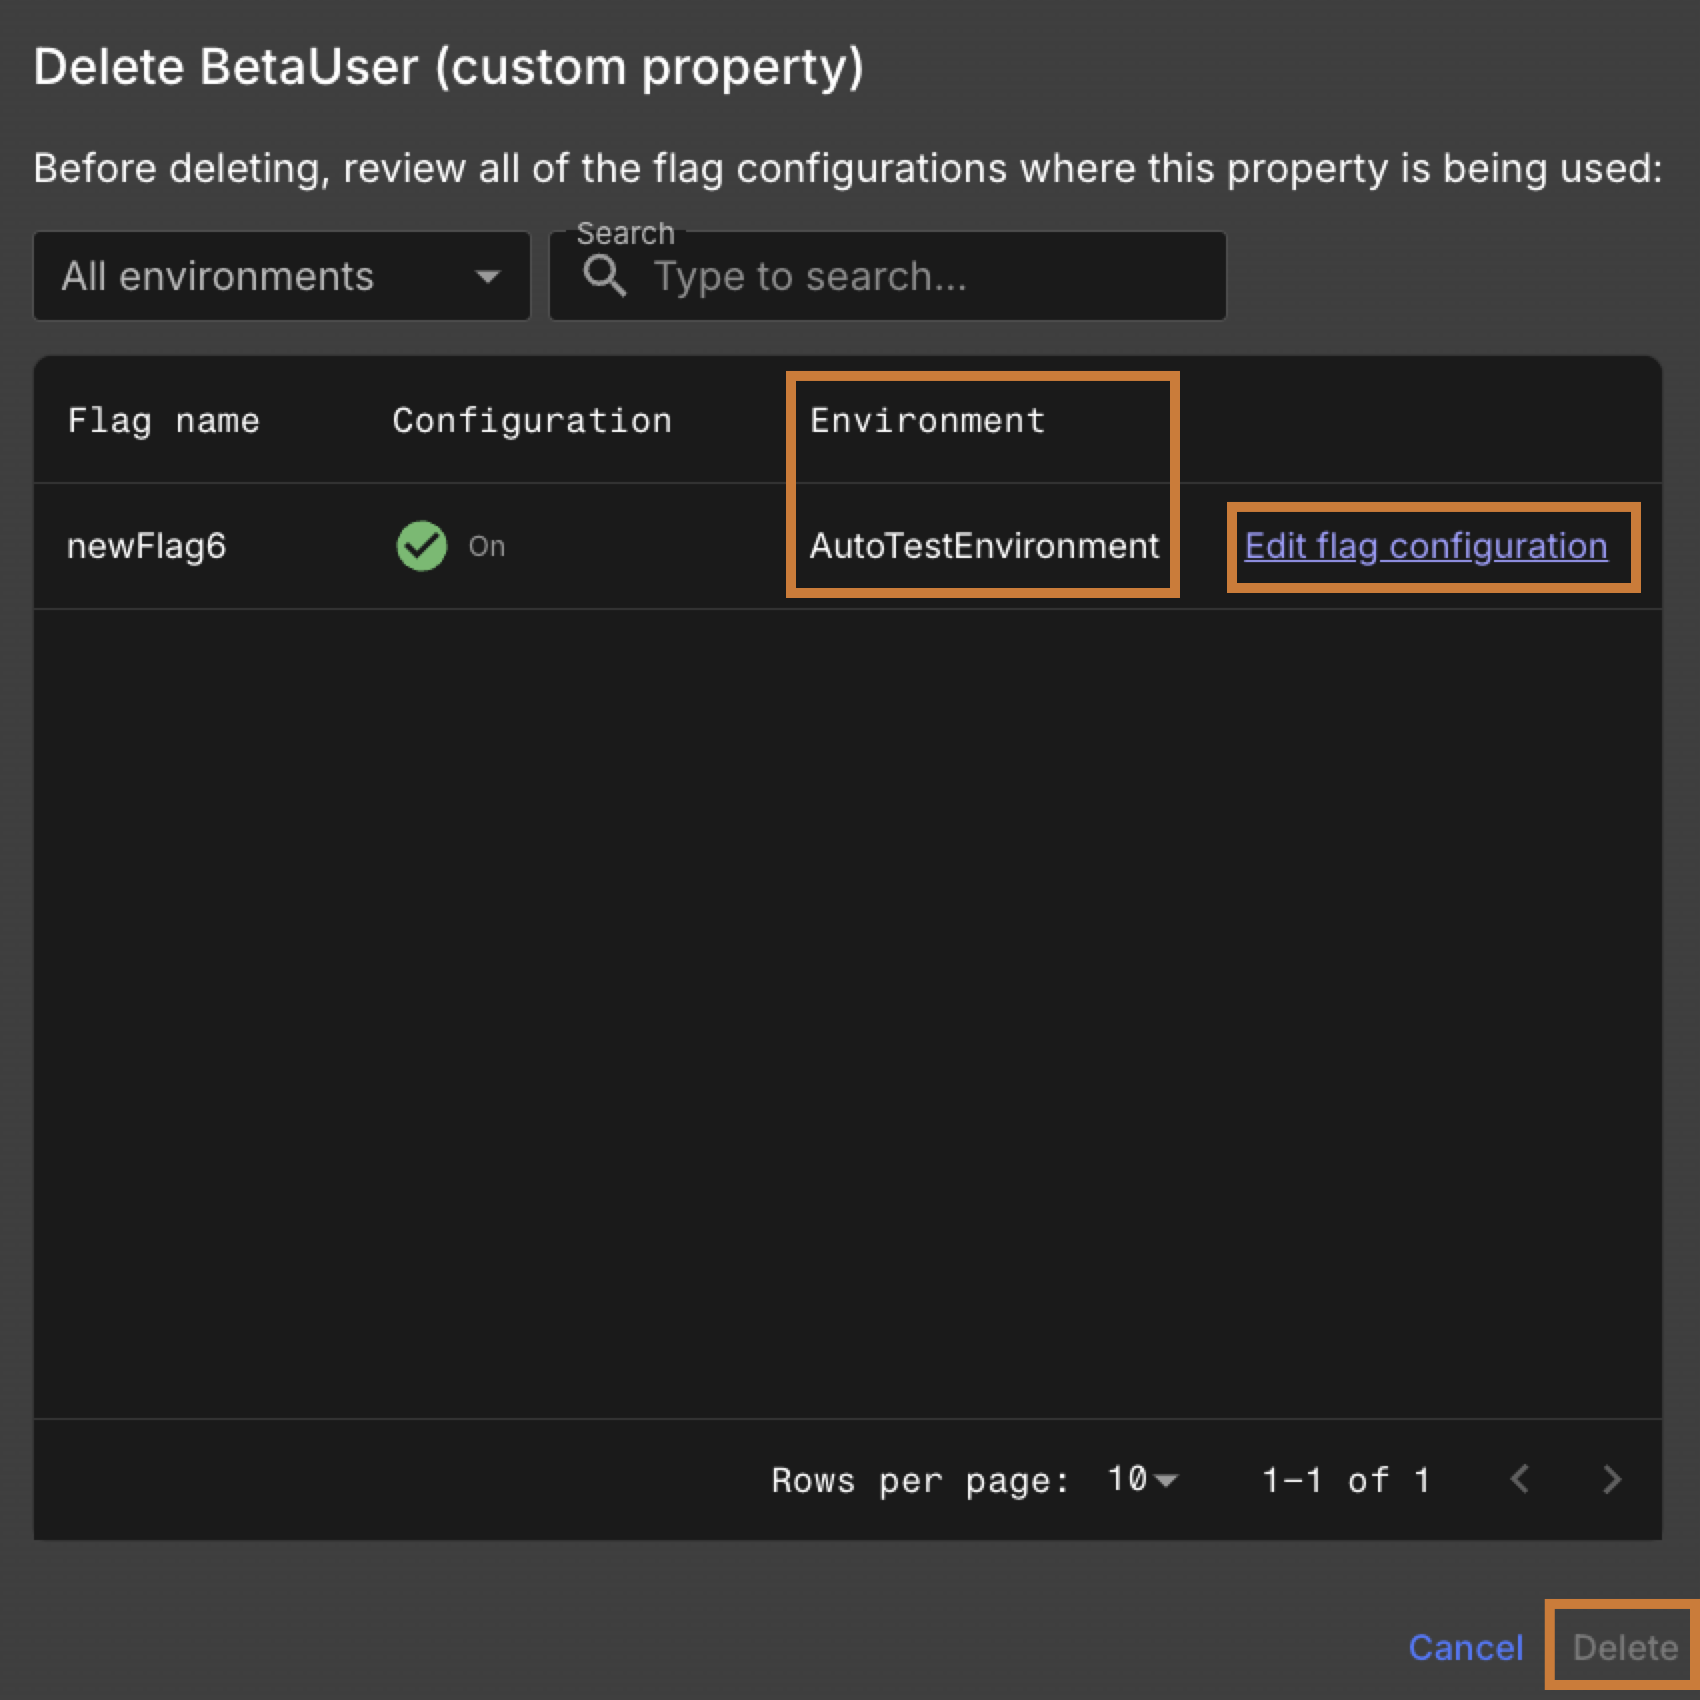
When the Delete (custom property) dialogue appears and shows the property is still in use, do the following:
-
Review the environments where the property is being used.
-
Select the Edit flag configuration link to open the configuration interface.
-
Review how the property is applied in feature flag rules.
-
Note that the Delete option is disabled until all references are removed.
View the Delete (custom property) dialogue
 Figure 2. Delete (custom property) dialogue
 -
Remove references by doing one of the following:
-
To remove a full configuration, including all conditions within the configuration, select Delete next to the configuration.
 Figure 3. Delete a configuration
 -
To remove individual conditions, select
 next to the conditions to be deleted.
 Figure 4. Delete a single condition
-
-
Select Save configuration to confirm changes.
-
Repeat for all environments and configurations where the property is used.
-
After removing all references, return to the custom properties list and attempt deletion again.
If the property has no references
When the Safely delete (custom property) dialogue appears, all references have been removed:
-
Review the confirmation message.
-
Select Delete to permanently remove the custom property from CloudBees Unify.
 Figure 5. Safely delete custom property dialogue
|
Once deleted, the custom property cannot be restored. |
For configuring user segmentation with target groups, refer to Target groups.