A component is a connected source code repository (SCM) that enables you to create and run workflows in the CloudBees platform.
Refer to Components to gain a deeper understanding of how to use components in the platform, and use role-based access control to manage permissions for component-related tasks. To learn how to connect your SCM, refer to SCM integrations.
Perform any of the following management functions on components in your organization:
Access a component
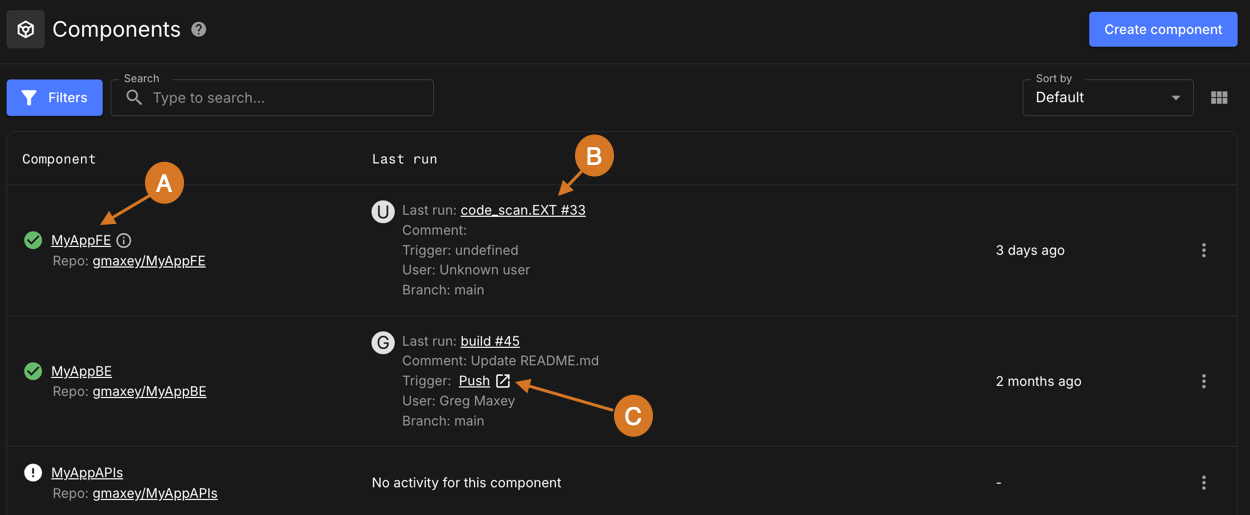
Select an organization, and then select Components, to display all components within that organization, including links to associated repositories and workflow runs.

Perform any of the following in the component list:
-
Select the component name to view the component summary, or the Repo link to view the repository.
-
Select the run link to view the details of the most recent run.
-
If the run is not manually triggered, select the Trigger link to view the commit in the repository.
To change the view, select the icon in the upper-right corner:
-
 : List view. Default display is sorted descending by last run.
 -
 : Block view. Default display is sorted left to right by last run.
|
To access a component from the list:
-
(Optional) Search for a specific component by entering all or part of its name into Search.
-
(Optional) Select Filter to select for components by the status of their most recent run. Only status types which are present in the unfiltered list are available in the filter.
-
Select a component name (in table view only) to view the component summary.
Create components
Create one or more components at once, each connected to a single integrated SCM. Choose the organization where you want to create each component.
To create components:
-
Configure an SCM integration with the CloudBees platform. You can integrate one or more repositories in your SCM organization.
-
Select an organization, and then select Components.
-
Select Create component.
-
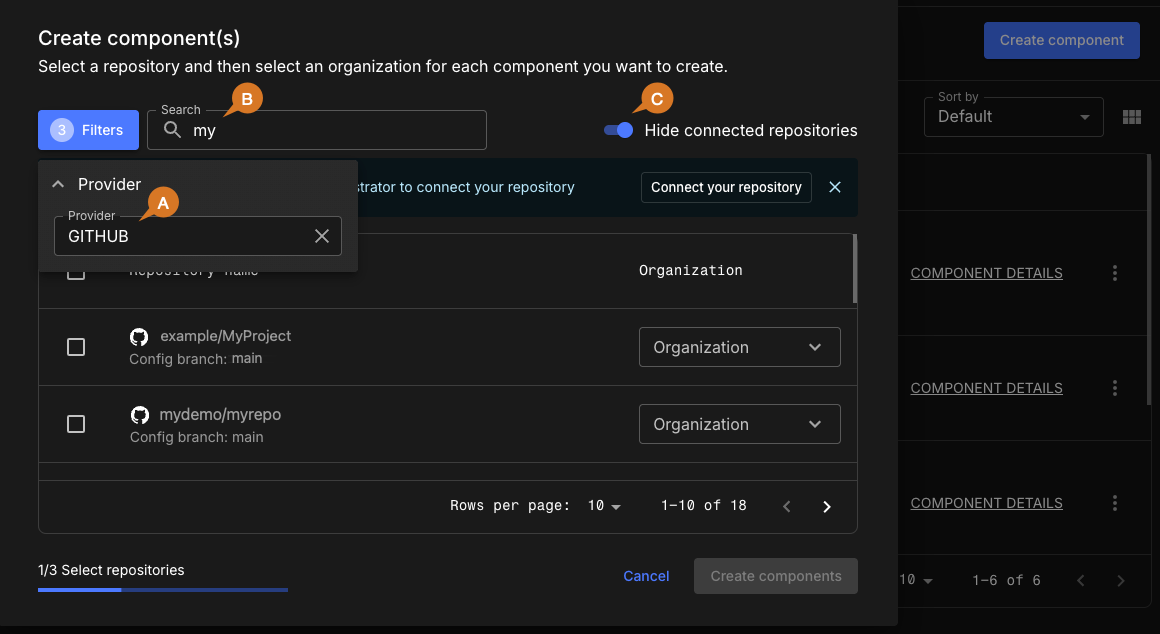
(Optional) Filter the integrated repository list by any of the following:
-
Select Filters to filter by SCM provider: GitHub or Bitbucket.
-
Enter all or part of a repository name into Search.
-
Select
 to show only those repositories available for connection (not yet connected to a component).
 Figure 2. Component creation using three filters.
Filters lists the number of active filters.
-
-
Select a repository, which sets Organization to the current organization (the default).
-
(Optional) Select Organization to choose a different organization:
-
Select a different organization from the options.
-
Select Save.
 Figure 3. Organization options selector highlighted.
-
-
(Optional) Select more repositories, if desired.
-
Each repository selection creates a new component.
-
For each repository selected, you have the option to create the component in the organization of your choice.
-
-
Select Create components to create and list your new components.
-
Select Finish and close to return to Components for your current organization.
Each component is created in the organization of your choice, and listed by the repository name in Components for that organization. Select the organization name in the breadcrumbs to switch to a different organization.
Update a component
Update the Component name or Description of a component.
To update a component:
-
Select a component.
-
Select
 next to the component you want to update.
 -
Select Edit component.
-
Make any desired changes.
-
Select Save.
The selected component is updated accordingly.
Delete a component
Delete any of your components. A deleted component is completely removed from all organizations in the CloudBees platform, and deletion is irreversible.
To delete a component:
-
Select a component.
-
Select
 next to the component you want to delete.
 -
Select Delete component.
-
Select Delete.
The selected component is deleted and removed from the component list.