In this quickstart, use a CloudBees platform workflow to scan a repository with the SonarQube static application security testing (SAST) scanner, which detects security flaws and provides suggested code fixes. After implementing this action in your workflow, SonarQube report data is collected and displayed in the CloudBees platform analytics dashboards.
| If you are already running a centralized SonarQube instance, you have the option to use the Scan with SonarQube action instead of the bundled SonarQube action used in the steps described below. In this case, the data collected from the scans is available in both CloudBees platform analytics dashboards and in SonarQube reports. |
Prerequisites
-
Complete the Quickstart: Connect to source code management that connects a sample Go app repository to the platform.
-
Complete the Quickstart: Create a build workflow that creates a build workflow.
-
Verify that your workflow YAML file is basically identical to the complete YAML file from the build workflow quickstart, as this quickstart adds a step to that
CI job.
Add a scanning step
To scan your repository, add a step to the CI job.
This step uses the CloudBees Configure SonarQube bundled action to scan your repository for security vulnerabilities.
Use either the code editor or the visual tool to add this step. Workflow updates made in the visual tool display in the code editor, and vice versa.
Add a scanning step using the code editor
To add the SonarQube bundled action using the code editor:
-
Select the
 , and then select a component in an organization.
 -
Select Edit YAML on your workflow.
-
Enter the following in the code editor, starting just after your
Run testsstep:- name: Scan with SonarQube bundled action uses: https://github.com/cloudbees-io/sonarqube-bundled-sast-scan-code@v1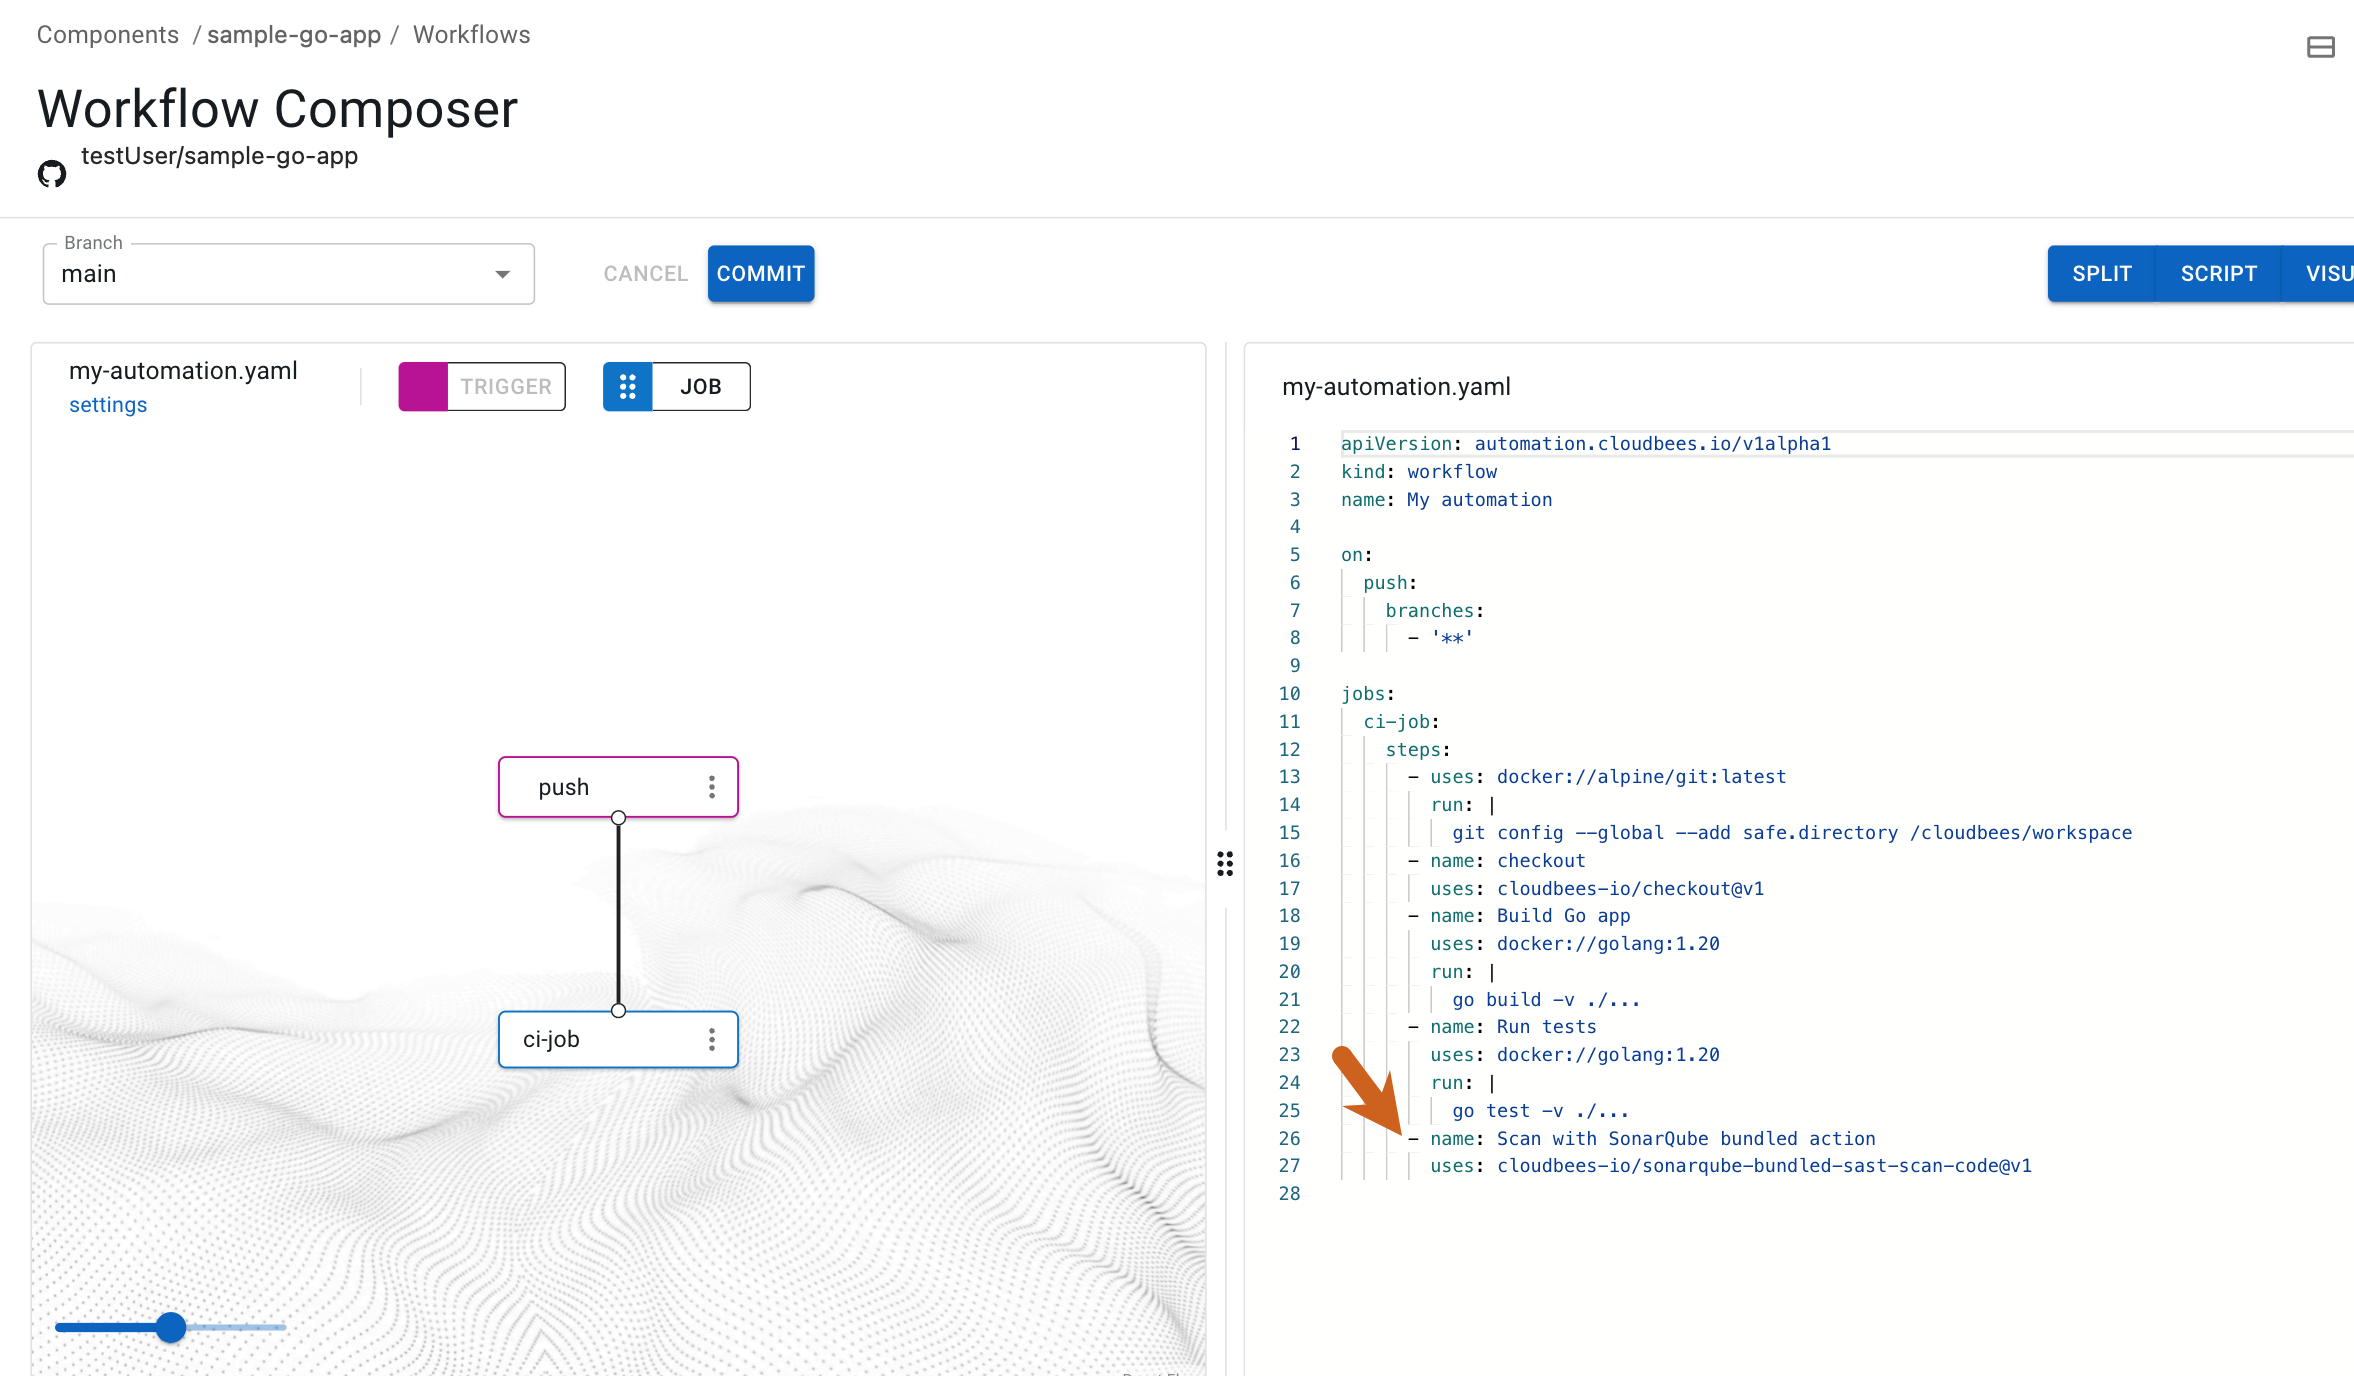 Figure 1. SonarQube scan step highlighted.
You have added a step using the code editor.
Add a scanning step using the visual tool
To add the SonarQube bundled action using the visual tool:
-
Select the
 , and then select a component in an organization.
 -
Select Edit YAML on your workflow.
-
Select the 'ci-job` in the visual tool, or select the
 next to
 ci-job, and then select Edit.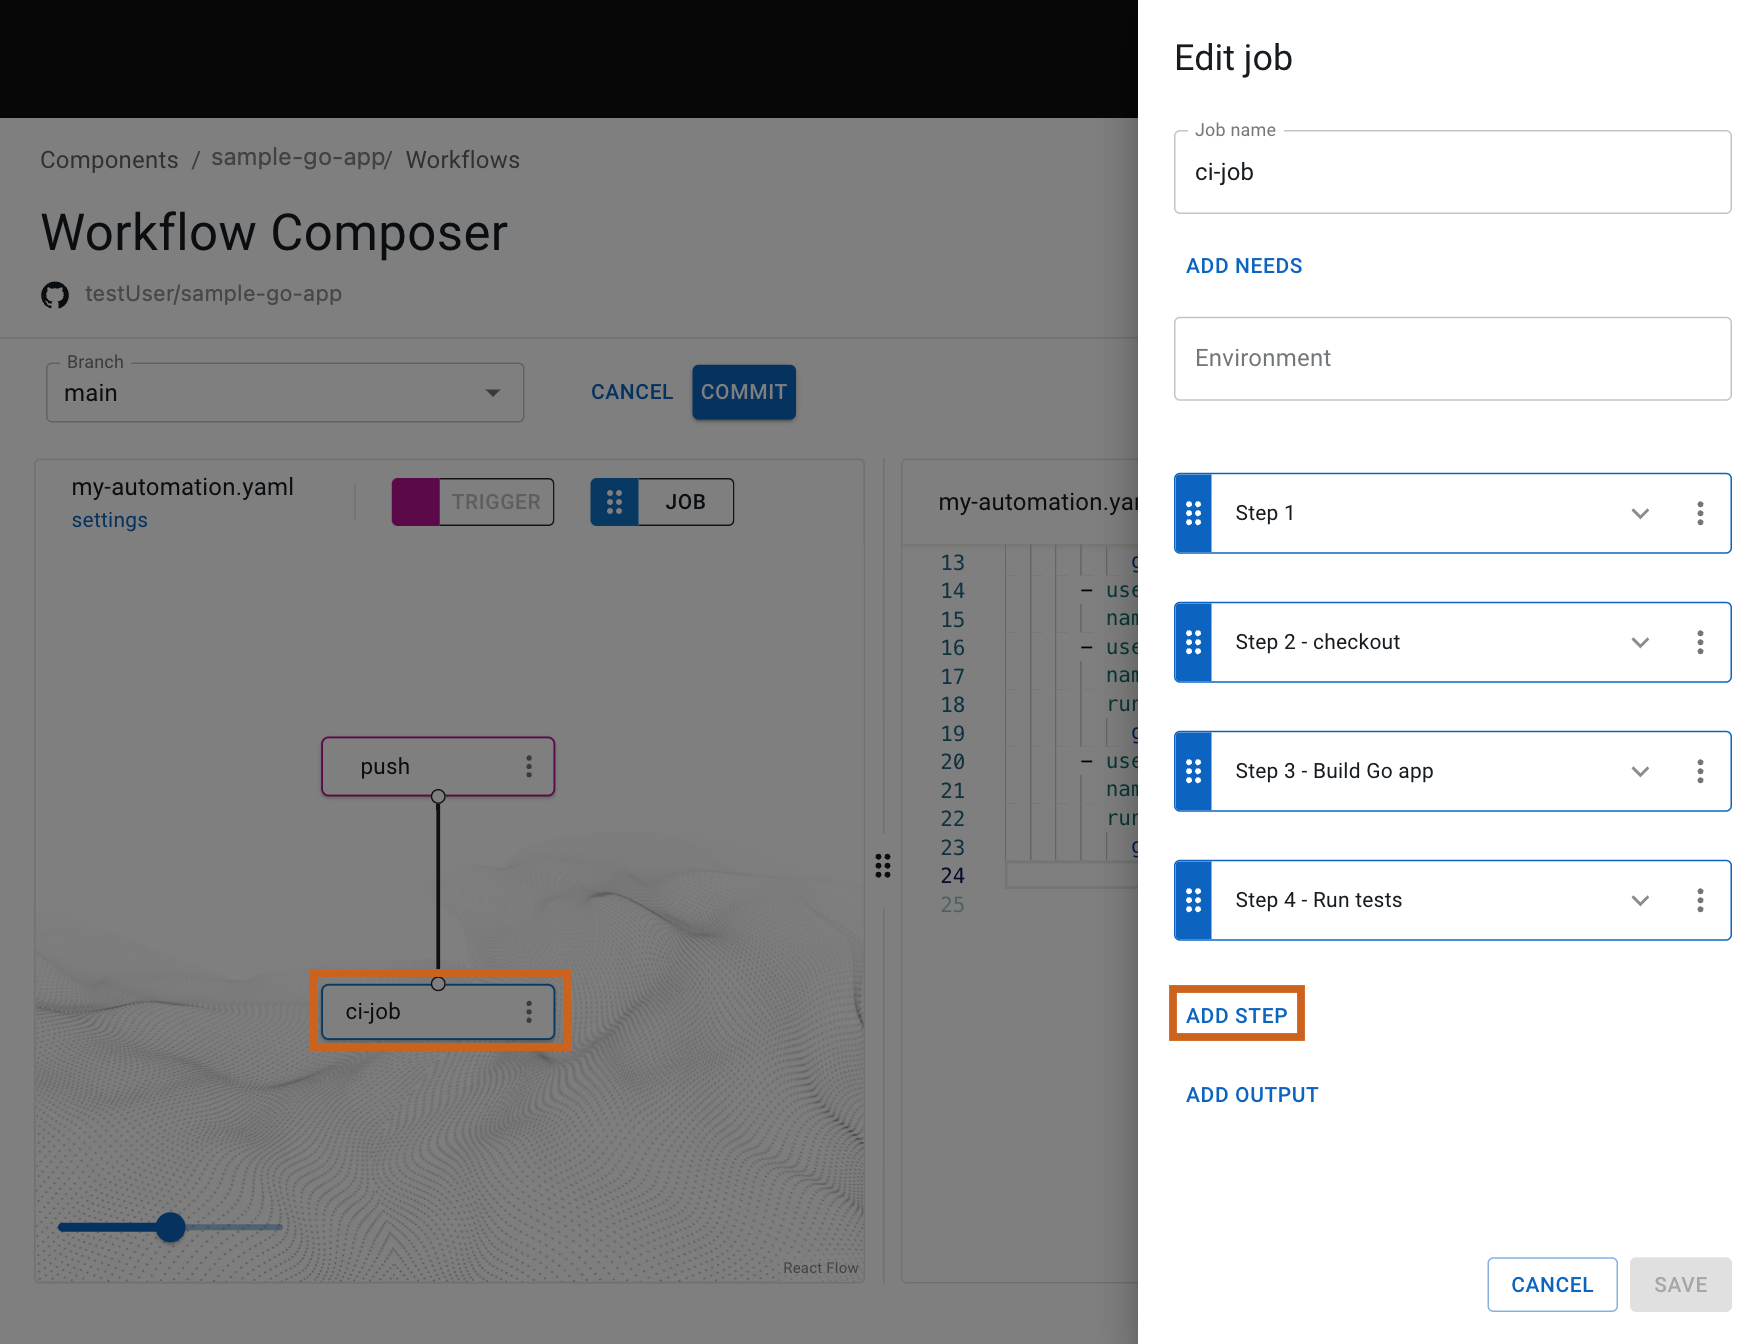 Figure 2. The selected job and Add step highlighted.
 -
Select Add step.
-
Select Select from catalog.
-
Search for the SonarQube bundled action by entering the name, then select
sonarqube-bundled-sast-scan-code. -
Select Apply selected.
-
(Optional) Select Scan from the options.
-
Select Save.
You have added a step using the visual tool.
|
Check to confirm that your YAML script is similar to the following: Display the complete YAML file for building the sample Go app and scanning the repository. |
Regardless of whether you have used the visual tool or the code editor to add the scan step, both the visual tool and the code editor are in sync and display the SonarQube bundled action in a new step of the ci-job job.
Run the updated workflow
Trigger the workflow to run by making a commit to your repository with the new scan step added to your workflow, then display the run details.
To trigger the workflow run and display the run details:
-
Select Commit.
-
Enter a Commit message.
-
Select Commit to current branch.
-
Select Finish.
-
Select Components from the left pane, select your component, and then select Runs to display your runs, with the most recent at the top of the list.
-
Select Display run to the right of your run.
-
Select the
ci-jobin the visual tool, and then select the scan step.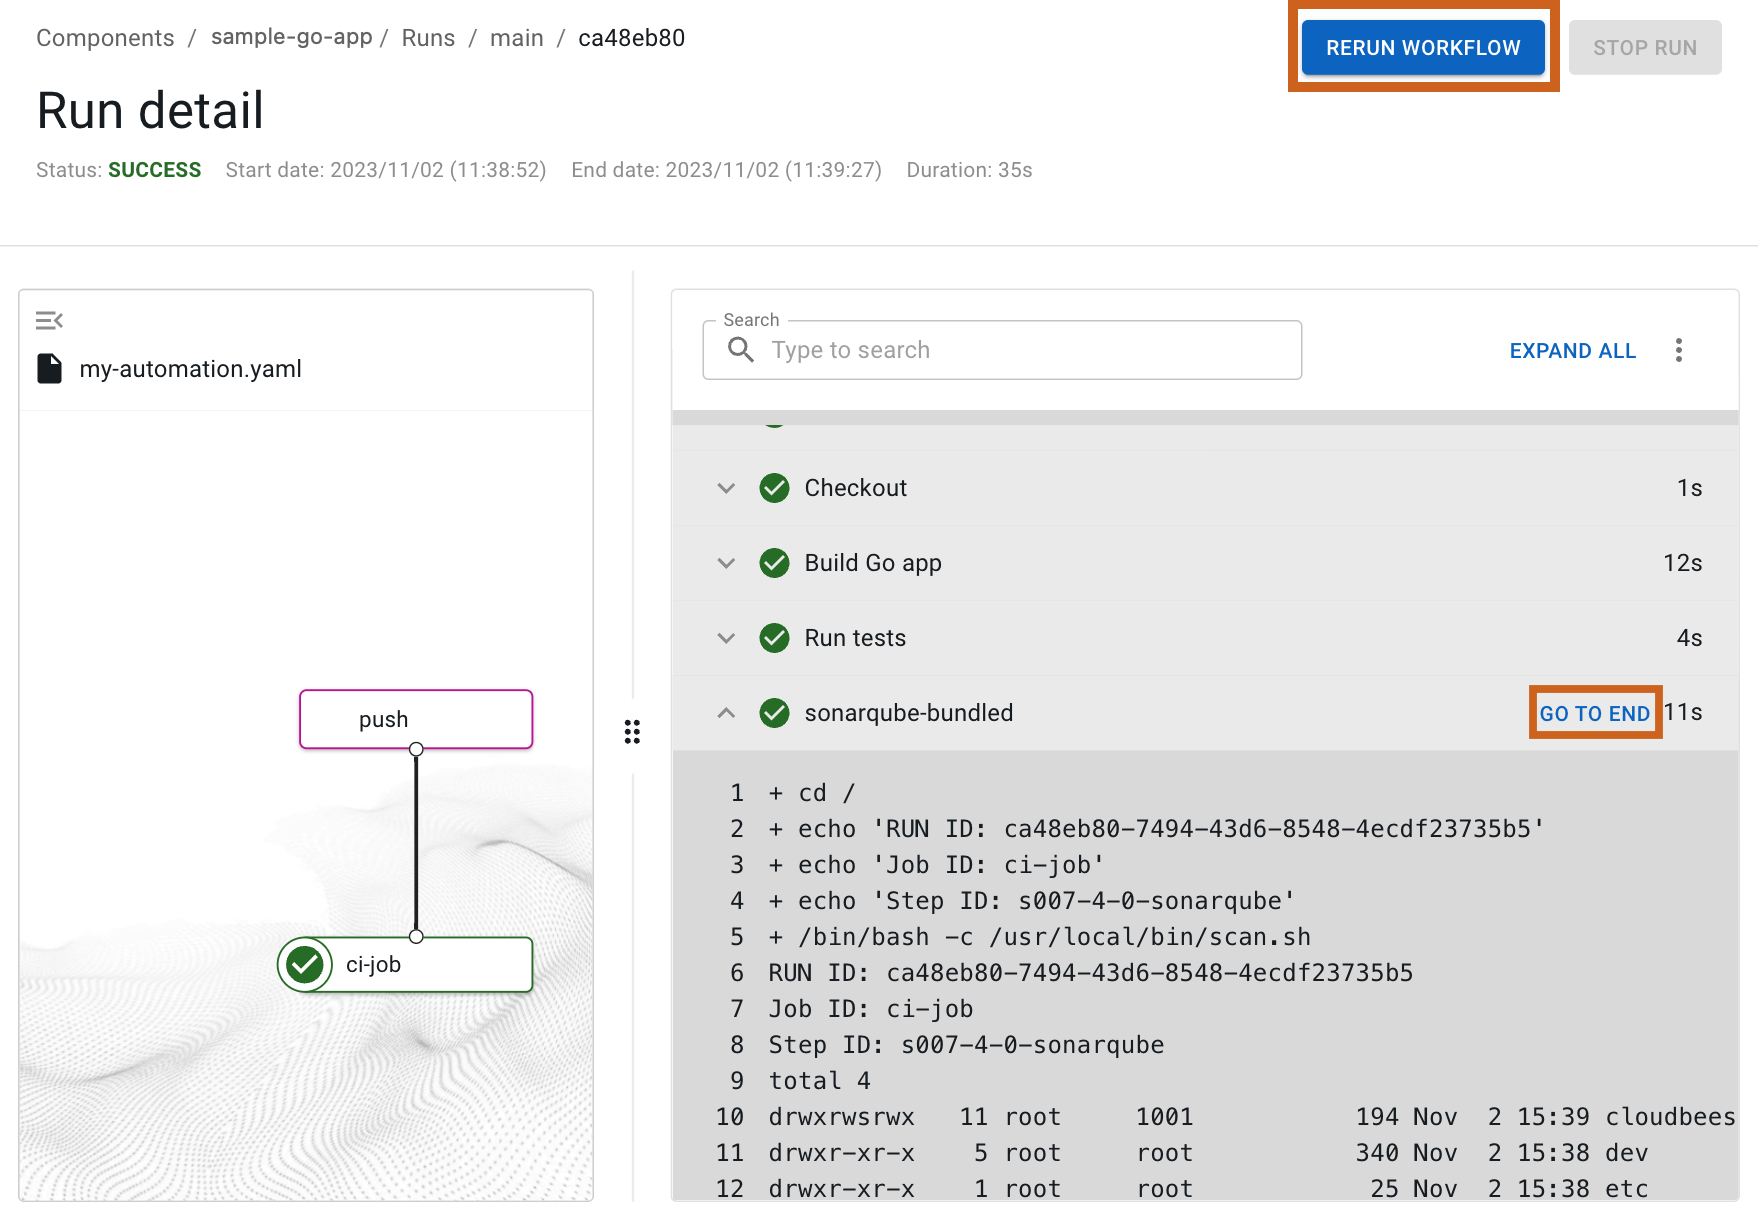 Figure 3. Run details with Rerun workflow and Go To End highlighted.
 -
(Optional) Scroll through the scan step run details, or select GO TO END to jump to the end of the log.
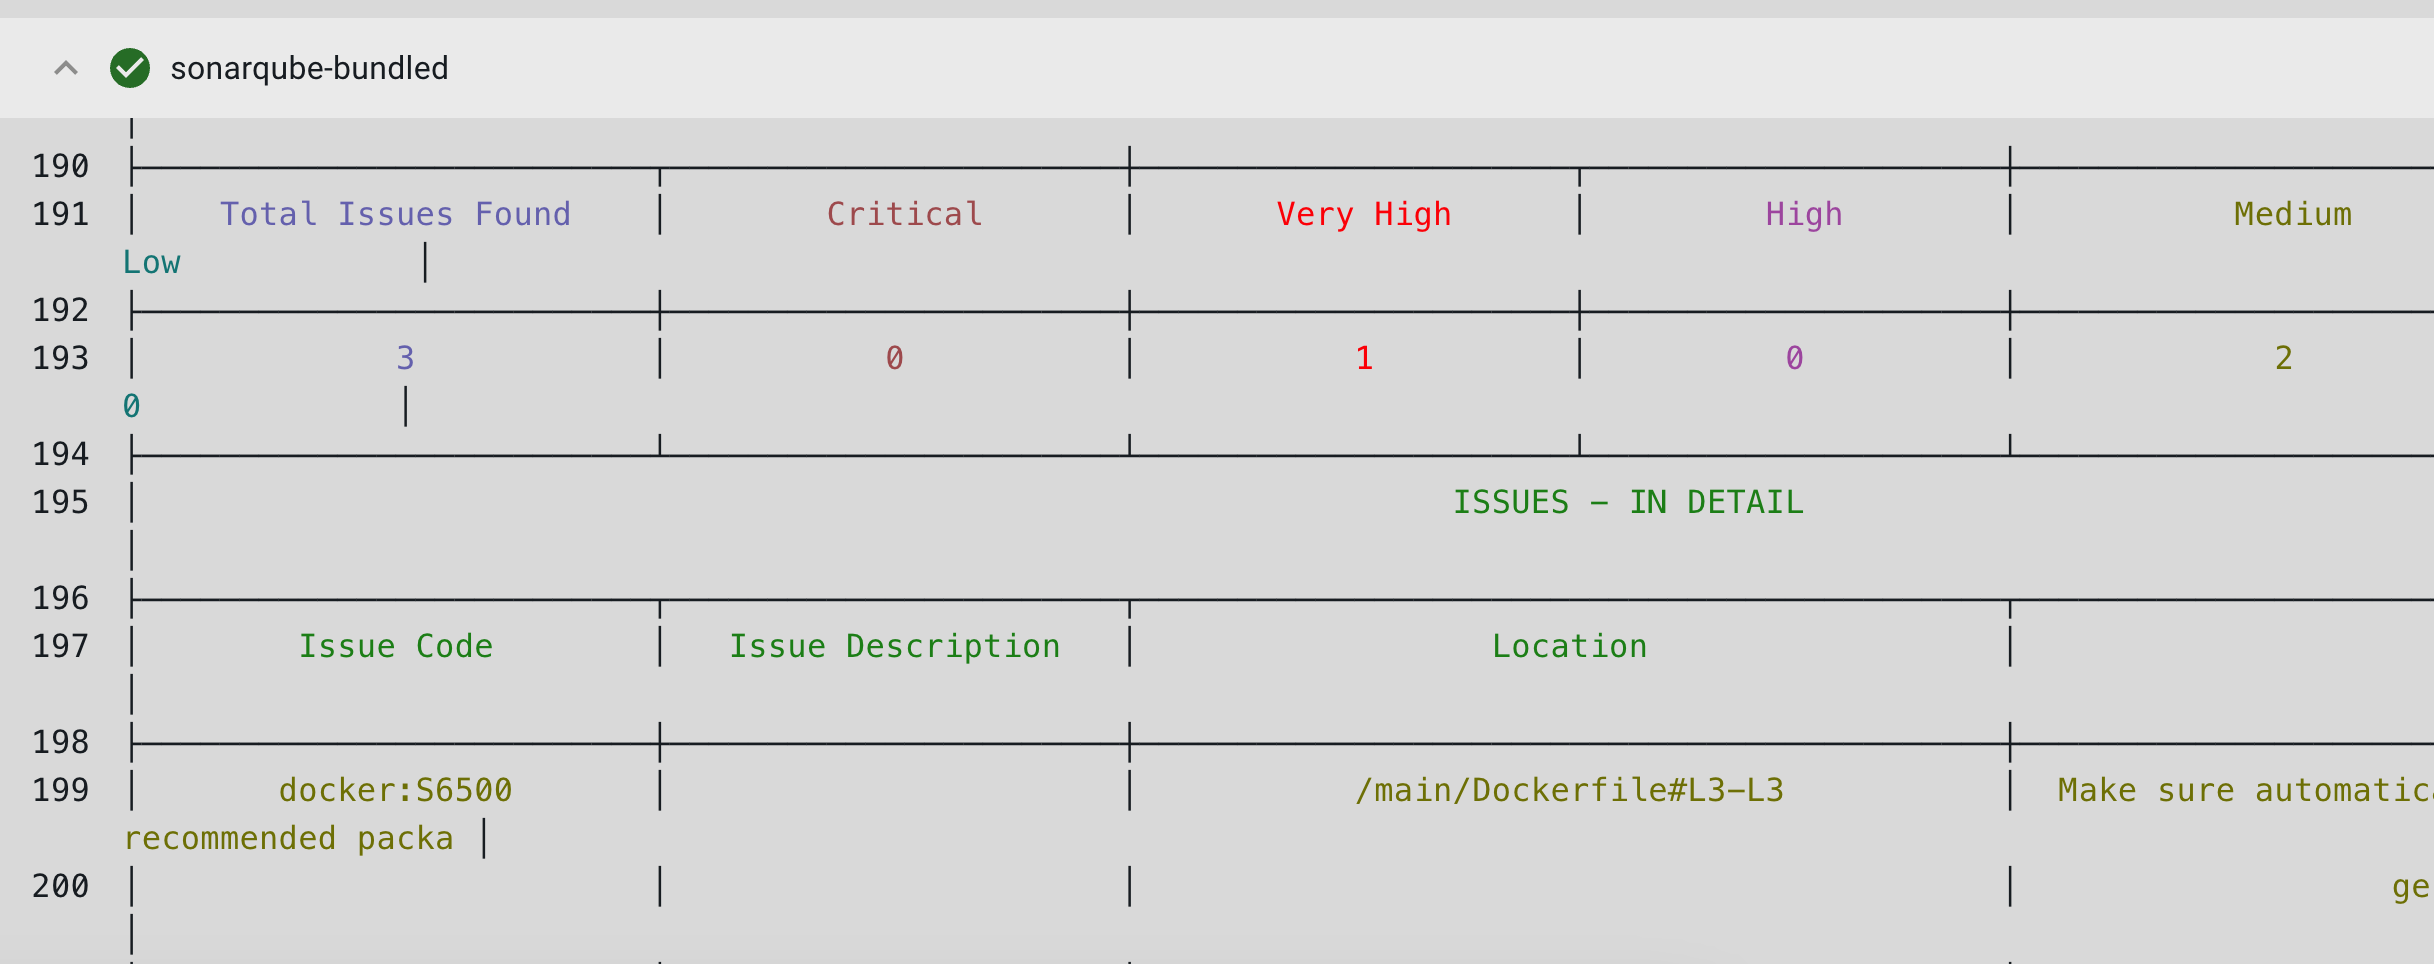 Figure 4. Run details displaying scan results
Manually rerun the workflow by selecting Rerun workflow.
You have run the workflow to build the Go app and scan your repository.
Display the scan summary
Scan results from the completed workflow run are available as a summary dashboard.
To display the scan results:
-
Select the
 , and then select a component in an organization.
 -
Select Summary from the left pane.
-
Scroll to display the SonarQube scan results.
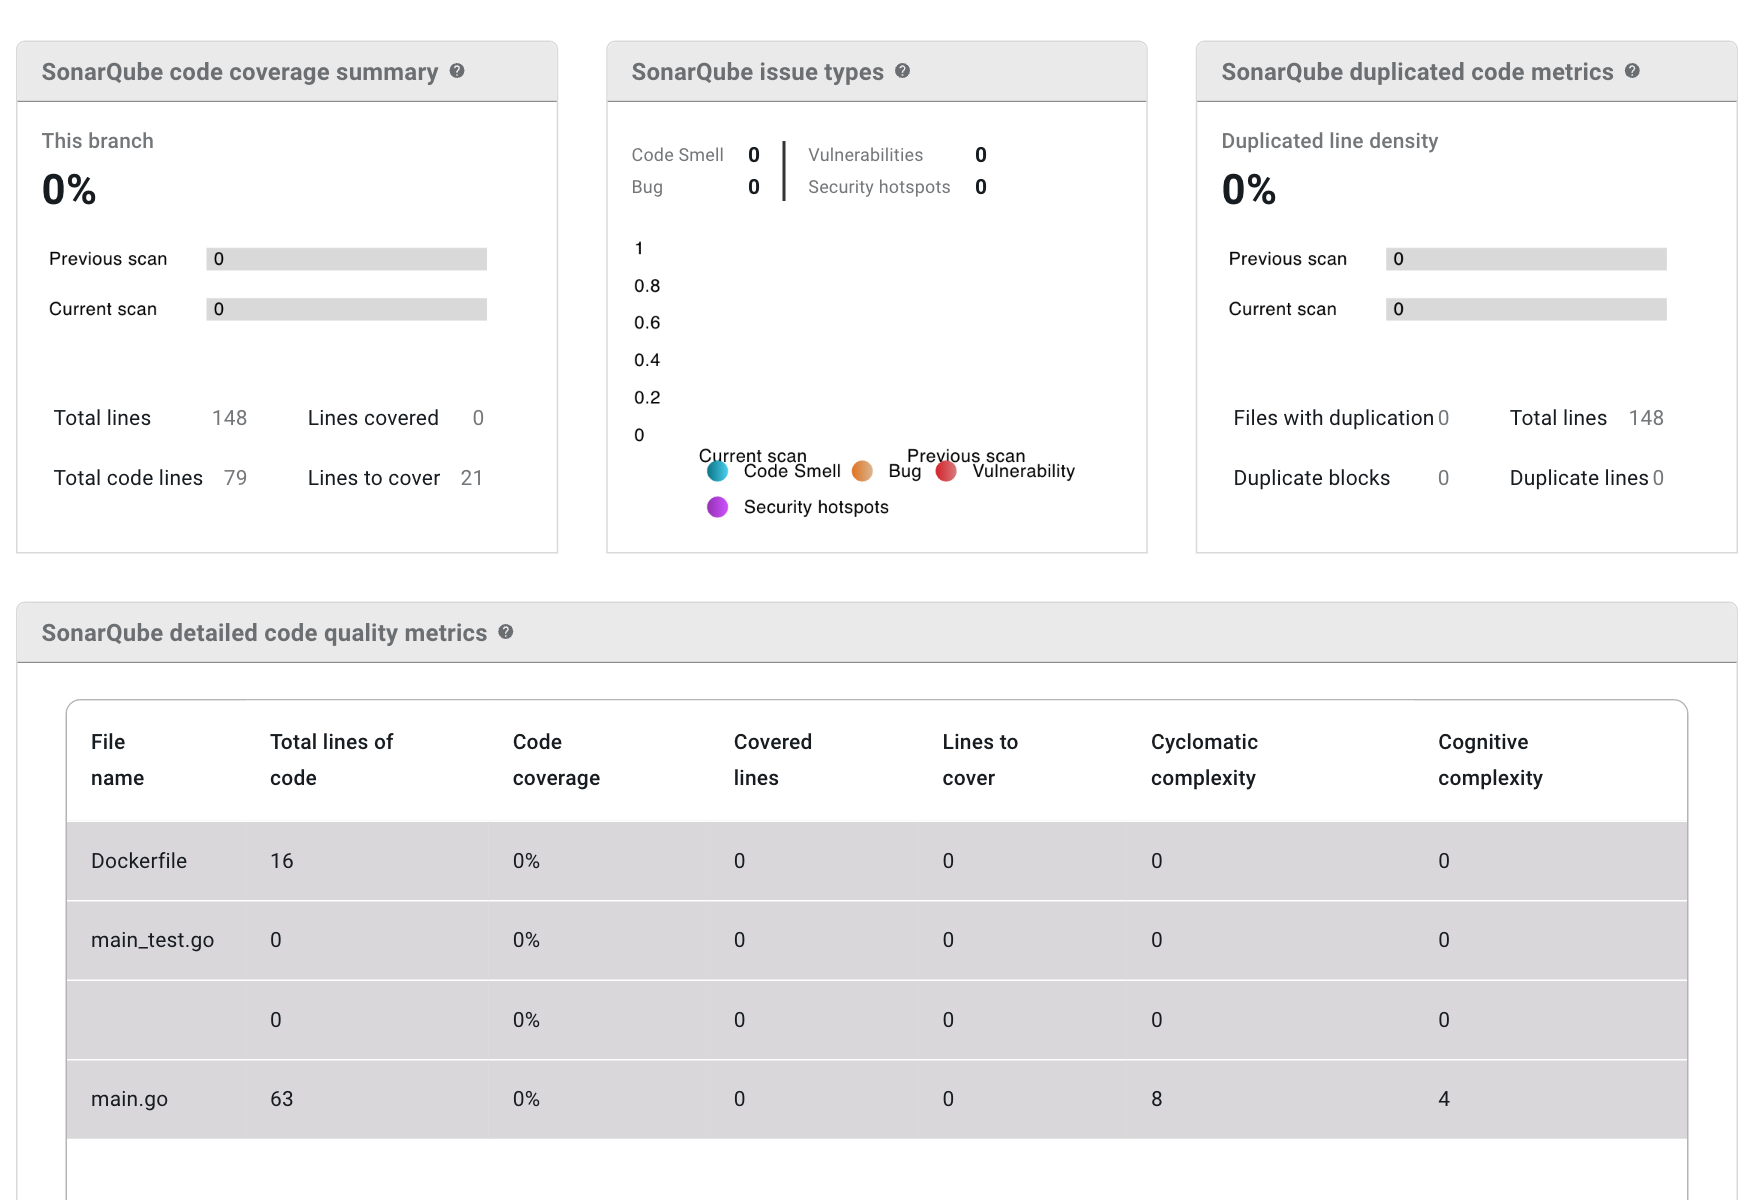 Figure 5. SonarQube scan results in the Summary dashboard.
You have added a scan step to your workflow, using the SonarQube bundled action, and displayed the collected data in the component where your workflow has run. You are now ready to publish an image with your workflow.