Use staged workflows to organize complex release activities into structured stages, each stage representing a deployment or transition across environments like staging, production, or QA.
Unlike standard workflows, staged workflows enable:
-
Organized release phases*: Break the release into distinct steps such as build, test, and deploy.
-
End-to-end visibility: Manage work across environments using a consistent flow.
-
Better debugging: Understand which stage failed and why, faster.
Standard workflows are best for simple CI/CD tasks. Use staged workflows when your releases span multiple steps, teams, or environments.
Prerequisites
Before creating a staged workflow:
-
Ensure your application has an integrated source repository.
-
If you want to call a deployer workflow from your staged workflow, the application must include one.
If no deployer exists, CloudBees platform can generate one automatically during staged workflow creation.
Create a staged workflow
To create a new staged workflow:
-
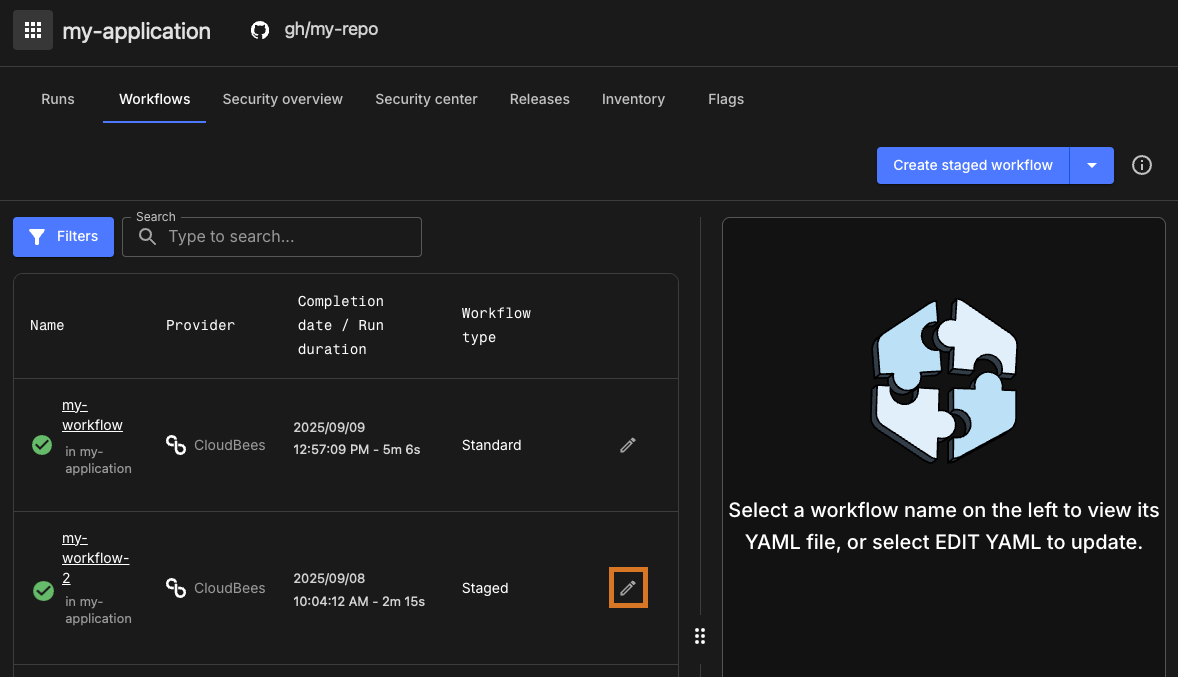
Go to Applications, and select your Application.
-
Select .
-
Select Create staged workflow.
If no deployer exists for your application, you’ll be prompted to create one using the assisted creation option. For more details, refer to Deployer workflows.
If the deployer is available, the initial staged workflow presented to the user includes a deployer job in each environment stage.
Assisted deployer workflow creation
CloudBees platform provides an assisted creation experience to help generate a deployer workflow if one doesn’t exist.
Assisted creation checks:
-
For a
deployer.yamlworkflow file. -
That the file is on the default branch.
-
That it includes an
on.workflow_calltrigger with the required parameters:manifestandenvironment, both of typestring.
If a deployer is not present, you’re prompted to make a choice:
-
Select Use the assisted deployer to generate a deployer automatically based on your current application components.
-
Select No, thanks to proceed without a deployer.
Staged workflows render visually in the Workflow composer as stages (![]() ), which you can configure.
), which you can configure.
Use the composer to:
-
Rename a stage: Select
 , then select Edit
 -
Add a stage: Hover between stages or over lines and select +
-
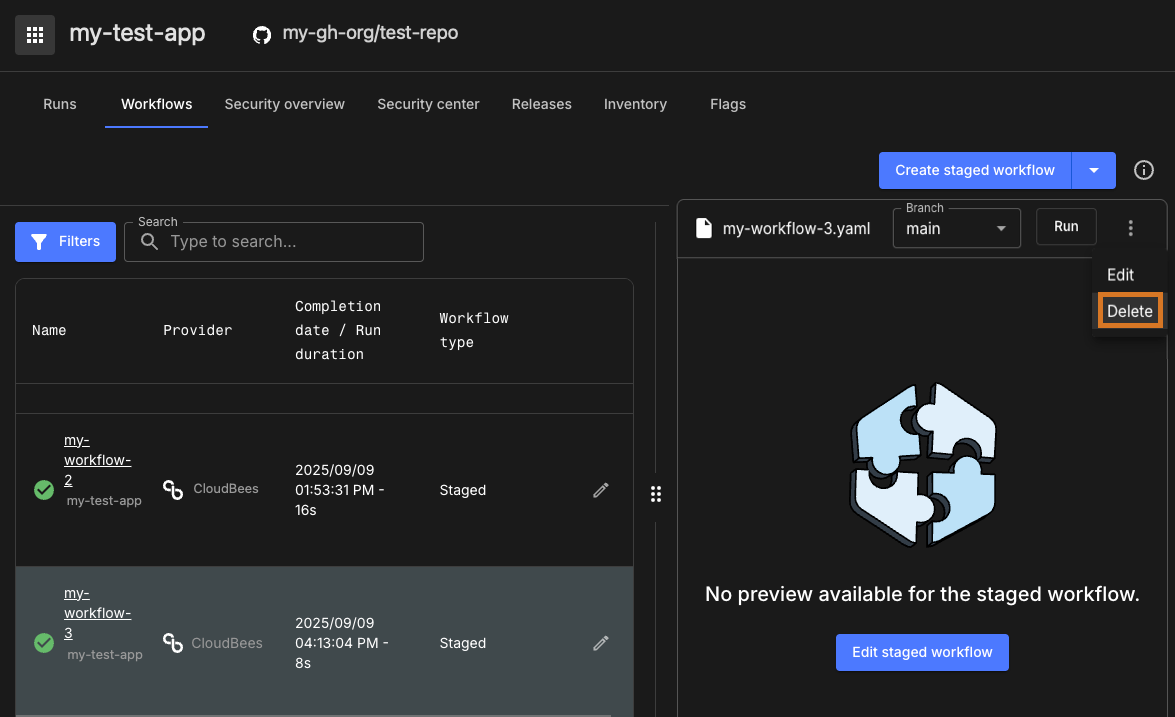
Delete a stage: Select
 , and then select Delete
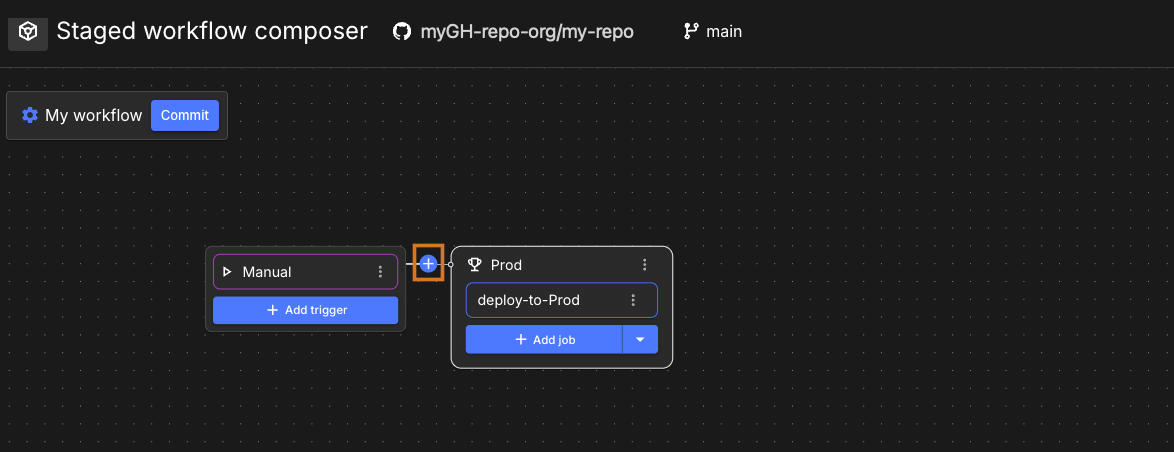 Figure 1. Add a stage to a workflow
Once stages are in place, you can connect jobs and add triggers using the workflow composer visual tool.
Save your staged workflow
To save a workflow in CloudBees platform, commit the YAML file to your repository:
-
Select Commit.
-
Enter a Commit message.
-
(Optional) Select a different branch or initiate a pull request.
-
Select Commit again to confirm.
Once saved, the staged workflow appears in the Workflows list for your application.
Use the Workflow composer
The Workflow composer provides a visual interface for configuring stages, jobs, approvals, environment variables, and more.
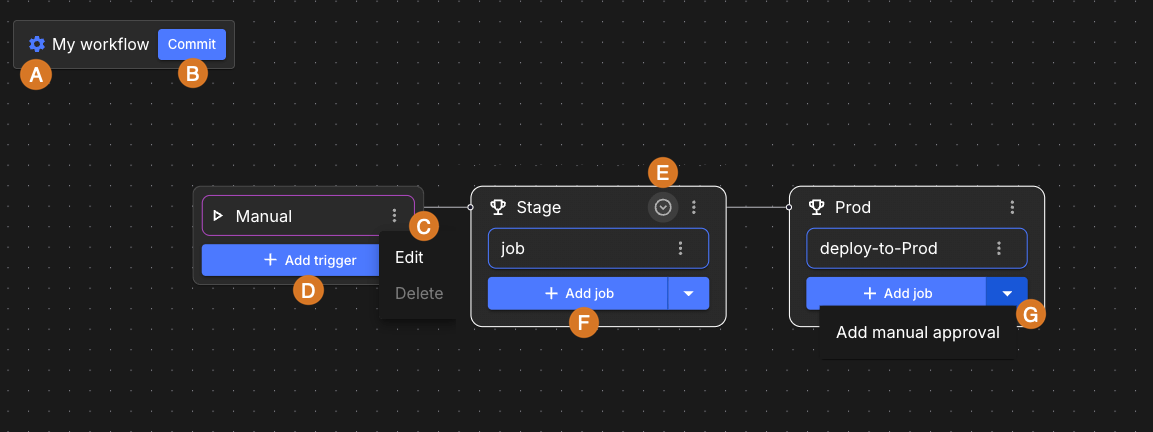
Use the composer to:
-
Edit workflow metadata, such as the name and environment variables.
-
Commit workflow updates (refer to Save your staged workflow).
-
Add or delete triggers, jobs, and stages.
-
Collapse or expand stages visually.
-
Insert approval steps.
-
Manage execution order between jobs.
| Each staged workflow must include at least one trigger, one stage, and one job. |
Add and manage triggers
All staged workflows begin with a manual trigger. You can add: - Push-based triggers - Pull request-based triggers - Scheduled triggers
To add a trigger:
-
In the composer, select Add trigger.
-
Choose a Type and fill in the fields:
-
Push: Select branches and tags.
-
Pull request: Select base branches.
-
Schedule: Provide a CRON expression.
-
-
Select Save, and then commit your changes.
For guidance on available triggers, refer to Manage workflows.
Add and manage jobs
Each stage contains jobs. You can add standard or reusable workflow jobs.
-
In the composer, find the stage you want to update.
-
Select Add job.
-
Choose a Job type:
-
Standard job: Basic CI/CD logic
-
Reusable workflow call: Points to another workflow, such as
deploy.yaml
-
-
Fill out the required configuration.
-
Select Save, and then commit the updates.
Run a staged workflow
To manually run a staged workflow:
-
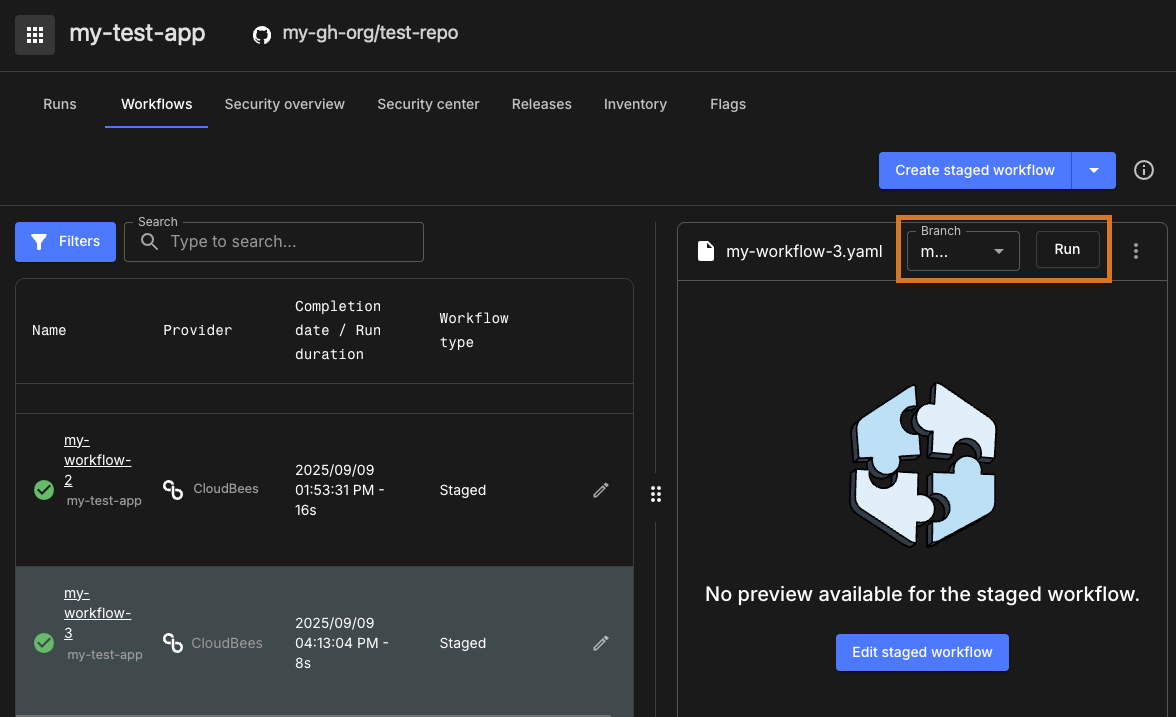
Navigate to Applications, select your Application, and open the Workflows tab.
-
Select the name of the staged workflow.
-
Select the Branch to run.
-
Select Run.
The primary intended use of staged workflows is within a release (refer to Releases).
A staged workflow can be run as a standalone workflow, but it requires specific input parameters.
By default, a staged workflow is configured to run as a reusable workflow and expects a manifest input parameter containing valid JSON, usually provided by a release manifest.
You can also run staged workflows using configured triggers. Executions are shown in Run details.
Update a staged workflow
To make changes to a staged workflow:
-
From , select the staged workflow you want to edit.
-
Select
 to open the composer.
 -
Modify any settings, jobs, triggers, or stages as needed.
-
Select Commit to save and apply changes.
