The following examples illustrate how you can use the SonarQube plugin in CloudBees CD/RO to:
Configure the SonarQube job to initiate analysis
You can use the Run Sonar Scanner plugin procedure to initiate analysis for the SonarQube plugin job. For more information, refer to Run Sonar Scanner.
Analysis data is saved for each run. All available SonarQube parameters depend on the list of installed plugins and can be checked in the log after the job runs:

Configure jobs
When your workflow launches, code is processed locally on the agent by SonarScanner in the Work directory. If this is an initial run or the configuration of your SonarQube server is changed, SonarScanner downloads all plugins from the SonarQube server. The job configuration provides all required parameters for the scanner to initiate an analysis.
Configure the SonarQube plugin in a pipeline
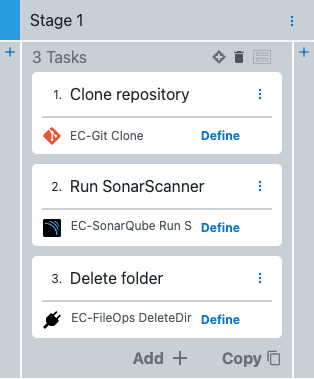
This example shows how to add tasks to a pipeline stage to trigger SonarScanner to initiate analysis.
To configure the SonarQube plugin in a pipeline:
-
Create a new pipeline. For more information, refer to Create a pipeline.
-
For the pipeline stage, add an EC-Git Clone task, to clone your repository into a Work directory.
-
Add an EC-SonarQube Run Sonar Scanner task, to run as a task targeting the Work directory.
-
Optionally, add an EC-FileOps Delete Directory task, to remove the Work directory.
 Figure 2. Pipeline stage
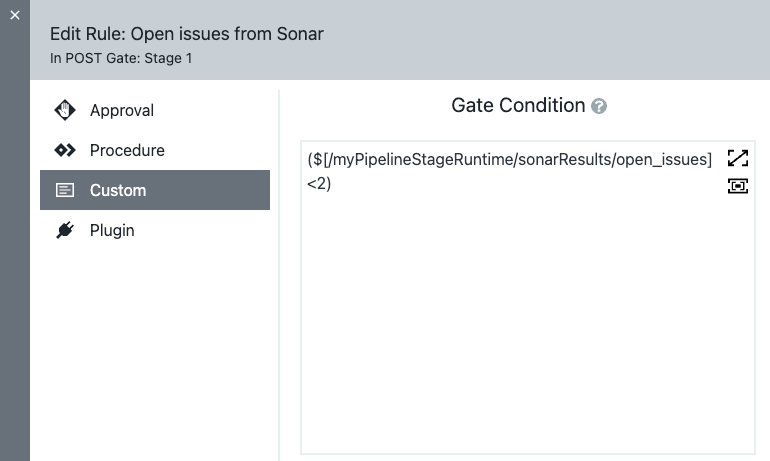
After fetching the code, the SonarQube plugin triggers SonarScanner to initiate analysis by checking the code in the Work directory against the given list of parameters. After the analysis runs, results are saved and can be used as gate parameters for follow-on steps.
