The following examples illustrate how you can use the Helm plugin in CloudBees CD/RO to:
Create a pipeline
This example shows how to add tasks to a pipeline stage to:
Prepare Google Cloud Platform
You must first create a pipeline and add tasks to the pipeline stage to prepare Google Cloud Platform (GCP).
To create a pipeline and add tasks:
-
Create a new pipeline. For more information, refer to Create a pipeline.
-
Add a Command task to the pipeline stage to clean up the configuration.
-
For the pipeline stage, select Add+ to add a new pipeline stage task.
-
Enter a task name.
-
Click Select Task Type to define the task.
-
From the Native list, select Command.
-
Select Define, specify the settings, and then select OK.
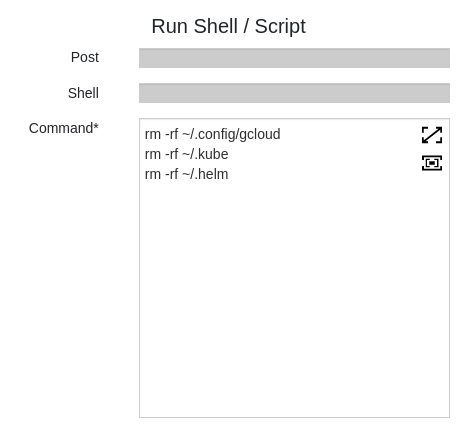 Figure 1. Clean up GCP configurations
-
-
Add another Command task to the pipeline stage to create a new configuration.
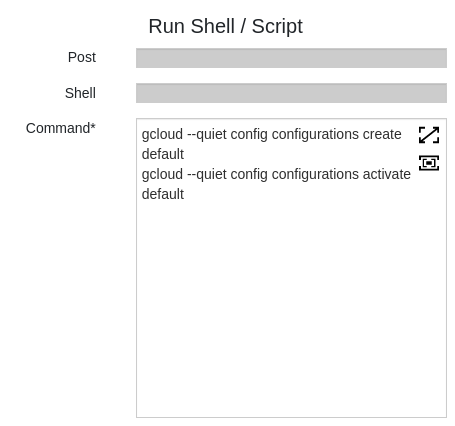 Figure 2. New configuration
 -
Add another Command task to the pipeline stage to activate the GCP service account.
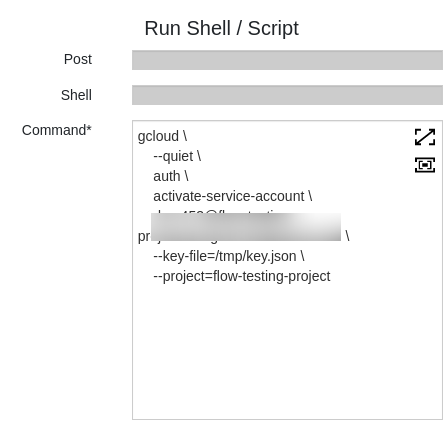 Figure 3. Activate the GCP service account
 -
Add another Command task to the pipeline stage to add the
config set computecommand.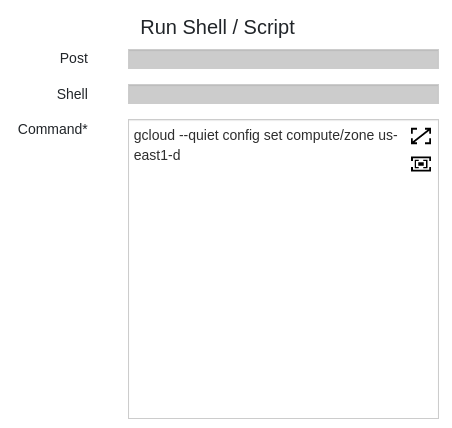 Figure 4. Add the
config set computecommand -
Add another Command task to the pipeline stage to retrieve the cluster credentials.
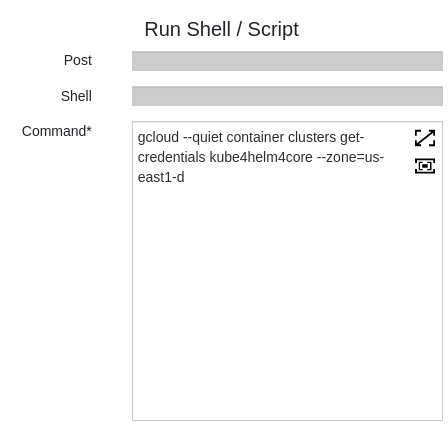 Figure 5. Retrieve cluster credentials
 -
Add another Command task to the pipeline stage to create the namespace.
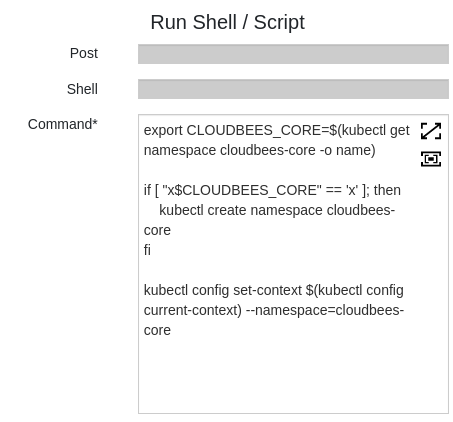 Figure 6. Create the namespace
 -
Add another Command task to the pipeline stage to configure the cluster admin permissions.
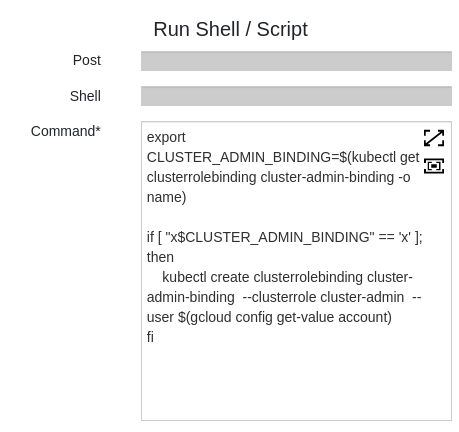 Figure 7. Configure cluster admin permissions
Prepare Helm
Once you have prepared GCP, you must add another pipeline stage to prepare Helm.
To prepare Helm:
-
Select Add stage to add a new pipeline stage.
-
Name the stage Preparation Helm and select OK.
-
Add a Plugins task to the pipeline stage to initiate Helm.
-
For the pipeline stage, select Add+.
-
Enter a task name.
-
Click Select Task Type to define the task.
-
From the Plugins list, select EC-Helm, and then select the Run Custom Command plugin procedure.
-
Select Define, configure the plugin task’s input and output parameters to initiate Helm, and then select OK.
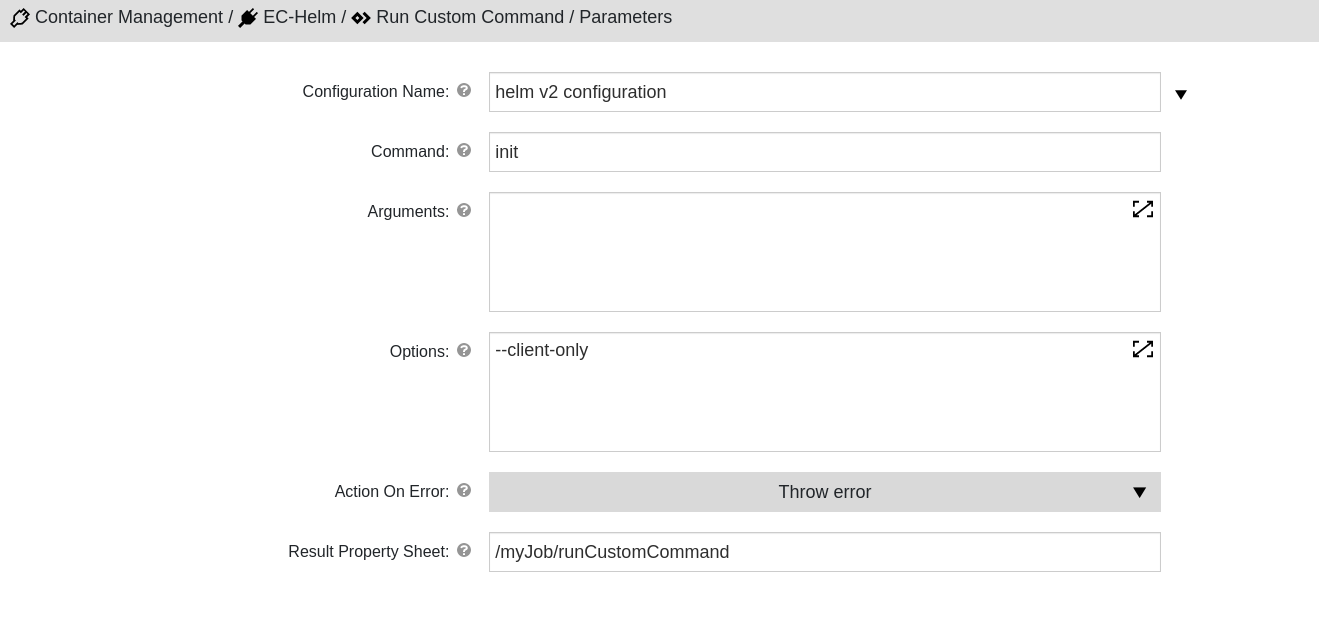 Figure 8. Initiate Helm
-
-
Add another Plugins task to the pipeline stage and configure the Run Custom Command plugin procedure to install the Helm plugin.
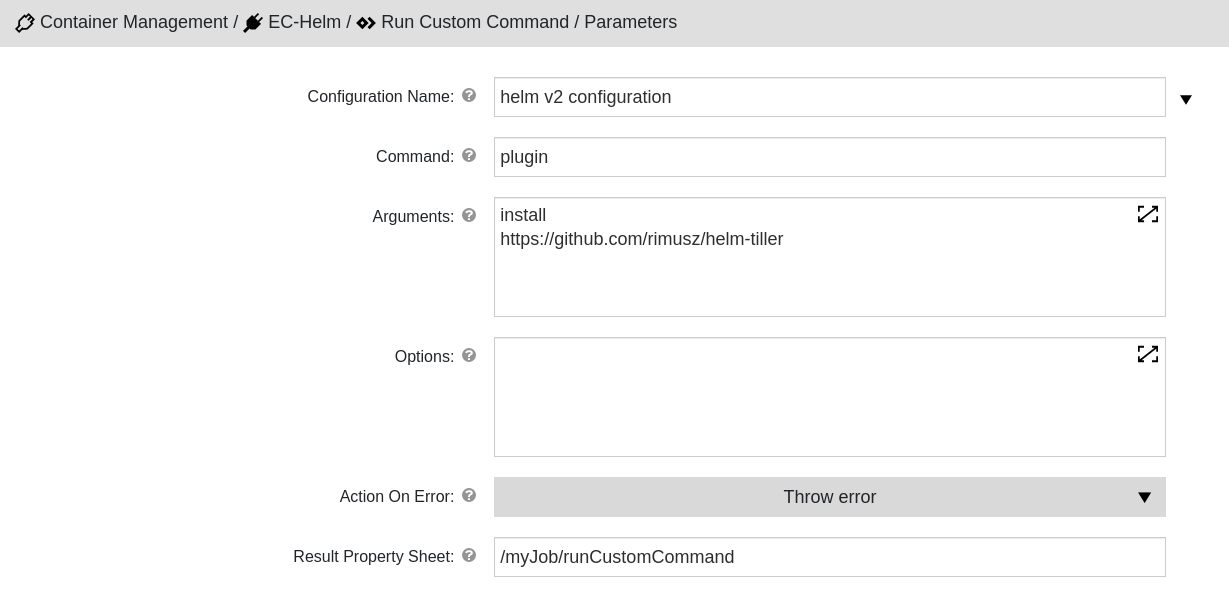 Figure 9. Install the Helm plugin
 -
Add another Plugins task to the pipeline stage and configure the Run Custom Command plugin procedure to start the Helm tiller.
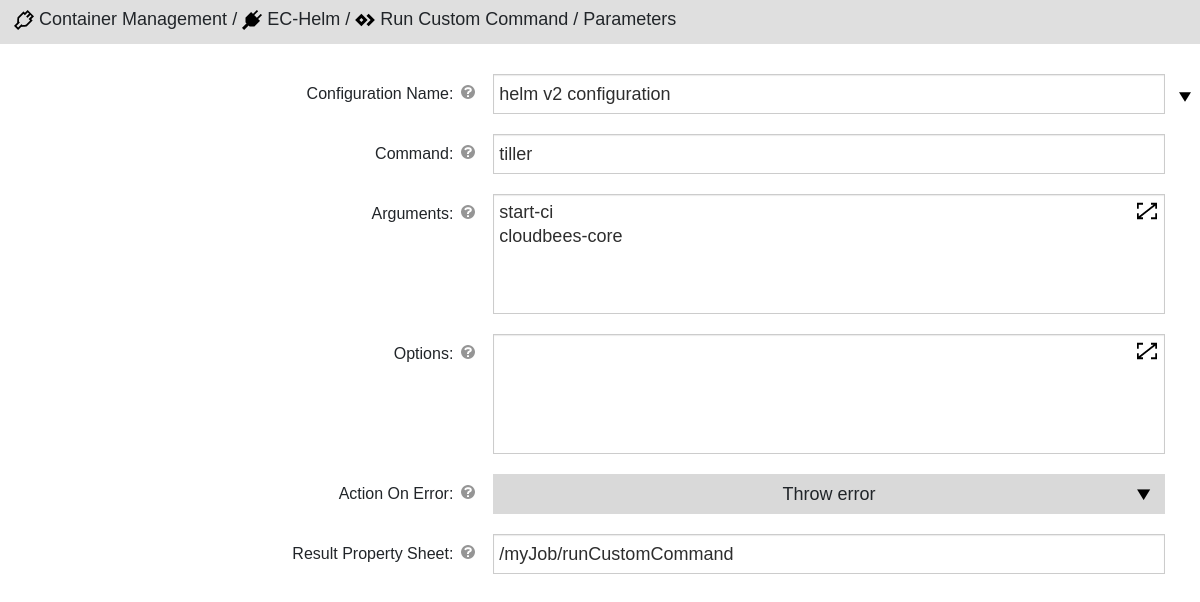 Figure 10. Start the Helm tiller
 -
Add another Plugins task to the pipeline stage and configure the Run Custom Command plugin procedure to add the CloudBees Helm chart repository.
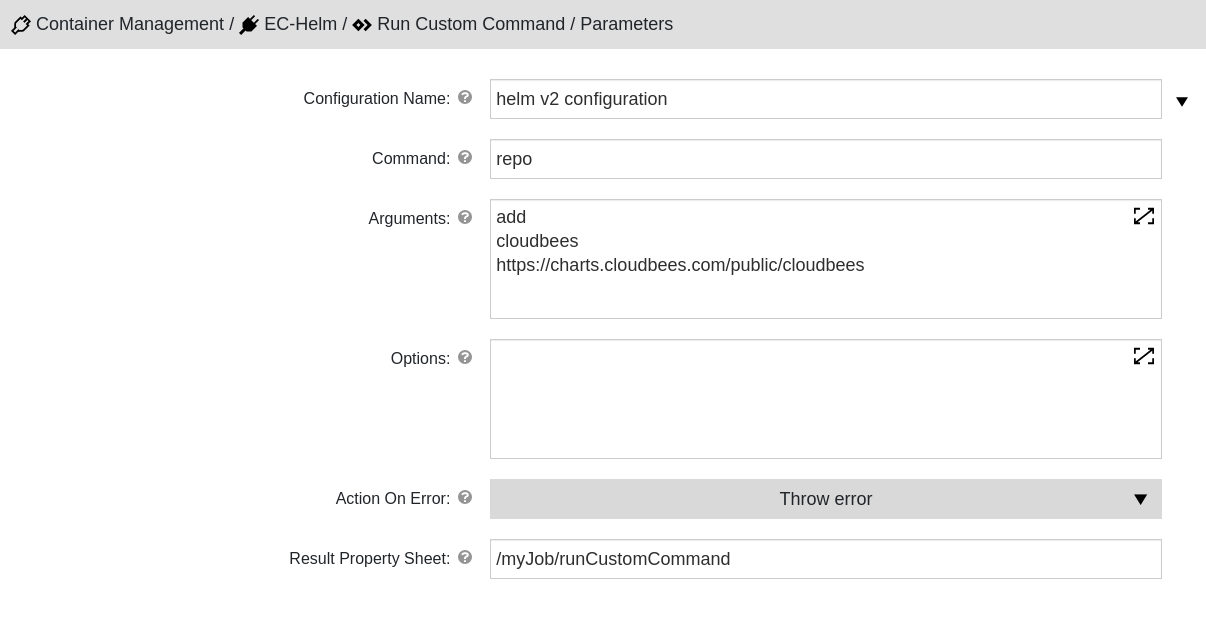 Figure 11. Add the CloudBees Helm chart repository
 -
Add another Plugins task to the pipeline stage and configure the Run Custom Command plugin procedure to update the repositories.
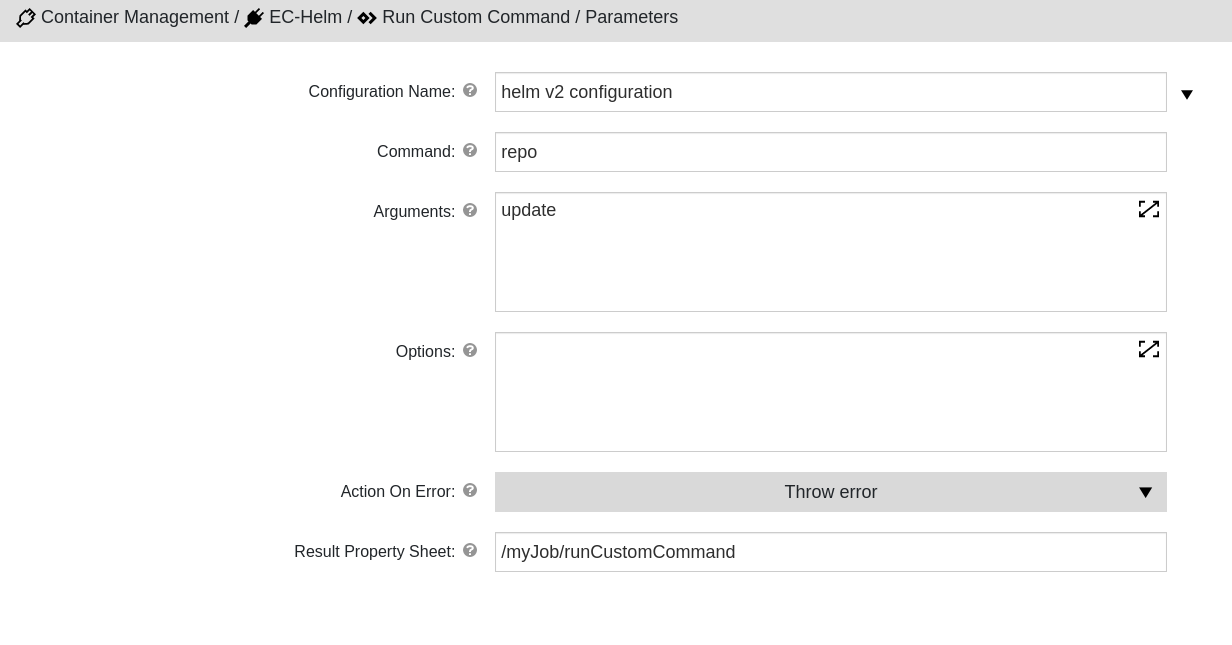 Figure 12. Update the repositories
 -
Add another Plugins task to the pipeline stage and configure the Delete Releases plugin procedure to clean up the old release.
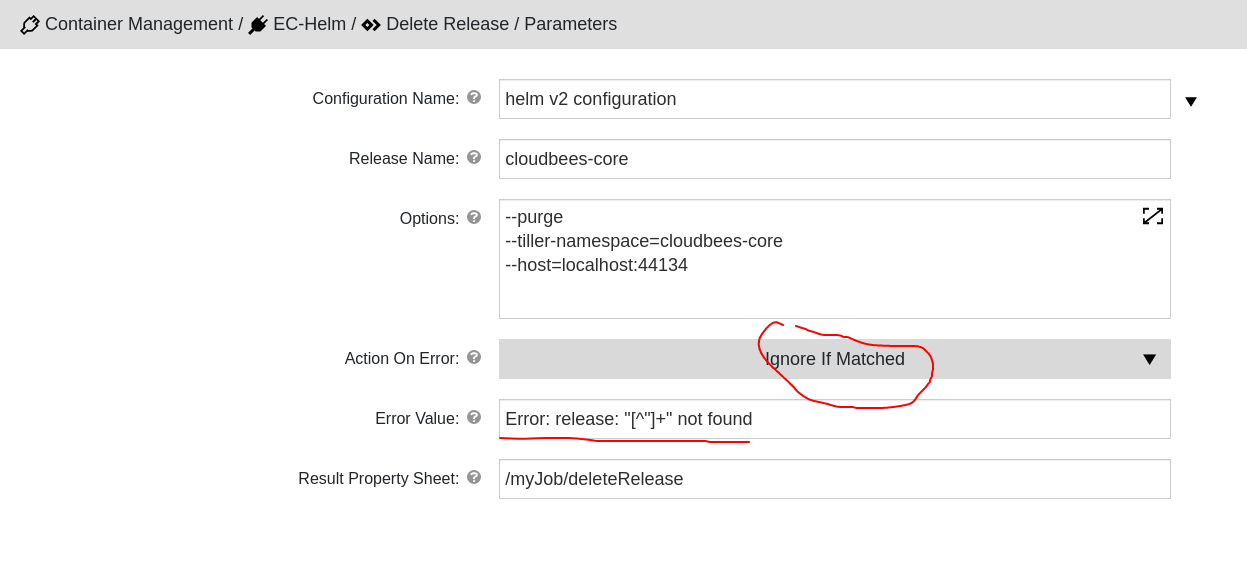 Figure 13. Clean up the old release
 -
Add another Plugins task to the pipeline stage and configure the Delete Releases plugin procedure to clean up the old Ingress controller.
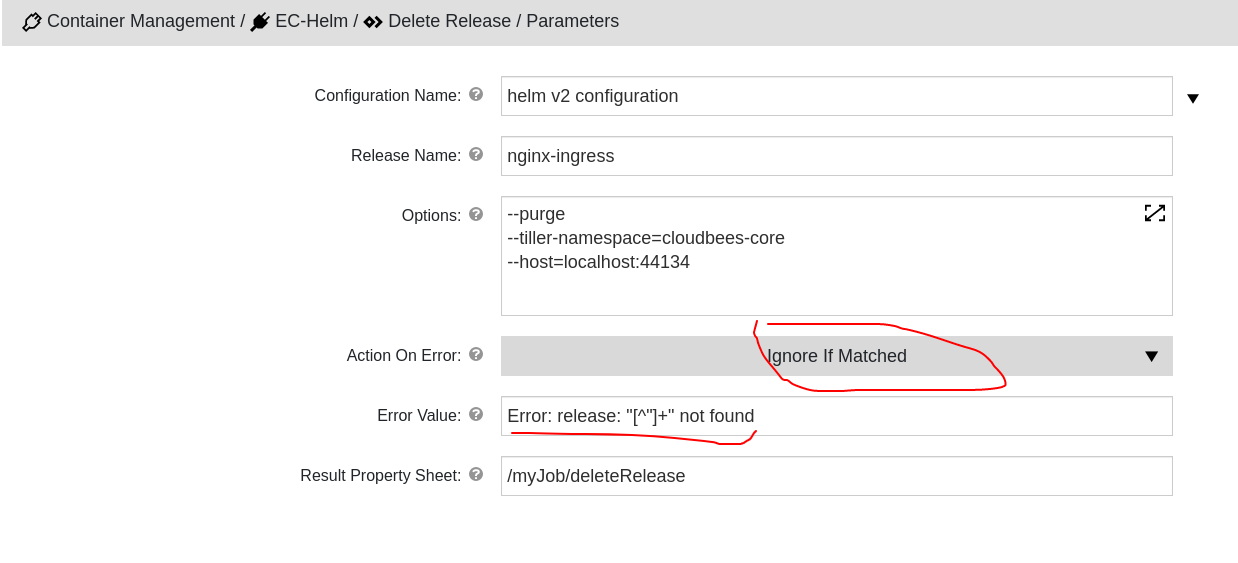 Figure 14. Clean up the old Ingress controller
Install the Ingress controller
Once you have prepared Helm, you must add another pipeline stage to install the Ingress controller.
To install the Ingress controller:
-
Select Add stage to add a new pipeline stage.
-
Name the stage Installation and select OK.
-
Add a Command task to the pipeline stage to prepare values for the Ingress controller.
-
For the pipeline stage, select Add+ to add a new pipeline stage task.
-
Enter a task name.
-
Click Select Task Type to define the task.
-
From the Native list, select Command.
-
Select Define, specify the settings, and then select OK.
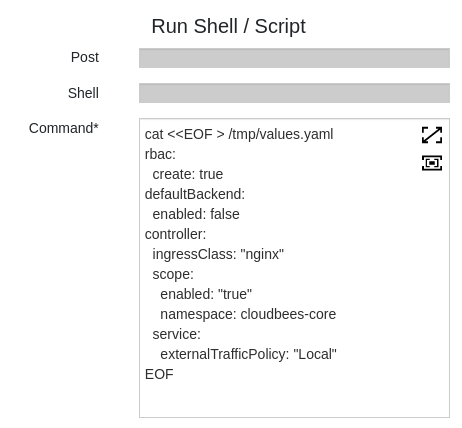 Figure 15. Prepare values for the Ingress controller
-
-
Add another Plugins task to the pipeline stage to configure the Install Chart plugin procedure to install the Ingress controller.
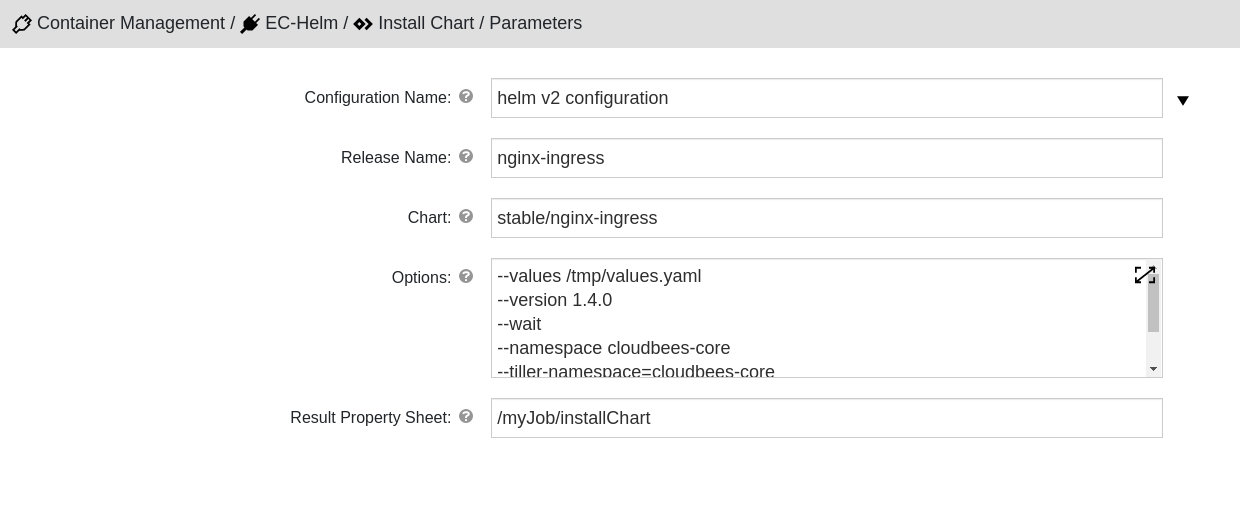 Figure 16. Install the Ingress controller
 -
Add another Command task to the pipeline stage to retrieve the host name for the Ingress controller.
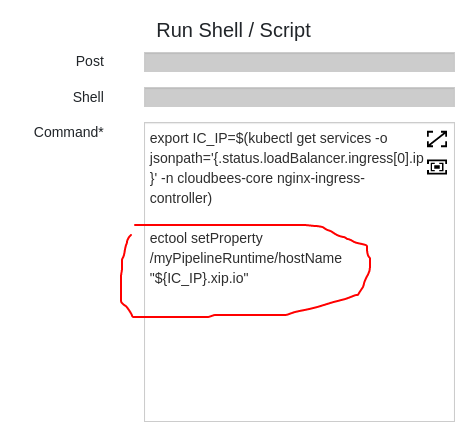 Figure 17. Retrieve the Ingress controller host name
 -
Add another Plugins task to the pipeline stage and configure the Install Chart plugin procedure to install the Helm chart.
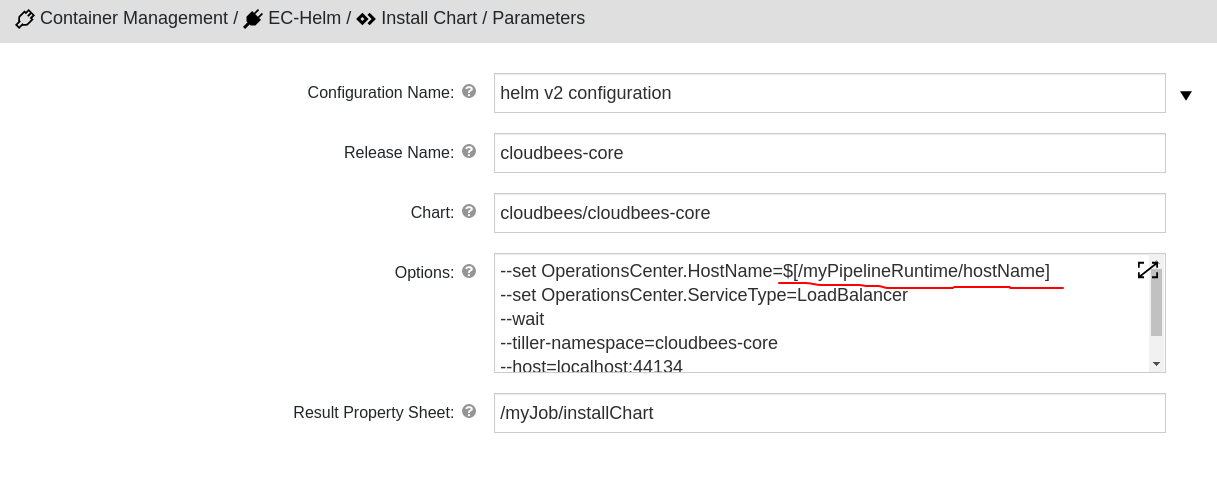 Figure 18. Install the Helm chart
 -
Add another Plugins task to the pipeline stage and configure the Run Custom Command plugin procedure to retrieve the release status.
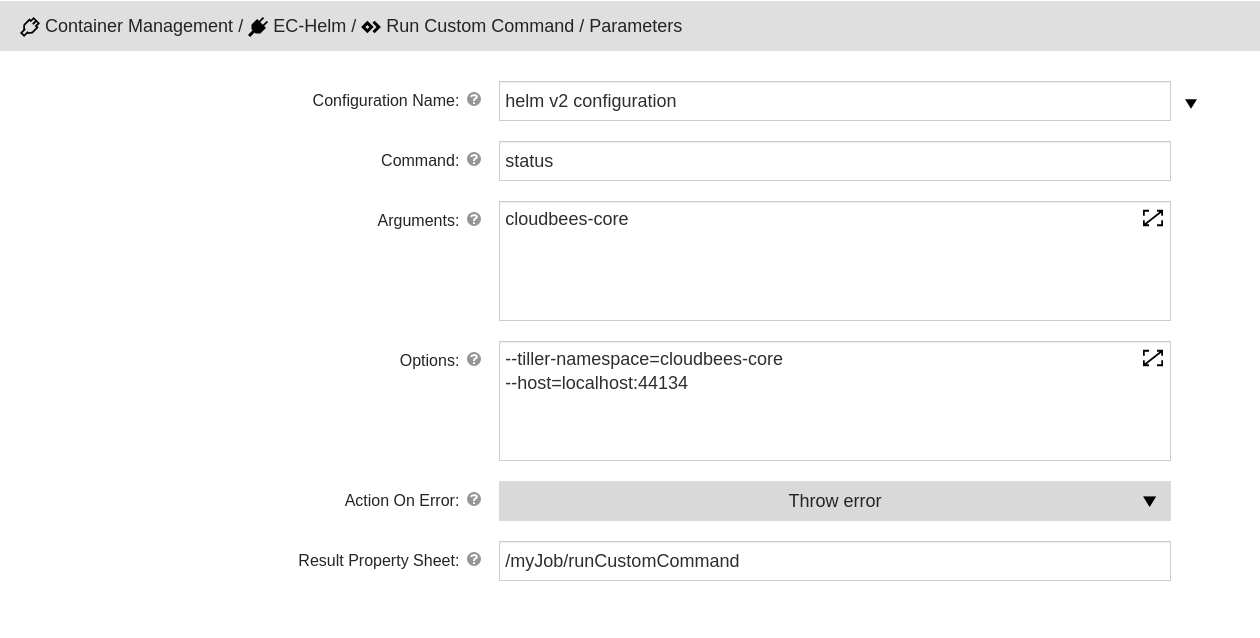 Figure 19. Retrieve the release status
For example:
STDOUT: LAST DEPLOYED: Tue Jan 21 12:47:29 2020 NAMESPACE: cloudbees-core STATUS: DEPLOYED RESOURCES: ==> v1/ClusterRole NAME AGE cjoc-master-management-cloudbees-core 59s ==> v1/ClusterRoleBinding NAME AGE cjoc-role-binding-cloudbees-core 59s ==> v1/ConfigMap NAME AGE cjoc-configure-jenkins-groovy 60s jenkins-agent 60s ==> v1/Pod(related) NAME AGE cjoc-0 56s ==> v1/Role NAME AGE cjoc-agents 58s cjoc-master-management 58s ==> v1/RoleBinding NAME AGE cjoc-master-role-binding 57s cjoc-role-binding 57s ==> v1/Service NAME AGE cjoc 57s ==> v1/ServiceAccount NAME AGE cjoc 60s jenkins 60s ==> v1/StatefulSet NAME AGE cjoc 56s ==> v1beta1/Ingress NAME AGE cjoc 55s -
Add another Command task to the pipeline stage to retrieve the initial admin password.
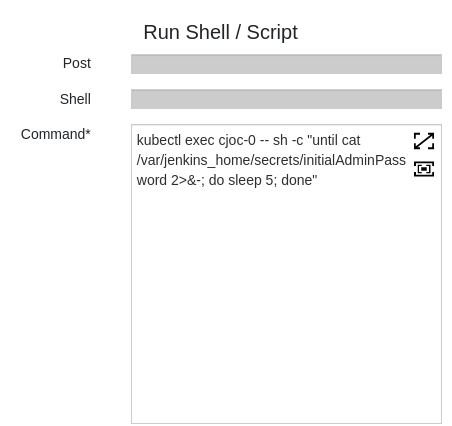 Figure 20. Retrieve the initial admin password
Finalize the pipeline
Once you have installed the Ingress {CTRL, you must add another pipeline stage to finalize the pipeline.
To finalize the pipeline:
-
Select Add stage to add a new pipeline stage.
-
Add a Plugins task to the pipeline stage to initiate Helm.
-
For the pipeline stage, select Add+.
-
Enter a task name.
-
Click Select Task Type to define the task.
-
From the Plugins list, select EC-Helm, and then select the Run Custom Command plugin procedure.
-
Select Define, configure the plugin task’s input and output parameters to stop the Helm tiller, and then select OK.
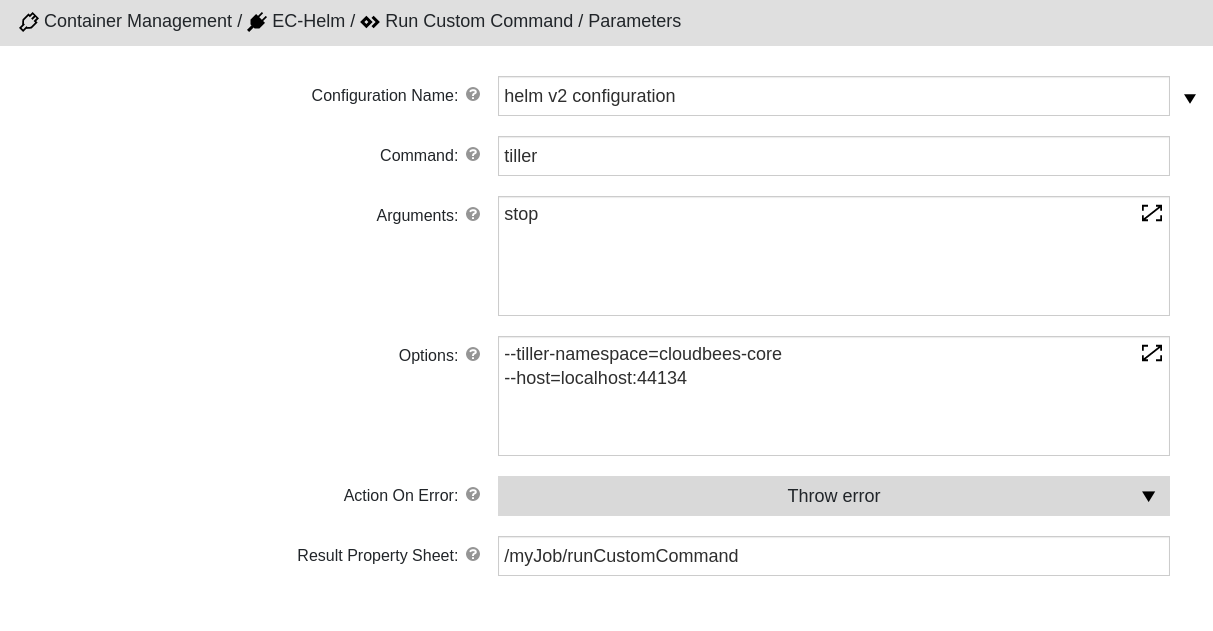 Figure 21. Stop the Helm tiller
-
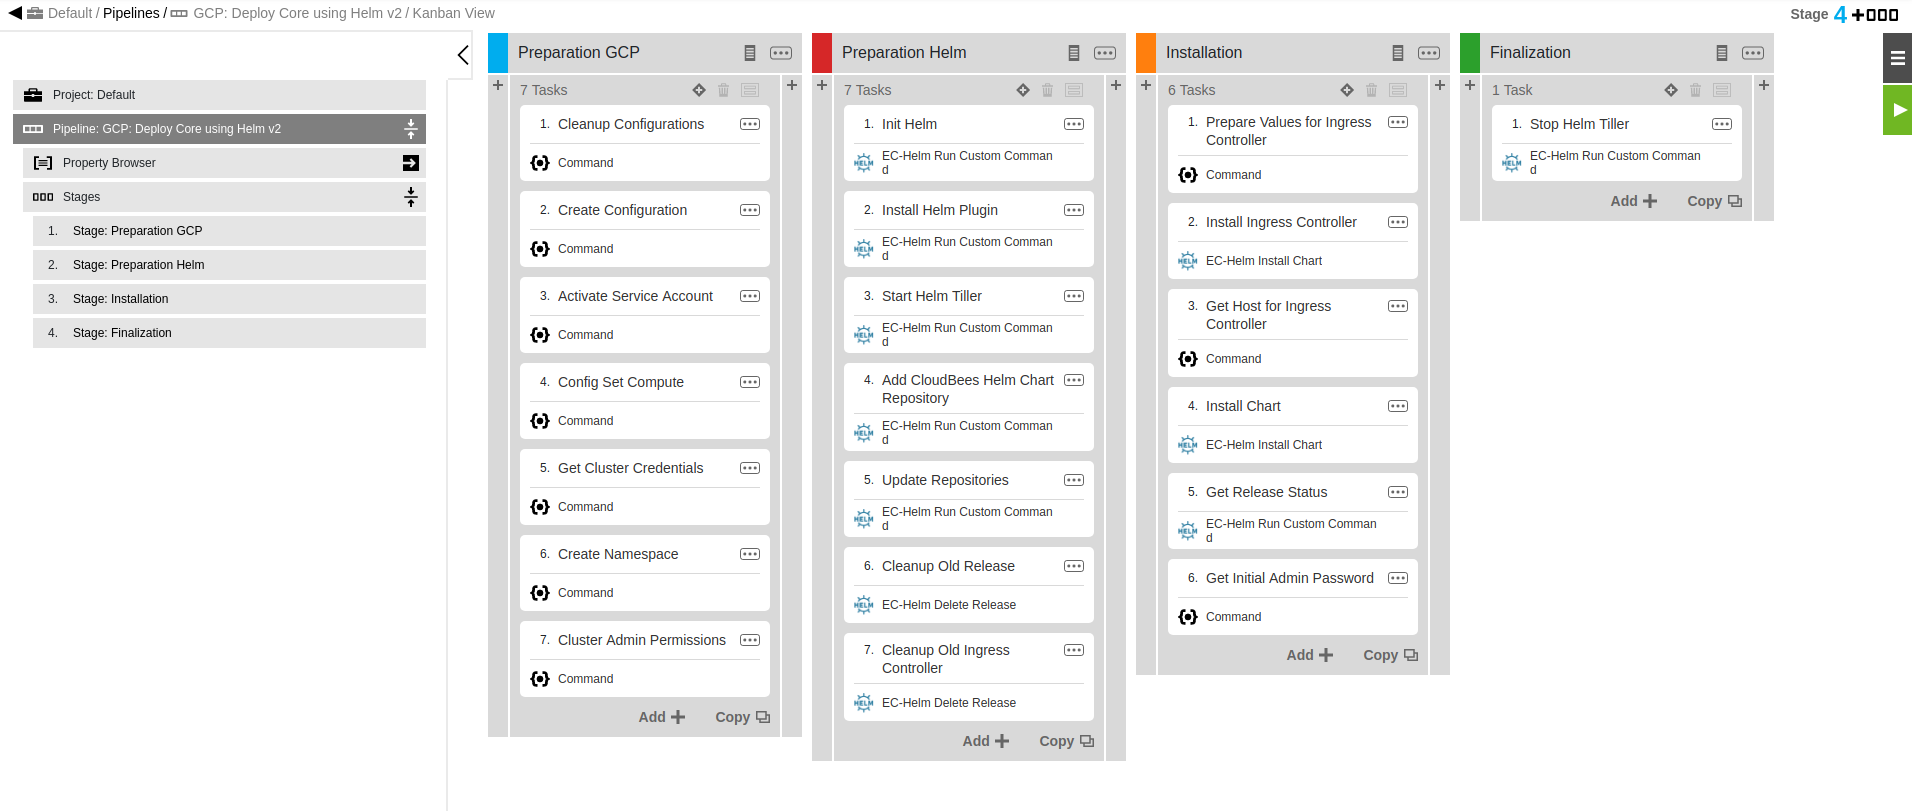
Once configured, your new pipeline should have the following four stages configured:
OpenShift: Deploy Jenkins using Helm v3
This example demonstrates how microservices can be deployed to an OpenShift cluster. In this example, Jenkins is deployed to an OpenShift cluster.
-
Generate a kubectl configuration for Helm.
If you do not have kubectl config for an OpenShift cluster, you can easily generate it using the operations center command line interface. For example:
oc login https://your-openshift-cluster-endpoint-url oc new-project helm-test-openshift cat ~/.kube/config -
Create an environment. For more information, refer to Create environments.
-
Create a cluster in the environment and add a new utility resource in the environment. For more information, refer to Create an environment cluster.
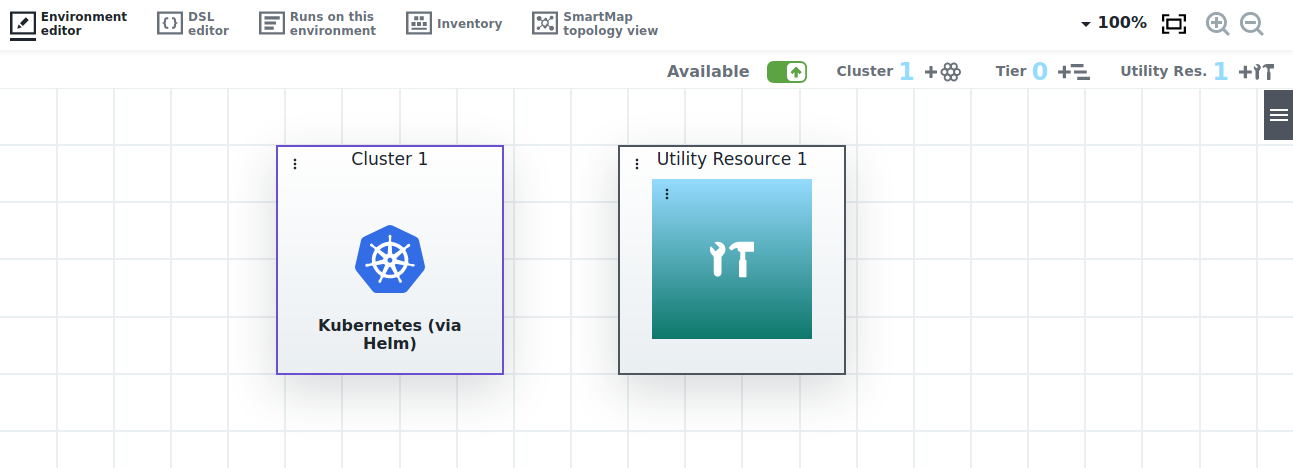 Figure 23. Create a cluster and add a utility resource
 -
Create a new application. For more information, refer to Create an application.
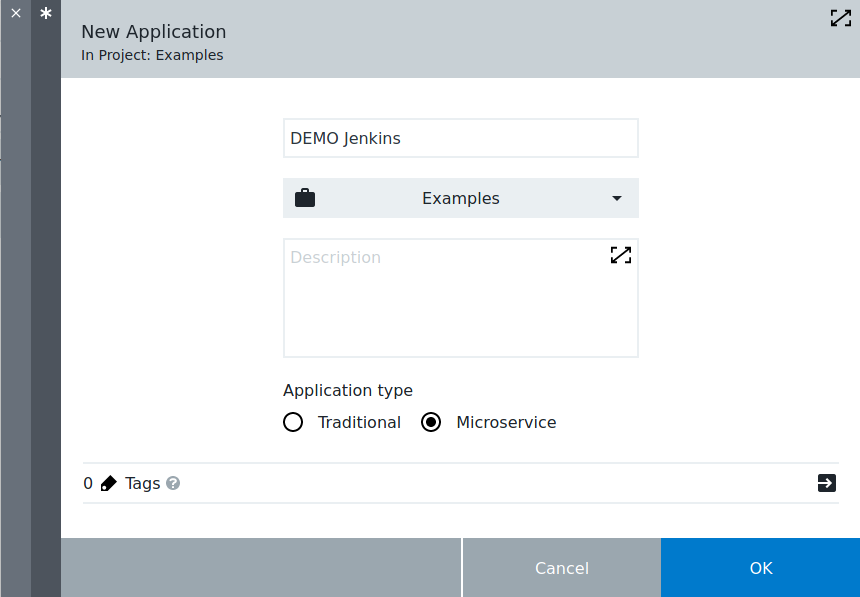 Figure 24. New application
 -
Create a new microservice in the application and define the microservice details for Helm. In this example, the following microservice details are used:
-
Name: Jenkins-OpenShift
-
Definition type: Helm
-
Definition source: Helm repository
-
Repository URL: https://charts.jenkins.io
-
Repository name: jenkins
-
Release name: myrelease
-
Chart: mychart
For more information, refer to Define microservice details for Helm.
-
-
Configure the microservice process. For more information, refer to Configure a microservice process.
-
Define the cluster environment into which the microservice is deployed. For more information, refer to Define the environment.
-
Deploy the application. For more information, refer to Deploy the application.
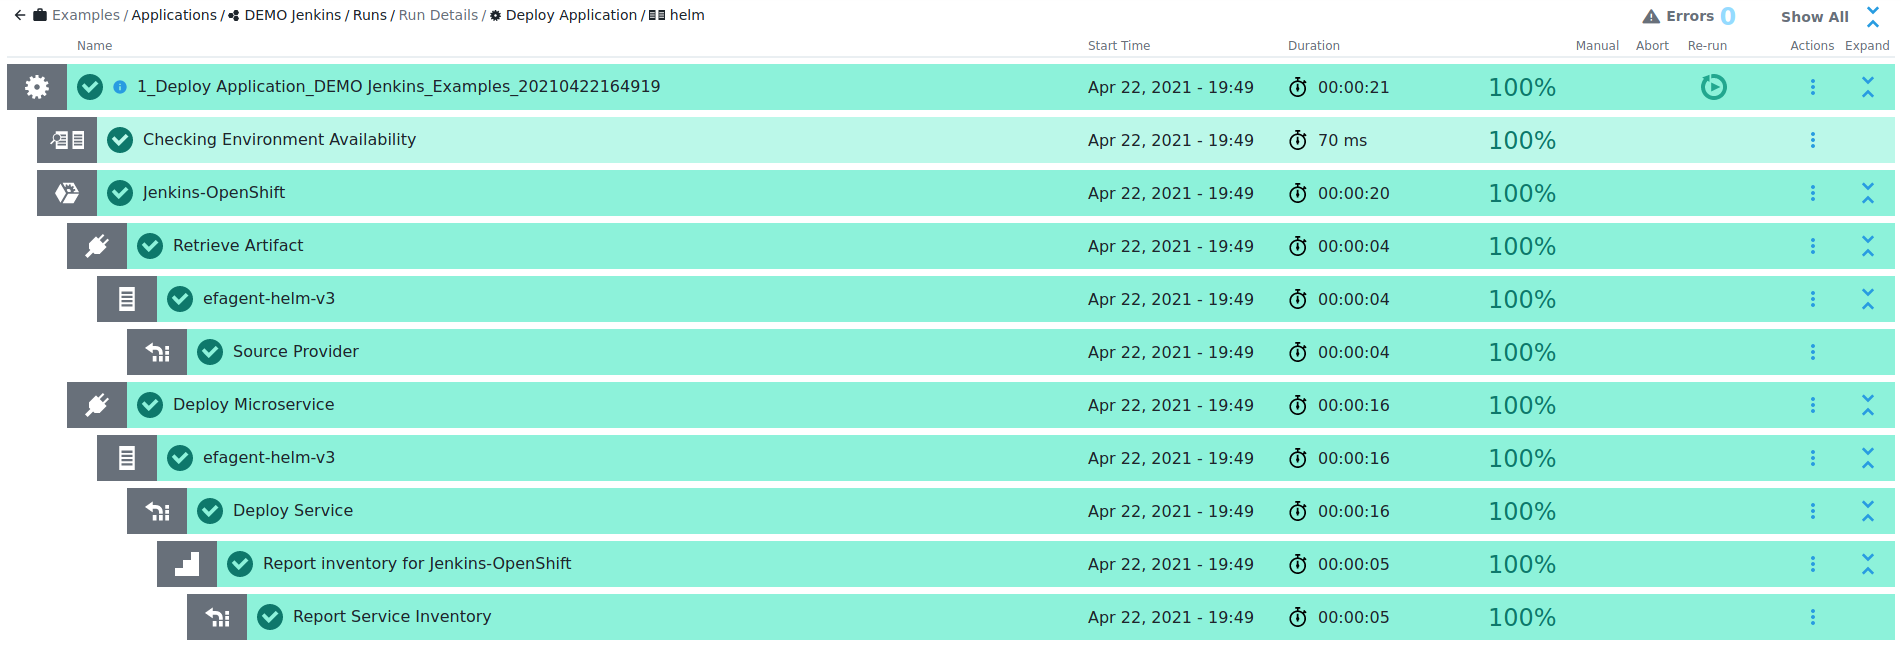 Figure 25. Deploy the application
 -
Check the environment inventory. For more information, refer to Environment inventory.
 Figure 26. Environment inventory
You can also check the deployment status via the operations center CLI:
$ oc status In project default on server https://xx.xx.xxx.xxx svc/myrelease-jenkins-agent - 10.7.253.124:50000 svc/myrelease-jenkins - 10.7.248.179:8080 statefulset/myrelease-jenkins manages jenkins/jenkins:2.277.3-jdk11,kiwigrid/k8s-sidecar:0.1.275 created 9 minutes ago - 1 pod $ oc get pods NAME READY STATUS RESTARTS AGE myrelease-jenkins-0 2/2 Running 0 13m