Experience the convenience of staying within IntelliJ IDEA to perform CloudBees CD/RO work. Once configured, IntelliJ IDEA Editor interacts with CloudBees CD/RO approvals, jobs, pipelines, releases, or manual tasks.
Get started by setting up the plugin as detailed in the following sections.
Configure the default connection to the CloudBees CD/RO server
| Configuration settings are specific for each IntelliJ IDEA project. |
Complete these steps in IntelliJ IDEA to configure the default connection to the CloudBees CD/RO.
-
Open a project in IntelliJ.
-
Access the CloudBees CD/RO Connections Settings.
If the  logo or CloudBees CD/RO plugin is not visible in Settings, install the CloudBees CD/RO plugin. Refer to the Intellij IDEA plugin installation for more information.
-
Select the
 logo. Then select the
  gear on the Manager tab of the CloudBees CD/RO plugin.
 -
Select Settings or Plugins from the
 IDE and Project settings icon. Then select CloudBees CD/RO from the left navigation menu of the Settings screen.
 -
Select Settings from the IntelliJ IDEA menu in the upper left corner. Then select CloudBees CD/RO from the left navigation menu of the Settings screen.
-
-
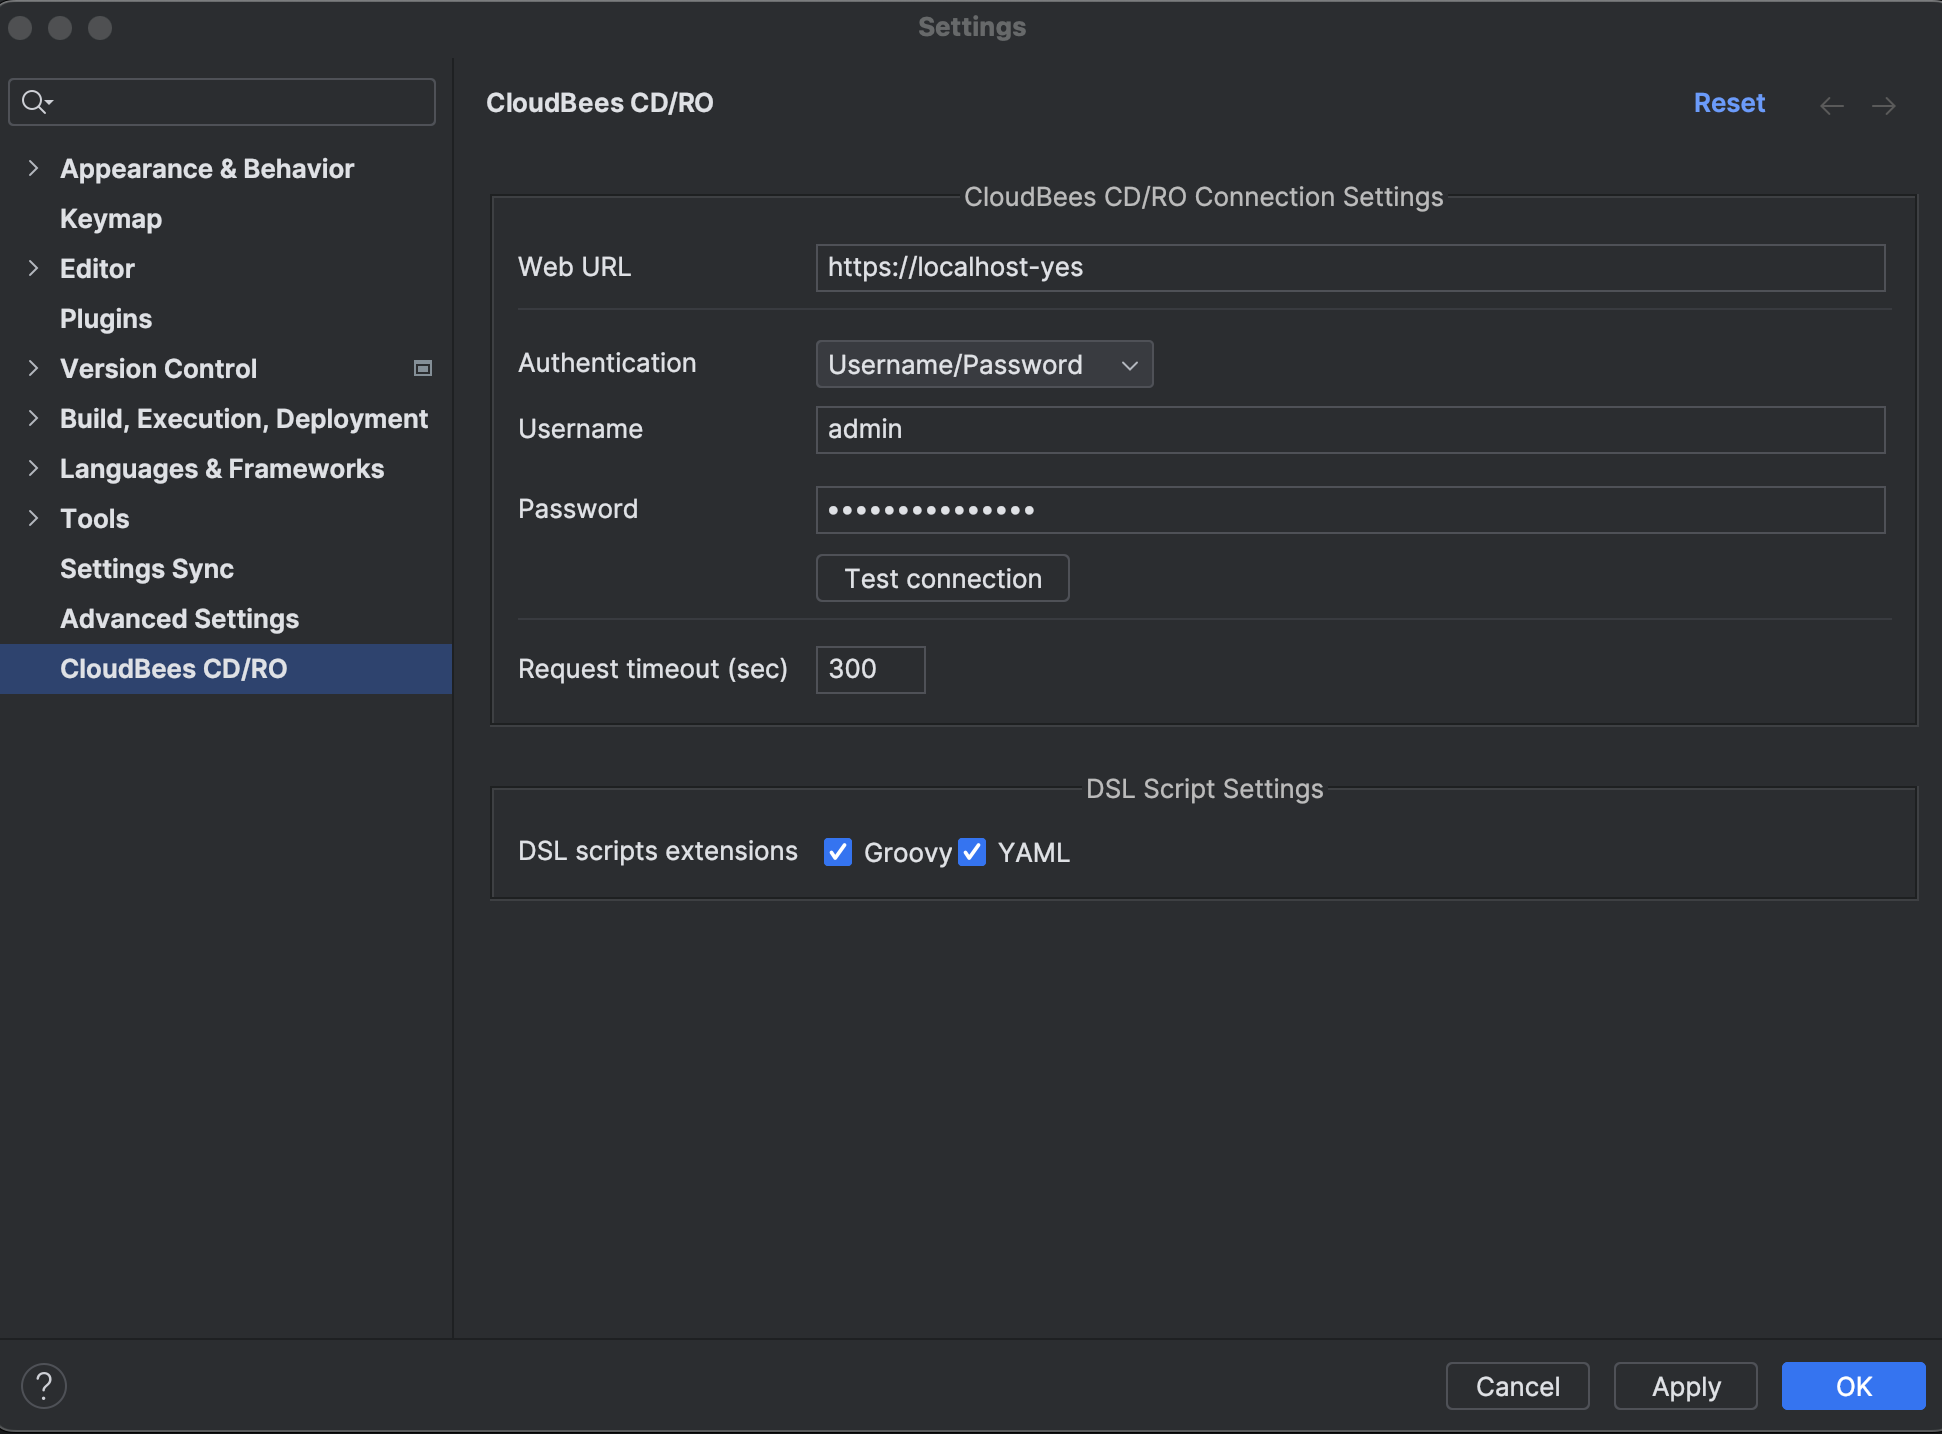
Use the information below to complete the CloudBees CD/RO connection settings fields. Then select OK to save the configuration.
 Figure 1. Settings
Field Description Web URL
Use to enter the CloudBees CD/RO web server address.
Authentication
Select either
UsernameandPasswordorTokenas the CloudBees CD/RO login method. For details regarding using an access token refer to, Sign in to CloudBees CD/RO.Test connection
Select to validate the connection to CloudBees CD/RO server.
Requests timeout (sec)
Enter the number of seconds the plugin will wait for a response from the CloudBees CD/RO server.
DSL script settings
Use to enable Groovy and YAML DSL script extensions.
Continue the plugin configuration by modifying the default Run/Debug Configuration template and enabling autocomplete for CloudBees CD/RO API commands and objects.
Remove the Build option from the Run/Debug Configuration template
The Build option must be removed from the Before launch settings to ensure the connection to the CloudBees CD/RO server functions properly.
Complete these steps in IntelliJ IDEA to configure the default connection to the CloudBees CD/RO.
-
Open a project in IntelliJ.
-
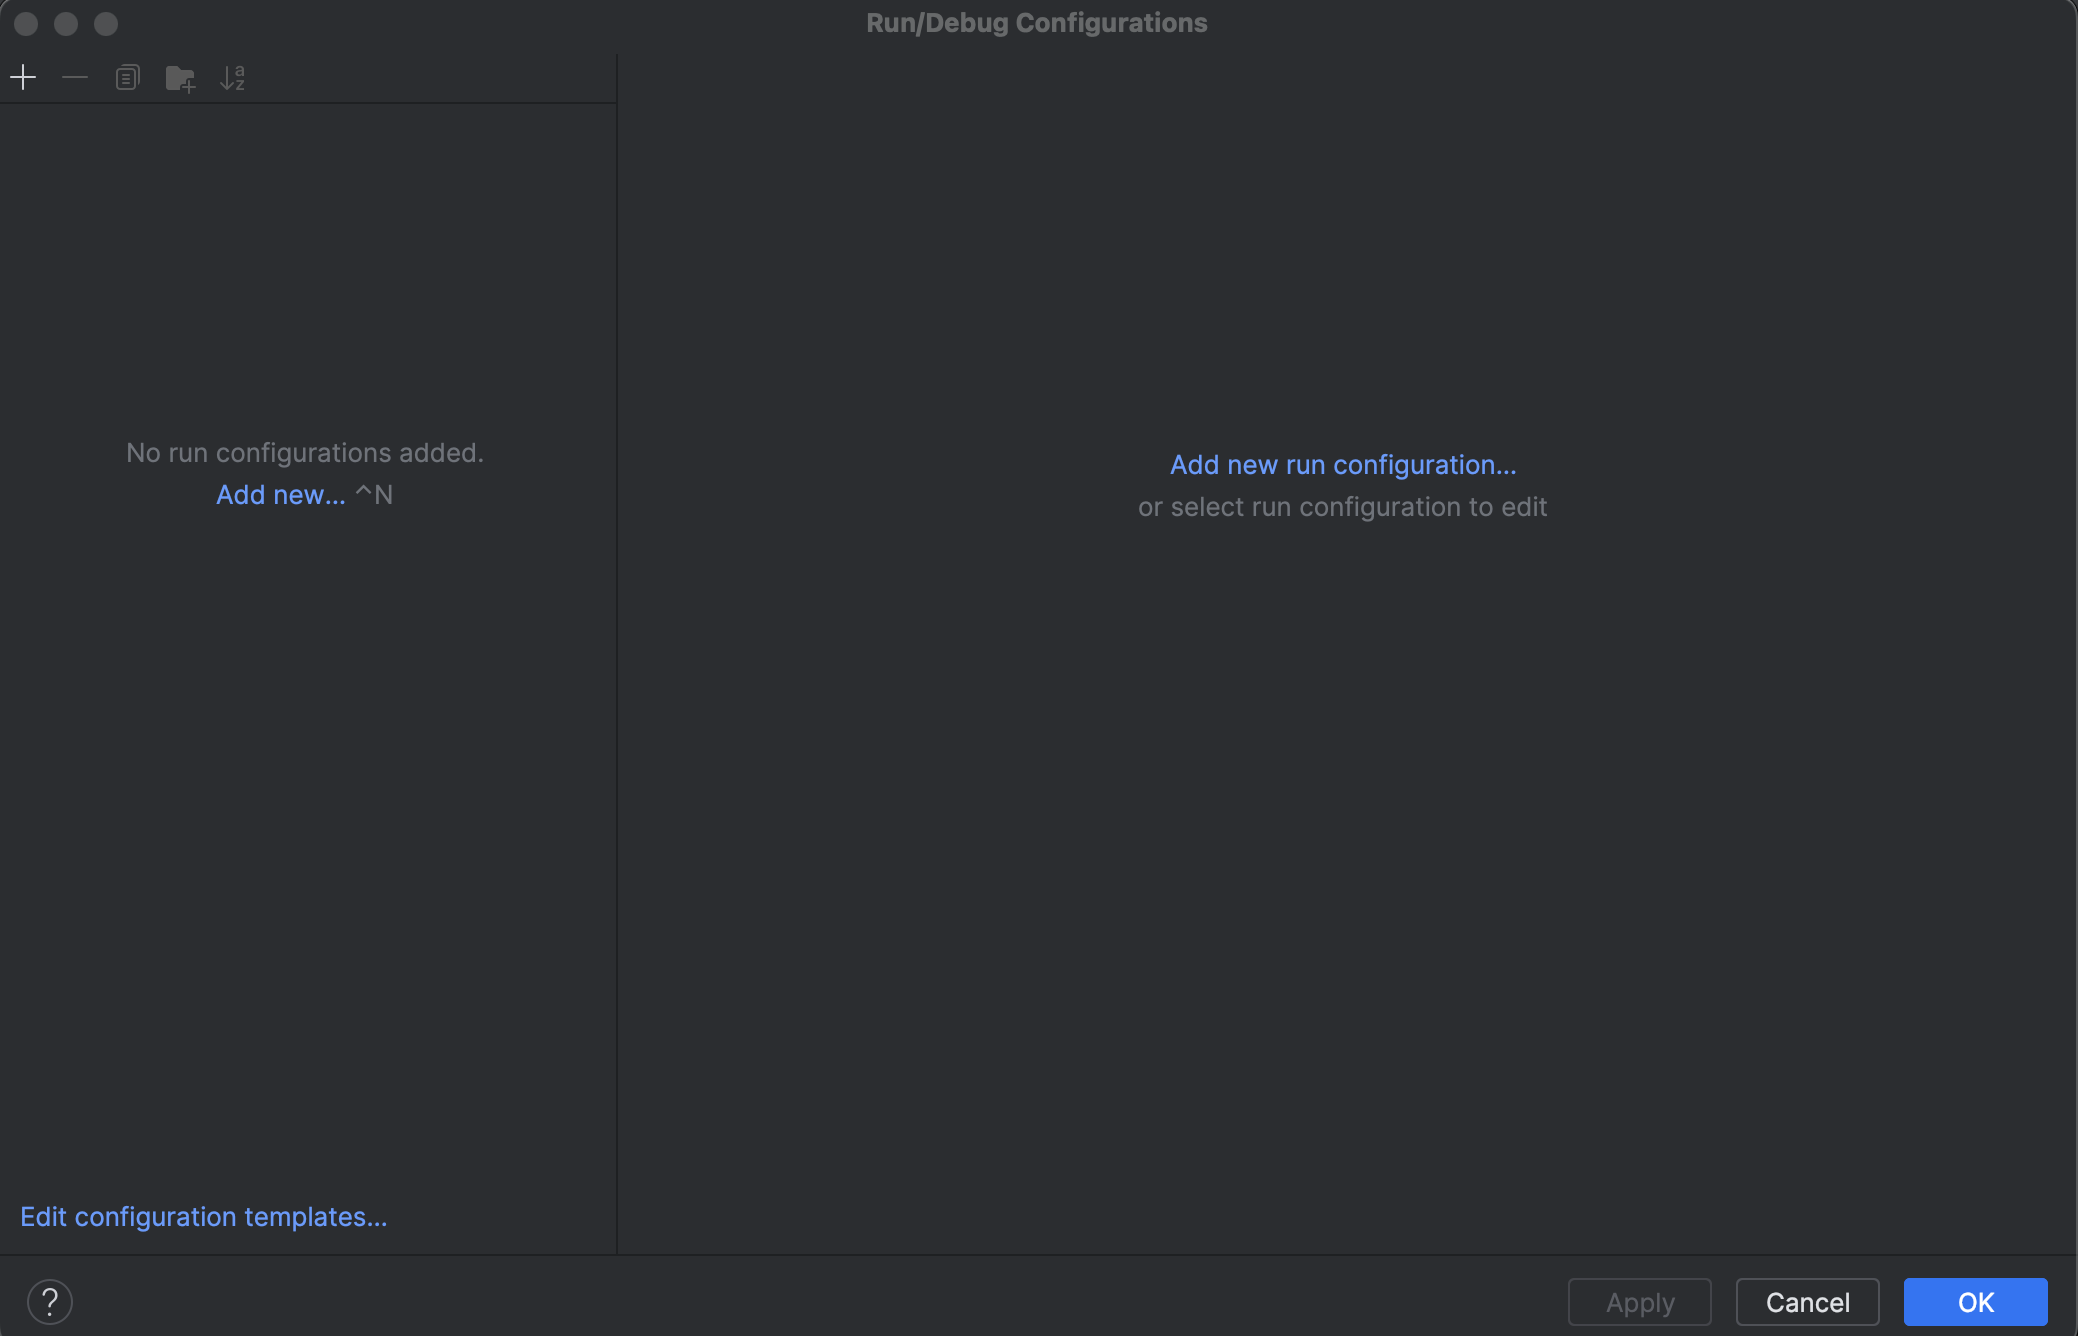
Select Edit configuration… from the Current File menu located in the upper right corner of the IntelliJ IDE editor. The Run/Debug configurations screen displays.
-
Select the Edit configuration templates link in the lower left corner of the Run/Debug configurations screen.
 Figure 2. Run/Debug Configurations
 -
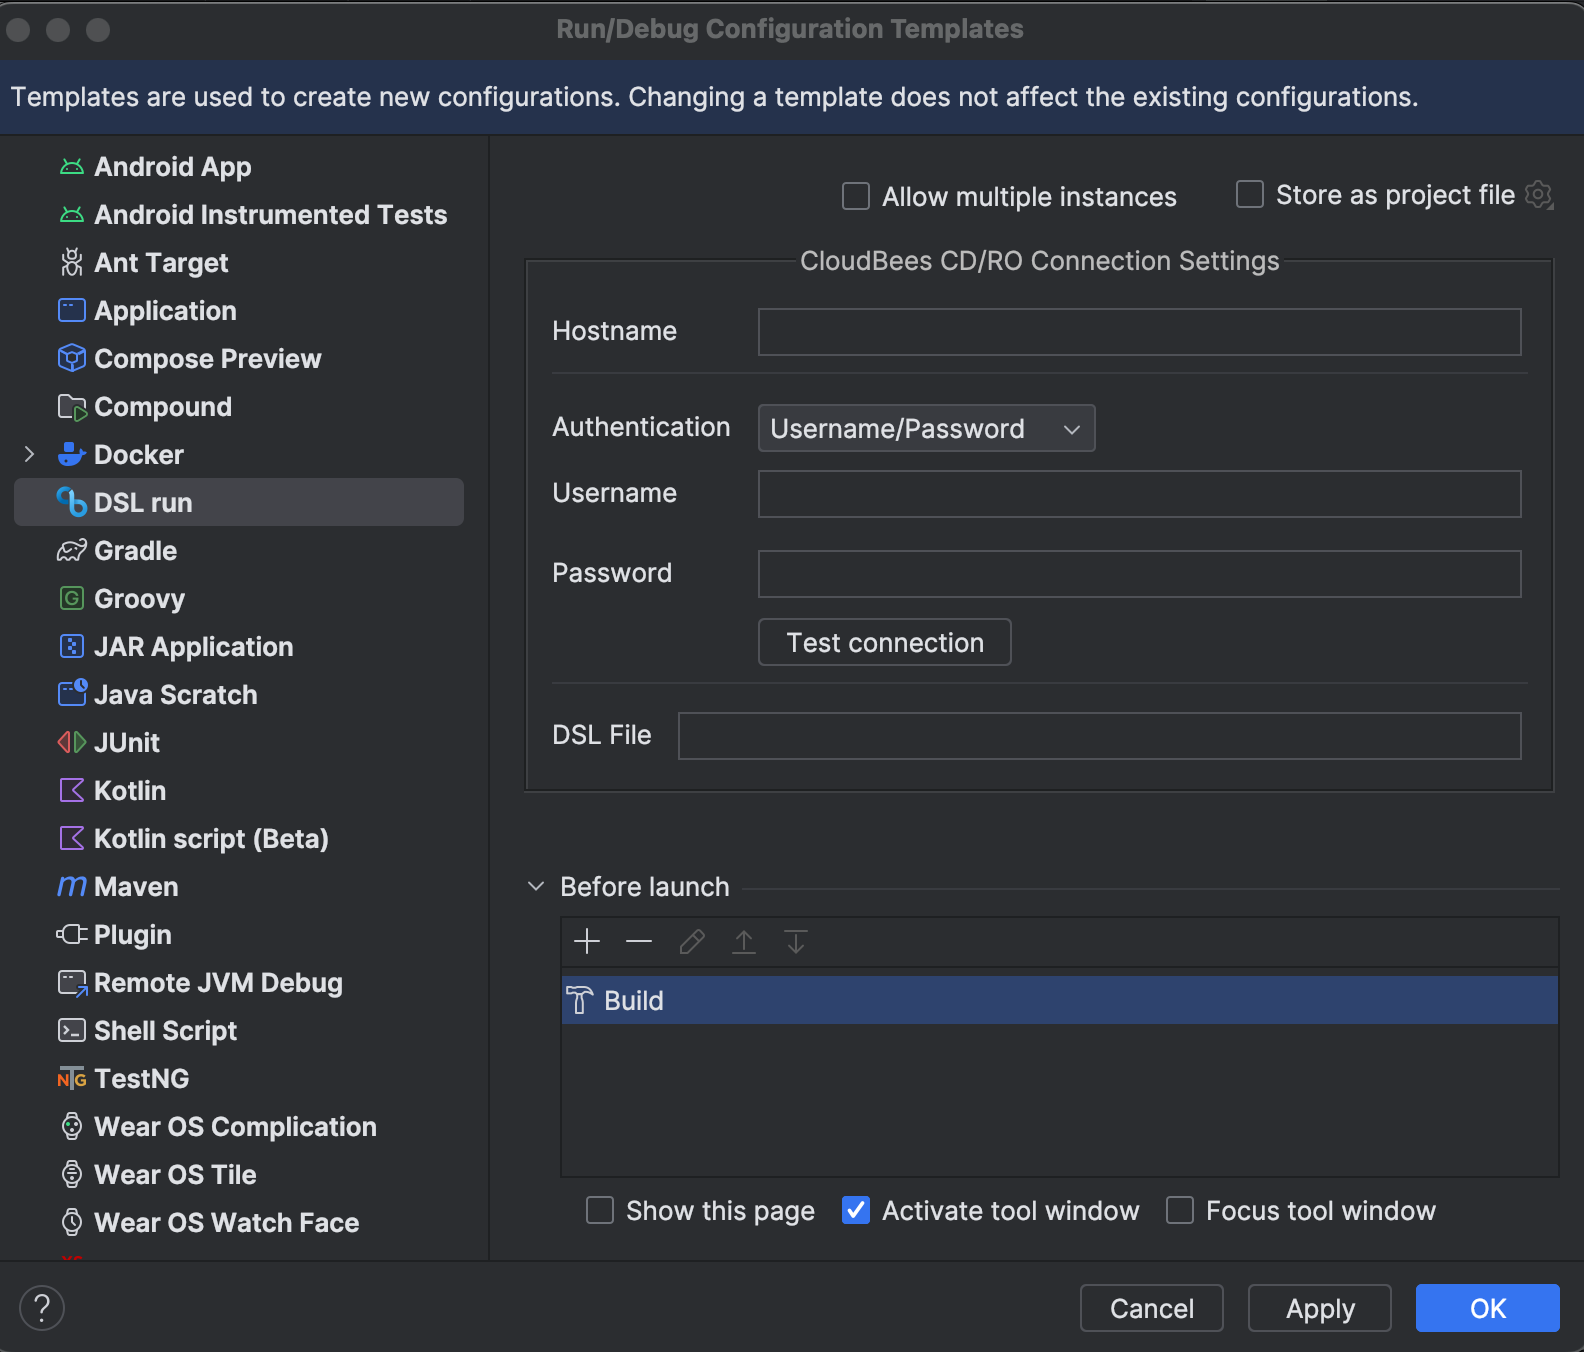
Select DSL run from the template list on the Run/Debug Configuration Templates screen.
-
Select the Build option in the Before launch section in the CloudBees CD/RO Connections settings.
-
Select the
 Remove icon.
Leave the Hostname, Authentication, and Credential fields blank. -
Select OK to save the template configuration.
 Figure 3. Run/Debug Configuration Templates
Complete the plugin configuration by enabling autocomplete for CloudBees CD/RO API commands and objects.
Enable autocomplete for CloudBees CD/RO API commands and objects
Enable access to a list of available CloudBees CD/RO API commands and objects within the IntelliJ editor.
-
Download the
commander-api-bindings.jarfile located in<CDRO_INSTALLATION_PATH>/utils/langs/directory. -
Select Project Structure from
 IDE and Project settings.
 -
Select Modules from the left pane.
-
Select Dependencies.
-
Select the
 icon.
icon. -
Select JARs or Directories from the options.
-
Locate and select the
commander-api-bindings.jarfile. -
Select Open.
-
Select OK.
Configure DSL script run and debug settings
Run/Debug configuration settings are created for each DSL script. Use these steps to modify settings for specific DSL script.
-
Access DSL file settings.
-
Select the DSL file name from the Current File. Then Edit from select
 thee-dots menu.
 -
Right-click on the object page in the editor or the file name in the project browser. Then select Modify Run Configuration from the More Run/Debug menu.
-
-
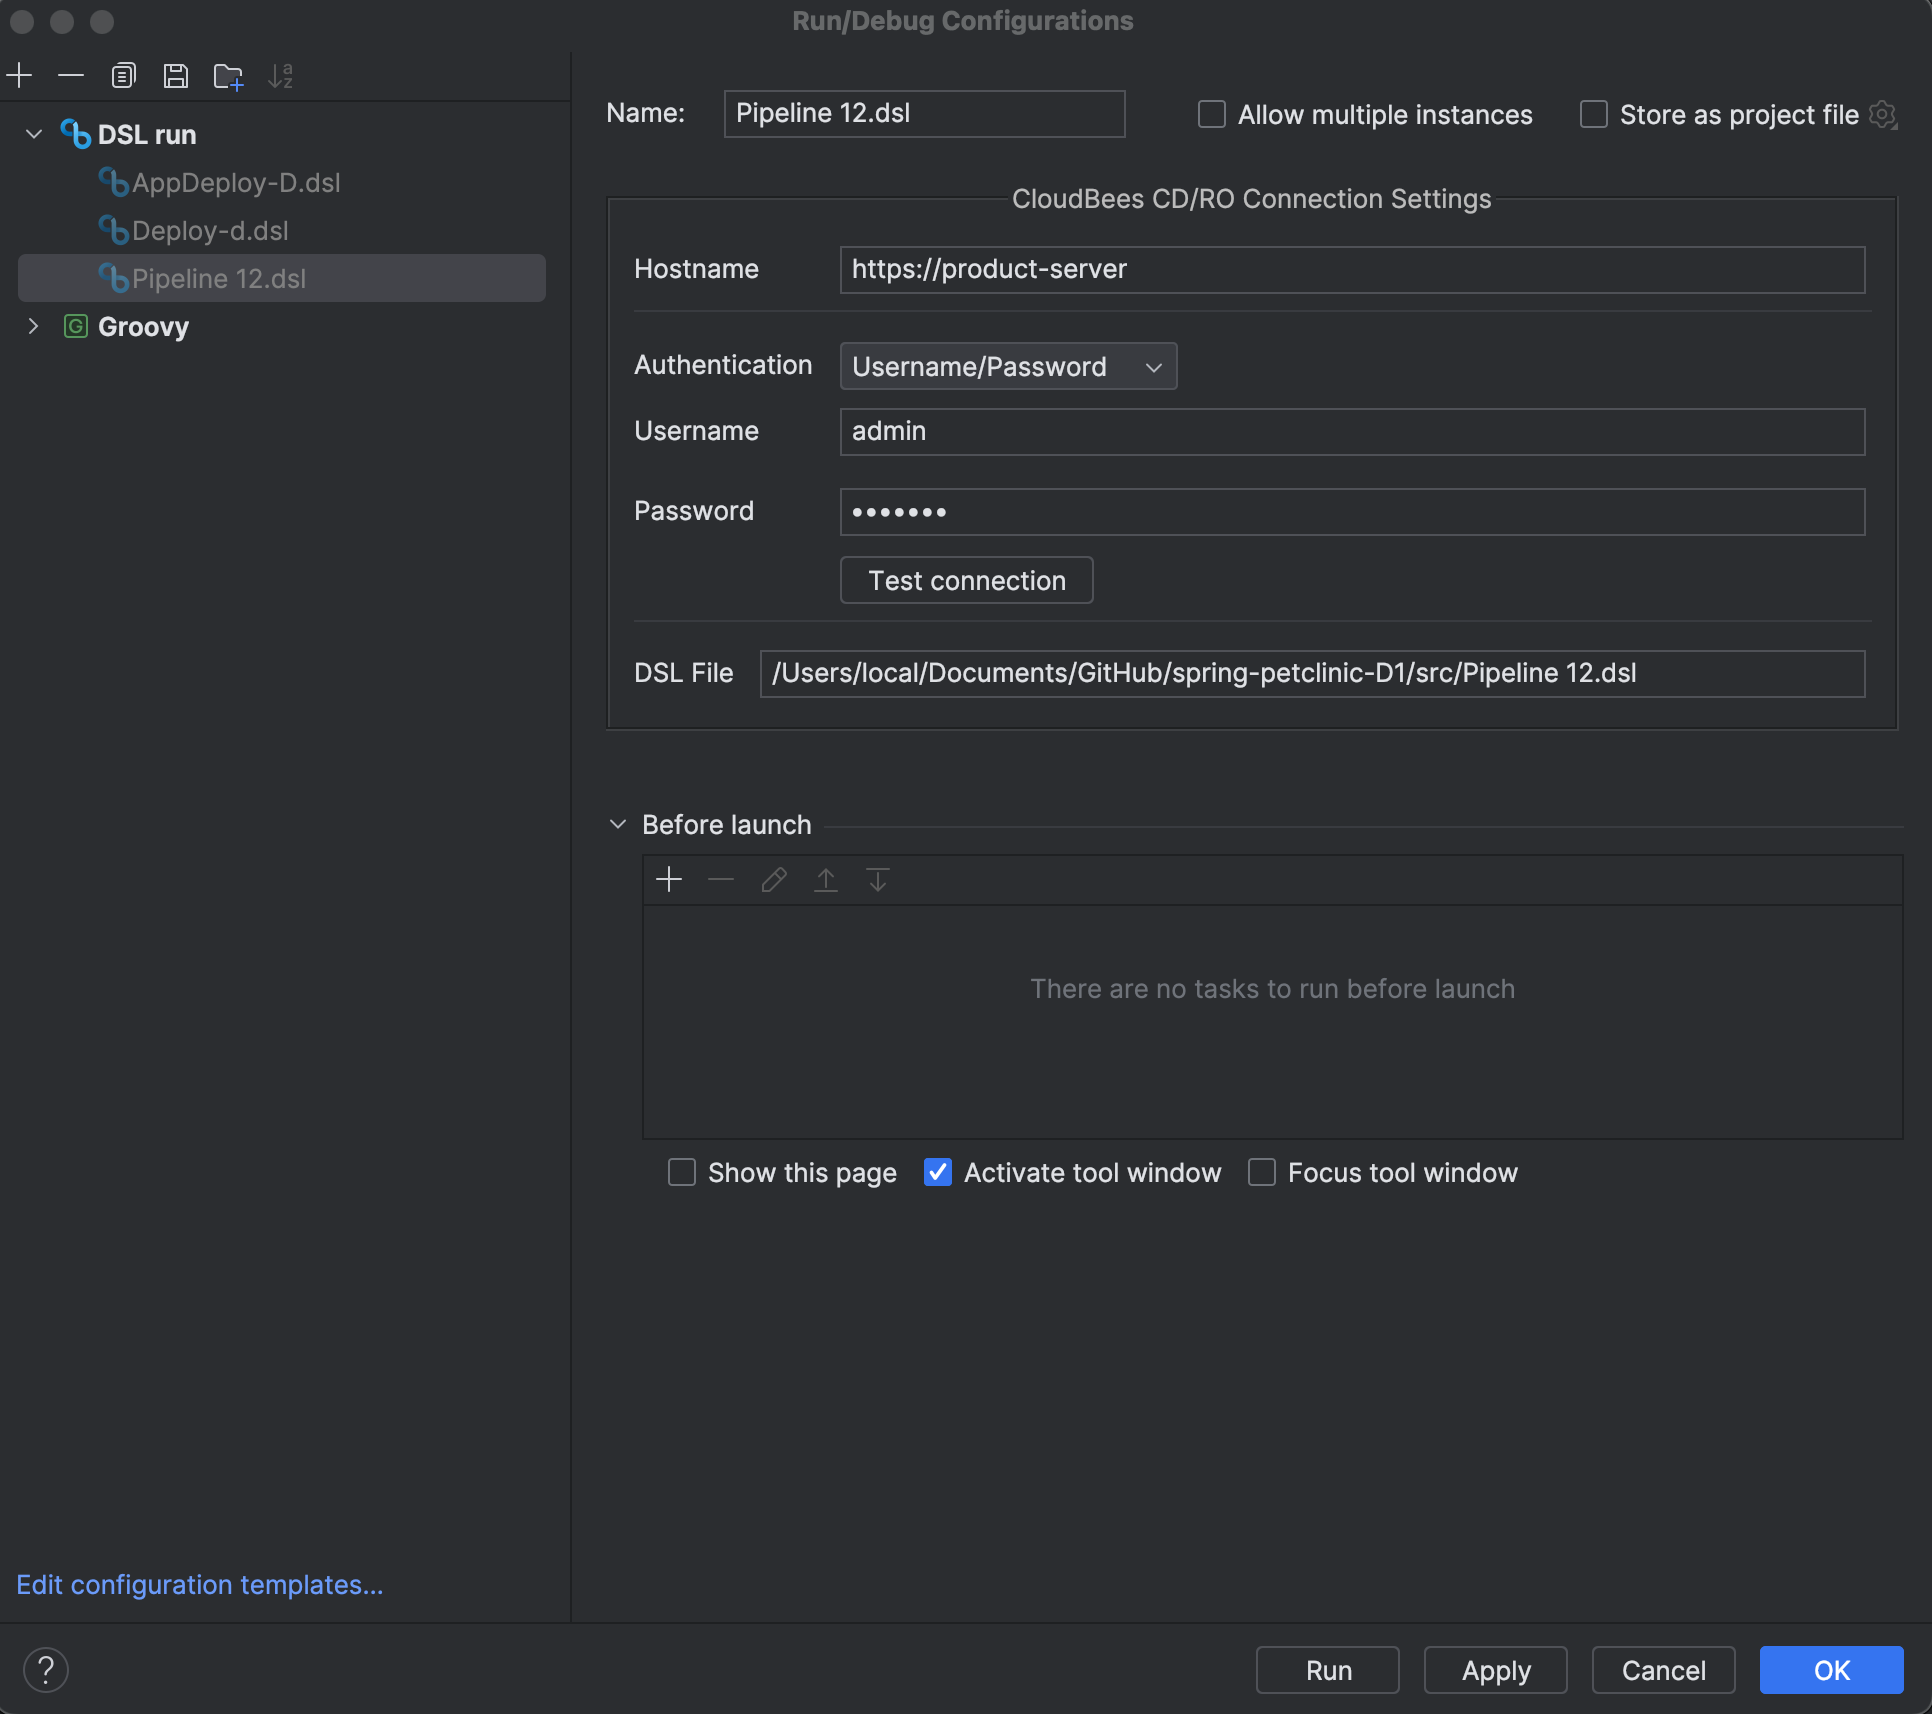
Use the information below to modify the configuration settings. Then select OK to save the configuration.
 Figure 4. Run/Debug Configurations
Field Description Name
Use to enter the name for the configuration. The default is the DSL file name.
Allow multiple instances
Do not use this field.
Store as a project file
Select to save the configuration file to a location within the IntelliJ project.
Hostname
Use to enter the CloudBees CD/RO web server address.
Authentication
Use select either
UsernameandPasswordorTokenas the CloudBees CD/RO login method. For details regarding using an access token refer to, Sign in to CloudBees CD/RO.Test connection
Select to validate the connection to CloudBees CD/RO server.
DSL File
Use to enter the local file path for the dsl file.
Before launch
Leave this field blank.
Show this page
Do not use this field.
Active tool window
Do not use this field.
Focus tool window
Do not use this field.