To sign in, copy https://<webHostName>/flow/ into a browser window, then enter your CloudBees CD/RO web host name as the <webHostName>.
One of the following sign-in pages displays, based on the server’s single sign-on (SSO) setting. For information about enabling SSO at your enterprise, refer to Configuring single sign-on for CloudBees Software Delivery Automation.
|
If you experience page redirect problems during SSO sign in, you can modify the
|
SSO enabled
The sample sign-in page below is SSO-enabled with GSuite and Kerberos SSO. Your page may be enabled with other SSO identity providers, such as Okta.
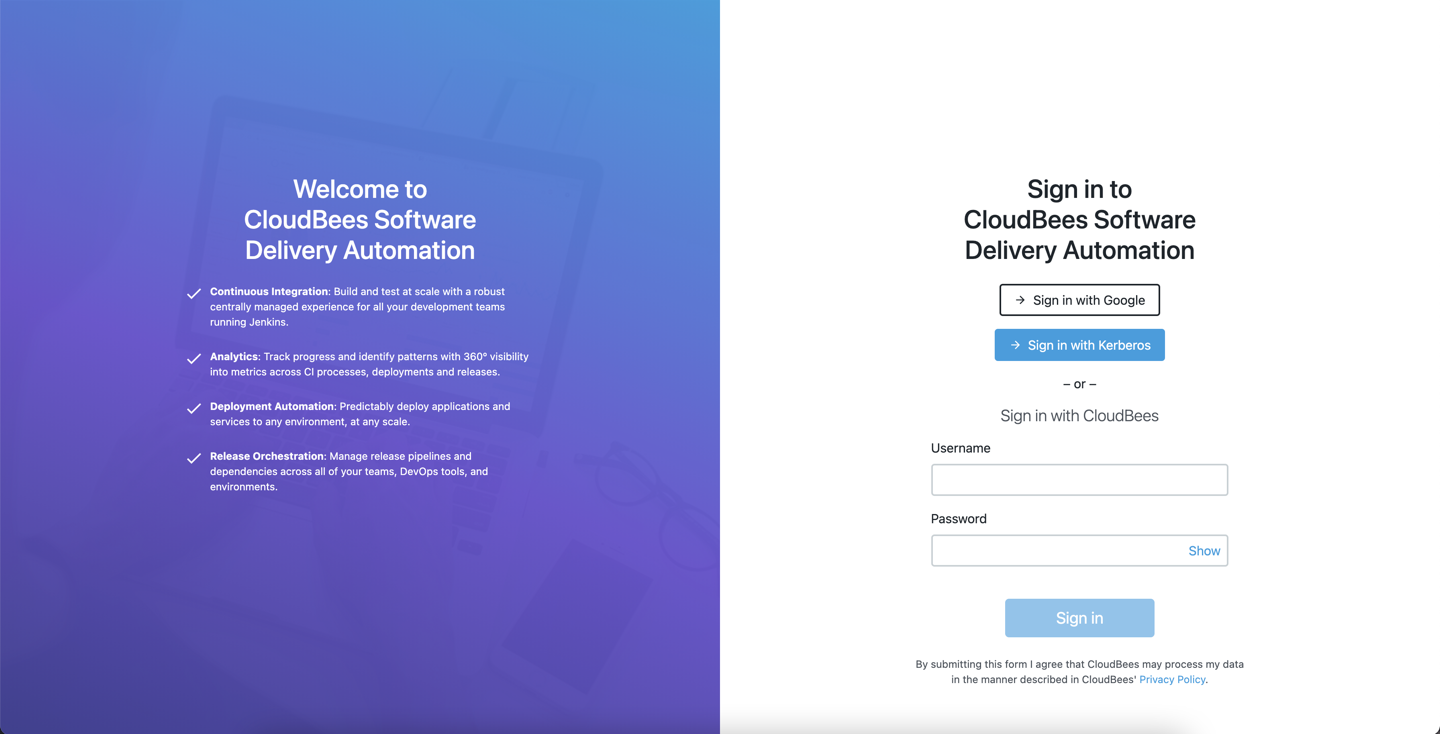
From here, use one of the following methods to sign in:
-
Select Sign in with Google: The credentials are authenticated via the Google identify provider, and if successful, you are redirected to the home page.
-
Select Sign in with Kerberos: This system has additionally been enabled with Kerberos SSO. The credentials are authenticated, and if successful, you are redirected to the home page.
-
Enter a Username and Password for local authentication. Then select Sign in. If successful, you are redirected to the home page.
| If you do not already have an active session, you are unable to sign in through the CloudBees CD/RO server when the CloudBees CD/RO server is being upgraded. The following message appears on the sign-in screen until the CloudBees CD/RO server upgrade is complete: “Server is starting. Please wait.” |
SSO disabled
This sign-in page has SSO disabled:
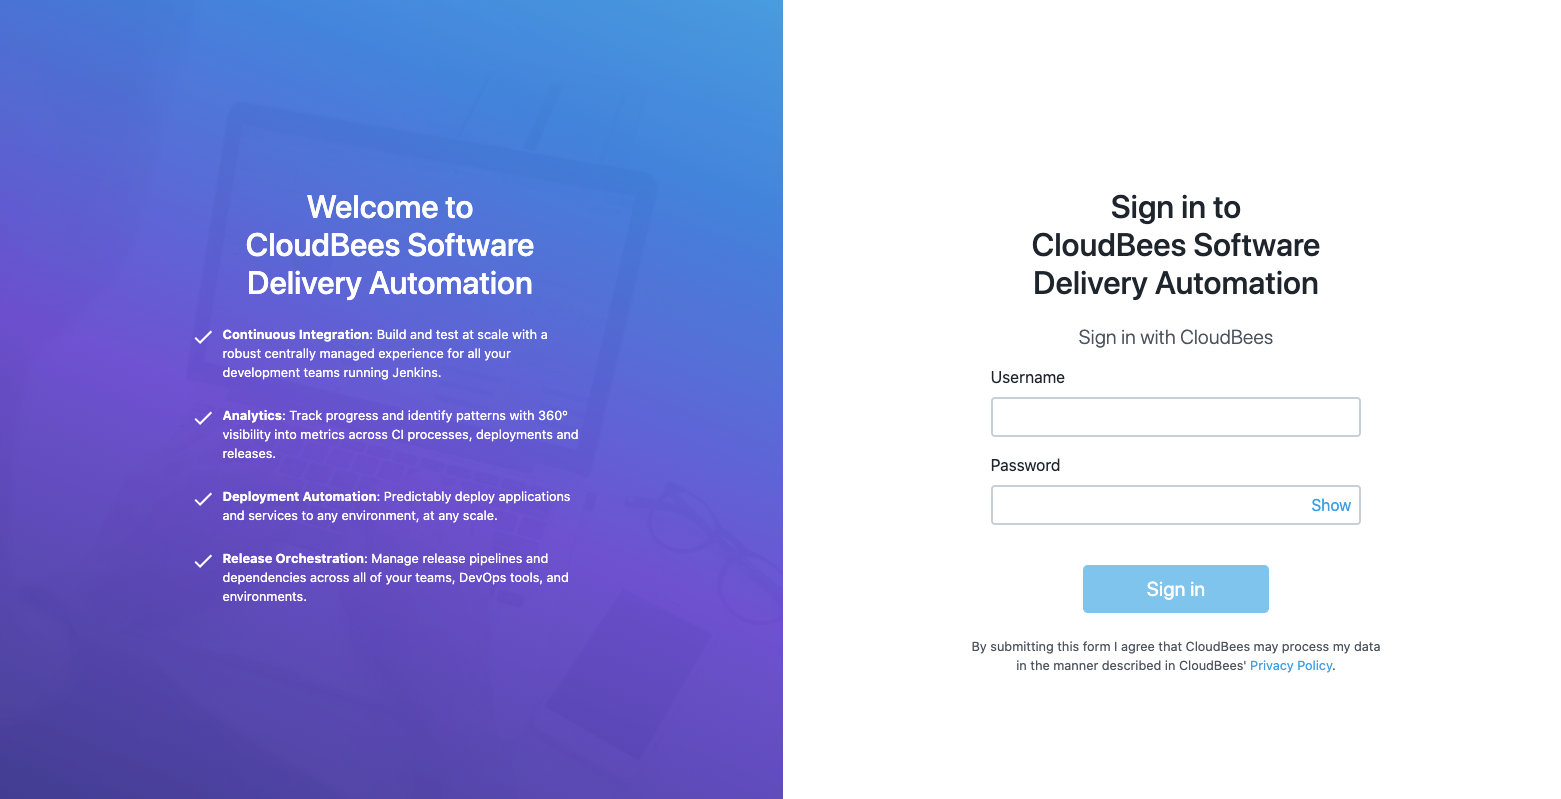
From here, enter a Username and Password and then select Sign in. If successful, you are redirected to the home page.
|
The default sign in credentials are:
On your first sign in, CloudBees strongly suggests to immediately change the default password. To do so:
|
Login disabled in maintenance mode
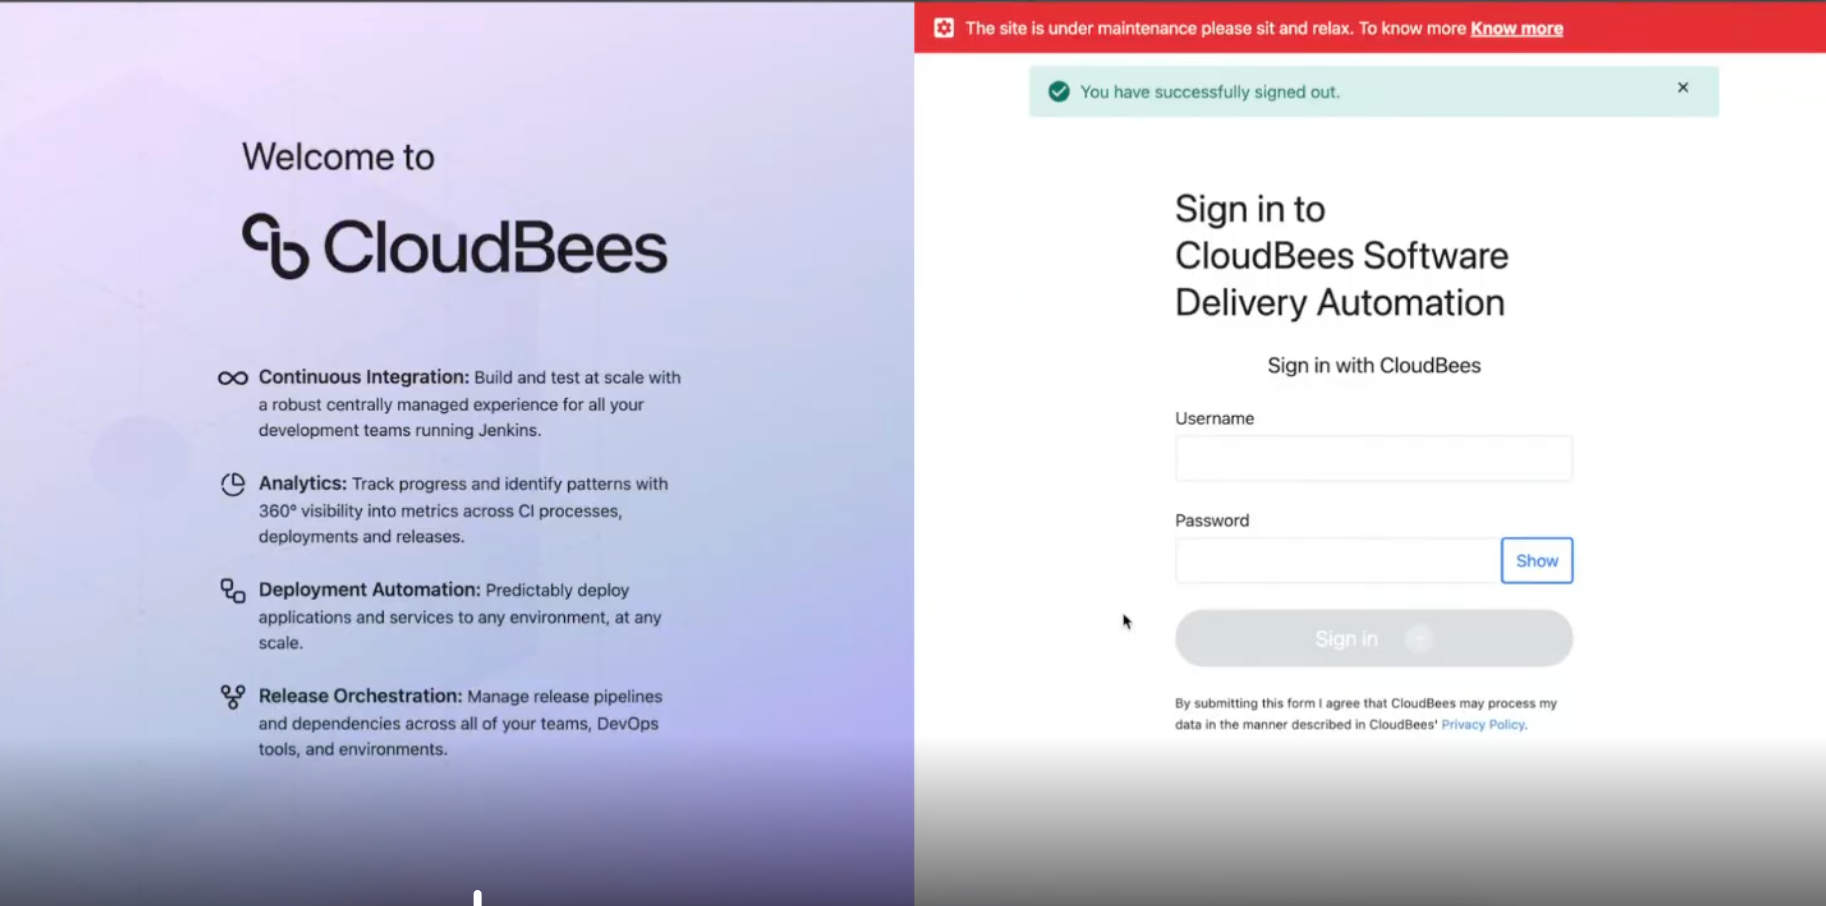
During system downtime, maintenance mode is enabled. Maintenance mode restricts access to all non-administrative users. As a result, all active sessions are terminated, and users are either denied access or automatically logged out and redirected to the login screen. A maintenance-specific message with support links is displayed. The user restriction also applies to API access.
Once maintenance mode is disabled, users can log back into the system and the banner no longer displays.
| Authorized administrative users can access the system during the maintenance period. |
Manage access tokens through the UI
Create and manage access tokens to automate tasks and for API authentication. You can create, view, and revoke tokens for your own account, while an administrator can manage tokens on behalf of other registered users.
| An admin user can set default token timeouts, minimum token timeouts, maximum token timeouts, and maximum number of tokens per user. Configure these options by navigating to . |
This section describes the following access token management scenarios:
-
Create access tokens for your own user account: Create an access token for your own account.
-
Create access tokens for a single (registered) user account as an administrator: As an administrator, create an access token for a user and deliver it to the user’s registered email address.
-
Create access tokens for bulk (registered) users as an administrator: Create access tokens for multiple registered users in a single operation and deliver the token to the corresponding user’s registered email address.
Create access tokens for your own user account
To create an access token for your own user account:
-
Navigate to .
-
Select Access tokens from the actions menu of your user account.
-
Select Create access token.
-
Complete the following fields on the New access token screen:
-
Name: (Required) Enter a name for the token.
-
Description: Enter a description of the token.
-
Expiration days: Enter the number of days before the token expires.
-
-
Select Save changes.
-
Copy the access token displayed for use.
Create access tokens for a single (registered) user account as an administrator
Before creating access tokens for single user account, ensure the following prerequisites are met:
-
You must be an admin user with modify privilege.
-
The target user is a registered user in CloudBees CD/RO.
-
The target user has a valid email address configured.
-
A default email configuration is set on the server (to send token notification emails).
| If any of these prerequisites are not met, token creation for that user account is blocked with an error message. |
To create an access token for a single user account as an administrator:
-
Navigate to .
-
Select Access tokens from the actions menu of the respective user account.
-
Select Create access token.
-
Complete the following fields on the New access token screen:
-
Name: (Required) Enter a name for the token.
-
Description: Enter a description of the token.
-
Expiration days: Enter the number of days before the token expires.
-
-
Select Save changes.
The access token is sent to the user’s registered email address.
Create access tokens for bulk (registered) users as an administrator
Before creating access tokens for bulk users, ensure the following prerequisites are met:
-
You must be an admin user with modify privilege.
-
The target user is a registered user in CloudBees CD/RO.
-
The target user has a valid email address configured.
-
A default email configuration is set on the server (to send token notification emails).
| If any of these prerequisites are not met, token creation for that user is blocked with an error message. |
To create an access token for bulk (registered) users as an administrator:
-
Navigate to .
-
Select Access tokens from the actions menu of the administrator account.
-
Select Create access token.
-
Complete the following fields on the New access token screen:
-
Create access token for other users: Enable this option to allow administrators to create access tokens on behalf of other registered users. When enabled, an administrator can generate access tokens for any user account in the system. When disabled, users can create access tokens only for their own accounts.
-
Select Users: (Required) Select one or more user names from the list for whom you want to create the access token. This field is available only when Create access token for other users is enabled. Name: (Required) Enter a name for the token.
-
Description: Enter a description of the token.
-
Expiration days: Enter the number of days before the token expires.
-
-
Select Save changes.
The access token is sent to the user’s registered email address.
Create an access token through ectool
You can generate a secure access token to authenticate and run CloudBees CD/RO API commands. Use your SSO credentials to generate the token, and then use tools such as ectool or curl to execute permission-based CloudBees CD/RO API commands from the command line, such as getProjects.
To generate an access token:
-
Run the
loginSsocommand.ectool loginSso -
Copy and paste the sign-in URL into a web browser.
ectool loginSso To sign in, use a web browser to open the page https://{webServerHost}/flow/#access-tokens/generate-token Type the token here: -
Enter your CloudBees CD/RO web server address as the
webServerHost.To configure the CloudBees CD/RO web server name, navigate to , and then enter your CloudBees CD/RO web server address into the Web Server Host field. -
Sign in using an SSO method such as SAML, OpenIDConnect, or Kerberos.
Figure 4. SSO sign in -
Copy the access token.
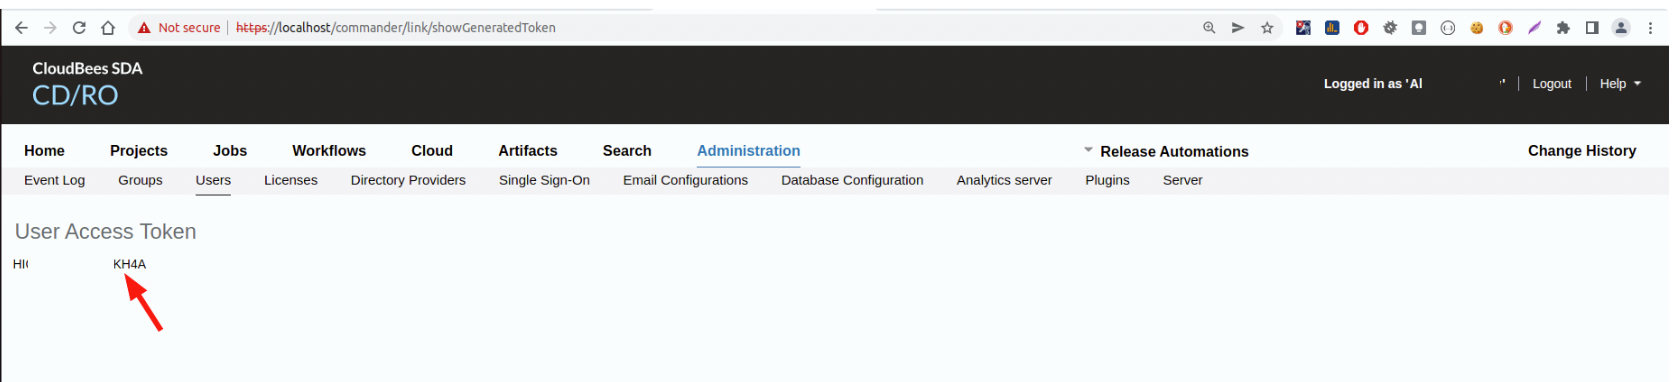 Figure 5. SSO user access token
Use access tokens with ectool
Use the generated access token to execute the CloudBees CD/RO API command using ectool.
-
Use one of the following methods to sign in:
-
Paste your generated access token into the Type the token here field, and then press enter.
 Figure 6. Paste token here
 -
Run the
loginSsocommand in ectool.ectool loginSso --token PasteTokenHere
-
-
A login response displays.
 Figure 7. Token login response
 -
Test your access by running this API command.
ectool getProjects -
A similar API command response displays.
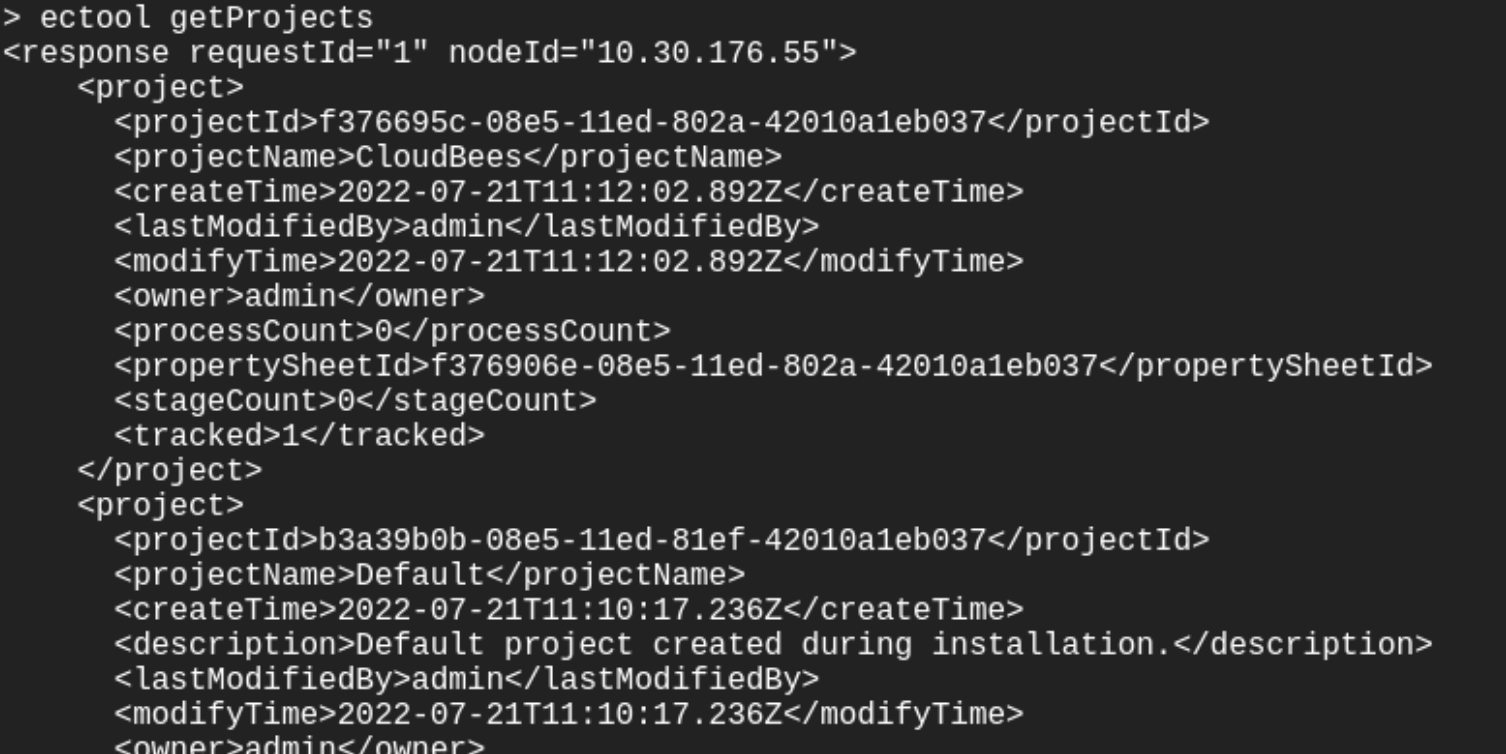 Figure 8. Successful API command response
Review tokens using ectool
| An admin user can set a default token timeout, minimum token timeout, maximum token time out, and maximum number of tokens per user. Configure these options by navigating to . |
Use these options to view tokens.
Review tokens in one of the following ways.
-
View your access token using the token name.
ectool getUserAccessToken TypeTokenName -
View all of your access tokens.
ectool getUserAccessTokens -
Admin users can view a user’s token one of following ways:
-
View a user's token using the token name.
ectool getUserAccessToken tokenName --userName TypeuserName -
View all of a user’s tokens.
ectool getUserAccessTokens --userName TypeUserName
-
Modify a token name or description using ectool
-
Change the name of your token.
ectool modifyUserAccessToken --userAccessTokenName TypeCurrentTokenName --newName TypenNewName -
Change the description of your token.
ectool modifyUserAccessToken --userAccessTokenName TypeTokenName --description TypenNewDescription
Revoke access tokens with ectool
Use these options to revoke an access token.
-
Revoke your access token using the token name.
ectool revokeUserAccessToken tokenName -
Revoke all of your tokens.
ectool revokeUserAccessTokens -
Admin users can revoke a user’s token one of the following ways:
-
Revoke a user's token using the token name.
ectool revokeUserAccessToken tokenName --userName userName -
Revoke all of a user’s tokens using the username.
ectool revokeUserAccessTokens --userName TypeUserName
-
Use access tokens with curl
Use the generated access token to execute CloudBees CD/RO API commands using curl.
-
Generate and copy a token using the Manage access tokens through the UI or Use access tokens with ectool.
-
Use the copied token to get a
sessionId.CommandResponsecurl -k -X POST "https://localhost/rest/v1.0/sessions?token=PasteYourTokenHere" -H "accept: application/json" -d "{}"{"sessionId":"SessionIdHere","userName":"admin"} -
Use the session ID argument
--cookie "sessionId=PasteSessionIdHere"to run curl commands.View example commands and responses
CommandResponseCommandResponsecurl --cookie "sessionId=YourSessionID" -k -X GET "https://localhost/rest/v1.0/projects" -H "accept: application/json"{"project":[{"projectId":"218e8718-c89e-11ed-a4d4-e6ea20d7bba5","projectName":"CloudBees","createTime":"2023-03-22T10:41:40.599Z","lastModifiedBy":"admin","modifyTime":"2023-03-22T10:41:40.599Z","owner":"admin","processCount":"0","propertySheetId":"218eae2a-c89e-11ed-a4d4-e6ea20d7bba5","stageCount":"0","tracked":"1"},{"projectId":"12345678-c89e-11ed-a013-e6ea20d7bba5","projectName":"Dev","createTime":"2023-03-22T10:42:44.849Z","lastModifiedBy":"admin","modifyTime":"2023-03-22T10:42:44.849Z","owner":"admin","processCount":"0","propertySheetId":"47832c33-c89e-11ed-a013-e6ea20d7bba5","stageCount":"0","tracked":"1"},{"projectId":"0ea00739-c89e-11ed-9cb3-e6ea20d7bba5","projectName":"EC-Examples","createTime":"2023-03-22T10:41:07.518Z","description":"This project contains templates for procedures that perform basic tasks within CloudBees CD.","lastModifiedBy":"admin","modifyTime":"2023-03-22T10:41:07.518Z","owner":"admin","processCount":"0","propertySheetId":"0ea0f19b-c89e-11ed-9cb3-e6ea20d7bba5","stageCount":"0","tracked":"0","workspaceName":""},{"projectId":"123456789-c89e-11ed-a5b3-e6ea20d7bba5","projectName":"EC-Utilities","createTime":"2023-03-22T10:41:09.943Z","description":"This project contains procedures that perform basic tasks within CloudBees CD. Also, the procedures can be used as examples that can be copied and modified in another project.","lastModifiedBy":"admin","modifyTime":"2023-03-22T10:41:09.943Z","owner":"admin","processCount":"0","propertySheetId":"0efe2d95-c89e-11ed-a5b3-e6ea20d7bba5","stageCount":"0","tracked":"0","workspaceName":"default"},{"projectId":"121345678-c89e-11ed-bdbb-e6ea20d7bba5","projectName":"Electric Cloud","createTime":"2023-03-22T10:41:35.434Z","lastModifiedBy":"admin","modifyTime":"2023-03-22T10:41:35.434Z","owner":"admin","processCount":"0","propertySheetId":"1e4d3ee9-c89e-11ed-bdbb-e6ea20d7bba5","stageCount":"0","tracked":"1"}curl --cookie "sessionId=YourSessionID" -k -X GET "https://localhost/rest/v1.0/zones" -H "accept: application/json"{"zone":[{"zoneId":"12345678-c89c-11ed-a69e-e6ea20d7bba5","zoneName":"default","createTime":"2023-03-22T10:29:37.388Z","lastModifiedBy":"admin","modifyTime":"2023-03-22T10:29:37.388Z","owner":"admin","propertySheetId":"72273a15-c89c-11ed-a69e-e6ea20d7bba5","resources":"local"}]}