After you define a release, you can run it multiple times on the journey to production. At the end of the software release life cycle, when the release process has been successfully completed and the software is ready for production, you can end the release. Once the release has ended, it cannot be run again.
Running the release
This example shows how to run a release called Q1_TimeBaseRelease. You can start the release run when the release status is Release in planning and Start release is enabled.
The release status changes to Running… and Start release is replaced by the ![]() button.
button.
The figure below displays a release in progress after you select Start release.
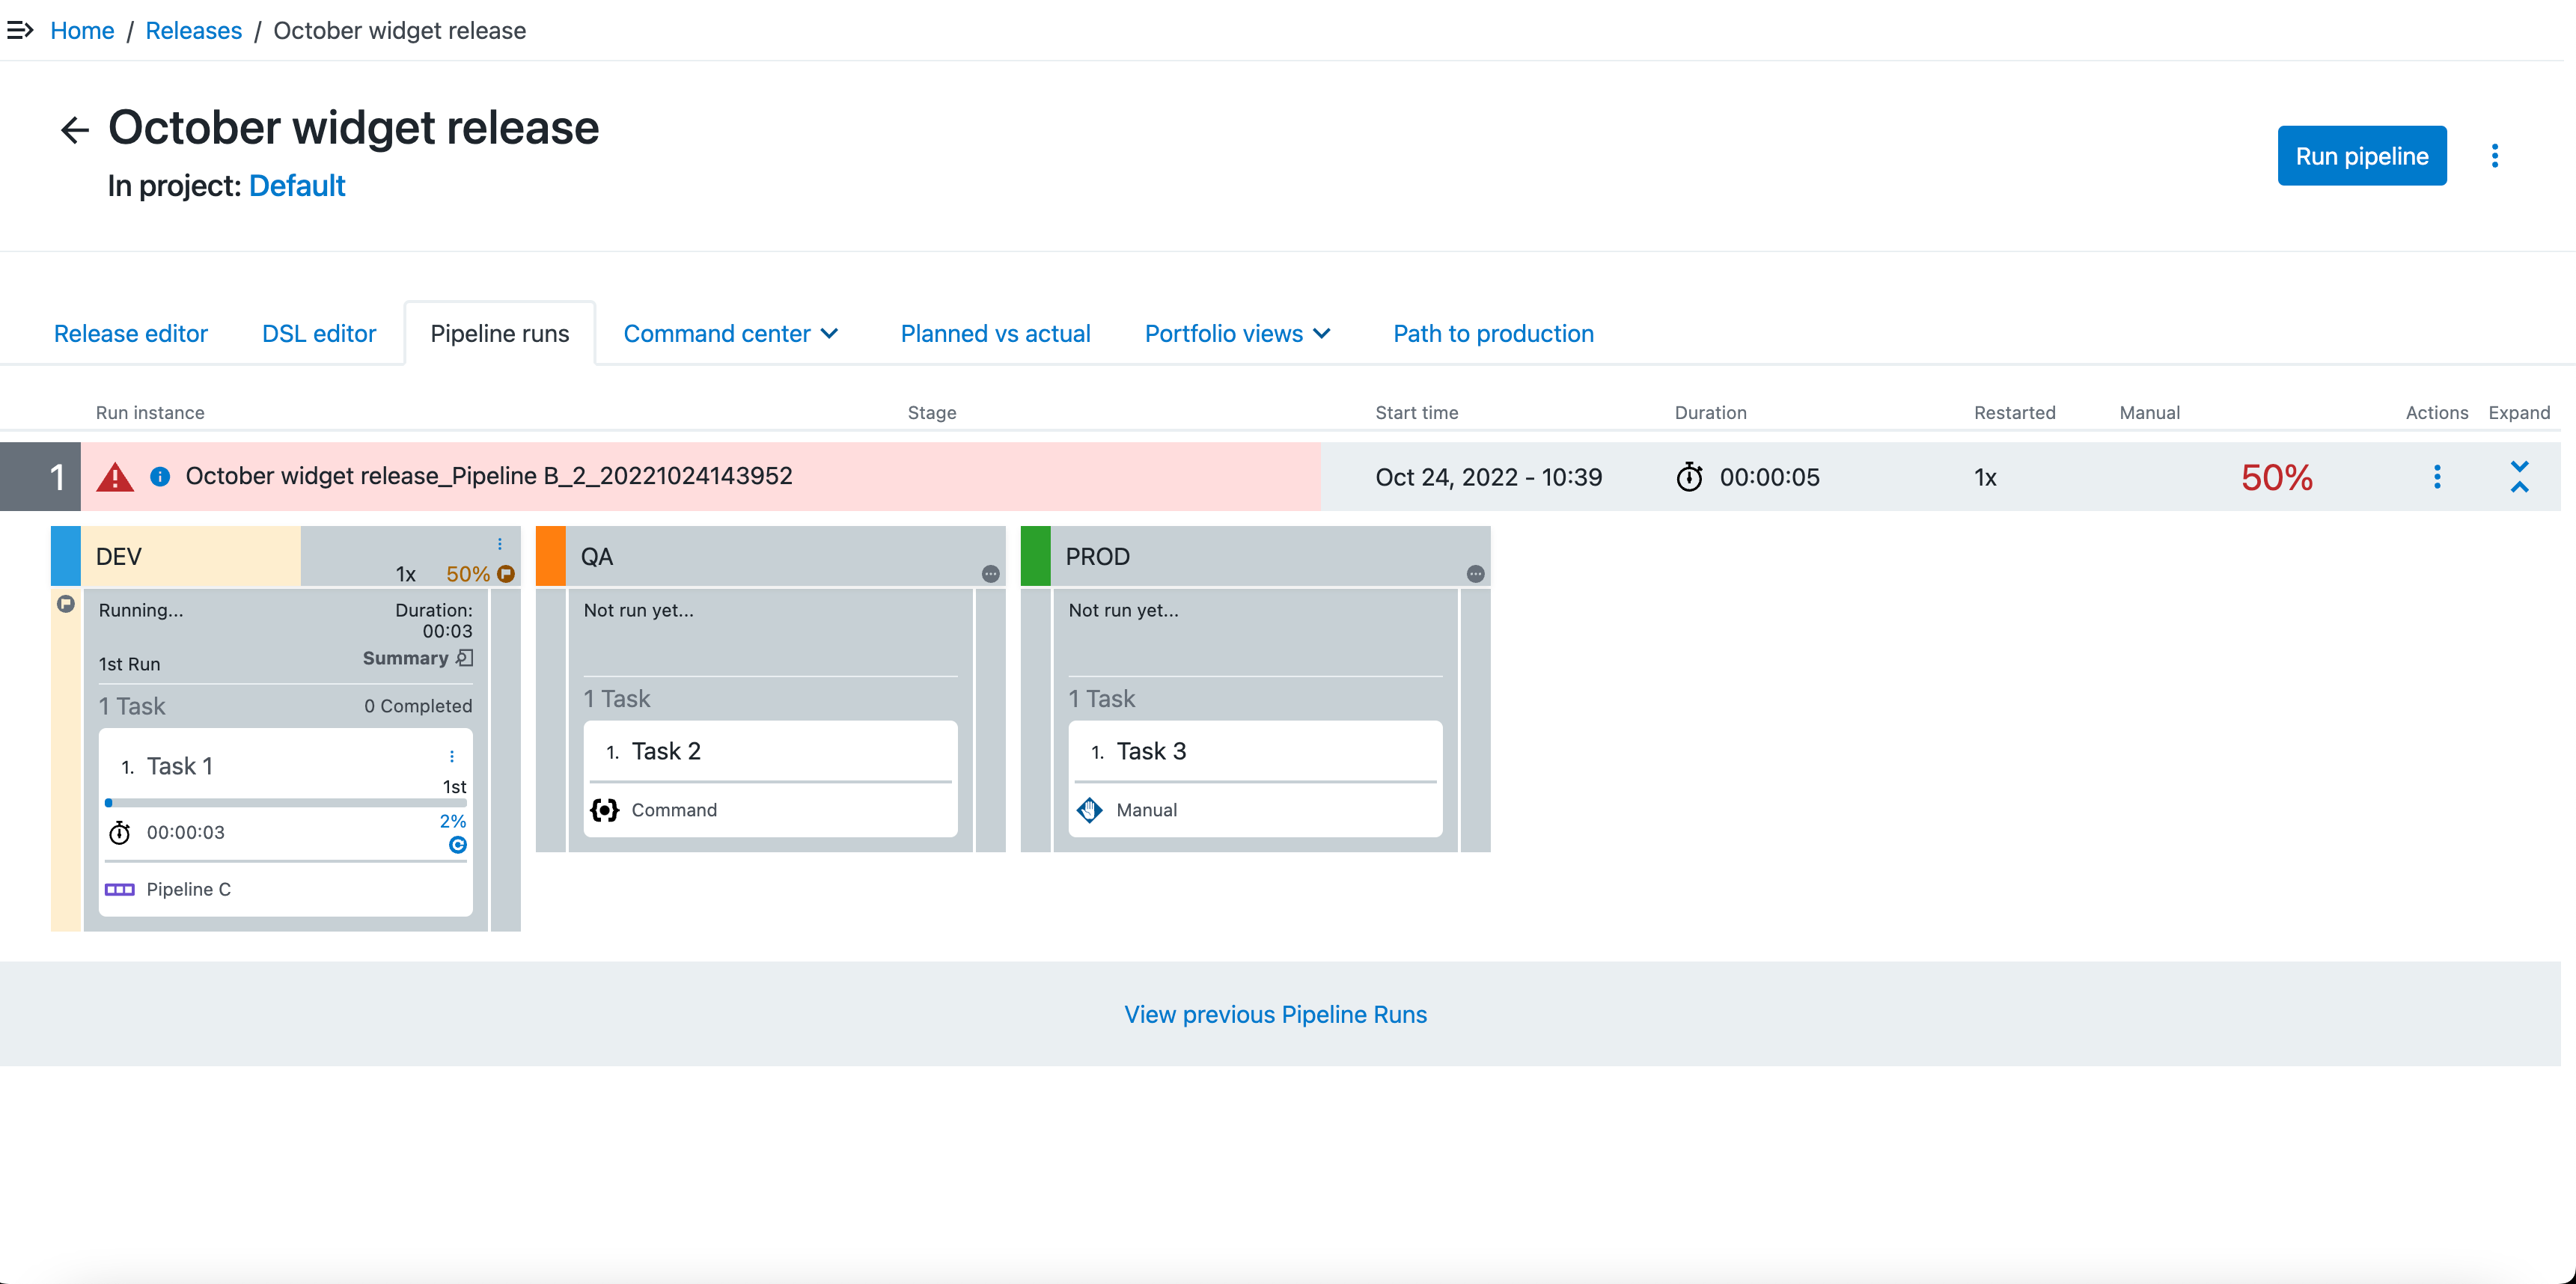
When the following is displayed, human intervention is required for the pipeline to progress to the first stage.

The pipeline can progress after you approve the entry to the QA stage of the pipeline. As the pipeline progresses, you can select the Summary link in the QA stage to view the pipeline stage summary.
The pipeline continues to progress to the PROD stage after the required approvers respond at the exit gate. Progress continues until this release run is completed.
After the release is completed, you can start a new release run by selecting the context menu for the pipeline and then selecting Run pipeline. You can re-run the release as many as times as you want during the software release life cycle.
Viewing Jenkins build details in a CloudBees CD/RO release
Using the CloudBees CD/RO Jenkins plugin, continuous integration processes in Jenkins can be configured to trigger a CloudBees CD/RO release as a post-build action from either a Jenkins job or from a Jenkins pipeline task. In addition, you can configure the Jenkins job to:
-
Send Jenkins job information and pipeline run information to the CloudBees CD/RO release.
-
Attach a Jenkins pipeline run to a CloudBees CD/RO release.
-
Publish Jenkins build artifacts to the CloudBees CD/RO repository.
Releases triggered by Jenkins are denoted by pipelines on the Pipeline runs list.
-
From the release dashboard, select a release. The Release editor opens for that release.
-
Select Pipeline Runs. Pipelines triggered by Jenkins are denoted on the Pipeline runs list with the Jenkins logo.
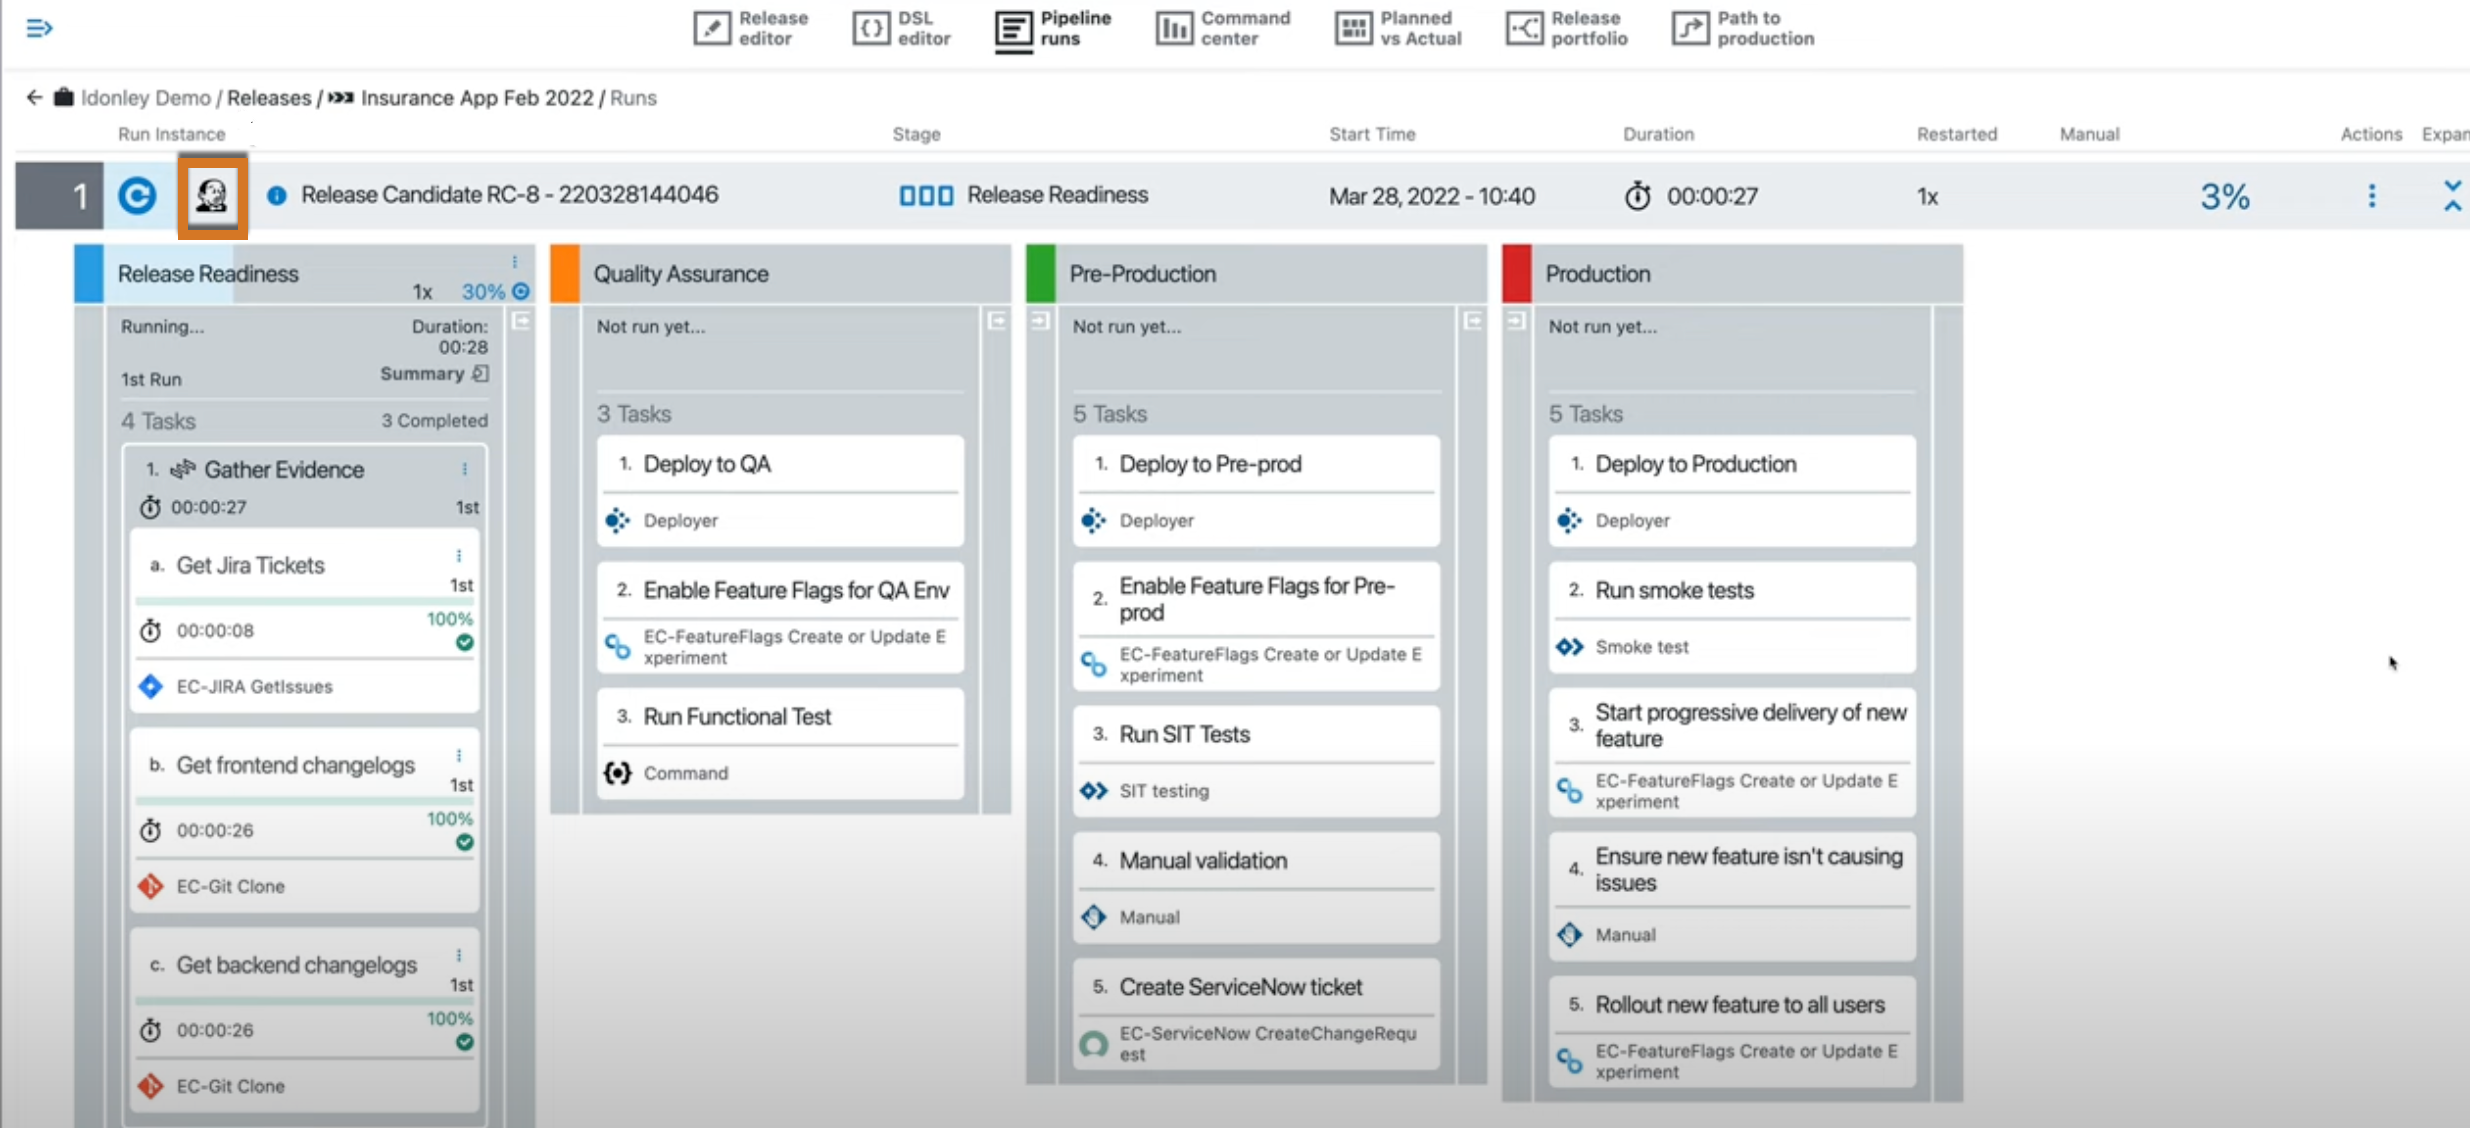 Figure 3. Pipeline triggered by Jenkins
To view the information sent by the post-build action from the Jenkins continuous integration process:
-
Select the Jenkins logo on the CloudBees CD/RO Pipeline runs list entry or select View previous Pipeline Runs to choose a previous pipeline. The Jenkins build data screen appears.
-
Select the Details icon on the right of build entry. The console output summary, test results, and build artifacts for the Jenkins job appears in separate tabs as shown below.
The value in the Association column indicates how this pipeline run is associated with the CloudBees CD/RO release.
-
Triggered by CI: Indicates the CloudBees CD/RO pipeline run is triggered by a Jenkins job or pipeline.
-
Attached: Indicates a Jenkins post-build action attached the Jenkins pipeline run to the CloudBees CD/RO release.
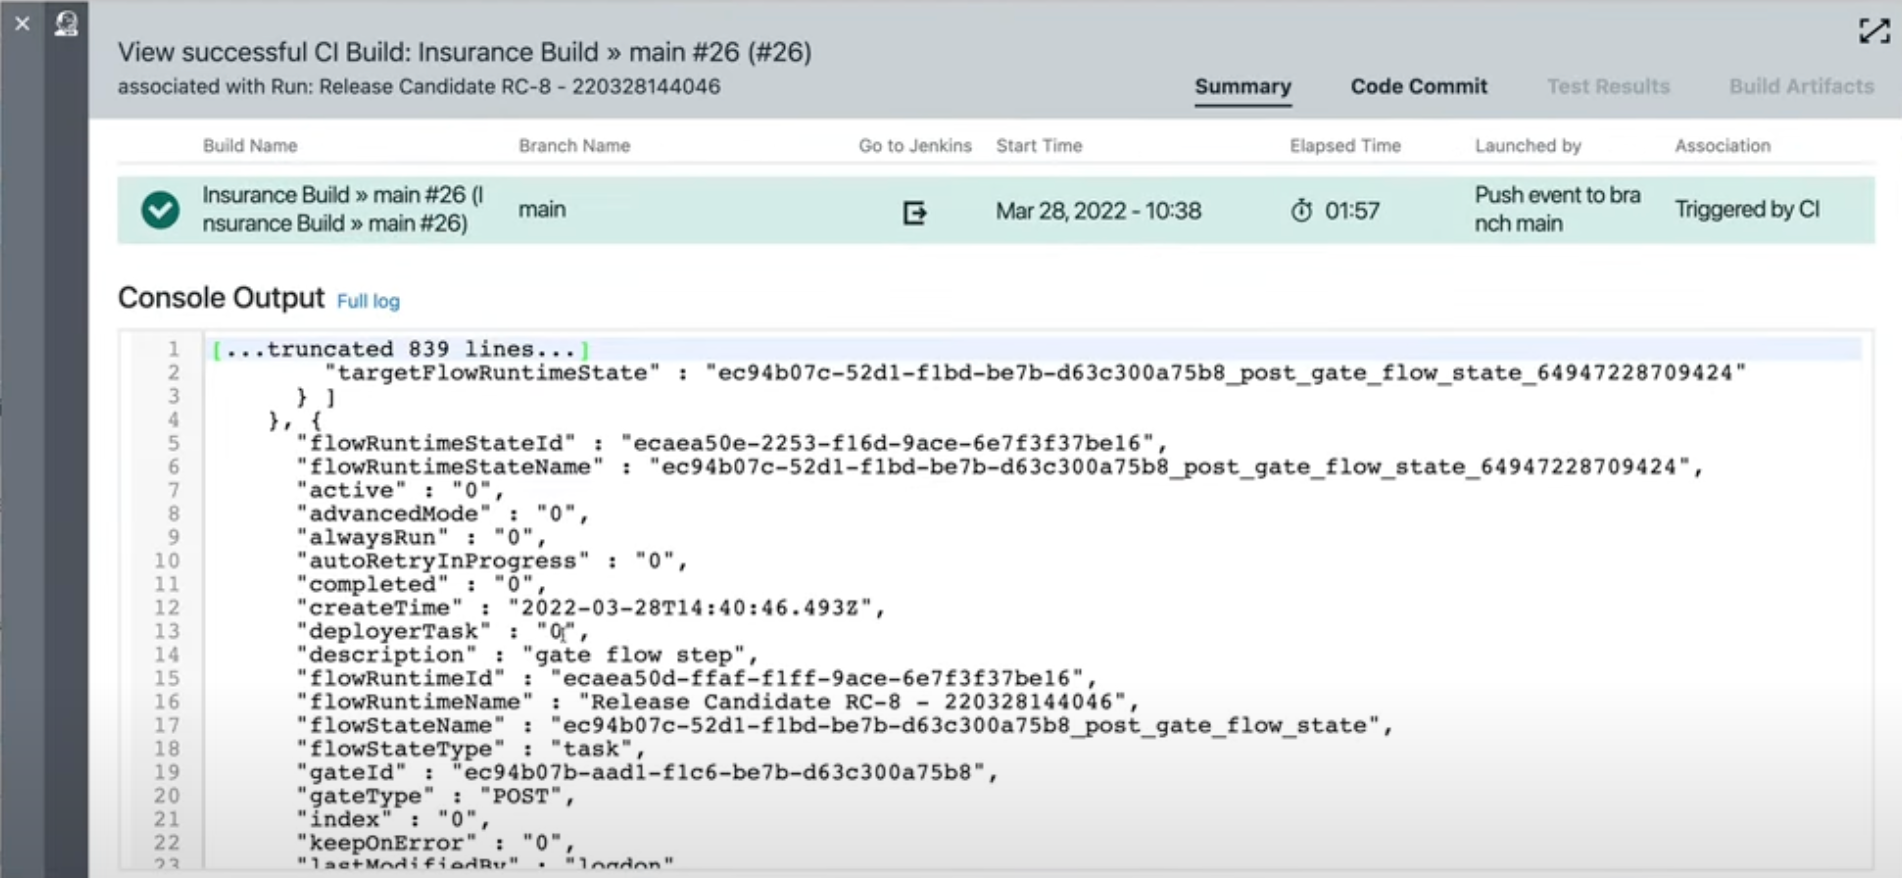 Figure 4. Jenkins post-build details
-
Creating event triggers
Event-based triggers provide the ability to automatically run pipelines and releases based on external events, supporting continuous integration models. Trigger support in CloudBees CD/RO allows you to integrate with external tools such as source control management systems. For example, you can configure a Git repository to automatically trigger a release upon code check-in.
-
Webhook Triggers: An inbound, asynchronous event from a GitHub repository triggers an action such as run a pipeline or start a release.
-
Polling Triggers: An internal trigger is periodically sent to an external tool to determine if an event has happened such as a code check-in. And, if so, an action is initiated such as run a pipeline or start a release.
Configure event-based triggers as part of starting or rerunning a release: select the Triggers action from the three-dots menu and configure them before you select Start release. For more configuration information, refer to Configure event-based triggers.
Aborting a release run
There are two ways to abort a release run.
-
During the first release run, you can abort it from the Release Dashboard. Selecting the
 button and selecting Abort Pipeline aborts the pipeline. The tasks that are currently running finish, and no new tasks are started. The Release status displays as Aborted by admin.
 -
During subsequent release runs, you can abort the current release run from the Pipeline Run view. Select the three vertical dots, then select Abort run to abort the pipeline.
 Figure 5. Abort the pipeline run
 -
Select OK on the confirmation dialog. The tasks that are currently running finish, and no new tasks are started.
Completing the release
When you complete the release, no other actions can take place on it, and this action cannot be undone (reversed). The release cannot be run again, and its properties, and those of its pipeline runs, become immutable.
You cannot end the pipeline that is currently running. If you want to end it, you must wait for the current run to complete or abort it in the Pipeline run view. For more information, refer to Aborting a release run.
If the release run is finished, you can complete the release from the release dashboard. Select the three vertical dots and then select End release to end the release.
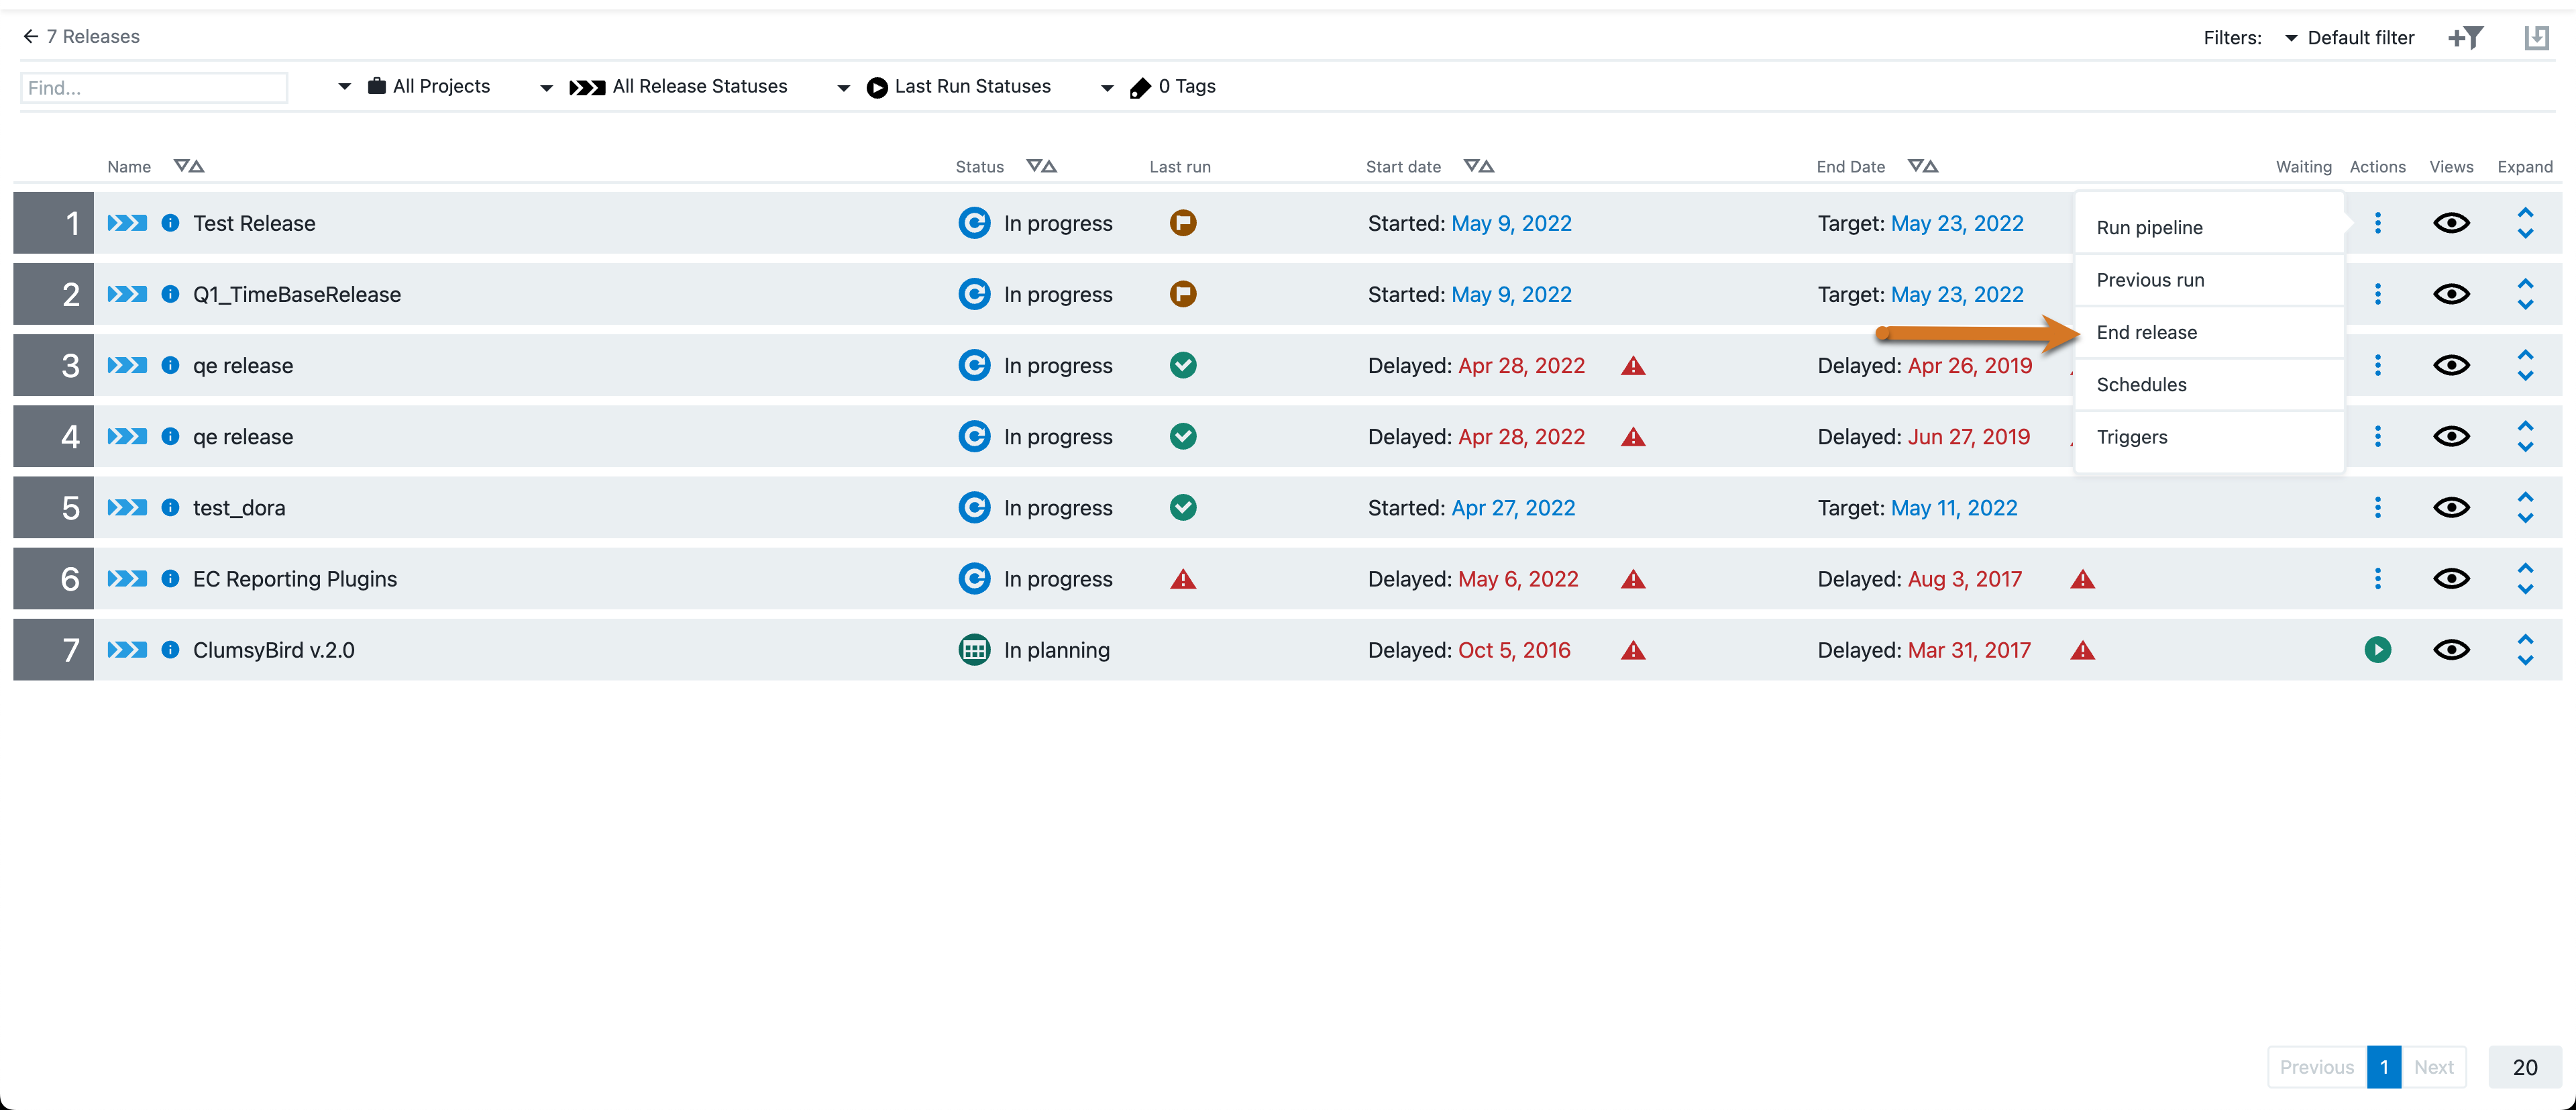
Select End Release in the confirmation dialog; the Pipeline run view now displays a Complete status:
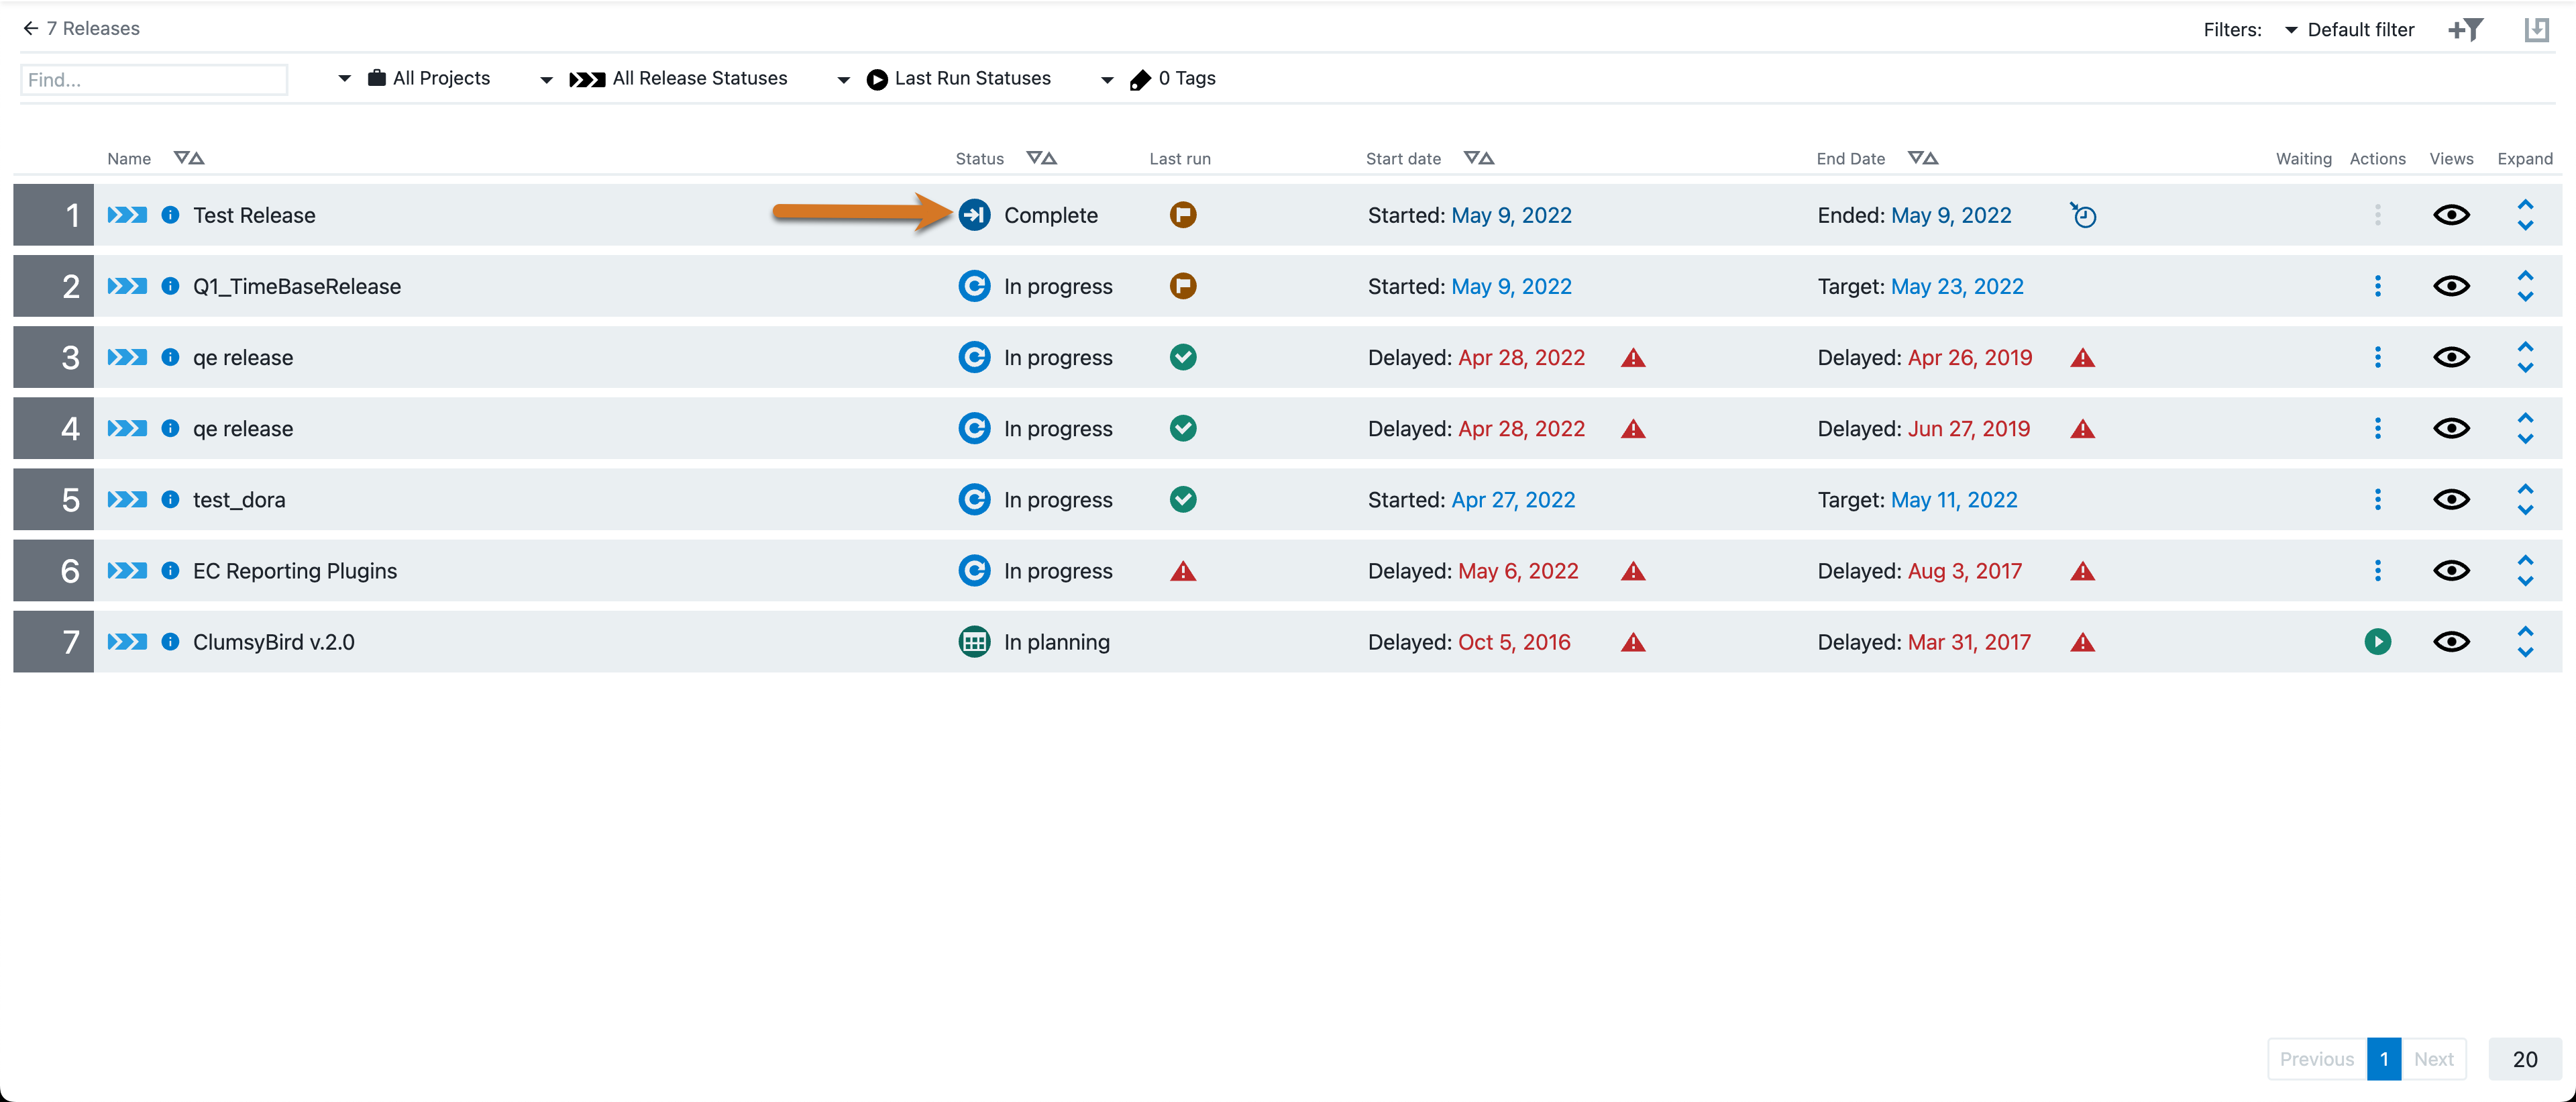
The release status is now:
-
The icon next to Release completed indicates that the release has been completed (ended).
-
The percentage complete icon on the right is split into two sections because the pipeline has two stages. It shows that the release run is 100% complete.
-
The target date has been replaced by the ended date.
-
The Started and Ended dates are in dark blue because the release is completed.
-
The Duration is the total time for the release.