|
Starting with CloudBees CD/RO version 2024.06.0, CloudBees Analytics with Elasticsearch will reach end-of-life (EOL) and will no longer be supported. After this date, Elasticsearch will not receive updates, security patches, or technical support and will be removed from the CloudBees Analytics server. What this means for you:
CloudBees CD/RO strongly recommends all customers to migrate from Elasticsearch to OpenSearch 2.14.0 before the EOL date to ensure uninterrupted service. For detailed migration guidance, please refer to Traditional platform upgrade to OpenSearch. If you have questions or need assistance, please contact CloudBees Support. |
Before starting the migration
Perform the following steps before starting the migration process:
-
Before migrating your data, back up the legacy CloudBees Analytics data. For more information on this process, refer to Maintain CloudBees Analytics server data.
Failing to back up the legacy CloudBees Analytics data could result in permanent data loss if issues arise during data migration.
-
To migrate the CloudBees Analytics, you must have a v2024.03.0 or earlier source instance and a v2024.06.0 or later destination instance. Once these instances are running, you can use either:
-
If your CloudBees Analytics instances are not running on the same machine, you must follow the instructions in Specify remote data source servers.
-
When configuring the Source URL and Destination URL parameters, format the URL as:
URL formatExample<protocol>://<hostname>:<portnumber>https://prod-instance.enterprise.com:9200-
By default, the legacy source server port number is
9200. -
By default, the updated destination server port number is
9201.
-
-
As part of the migration job, you also have to supply an authorization method for the source and destination servers. For more information, refer to Authorization methods.
If using Migrate data with CloudBees CD/RO procedure, the authorization methods Username and password authorization is the suggested method.
Specify remote data source servers
Because of security reasons, OpenSearch limits the host names allowed as reindexing sources (source server). By default, the source can only be a local host addresses, such as 127.0.0.1 or localhost. If the source and destination servers are not on the same machine, you must allow the source endpoints by starting the installer on the destination machine with the following argument:
--serverReindexRemoteAllowlist
Additionally, if you have more than one source server, this parameter accepts comma-separated endpoints allowed for reindexing. Each endpoint is a host and port number pair separated by a colon, where asterisks can be used to mask port numbers. For example, to enable reindexing from the following endpoints:
-
192.168.0.10 -
prod-instance.enterprise.com -
2001:db8:1::ab9:C0A8:102If using an IPv6 address, your URL must be wrapped in square brackets [].
The CloudBees Analytics server would be installed with the following:
--serverReindexRemoteAllowlist "192.168.0.10:*,prod-instance.enterprise.com:*,[2001:db8:1::ab9:C0A8:102]:*"
|
This option must be used as command-line parameter during the installation of your updated CloudBees Analytics server. If your updated CloudBees Analytics server is already installed, and you want to enable new endpoints:
|
Authorization methods
To transfer data, the source and destination servers must be specified, including data for authorization on these servers. The following authorization methods are supported:
Internal authorization
To use internal authorization, install the certificate on the destination server to authenticate with the source server. Once the certificate is present on the destination server, additional authorization parameters are typically not required.
| Internal authorization is the simplest when the source and destination servers are installed on the same machine. |
Username and password authorization
Username and password authorization can be used if the password for the reportuser account is known. If the destination server was installed on top of the source server, the password for reportuser remains the same.
SSL/TLS certificate authorization
SSL/TLS certificate authorization can be used if the password for the reportuser account is unknown.
| The certificate required by the source server must be configured on the destination server. Therefore, this authorization method can only be used if the data migration will run on the same machine where the destination server is installed. |
For this method, the administrator certificate is used for authentication, which are located in:
-
Source server:
<data-directory>/conf/reporting/elasticsearch -
Destination server:
<data-directory>/conf/analytics
The required files are:
-
Certificate:
admin.crtfull.pem -
Private key:
admin.key.pem
Migrate data with CloudBees Analytics installer
To migrate your CloudBees Analytics from Elasticsearch to OpenSearch using the CloudBees Analytics installer, run the installer with the command line parameter --reindex.
The installer can run in the following modes:
-
Silent mode: For silent mode, you must explicitly specify the mode with the command-line argument
--reindex --mode silent. -
GUI mode: By default, the installer runs in GUI mode if possible.
-
Console mode (Linux-only): On the Linux platforms, if GUI mode is not available, the installer runs in console mode.
Silent mode
When migrating your CloudBees Analytics data in this silent mode, all parameters for data migration must be specified using command-line parameters and arguments. These parameters and arguments are passed to Reindex Wizard automatically.
| If no authorization parameters are specified, the Reindex Wizard attempts to use Internal authorization. |
After the Reindex Wizard launches, the specified parameters are checked and the process of migrating data from the source server to the destination server starts. The migration process runs silently, and the progress and result are written to the installer log.
If your source and destination servers are on separate machines, ensure you run the CloudBees Analytics installer on the destination machine using --serverReindexRemoteAllowlist, and provide the source machine URL. For more information, refer to Specify remote data source servers.
|
Once your CloudBees Analytics source and destination are running, to run the CloudBees Analytics data migration in silent mode:
Launch the installer with the command-line argument --mode silent --reindex, and include the following command-line options, as required:
| The Before starting the migration section provides specific guidance for the following parameter values. |
| Parameter Name | Description | ||
|---|---|---|---|
|
Specify the URL for the source server in the format:
|
||
|
When using Username and password authorization, specifies the username on the source server for reindexing.
|
||
|
When using Username and password authorization, specifies the password for the username on the source server for reindexing. |
||
|
When using SSL/TLS certificate authorization, specifies the SSL certificate file to connect to the source server for reindexing. |
||
|
When using SSL/TLS certificate authorization, specify the private key file for the SSL certificate to connect to the source server for reindexing. |
||
|
Specify the URL for the destination server in the format:
|
||
|
When using Username and password authorization, specify the username on the destination server for reindexing.
|
||
|
When using Username and password authorization, specify the password for the username on the destination server for reindexing. |
||
|
When using SSL/TLS certificate authorization, specify the SSL certificate file to connect to the destination server for reindexing. |
||
|
When using SSL/TLS certificate authorization, specify the private key file for the SSL certificate to connect to the destination server for reindexing. |
When the installer launched, a log file was generated, and the path to installer-CBSDAAnalyticsServer.log was provided in the terminal. For more information about the migration steps the Reindex Wizard performs, refer to Data migration log example.
|
GUI mode
Once your CloudBees Analytics source and destination are running, to migrate your CloudBees Analytics from Elasticsearch to OpenSearch using the Reindex Wizard:
-
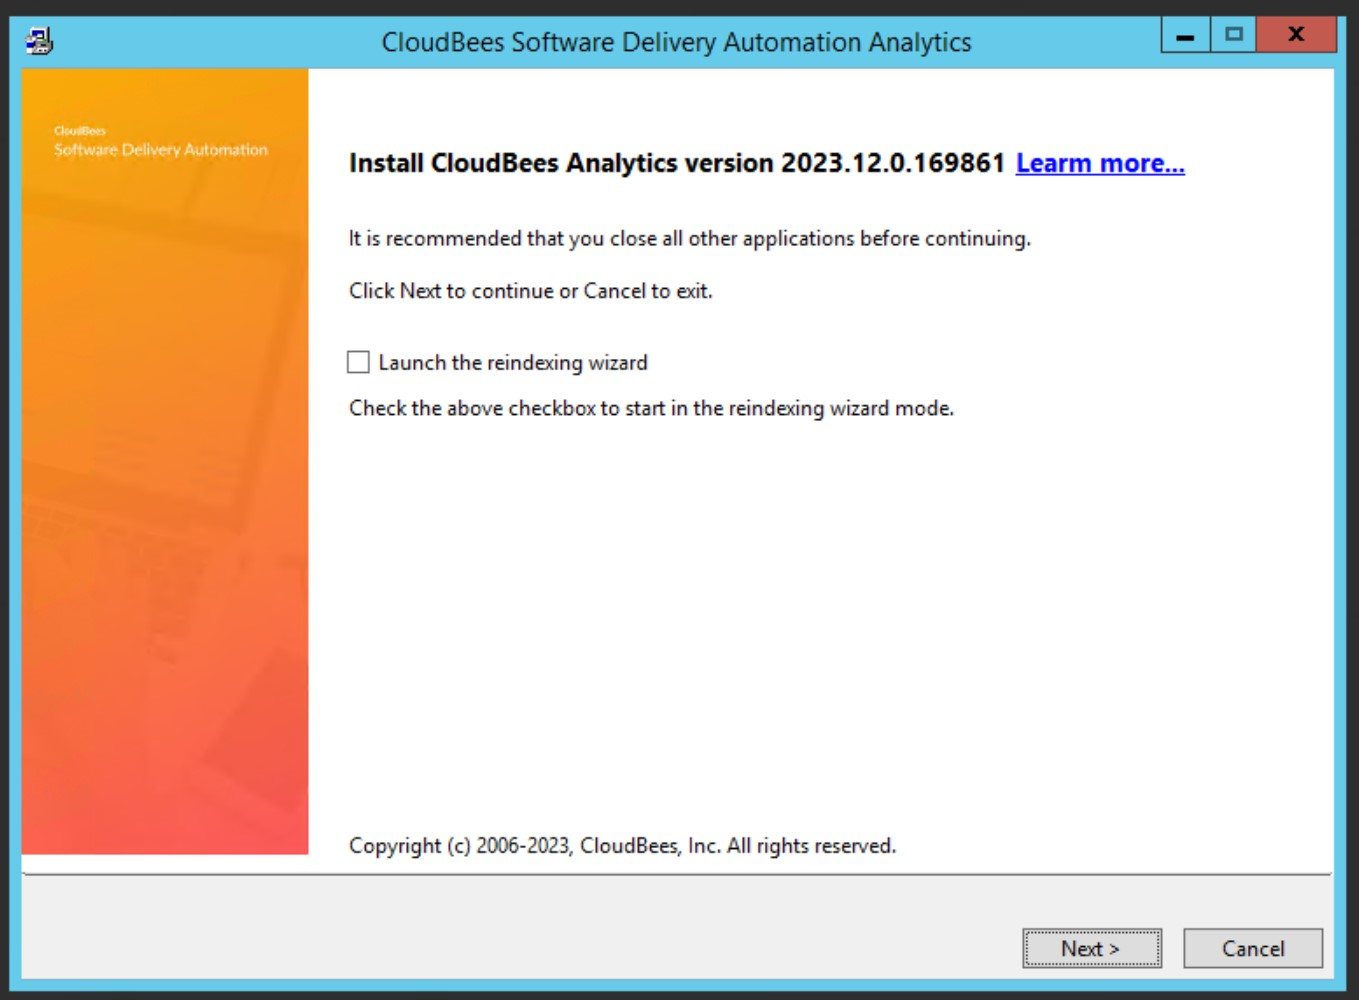
Launch the CloudBees Analytics installer.
If your source and destination servers are on separate machines, ensure you run the CloudBees Analytics installer on the destination machine using --serverReindexRemoteAllowlist, and provide the source machine URL. For more information, refer to Specify remote data source servers. -
Select Launch the reindexing wizard checkbox option, and Next.
-
The Reindex Wizard prompts you to specify URLs for the source and destination servers.
The Before starting the migration section provides specific guidance for the following parameter values. 
-
In the next window, specify authorization methods for the specified servers.
The Before starting the migration section provides specific guidance for the following parameter values. 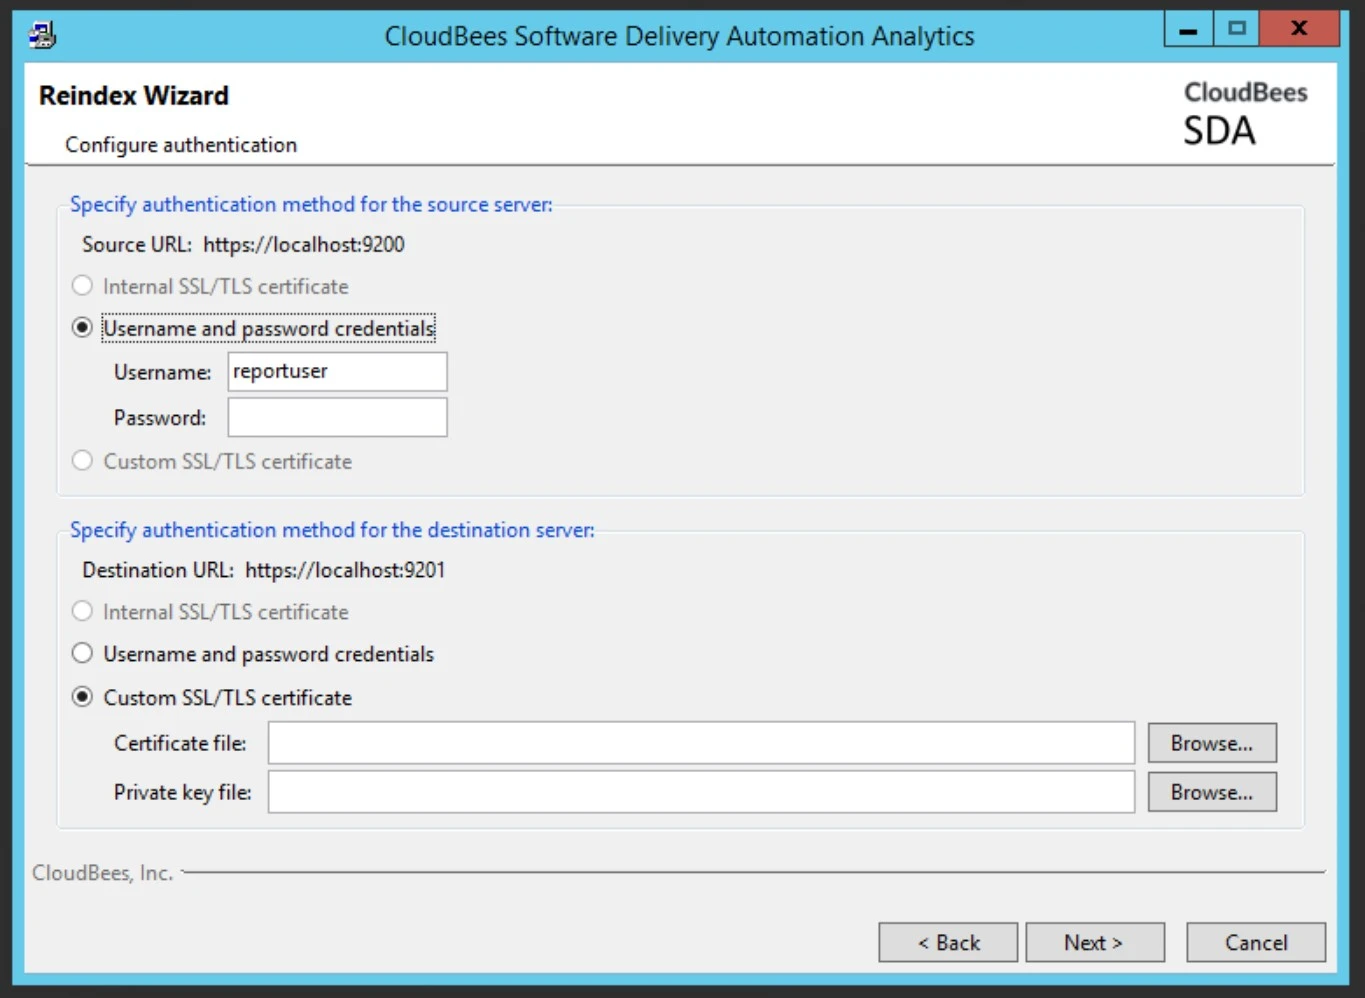
If using Username and password authorization, the reportuseraccount credentials should be used for the Source Credential and Destination Credentials.
After checking the entered parameters, the Reindex Wizard asks you to confirm them. After confirmation, the data migration starts, and the progress of the migration is displayed.
When the installer launched, a log file was generated, and the path to installer-CBSDAAnalyticsServer.log was provided in the terminal. For more information about the migration steps the Reindex Wizard performs, refer to Data migration log example.
|
If the migration fails because of a reindex_remote_allowlist error, refer to GUI migration failed servers on different machines.
GUI migration failed servers on different machines
If you attempted to migrate data between source and destination servers on different machines without specifying the source using --serverReindexRemoteAllowlist, the GUI migration will fail. To fix this issue:
-
Restart the installer on the destination machine, using the instructions in Specify remote data source servers to specify the remote source.
-
Select the Repair errors in the current server installation option.
-
Confirm the default values on the Ready to Repair screen, and select Repair.
-
-
Once the repair process is finished, launch the installer again and select the Launch the reindexing wizard option.
-
Provide the details needed for data migration.
After checking the entered parameters, the Reindex Wizard asks you to confirm them. After confirmation, the data migration starts, and the progress of the migration is displayed.
Console mode (Linux-only)
Console mode is an interactive mode, available only for Linux platforms, where required parameters are entered in command-line prompts. Once your CloudBees Analytics source and destination are running, to migrate your CloudBees Analytics from Elasticsearch to OpenSearch using Console mode:
-
Launch the CloudBees Analytics installer with the
--reindexparameter.If your source and destination servers are on separate machines, ensure you run the CloudBees Analytics installer on the destination machine using --serverReindexRemoteAllowlist, and provide the source machine URL. For more information, refer to Specify remote data source servers.The Before starting the migration section provides specific guidance for the following parameter values. -
Specify the URL of the source server:
Specify the URL of the source CloudBees Software Delivery Automation Analytics server: -
If the Reindex Wizard detects the source server requires authorization, you are promoted to provide the authorization type and appropriate parameters.
-
Specify the URL of the destination server:
Specify the URL of the destination CloudBees Software Delivery Automation Analytics server: -
If the Reindex Wizard detects the destination server requires authorization, you are prompted to config the authorization type and appropriate parameters.
-
Once all parameters has been entered, the Reindex Wizard validates them and request confirmation:
The Reindex Wizard is ready to start the data transfer. As part of this migration, the indices will be migrated from the server: URL: https://<hostname>:<port> Server type: Elasticsearch version x.x.x to the server: URL: https://<hostname>:<port> Server type: OpenSearch version x.x.x Would you like to start transferring data? [n/Y]
After you provide confirmation, the data migration process starts, and its progress is shown in the terminal.
When the installer launched, a log file was generated, and the path to installer-CBSDAAnalyticsServer.log was provided in the terminal. For more information about the migration steps the Reindex Wizard performs, refer to Data migration log example.
|
Migrate data with CloudBees CD/RO procedure
The EC-Utilities project comes with a Reindex Analytics Data procedure that can be used to migrate your data from Elasticsearch to OpenSearch. This procedure copies data from the source server to the destination server.
Perform the following steps to migrate your CloudBees Analytics from Elasticsearch to OpenSearch using the Reindex Analytics Data procedure:
|
Before running the Reindex Analytics Data procedure:
|
-
In CloudBees CD/RO, navigate to .
-
For the project, in the filtering options, change from All projects to EC-Utilities.
-
Select Run icon for the Reindex Analytics Data procedure, and New run.
-
Provide the following data:
The section Before starting the migration provides specific information on the values required for the Reindex Analytics Data procedure parameters. Table 1. Reindex Analytics Data procedure description Procedure Parameter Description Source URL
Specify the URL for the data source in the format:
<protocol>://<hostname>:<portnumber>Source credential
Specify the username and password on the data source server for reindexing:
-
Username:
reportuser -
For the
reportuserpassword, refer to Username and password authorization.
Destination URL
Specify the URL for the destination server in the format:
<protocol>://<hostname>:<portnumber>Destination credential
Specify the username and password on the data recipient server for reindexing:
-
Username:
reportuser -
For the
reportuserpassword, refer to Username and password authorization.
Allow mismatched indices
This setting controls the behavior if indices on the source and destination have the same name:
-
If selected, indices with the same name are automatically handled as described in Handling of indexes with the same name.
-
If unselected, and indices with the same name are encountered during migration, the procedure terminates with an error.
Debug
Specify the verbosity level of debug messages. The entries/level for this value are as follows:
-
-2: Critical -
-1: Error -
0: Info (Default) -
1: Debug -
2: Trace
-
-
Select OK to start the migration.
After starting the procedure with the parameters, the provided parameters will be checked and the data copying process will start. The jobstep log shows the progress and result of this copying. For more information, refer to Data migration log example.
Data migration log example
Whether migrating your data using the CloudBees Analytics installer or a CloudBees CD/RO procedure the same basic steps are performed, and the log will be similar to:
CloudBees Analytics example data migration log
Checking available indices from the source server... [ 1/ 22] Checking the index 'ef-build-2020' ... [ 2/ 22] Checking the index 'ef-build-2021' ... ... [ 21/ 22] Checking the index 'ef-pipelinerun-2023' ... [ 22/ 22] Checking the index 'ef-release' ... The source server contains 22 indices with 260,000 documents. [ 1/ 22] Transferring the index 'ef-build-2020' with 2 documents... Done 2 documents in 882 msecs. Created: 2; Updated: 0; Deleted: 0; Batches: 1; Conflicts: 0; Noops: 0 Verifying the index 'ef-build-2020' in the destination server... The resulting index 'ef-build-2020' on the destination server contains 2 documents. [ 2/ 22] Transferring the index 'ef-build-2021' with 21 documents... Done 21 documents in 549 msecs. Created: 21; Updated: 0; Deleted: 0; Batches: 1; Conflicts: 0; Noops: 0 Verifying the index 'ef-build-2021' in the destination server... The resulting index 'ef-build-2021' on the destination server contains 21 documents. ..... [ 21/ 22] Transferring the index 'ef-pipelinerun-2023' with 50,061 documents... Done 50,061 documents in 13 secs 609 msecs. Created: 50,061; Updated: 0; Deleted: 0; Batches: 51; Conflicts: 0; Noops: 0 Verifying the index 'ef-pipelinerun-2023' in the destination server... The resulting index 'ef-pipelinerun-2023' on the destination server contains 50,061 documents. [ 22/ 22] Transferring the index 'ef-release' with 66 documents... Done 66 documents in 340 msecs. Created: 66; Updated: 0; Deleted: 0; Batches: 1; Conflicts: 0; Noops: 0 Verifying the index 'ef-release' in the destination server... The resulting index 'ef-release' on the destination server contains 66 documents. Reindexing has been successfully completed. Processed 22 indices and 260,000 documents in 1 min 33 secs.
|
To view the data migration log:
|
In the first step, the Reindex Wizard checks available indices on the source server, and displays basic statistics:
Checking available indices from the source server... [ 1/ 22] Checking the index 'ef-build-2020' ... [ 2/ 22] Checking the index 'ef-build-2021' ... ... [ 21/ 22] Checking the index 'ef-pipelinerun-2023' ... [ 22/ 22] Checking the index 'ef-release' ...
In the second stage, each index is copied individually from the source to destination server. The progress is shown similar to:
[ 1/ 22] Transferring the index 'ef-build-2020' with 2 documents... Done 2 documents in 882 msecs. Created: 2; Updated: 0; Deleted: 0; Batches: 1; Conflicts: 0; Noops: 0 Verifying the index 'ef-build-2020' in the destination server... The resulting index 'ef-build-2020' on the destination server contains 2 documents.
The third step outputs the result of migration, which includes the total number of transferred indices and documents. This is similar to:
Reindexing has been successfully completed. Processed 22 indices and 260,000 documents in 1 min 33 secs.
In this example, 22 indices with 260,000 documents were detected on the source server and migrated to the designation server.
Known issues for data migration
This section provides information about known issues you may encounter while migrating data from Elasticsearch to OpenSearch.
Increased disk space requirements for data migration
During the migration from Elasticsearch to OpenSearch, disk space requirements may need to be increased. This is caused by the simultaneous existence of indexes for both the legacy and updated CloudBees Analytics instances.
|
This issue typically only applies to:
|
To roughly calculate the space needed during migration, CloudBees has provided a utility. To use this utility:
-
Navigate to the CloudBees examples repository.
-
Download the
reporting-data-reindex.plutility. -
Follow the instructions in the README.md.
-
Based on the value returned for
Indices Sizetotaled for all nodes, double the disk space.-
Example: If the total returned for all nodes was
20GB, then an additional20GBis required only for the migration.After the migration is completed, you can return the disk space to the desired level.
-
Timeouts reached when migrating large indexes
The migration options provided by CloudBees have a timeout of 180 minutes per index to avoid unexpected hangs. In cases where an index contains a considerably large amount of data, and its migration does not complete within the timeout duration, the migration process fails.
This may result in having to split such indexes into multiple smaller indexes. If you encounter multiple timeout issues, contact CloudBees support.
|
To calculate the size of indexes, CloudBees has provided a utility. To use this utility:
|
Handling of indexes with the same name
During reindexing, there are several scenarios that can occur:
-
An index is copied from the source server, and no index on the destination server has the same name. A new index is then created on the destination server with the same settings as the source server, and the data is copied to it.
-
An index is copied from the source server, and an index on the destination server has the same name with the same settings. The index on the destination server is then updated to include any new data from the source server.
-
An index is copied from the source server, and an index on the destination server has the same name, but with different settings. When this occurs:
-
The existing index destination server is backed up as a new index with a new name using the scheme
ef-reindex_backup-<timestamp>-<index name>. -
A new index is created with the name and settings from the source server.
-
An entry for each such event appears in the job log, similar to:
[ 6/ 22] Transferring the index 'ef-defect-2021' with 175 documents... Properties with mismatched types were found in the destination index. This index will be saved under a different name. Renaming the existing index 'ef-defect-2021' on the destination server to the new name 'ef-reindex_backup-20240510130805-defect-2021'... Done 175 documents in 186 msecs. Created: 138; Updated: 37; Deleted: 0; Batches: 1; Conflicts: 0; Noops: 0 Verifying the index 'ef-defect-2021' in the destination server... The resulting index 'ef-defect-2021' on the destination server contains 138 documents.
-
In this case:
-
Both the source and destination server have an index named
ef-defect-2021. -
Different settings are detected for the index on each server.
-
The existing
ef-defect-2021index on the destination server is backed up as:ef-reindex_backup-20240510130805-defect-2021 -
A new
ef-defect-2021index is created on the destination server with the data and settings from the source server.
Handling of removed or deprecated Elasticsearch query syntax
With the upgrade from Elasticsearch to OpenSearch, query DSL changes for all default CloudBees reports that used Elasticsearch query DSL syntax are handled automatically. This includes the following changes:
-
Replacing the deprecated field
[inline]with[source]in the[script]section. -
Replacing the deprecated field
[interval]with[calendar_interval]in the[date_histogram]section. -
Replacing the deprecated order key
[_term]with[_key]in the aggregation section. -
Replacing
["field": "_type"]with["script", "_doc"], because the"_type"field was removed.
| The changes described above are also automatically handled within custom reports. |
However, for custom reports that use other query constructs, this upgrade may create breaking changes caused by deprecated or removed ElasticSearch fields. As a result, such queries must be updated with DSL syntax that is compatible with OpenSearch. For more information, refer to the OpenSearch Query DSL documentation.
| For any other breaking changes that may impact your custom reports, refer to the OpenSearch v2.14 breaking changes documentation. |