CloudBees CI allows administrators to standardize their build environments and share those environments with their teams. Standardized build environments are easier to manage, easier to upgrade, and provide consistency for users.
Agents are computers that handle the tasks of running builds in a CloudBees CI cluster, and within the context of a CloudBees CI cluster, they are shared resources for connected controllers.
Static agents
There may be times when the standardized CloudBees CI build environment cannot represent the required agent:
-
On operating systems such as Microsoft Windows, Oracle Solaris, FreeBSD, or OpenBSD.
-
When tool licenses permit the tool to run only on a dedicated agent.
-
In security configurations which require a specific agent (code signing certificates, hardware security devices, and so forth).
CloudBees CI provides advanced capabilities to manage platform-specific and purpose-built agents and to schedule work on agents.
For CloudBees CI on traditional platforms, CloudBees recommends cloudbees-core-agent when launching containerized agents.
|
CloudBees SSH Build Agents plugin
The CloudBees SSH Build Agents plugin is an alternative SSH agent connector that uses a non-blocking I/O architecture. This alternative connector shows different scalability properties from the standard SSH agent connector.
There are three main differences in scalability characteristics between the non-blocking I/O connector and the standard SSH agent connector:
-
The non-blocking I/O connector limits the number of threads that are used to maintain the SSH channel: when there are a large number of channels (that is, many SSH agents) the non-blocking connector uses fewer threads. This permits the UI to remain more responsive than with the standard SSH agent connector.
-
The non-blocking I/O connector balances CPU resource requirements. If it requires more CPU resources than are available, it applies back-pressure to the channels generating the load. This allows the system to remain responsive, but slightly increases build times, whereas the traditional SSH agent connector would typically lose the connection and register a corresponding build failure.
-
The non-blocking I/O connector is optimized for reduced connection time. For example, it avoids copying the agent JAR file unless necessary, and by default suppresses the logging of the agent environment.
There are four important technical notes regarding SSH keys:
-
The SSH client library used by the non-blocking I/O connector currently supports only RSA, DSA and (as of version 2.0) ECDSA keys.
-
The key must be in PEM key format. The CloudBees SSH Build Agents plugin currently does not support other key formats.
-
The maximum key size is limited by the Java Cryptography Extension (JCE) policy of the Jenkins controller’s JVM. Unless the unrestricted policy is installed, the plugin limits the RSA key size to 2048 bits. For more information, refer to "Java Cryptography Extension (JCE) Unlimited Strength Jurisdiction Policy Files" on the Oracle Java SE downloads page.
-
Versions of the plugin prior to 2.0 did not support connecting to CYGWIN or other Microsoft Windows-based SSH servers.
Use the SSH Build Agents plugin
The plugin adds a launch method: Launch build agents via SSH (Non-blocking I/O). The configuration options are almost identical to those in the traditional SSH agents connector.
The differences in the configuration parameters are:
-
If specified, a space character is appended to the Prefix Start Agent Command, and the entire string is prepended to the start agent command. The traditional SSH Agents connector requires that the user remembers to end the prefix with a space or a semicolon to avoid breaking the agent launch command.
-
If specified, a space is prepended to the Suffix Start Agent Command and the entire string is appended to the start agent command. The traditional SSH Agents connector requires that the user remembers to start the suffix with a space or a semicolon to avoid breaking the agent launch command.
-
The traditional SSH Agents connector always copies the agent environment variables to the agent launch log, whereas the non-blocking I/O SSH agents connector provides this as an option that defaults to off.
| The logging of the agent environment is only of use when debugging initial connection issues and has a performance impact on the startup time. Once the agent channel has been established, the agent environment variables are accessible via the Node’s System Information screen. |
For information on connecting remote SSH agents, refer to How to connect to remote SSH agents. If further assistance is needed, refer to CloudBees Support.
Microsoft Windows
The CloudBees SSH Build Agents Plugin version 2.0 and above supports agents running Microsoft Windows. There are some restrictions on connecting Microsoft Windows agents over SSH:
-
SSH server implementations on Microsoft Windows do not all behave the same when it comes to launching processes and managing the I/O streams from those processes. As a result, not every SSH server implementation works for launching Jenkins agents. At the time of writing, the recommended SSH server implementation is what provided the Cygwin project’s port of OpenSSH.
The Microsoft port of OpenSSH does not work correctly for connecting Jenkins agents. The way I/O streams are forwarded causes the connection to be terminated early. The plugin will log a warning if the Microsoft port of OpenSSH is detected, but will attempt to connect regardless. -
The CloudBees recommended SSH server is Cygwin’s port of OpenSSH. Other SSH implementations on Windows may require special configuration and handling to function properly.
-
Microsoft Windows by default does not provide command line tools to verify the integrity of the agent JAR file.
As a result, when launching agents over SSH, the agent JAR file is always transferred.
Configure Windows agents
CloudBees has included agent installation instructions as a reference for Microsoft Windows administrators. These instructions have been validated by CloudBees to confirm that they are a minimal setup for Microsoft Windows Server 2012 using a GUI.
If no Microsoft Windows agents can connect over SSH, set up an agent using this procedure to determine whether it is either:
-
a network issue or
-
an issue with the configuration of the Microsoft Windows operating system images.
| These instructions are provided as a working example. Additional steps and configuration settings may be required in your environment. The exact steps required depend on your own network risk profile and domain settings. |
This procedure assumes the following prerequisites:
-
A server or virtual machine with at least 2GB of RAM and 60GB of disk space.
-
Installation of Microsoft Windows Server 2012 R2 x86_64 Standard (Server with a GUI).
-
All security updates from Microsoft have been applied to an operating system.
-
The server has not joined a domain, nor have any group policy files been applied to the server.
To configure the Windows Agent:
-
Install the Oracle Java Virtual Machine:
-
Download and run the Java virtual machine installer for a supported version (refer to Supported platforms for CloudBees CI on traditional platforms).
-
Start a Command Prompt and verify that Java is correctly on the system PATH by running
java -version. The output from the command should report the version of Java that has been installed.
-
Install Cygwin’s port of OpenSSH:
-
Go to https://cygwin.com/.
-
Download and run the
setup-x86_64.exeinstaller.The default options should be enough, but it may be necessary to configure an HTTP proxy if the server cannot connect directly. It will be necessary to select a local mirror to download from.
-
From the Select Packages screen, select the OpenSSH package for installation:
-
Proceed to the next screen of the installer, and ensure that the
Select required packages (RECOMMENDED)option is enabled. -
After selecting
Nextthe installation should proceed. -
When the installation is completed, you are asked if you want to create an icon on the desktop and a start menu item. It is recommended that you select both options.
-
-
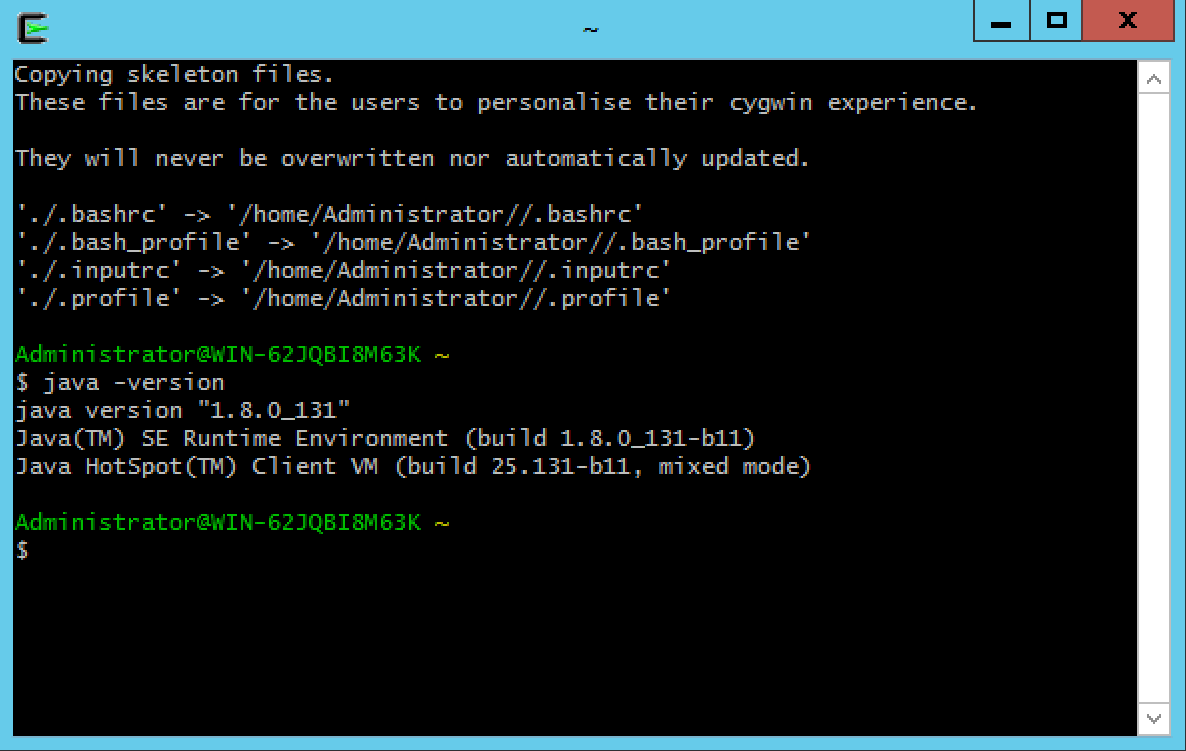
Validate that Cygwin and Java are correctly installed:
-
Launch a Cygwin64 Terminal.
-
Run
java -version. -
Verify that the output looks similar to the following (version numbers and usernames may differ):
-
Verify that the
cygrunsrvprogram is correctly installed by runningcygrunsrv -h. The output should be a help screen similar to the following: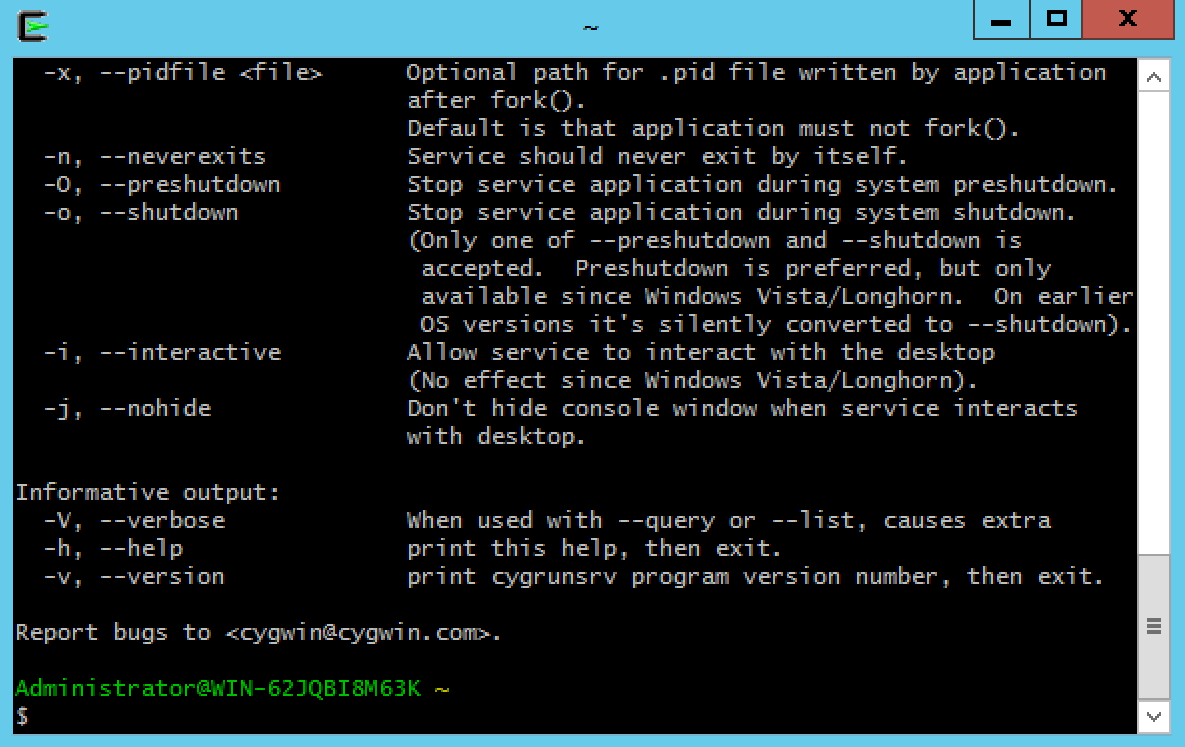
-
-
Configure Cygwin’s port of OpenSSH:
-
From a Cygwin64 Terminal launched to run as an Administrator, run the
ssh-host-configscript. -
Provide the following answers:
-
Should StrictModes be used:
yes -
Should privilege separation be used:
yes -
new local account 'sshd':
yes -
Do you want to install sshd as a service:
yes -
Enter the value of CYGWIN for the daemon:
A significant number of tutorials on the internet incorrectly advise you to enter binmode ntsecat this step. Those instructions are incorrect as of the Cygwin 1.7 release (2009).-
Do you want to use a different name: no
-
Create new privileged user account 'WIN-…\cyg_server' (Cygwin name: 'cyg_server'): yes
-
Please enter the password: (you must provide a password)
*** Info: Generating missing SSH host keys ssh-keygen: generating new host keys: RSA DSA ECDSA ED25519 *** Info: Creating default /etc/ssh_config file *** Info: Creating default /etc/sshd_config file *** Info: StrictModes is set to 'yes' by default. *** Info: This is the recommended setting, but it requires that the POSIX *** Info: permissions of the user's home directory, the user's .ssh *** Info: directory, and the user's ssh key files are tight so that *** Info: only the user has write permissions. *** Info: On the other hand, StrictModes don't work well with default *** Info: Windows permissions of a home directory mounted with the *** Info: 'noacl' option, and they don't work at all if the home *** Info: directory is on a FAT or FAT32 partition. *** Query: Should StrictModes be used? (yes/no) yes *** Info: Privilege separation is set to 'sandbox' by default since *** Info: OpenSSH 6.1. This is unsupported by Cygwin and has to be set *** Info: to 'yes' or 'no'. *** Info: However, using privilege separation requires a non-privileged account *** Info: called 'sshd'. *** Info: For more info on privilege separation read /usr/share/doc/openssh/README.privsep. *** Query: Should privilege separation be used? (yes/no) yes *** Info: Note that creating a new user requires that the current account have *** Info: Administrator privileges. Should this script attempt to create a *** Query: new local account 'sshd'? (yes/no) yes *** Info: Updating /etc/sshd_config file *** Query: Do you want to install sshd as a service? *** Query: (Say "no" if it is already installed as a service) (yes/no) yes *** Query: Enter the value of CYGWIN for the daemon: [] *** Info: On Windows Server 2003, Windows Vista, and above, the *** Info: SYSTEM account cannot setuid to other users -- a capability *** Info: sshd requires. You need to have or to create a privileged *** Info: account. This script will help you do so. *** Info: It's not possible to use the LocalSystem account for services *** Info: that can change the user id without an explicit password *** Info: (such as passwordless logins [e.g. public key authentication] *** Info: via sshd) when having to create the user token from scratch. *** Info: For more information on this requirement, see *** Info: https://cygwin.com/cygwin-ug-net/ntsec.html#ntsec-nopasswd1 *** Info: If you want to enable that functionality, it's required to create *** Info: a new account with special privileges (unless such an account *** Info: already exists). This account is then used to run these special *** Info: servers. *** Info: Note that creating a new user requires that the current account *** Info: have Administrator privileges itself. *** Info: No privileged account could be found. *** Info: This script plans to use 'cyg_server'. *** Info: 'cyg_server' will only be used by registered services. *** Query: Do you want to use a different name? (yes/no) no *** Query: Create new privileged user account 'WIN-...\cyg_server' (Cygwin name: 'cyg_server')? (yes/no) yes *** Info: Please enter a password for new user cyg_server. Please be sure *** Info: that this password matches the password rules given on your system. *** Info: Entering no password will exit the configuration. *** Query: Please enter the password: *** Query: Reenter: *** Info: User 'cyg_server' has been created with password 'phish!998'. *** Info: If you change the password, please remember also to change the *** Info: password for the installed services which use (or will soon use) *** Info: the 'cyg_server' account. *** Info: The sshd service has been installed under the 'cyg_server' *** Info: account. To start the service now, call `net start sshd' or *** Info: `cygrunsrv -S sshd'. Otherwise, it will start automatically *** Info: after the next reboot. *** Info: Host configuration finished. Have fun!
-
-
-
-
Start the
CYGWIN sshdservice from the Services management panel. -
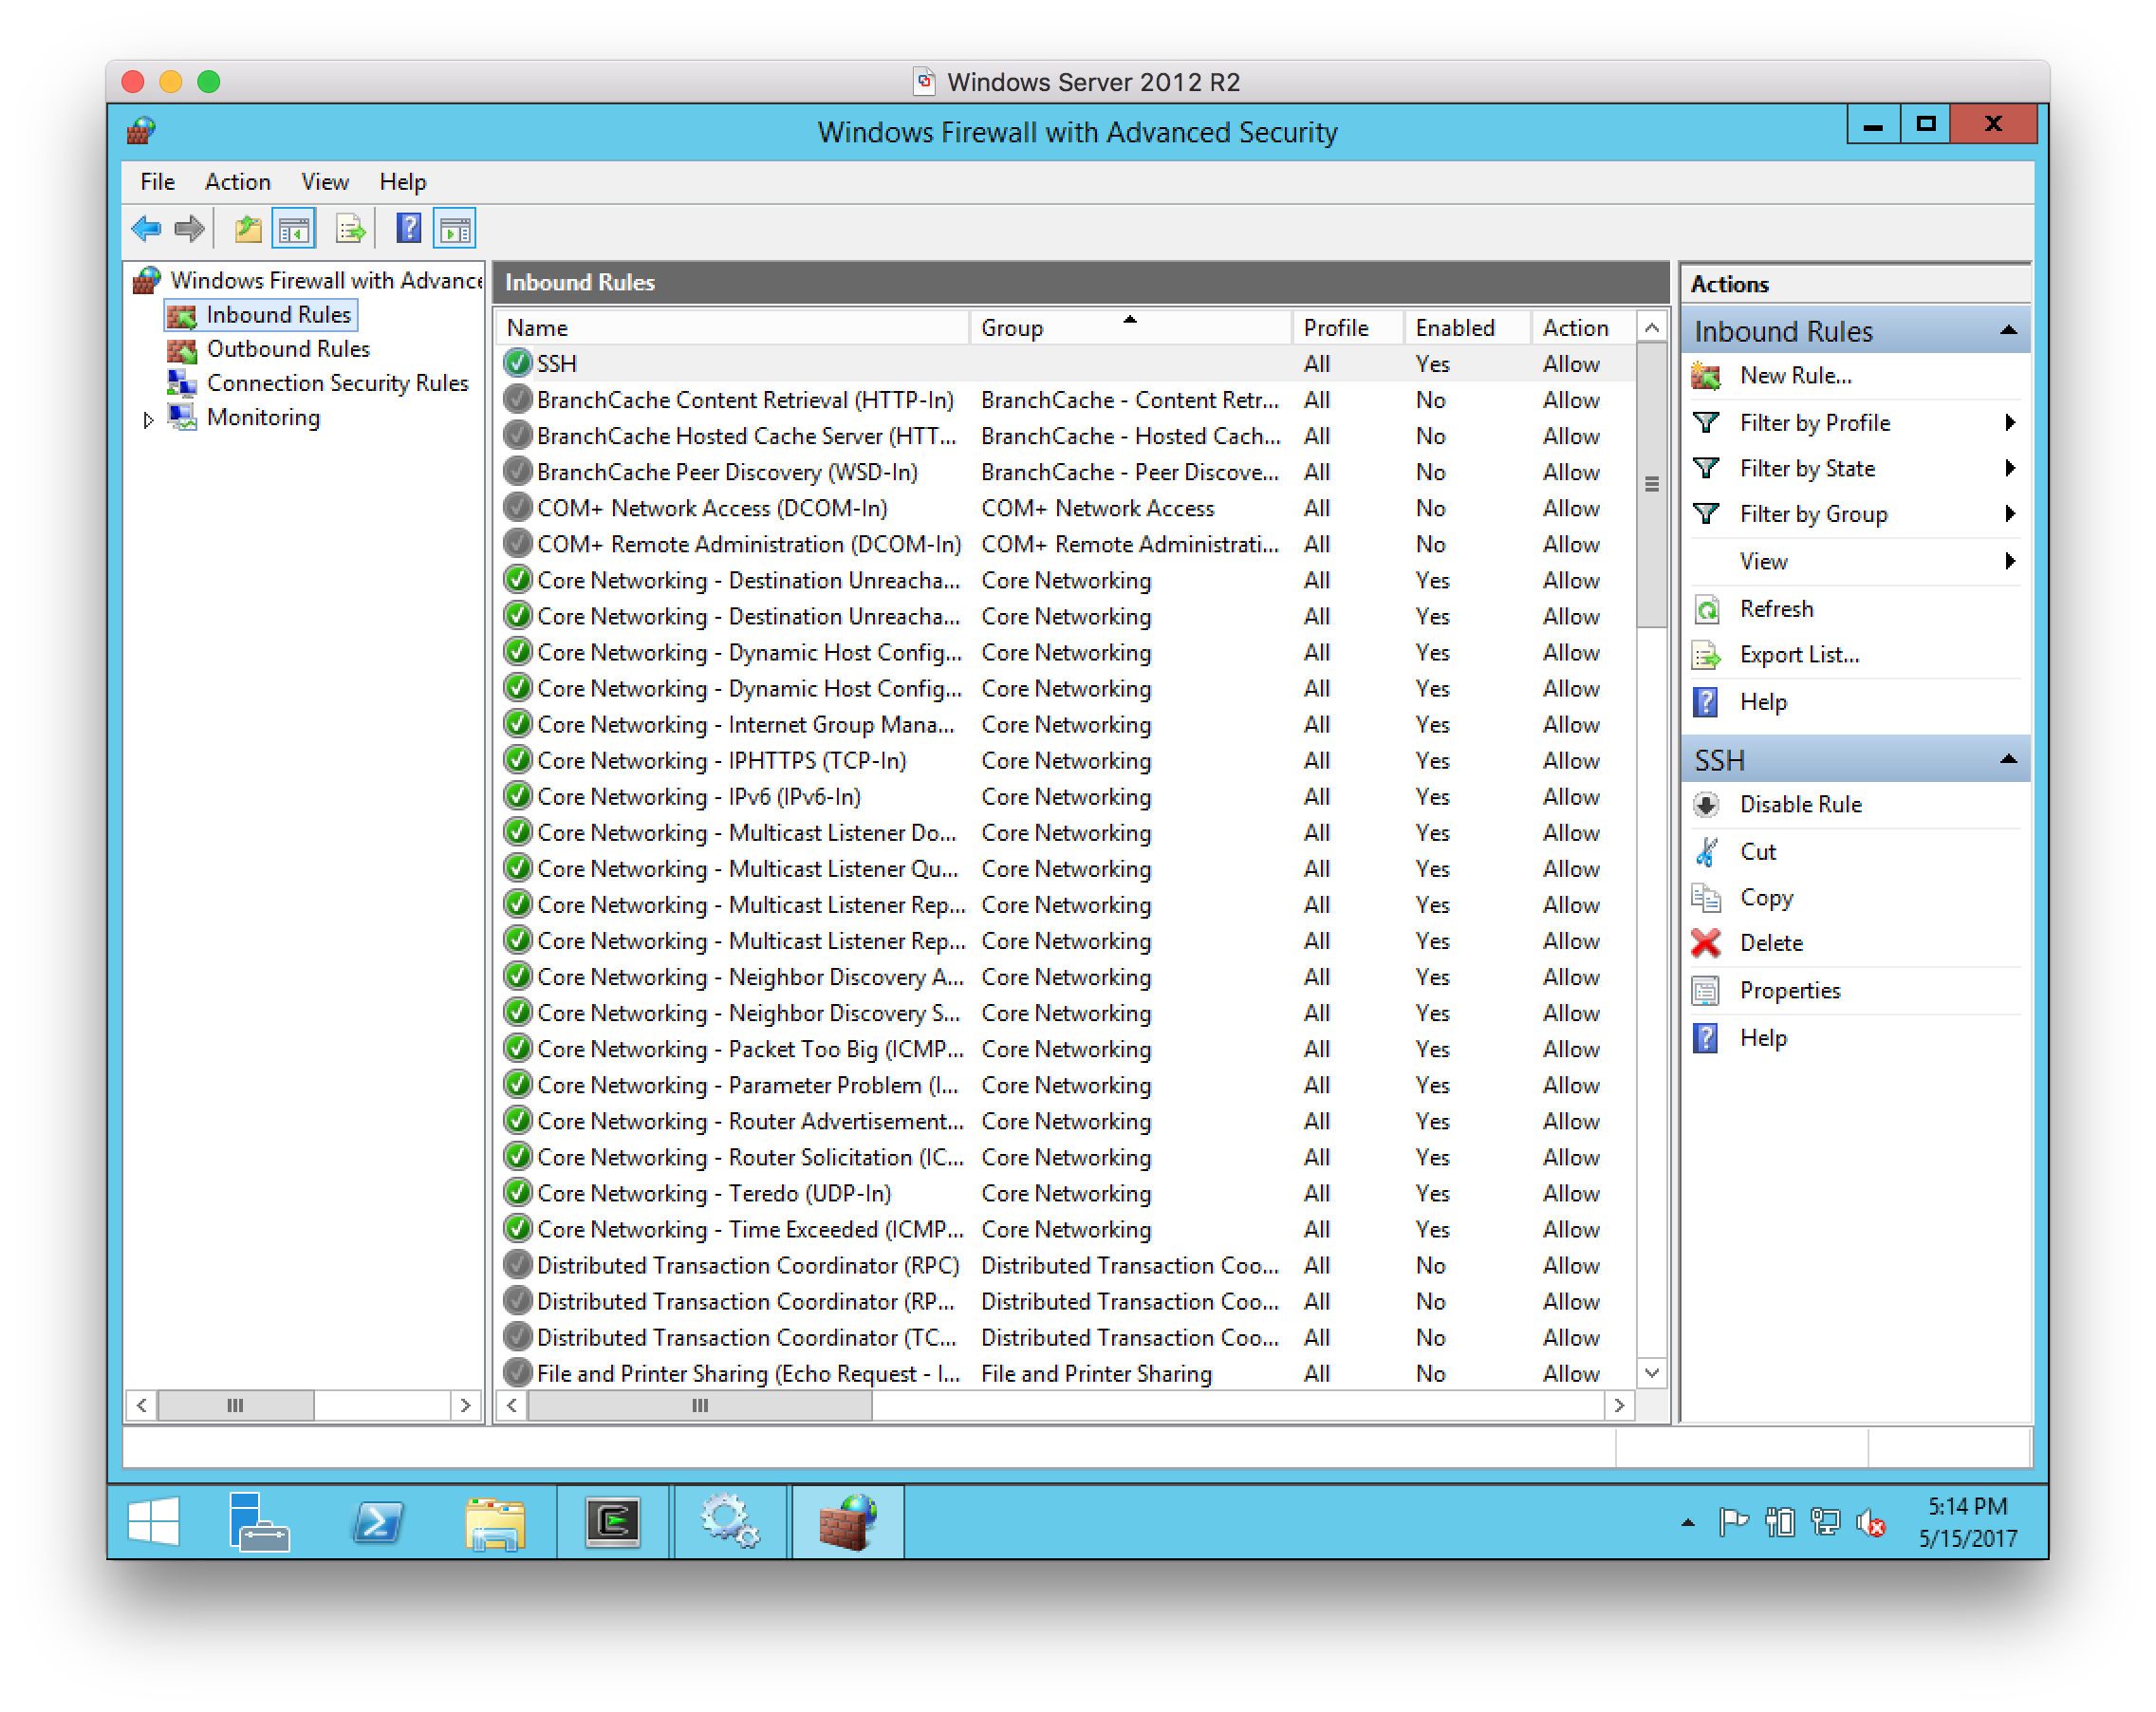
Open and configure Windows Firewall:
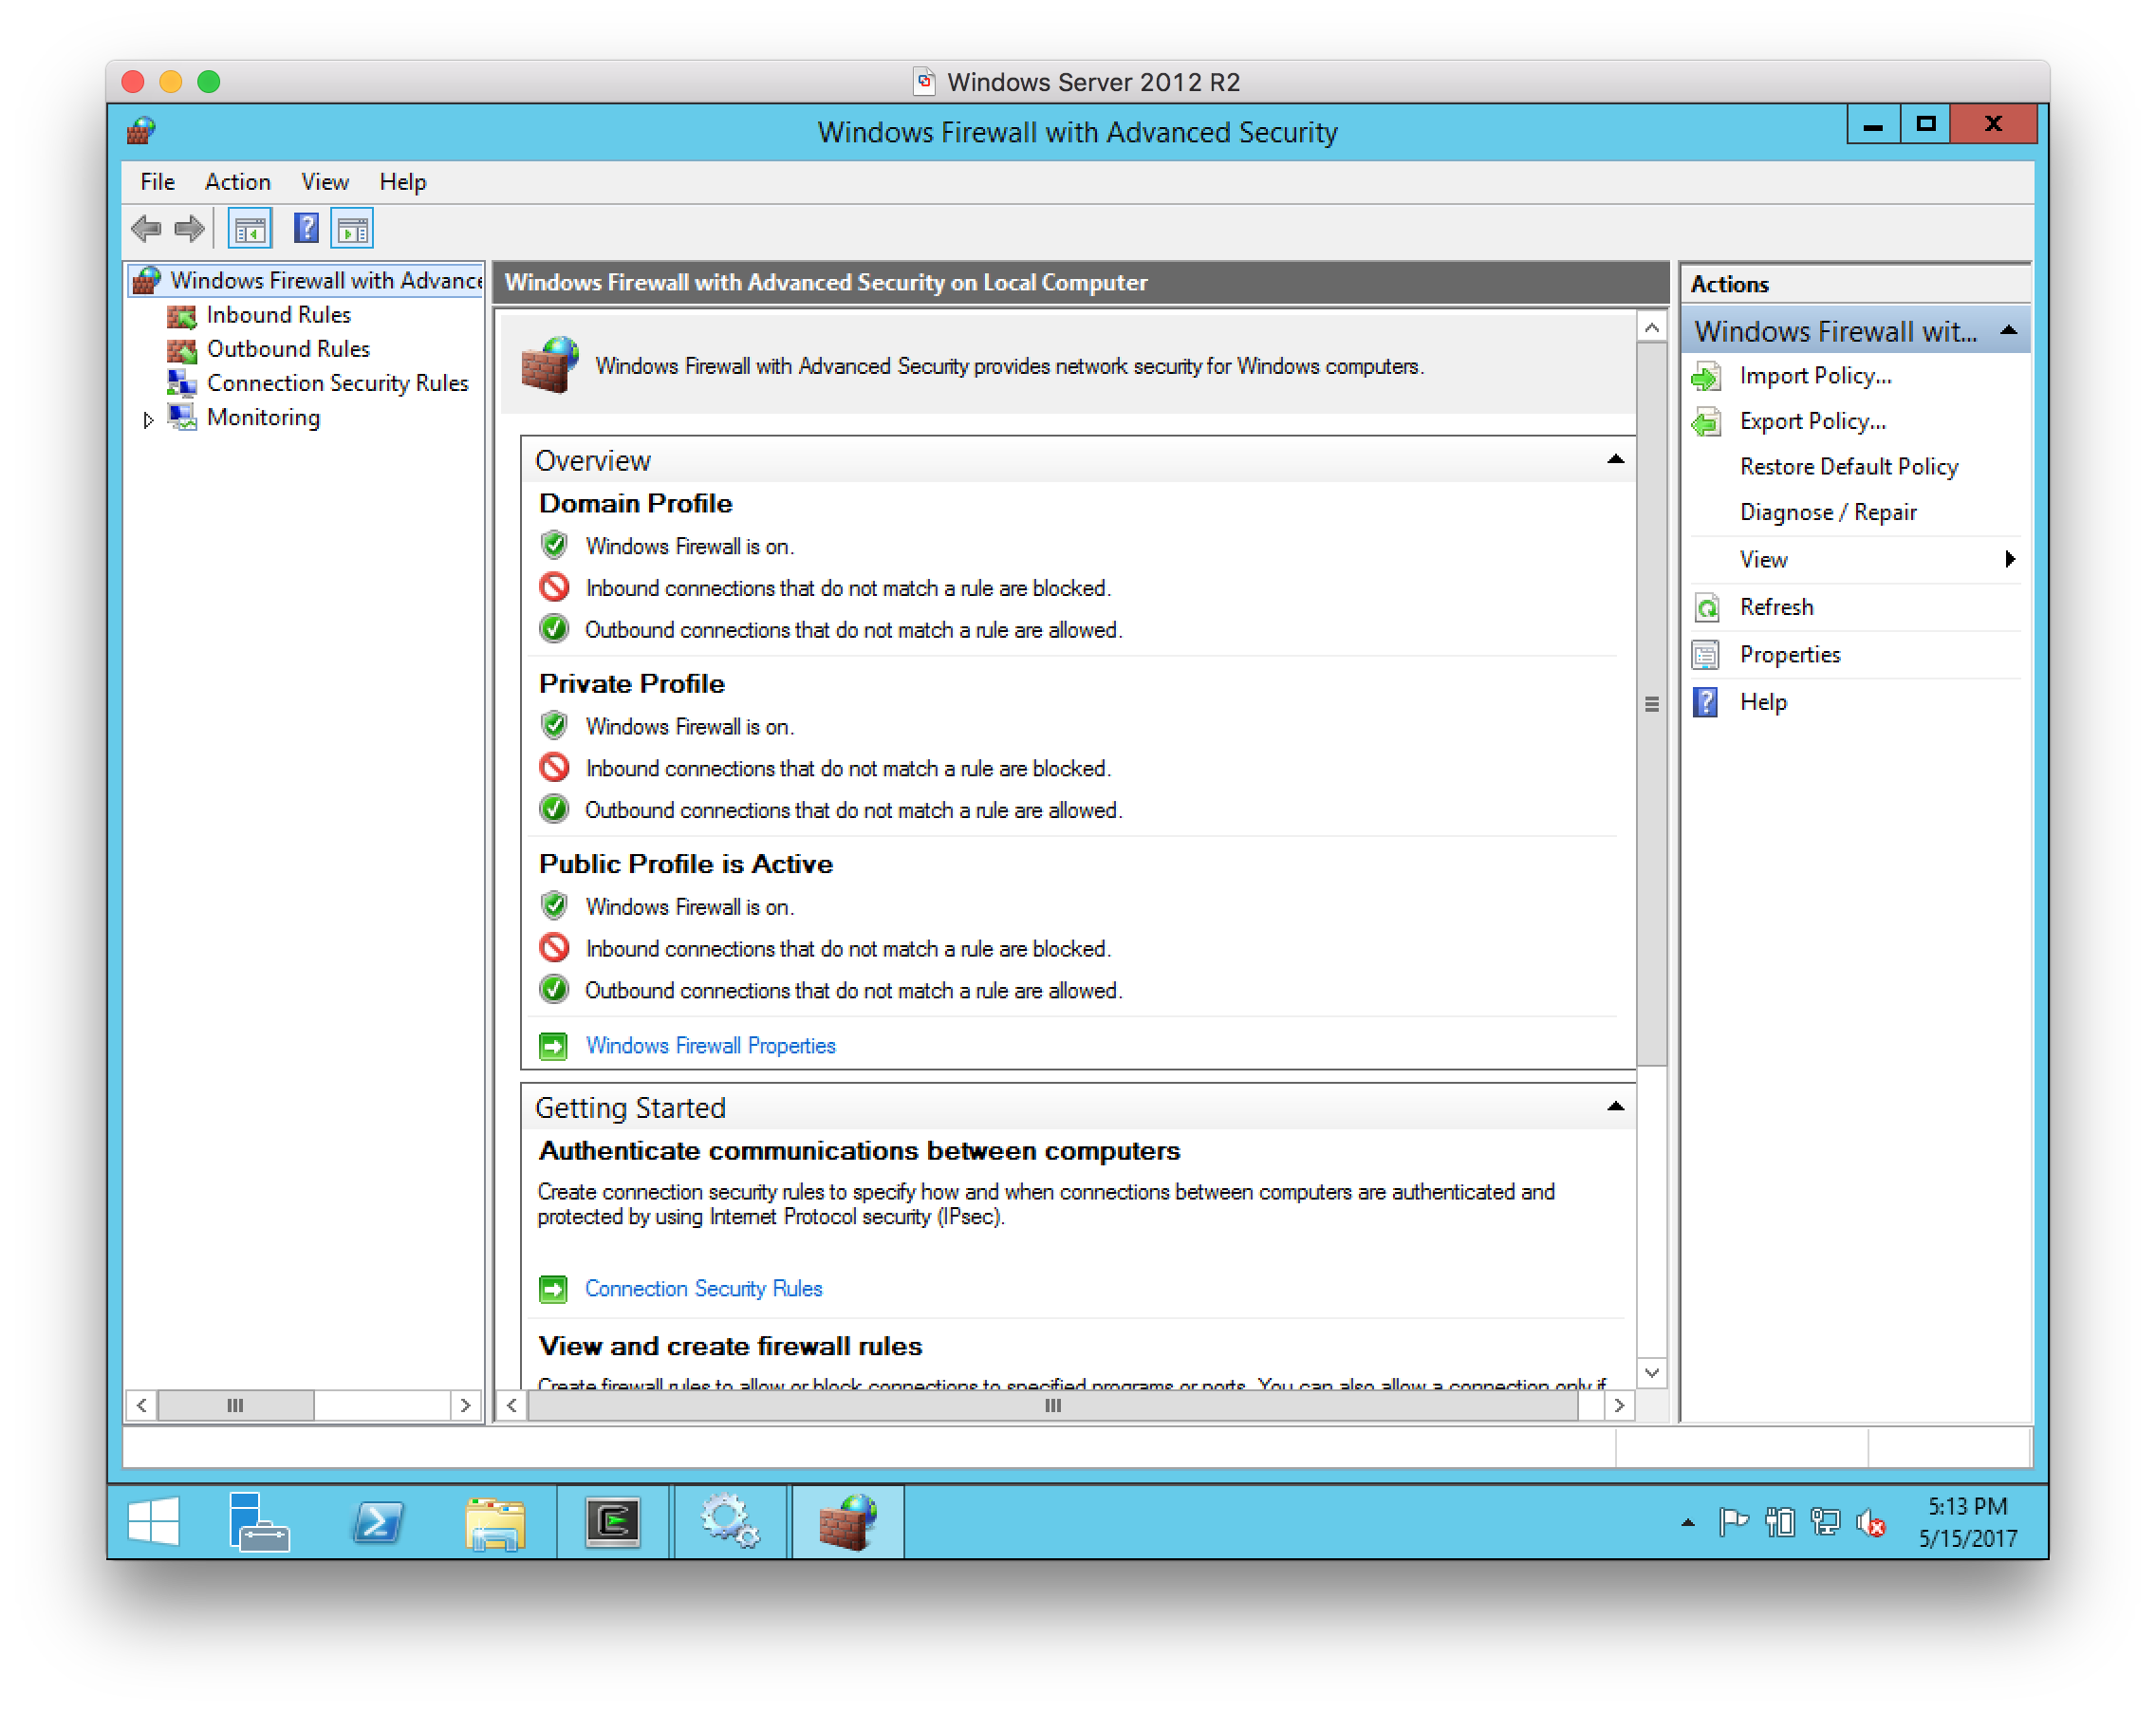
-
Select
Inbound rulesin the left-hand pane: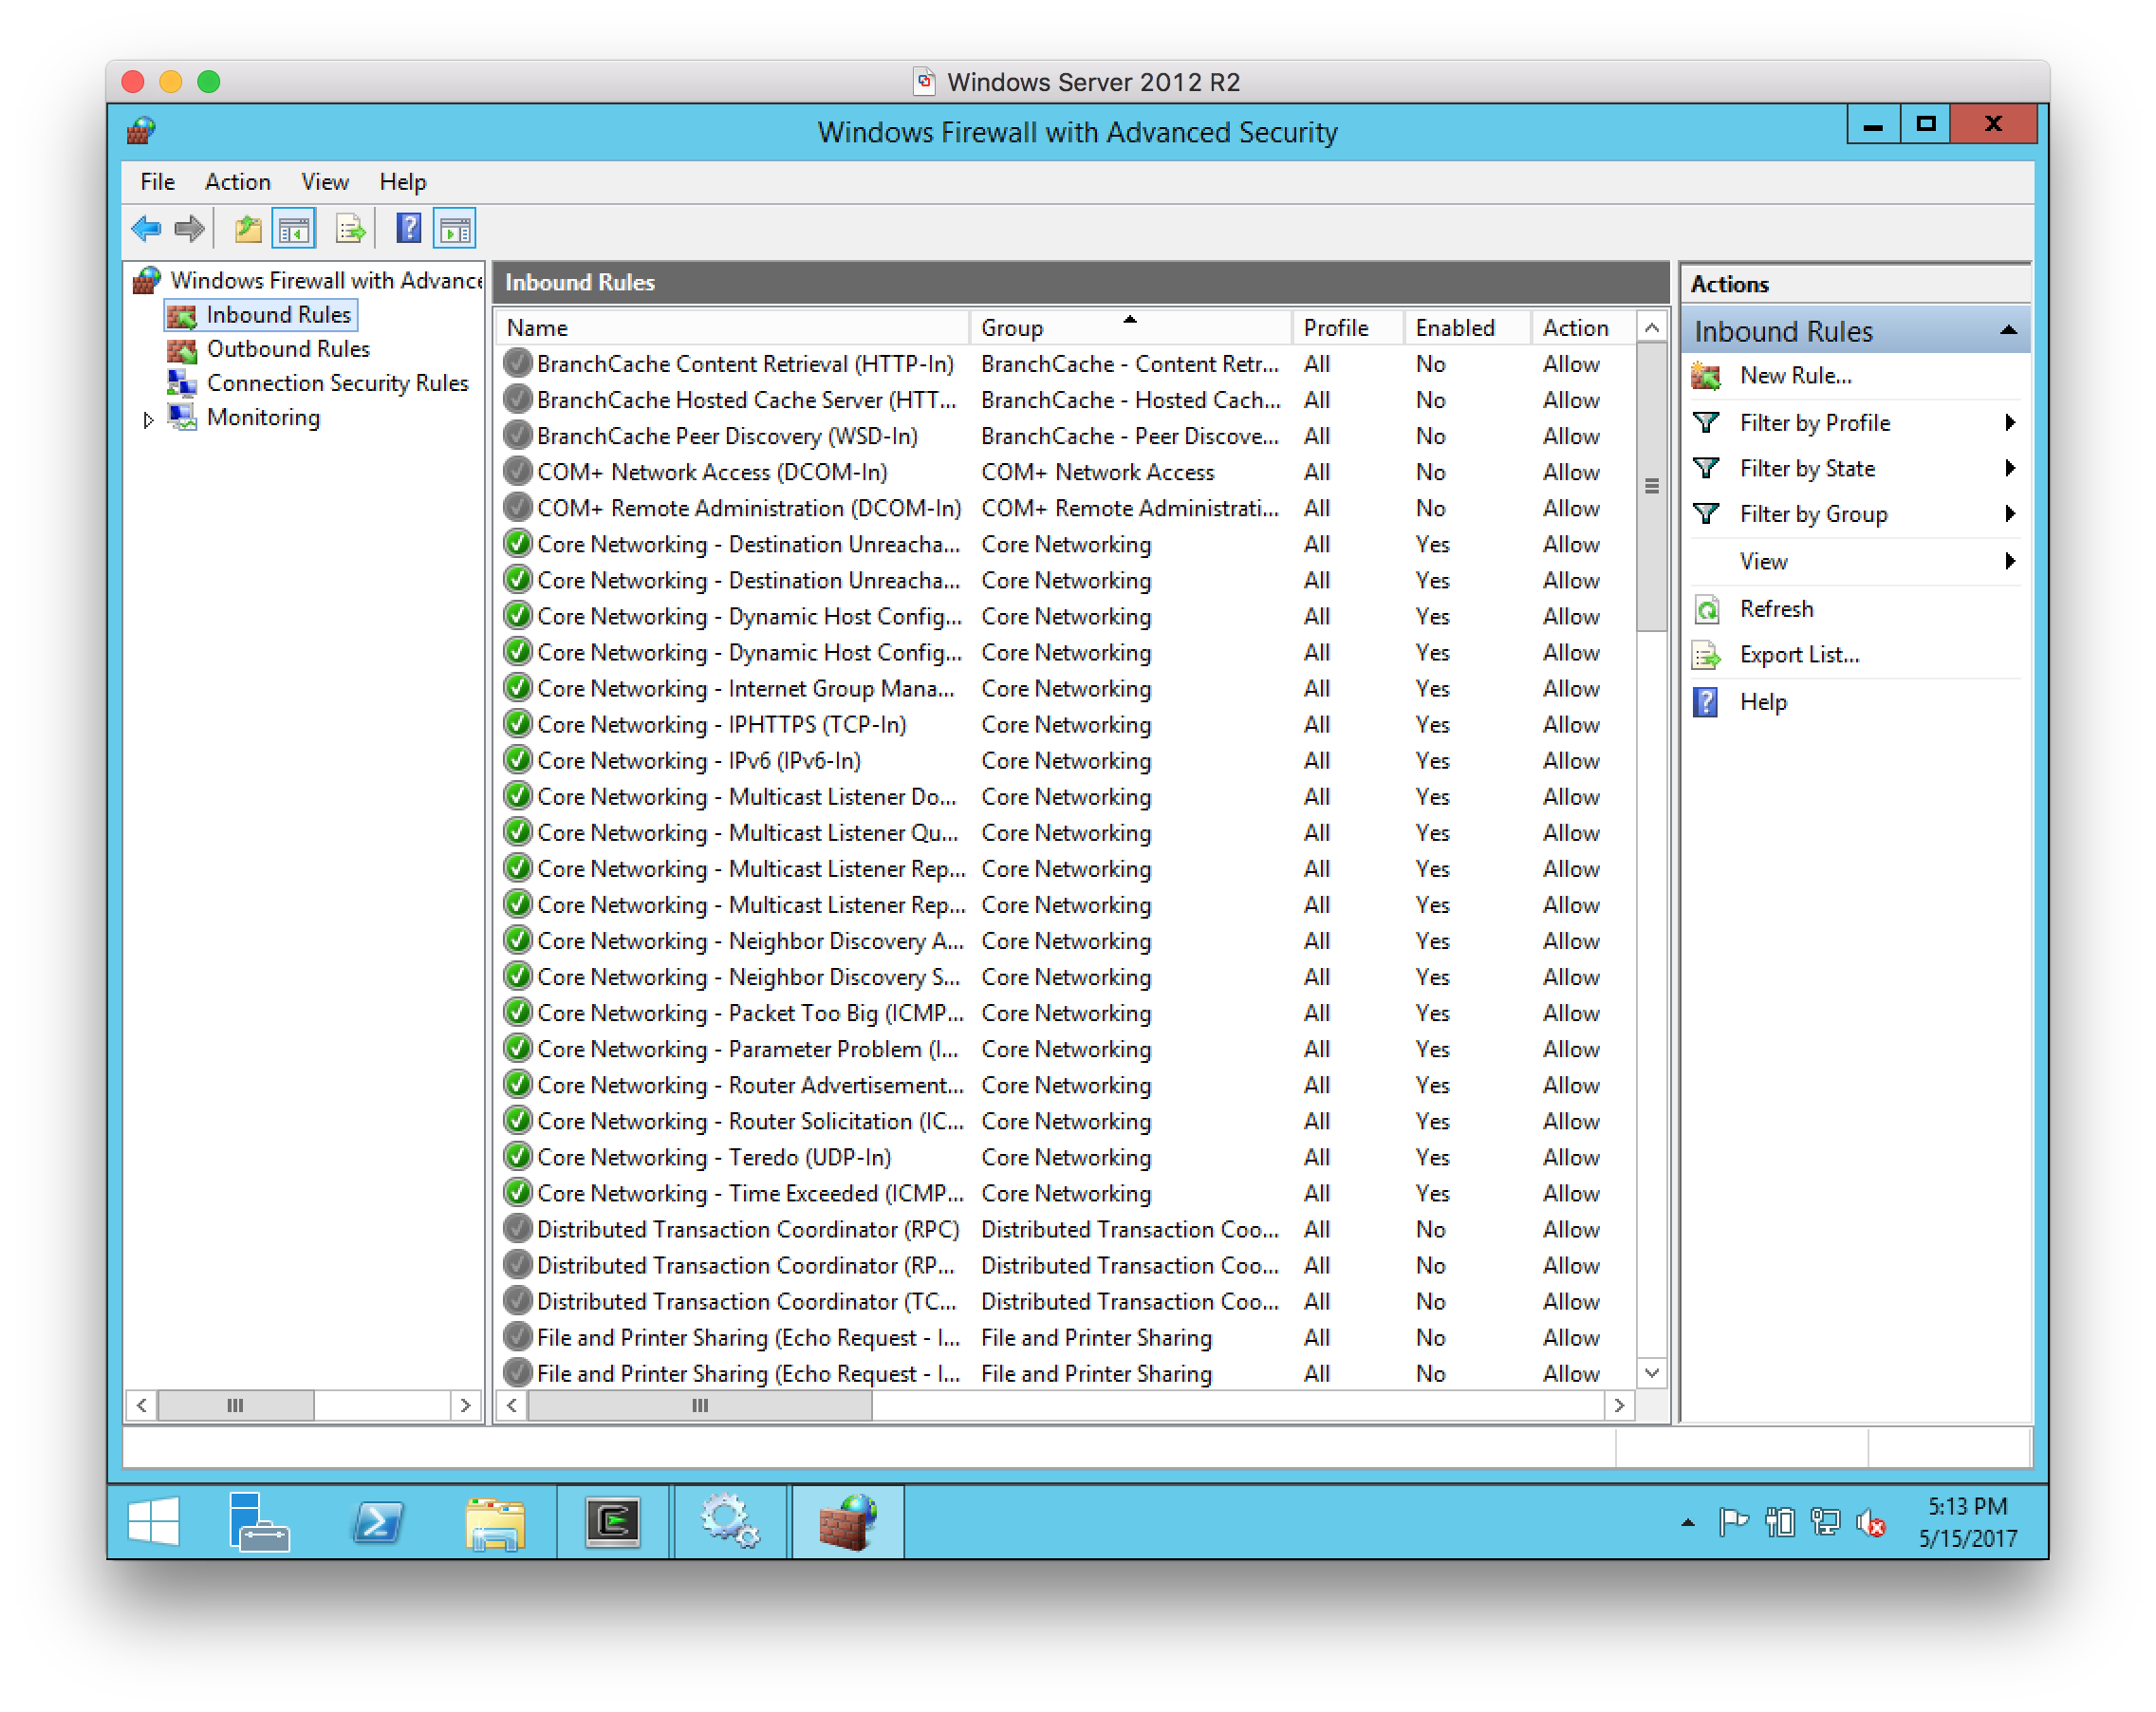
-
Select
New Rulein the right-hand pane, and select a Port rule as the type of rule to create: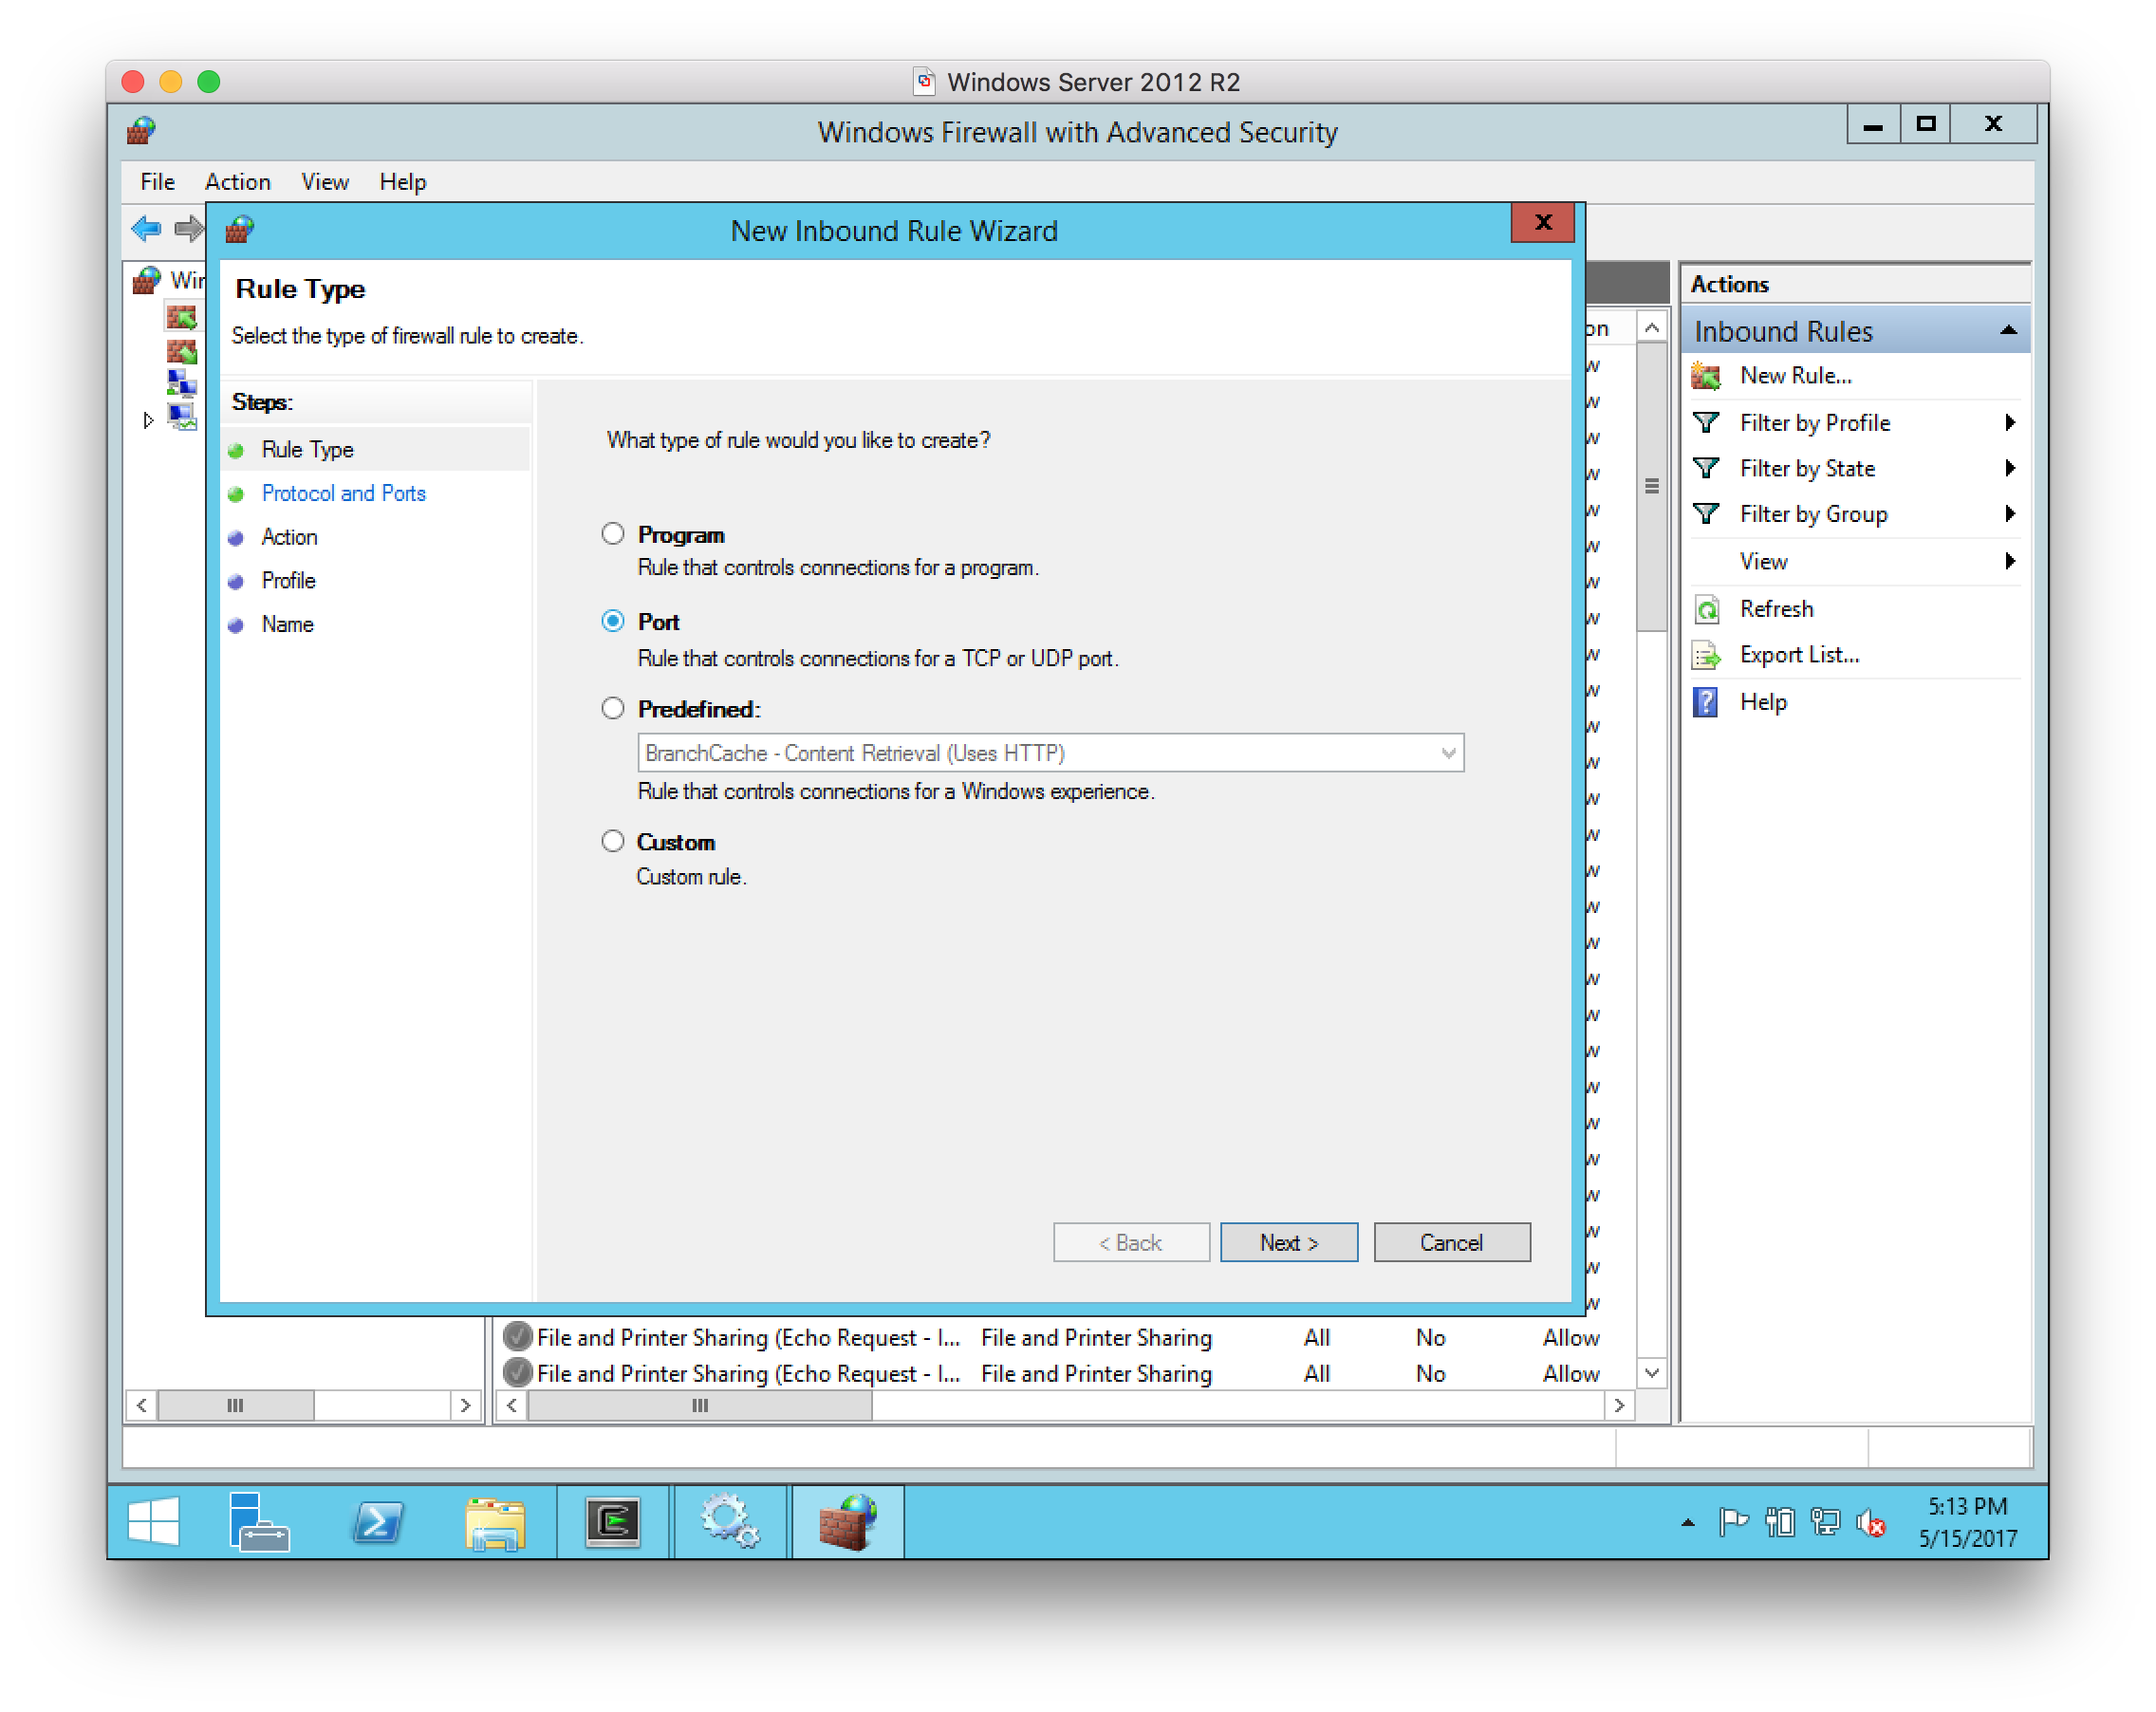
-
For the Protocol and Ports, select
TCPand port22:
-
For the Action, select
Allow the connection: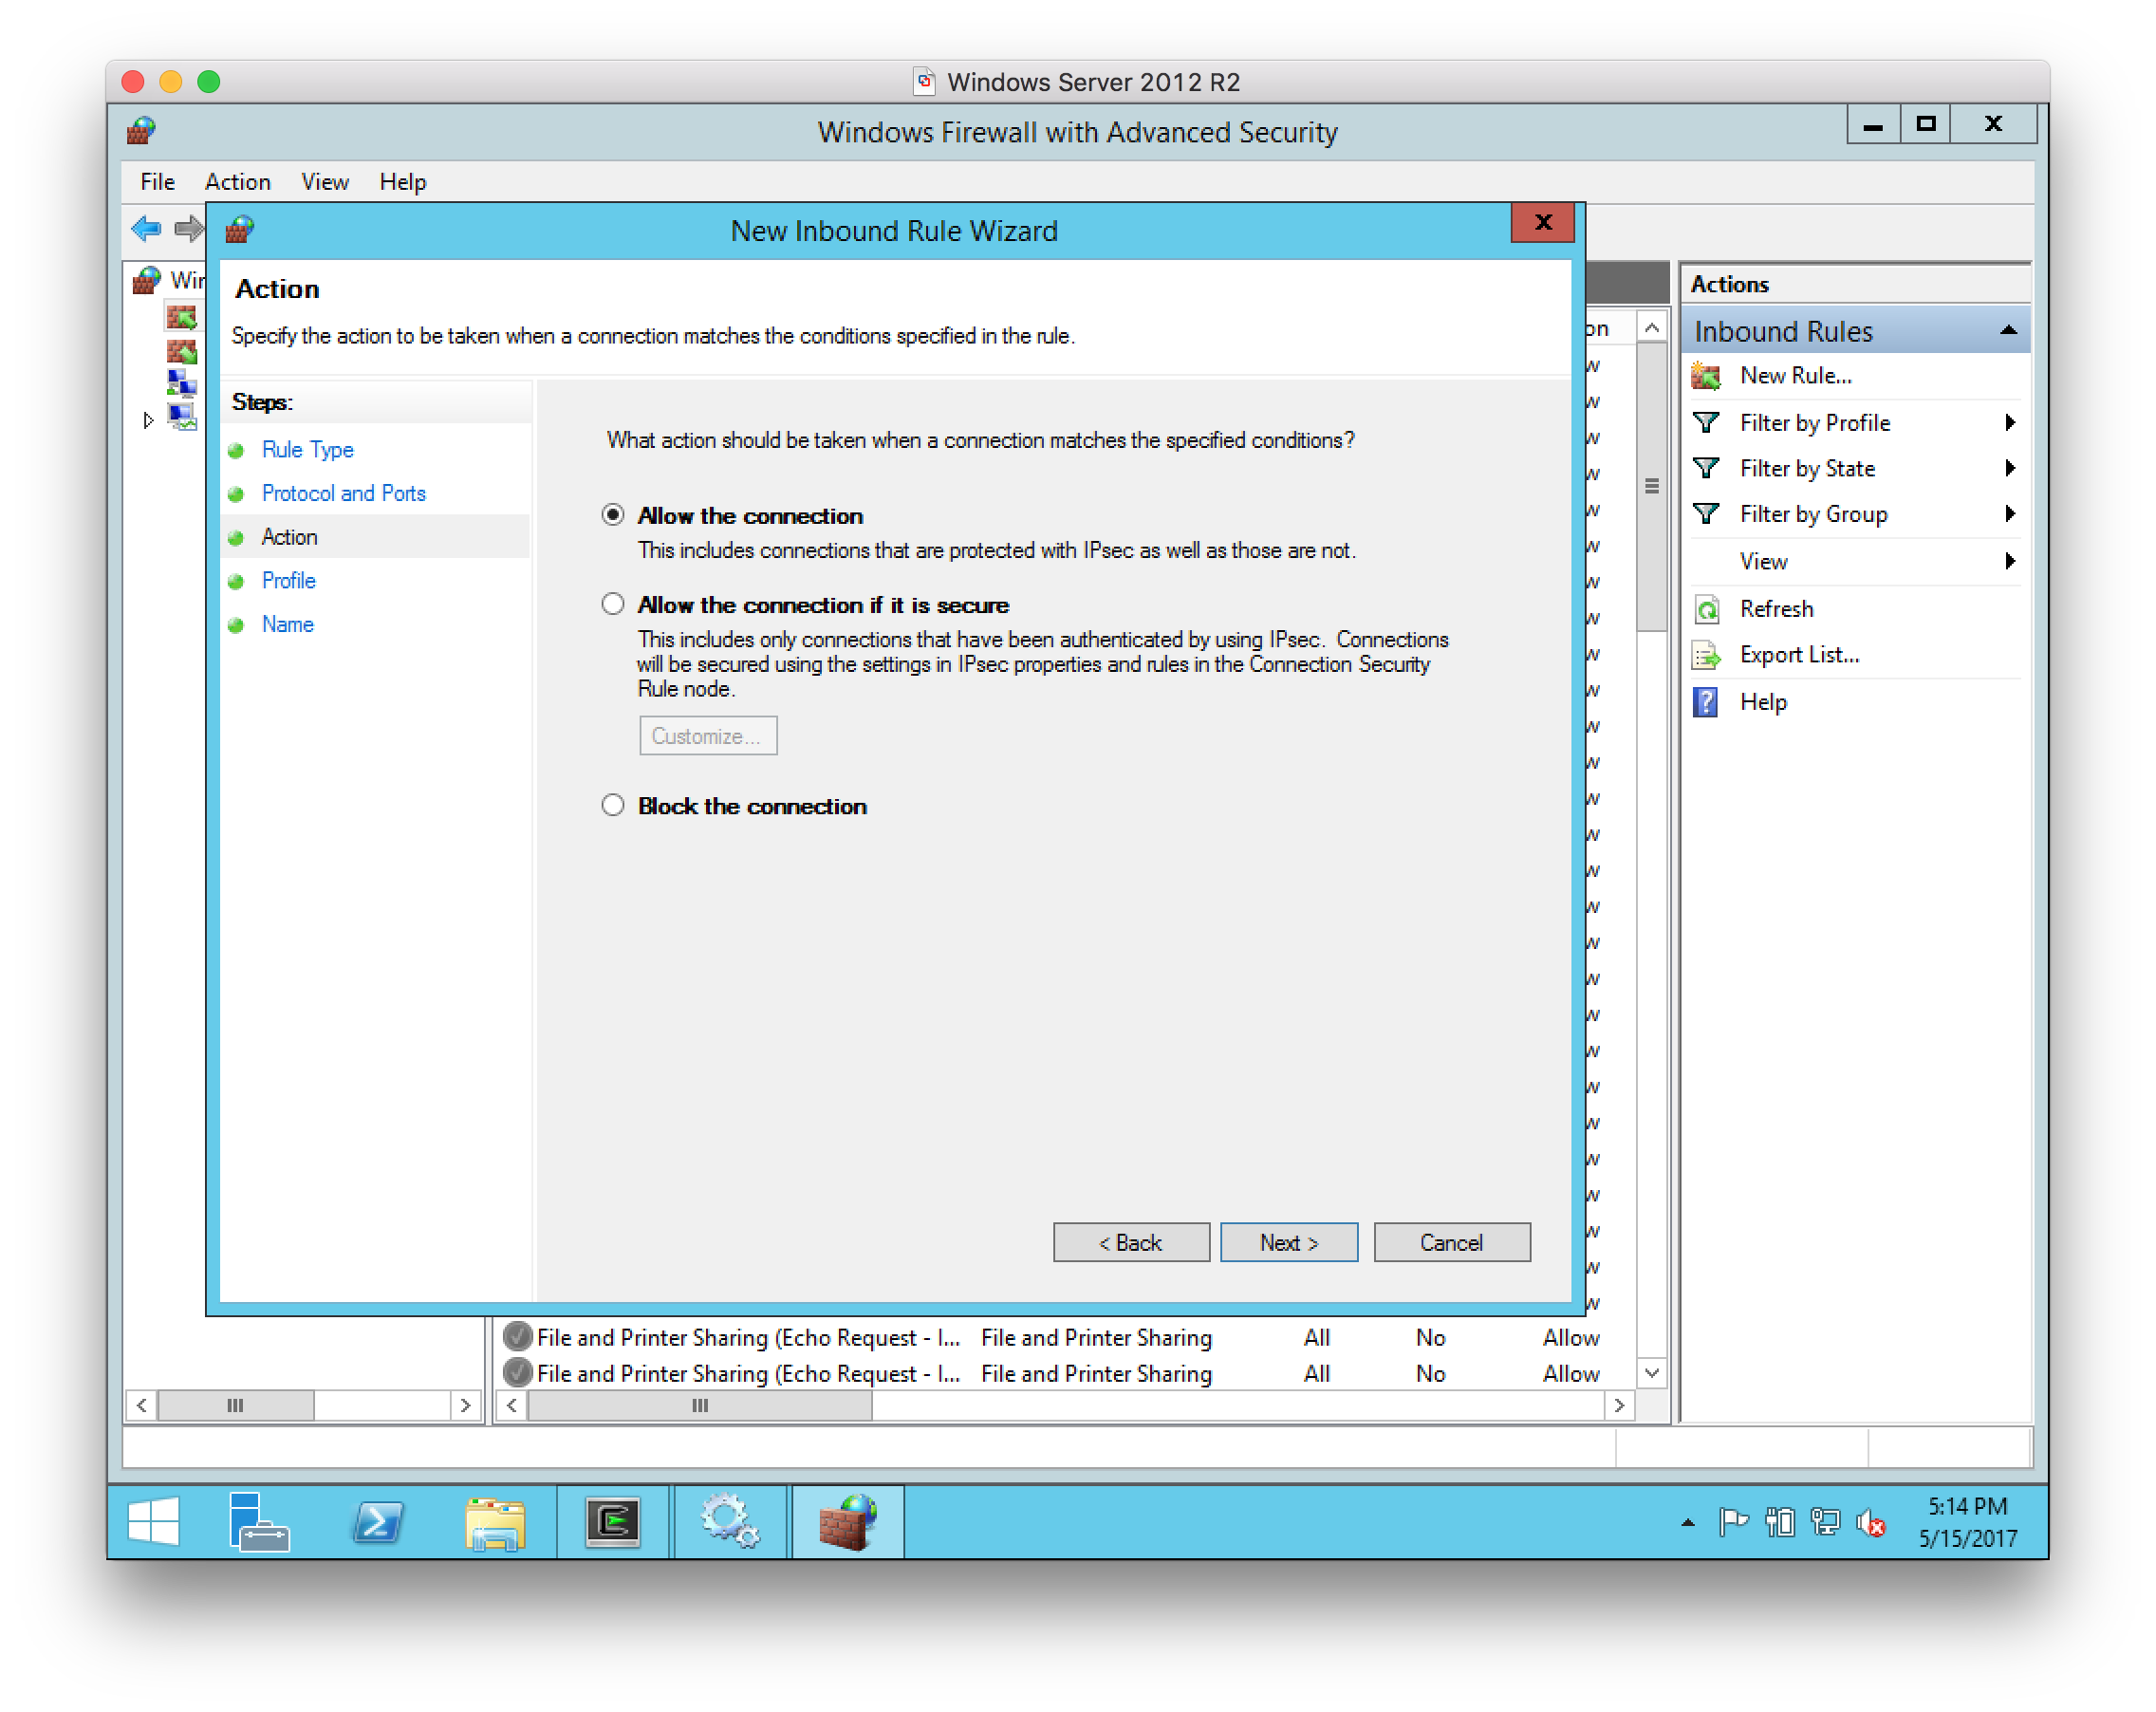
-
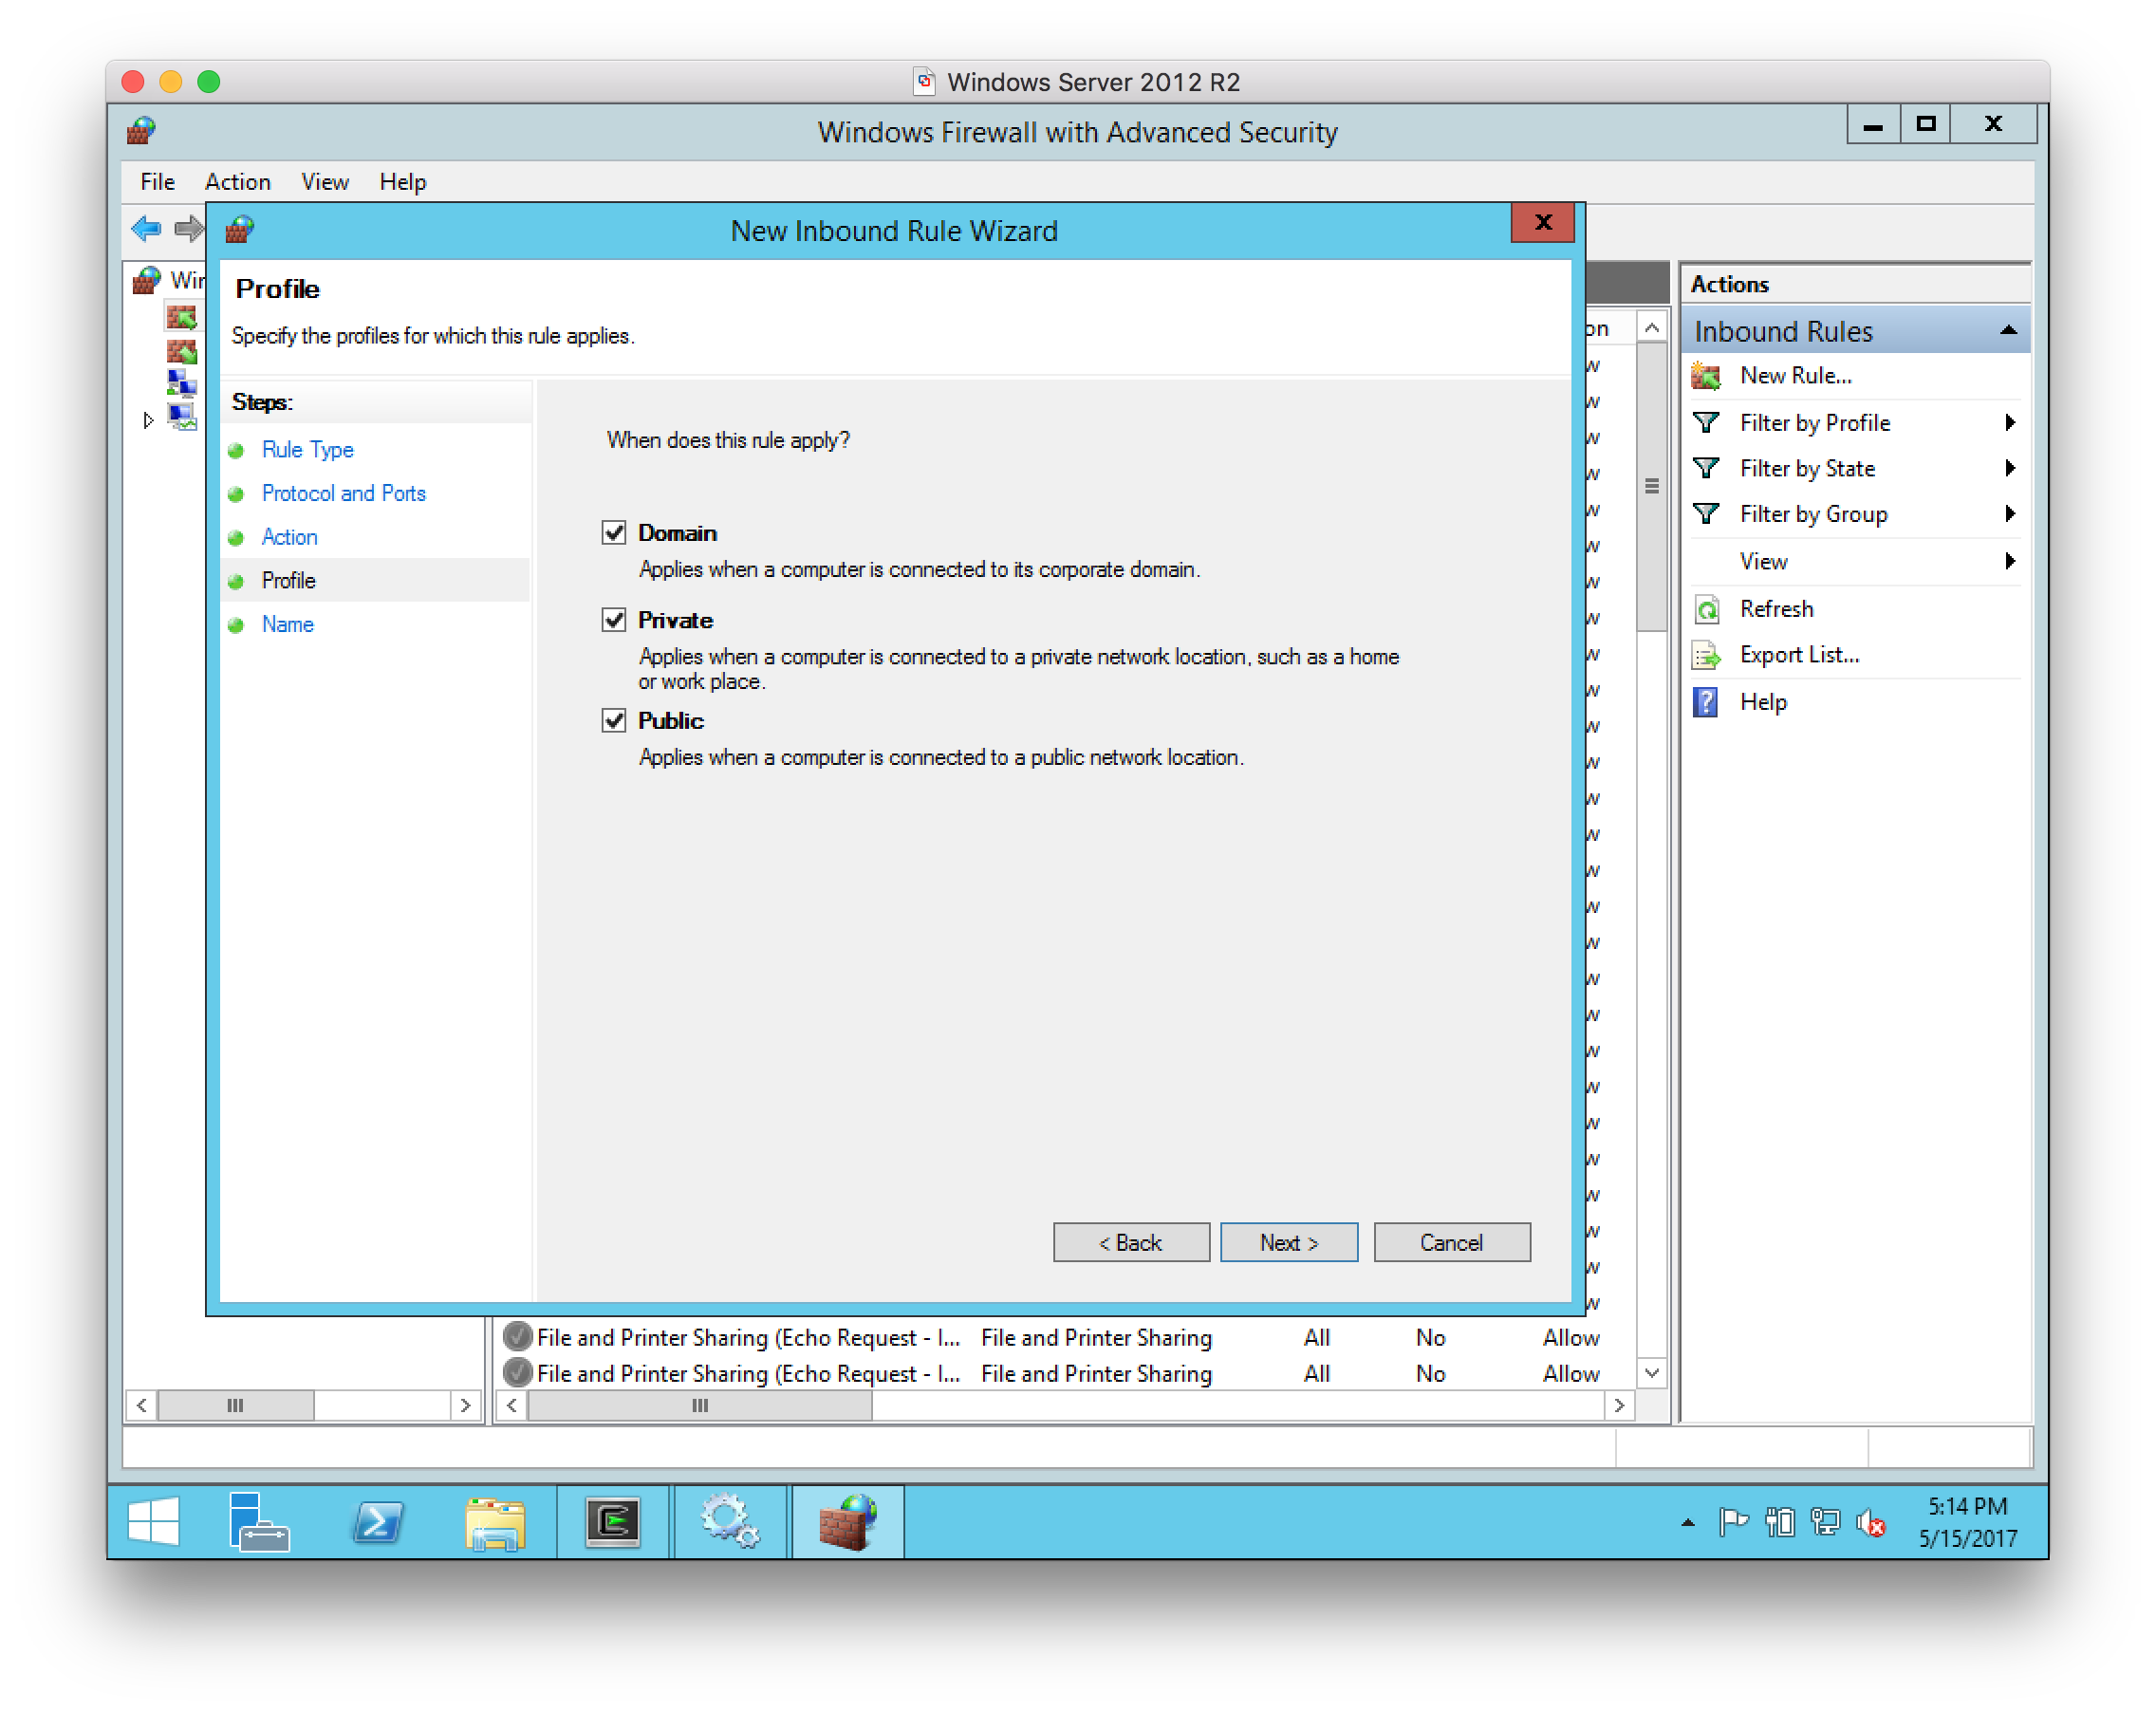
For the Profile, select all networks:
-
Give the rule the name
SSH: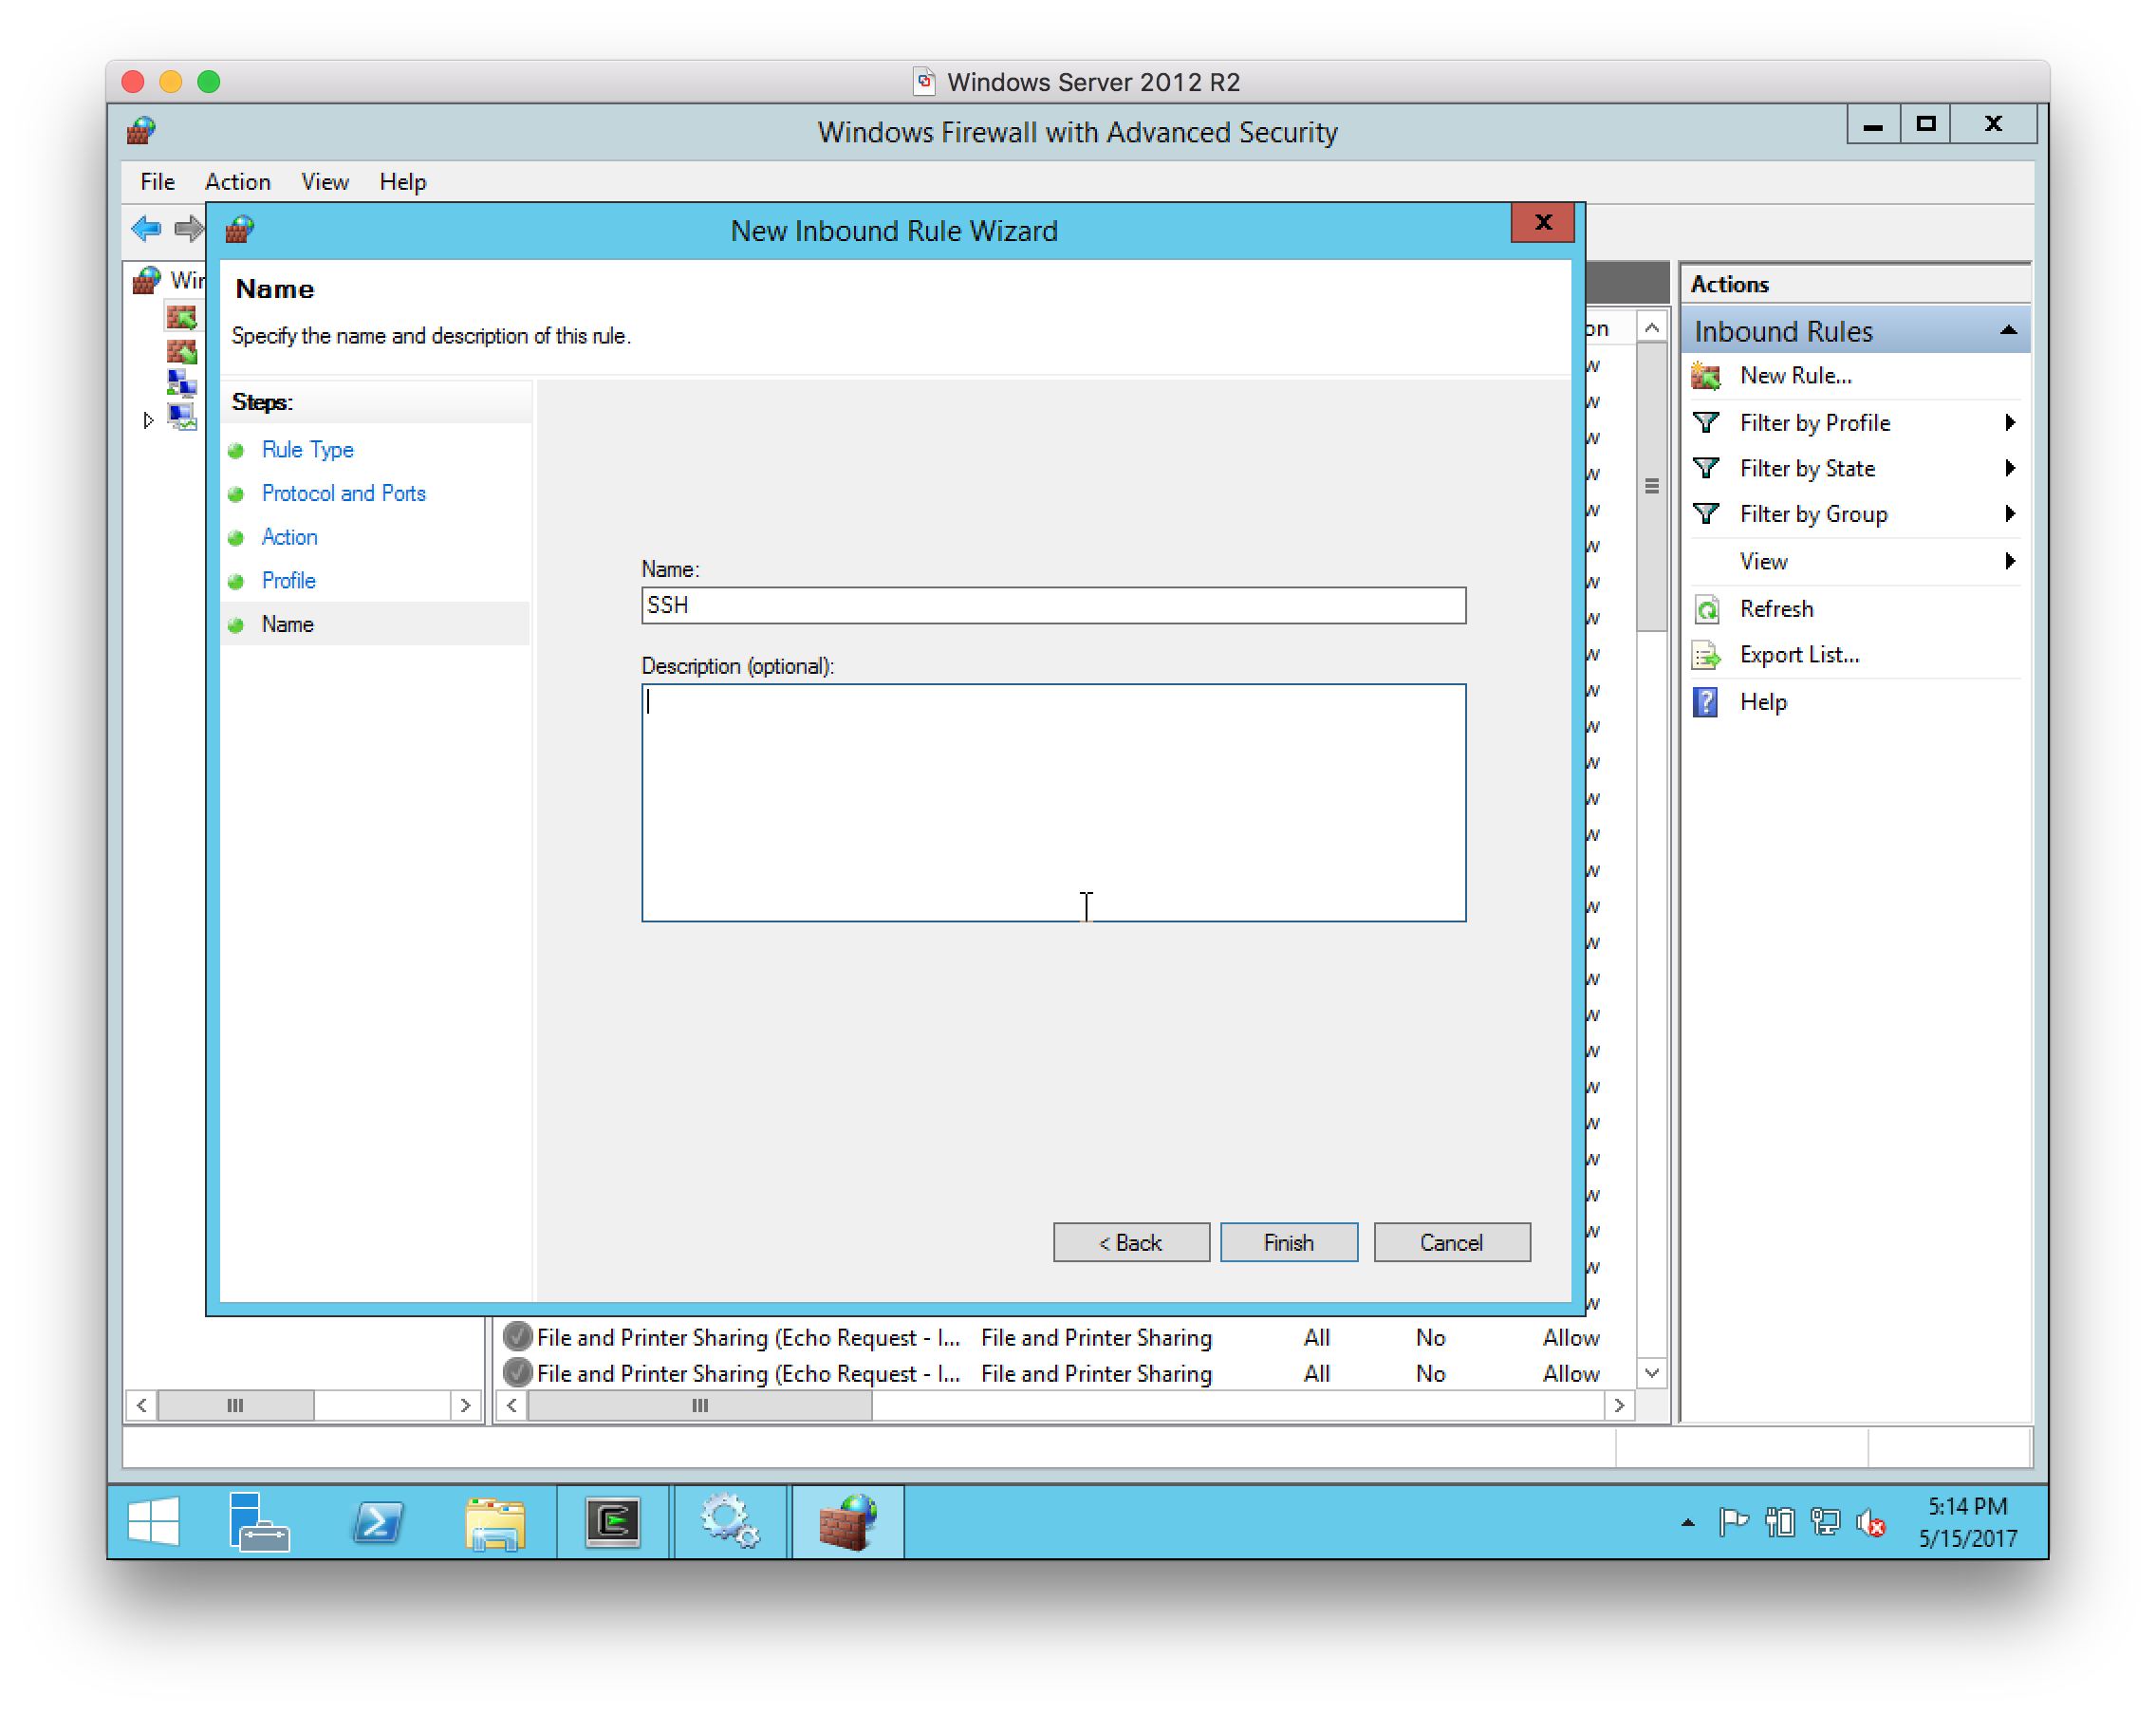
-
Verify that the inbound rule is created and enabled.
-
-
Configure the user account that Jenkins must use to sign in with to use SSH key-based authentication. There is no requirement to use key-based authentication, but it presents significant advantages in terms of security and is the recommended authentication mechanism when connecting agents using SSH.
-
Sign in to the Microsoft Windows server with the account that Jenkins will connect as.
-
Open a Cygwin64 Terminal and run the command
ssh-keygen -t ecdsa(other key types are supported). Specifically, some plugins require that you usessh-keygen -m pem -t ecdsainstead.A 256-bit ECDSA key is stronger than a 2048-bit RSA key. This means that without applying the JCE Unlimited Strength Jurisdiction Policy Files, ECDSA keys are more secure than RSA keys as the JVM is limited to 2048-bit RSA keys. $ ssh-keygen -t ecdsa Generating public/private ecdsa key pair. Enter file in which to save the key (/home/Jenkins/.ssh/id_ecdsa): Created directory '/home/Jenkins/.ssh'. Enter passphrase (empty for no passphrase): Enter same passphrase again: Your identification has been saved in /home/Jenkins/.ssh/id_ecdsa. Your public key has been saved in /home/Jenkins/.ssh/id_ecdsa.pub. The key fingerprint is: SHA256:JfjsfW6pbmW/ENOe400/MIrmB1jxCE8Cy68/cUMoEik Jenkins@WIN-62JQBI8M63K The key's randomart image is: +---[ECDSA 256]---+ | ... | | E o. .+ o | | . .o. B = | | . ..+ B . . | | . ..S o . | | .+ = o* . | | . + =o+o* .| | .. o.=oo.=.| | .+++o. o.+| +----[SHA256]-----+ -
Next change the working directory to
~/.sshby runningcd ~/.ssh. -
Now create the
authorized_keysby copying the public key that we have just generated:cp idecdsa.pub authorized_keys. -
Extract the private key from the server. If the server is running as a virtual machine, this is typically just a question of displaying the public key on the screen using copy and paste to transfer to the host operating system. With a physical server it may be easier to use
sftpto copy the file out.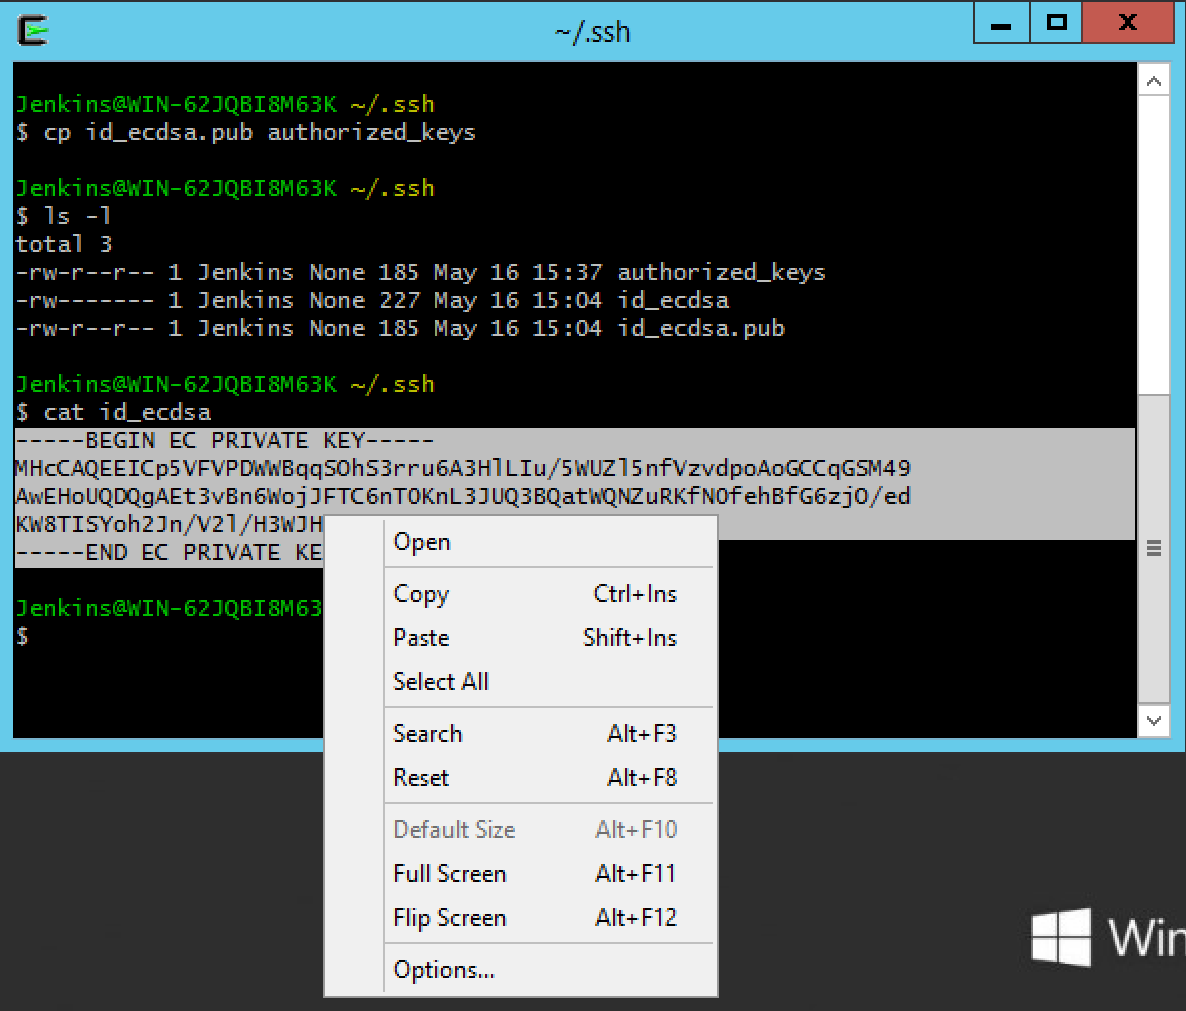
-
Connect the Windows agent to Jenkins
-
Create the SSH key in Jenkins:
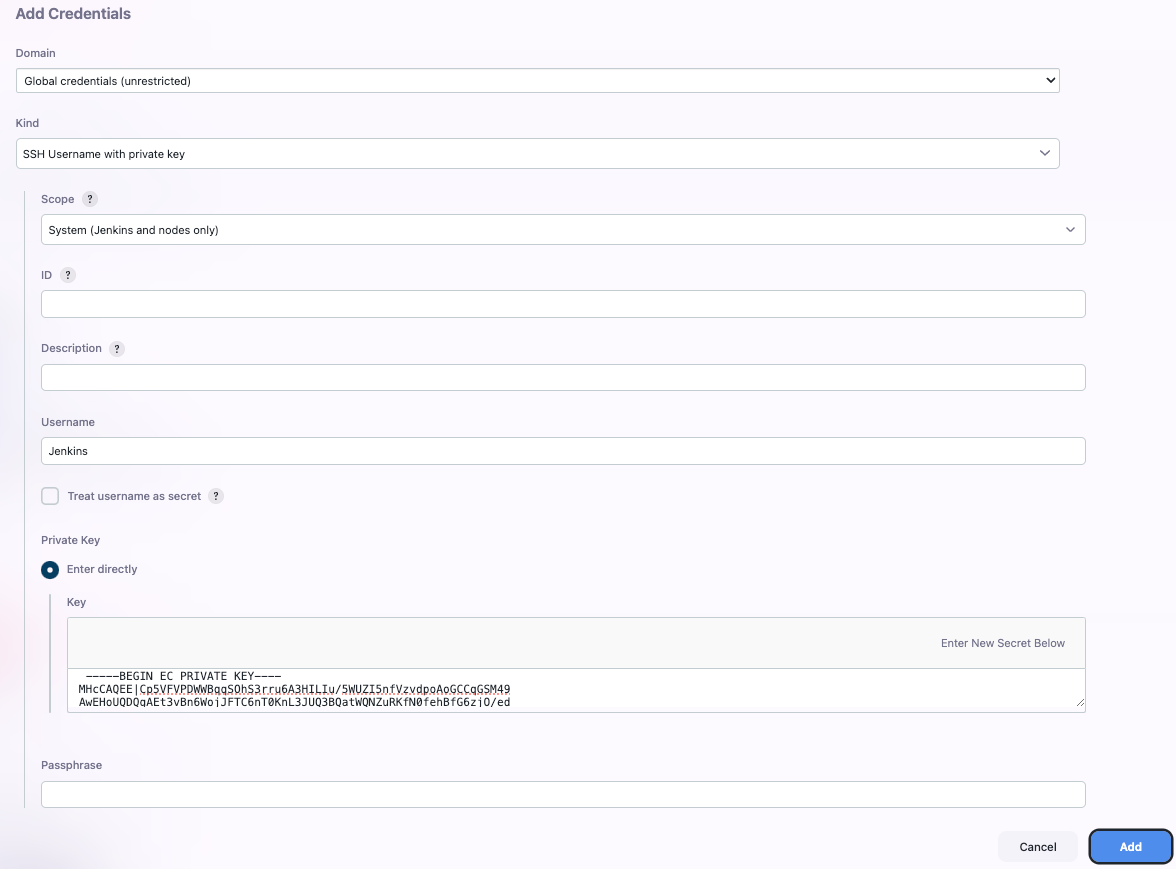
-
Configure the agent to use the SSH key credential:
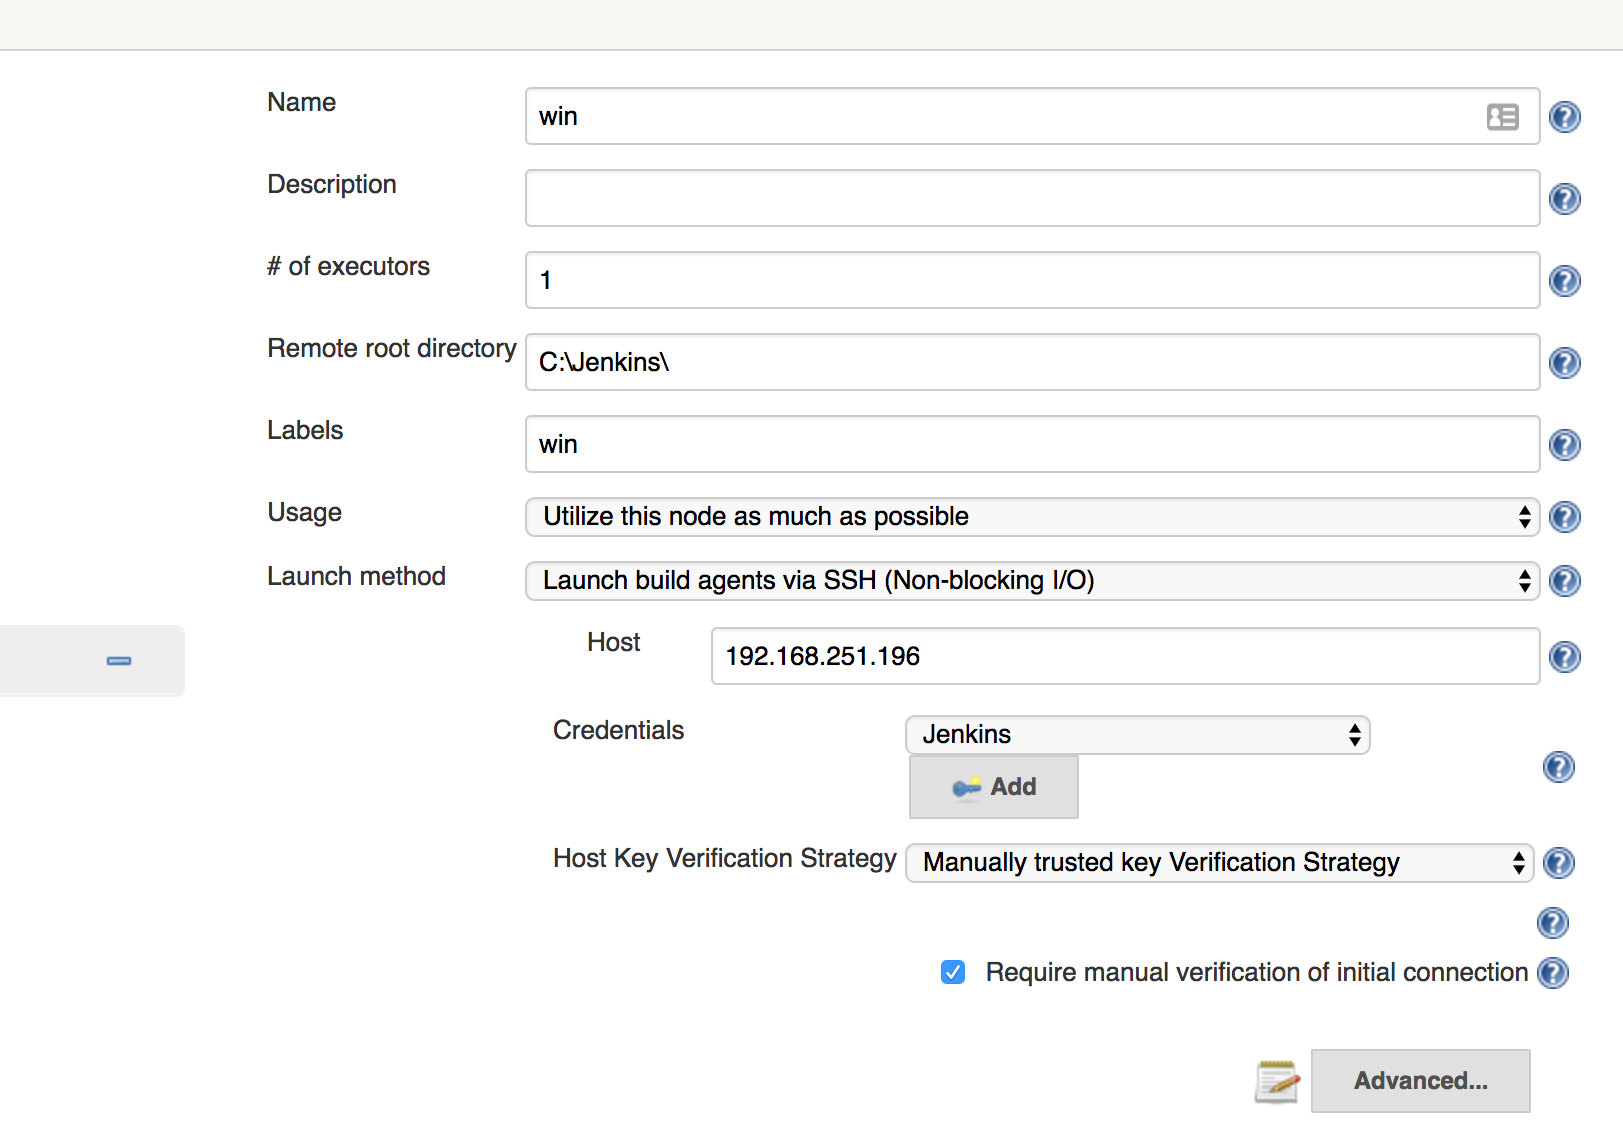
If you select Manually trusted key Verification Strategy and leave Require manual verification of initial connection selected, Jenkins will refuse to connect until you approve the SSH Host key from the SSH Host Verification action. The SSH Host Verification action is only available after the first connection attempt.
 Figure 1. SSH Host Verification
 -
The agent should connect.
Agent scheduling
CloudBees CI includes agent scheduling facilities, including:
-
Even scheduler - balancing projects among workers
-
Label throttle - limiting project execution by agent label
Even scheduler
|
End-of-life announcement CloudBees removed this plugin from the CloudBees Assurance Program (CAP) in January 2023. As an alternative, CloudBees recommends replacing it with Least Load. Please contact CloudBees Support if you have any concerns or questions. |
When using many agent nodes, Jenkins needs to decide where to run any given build. This is called "scheduling", and there are several aspects to consider.
First, it can be necessary to restrict which subset of nodes can execute a given build. For example, if your job is to build a Windows installer, chances are it depends on some tools that are only available on Windows, and therefore you can only execute this build on Windows nodes. This portion of the scheduling decision is controlled by Jenkins core.
The second part is determining one node that carries out the build, of all the qualifying nodes, and that is what this plugin deals with.
Default behavior
To better understand what this plugin does, let us examine the default scheduling algorithm of Jenkins. How does it choose one node out of all the qualifying nodes?
By default, Jenkins employs the algorithm known as consistent hashing to make this decision. More specifically, it hashes the name of the node, in numbers proportional to the number of available executors, then hashes the job name to create a probe point for the consistent hash. More intuitively speaking, Jenkins creates a priority list for each job that lists all the agents in their "preferred" order, then picks the most preferred available node. This priority list is different from one job to another, and it is stable, in that adding or removing nodes generally only causes limited changes to these priority lists.
As a result, from the user’s point of view, it looks as if Jenkins tries to always use the same node for the same job, unless it’s not available, in which case it’ll build elsewhere. But as soon as the preferred node is available, the build comes back to it.
This behavior is based on the assumption that it is preferable to use the same workspace as much as possible, because SCM updates are more efficient than SCM checkouts. In a typical continuous integration situation, each build only contains a limited number of changes, so indeed, updates (which only fetch updated files) run substantially faster than checkouts (which refetch all files from scratch.)
This locality is also useful for a number of other reasons. For example, on a large Jenkins instance with many jobs, this tends to keep the number of workspaces on each node small. Some build tools (such as Maven and RVM) use local caches, and they work faster if Jenkins keeps building a job on the same node.
However, the notable downside of this strategy is that when each agent is configured with multiple executors, it doesn’t try to actively create a balanced load on nodes. Say you have two agents X and Y, each with four executors. If at one point X is building FOO #1 and Y is completely idle, then on average, the upcoming BAR #1 still gets assigned to X with 3/7 chance (because X has three idle executors and Y has four idle executors.)
Even loading strategy
What this plugin offers is a different scheduling algorithm, which we refer to as "even loading strategy".
Under this strategy, the scheduler prefers idle nodes absolutely over nodes that are doing something. Therefore, in the above example, BAR #1 always runs on Y, because X is currently building FOO #1. Even though it still has three idle executors, it will not be considered so long as there are other qualifying agents that are completely idle.
However, idle executors are still idle, so if more builds are queued up, they will eventually occupy the other three executors of X, thereby using this agent to its fullest capacity. In other words, with this algorithm, the total capacity of the system does not change—only the order in which the available capacity is filled.
The strength of this algorithm is that you are more likely to get a fully idle node. Quite simply, executing a build on a fully idle system is faster than executing the same thing on a partially loaded system, all else being equal.
However, the catch is that all else may not be equal. If the node does not have a workspace already initialized for this job, you’ll pay the price of fully checking out a new copy, which can cancel other performance gains. In a nutshell, even loading is most useful for jobs which are slow to build, but for which the very first build on a node is not notably slower than any other.
Use the even scheduler
This plugin adds two ways to control which algorithm to use for a given job:
-
Global preference, which picks the scheduling algorithm globally for all jobs, unless specifically overridden by individual jobs.
-
Per-job preference, which picks the scheduling algorithm for a specific job, regardless of the global preference.
Select global preferences
To set global preferences:
-
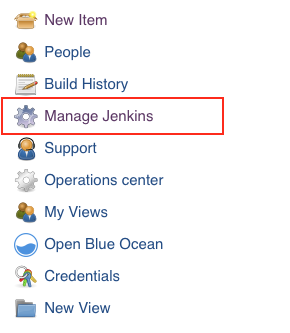
Select in the upper-right corner to navigate to the Manage Jenkins page.
-
Select System, and then select Default Scheduler Preference.
-
To make the even scheduler loading strategy the default strategy, select Prefer execution on idle nodes over previous used nodes.
Select per-job preference
Go to the configuration screen of a job, and then select Override the default scheduler preference. This activates the per-job override. If Prefer execution on idle nodes over previous used nodes is selected, Jenkins uses the even loading strategy for this job. Otherwise, Jenkins uses the default scheduling algorithm.
Label throttling
|
End-of-life announcement CloudBees removed this plugin from the CloudBees Assurance Program (CAP) in January 2023. As an alternative to this plugin, CloudBees recommends provisioning agents on demand than statically with a cloud provider. Please contact CloudBees Support if you have any concerns or questions. |
The Label Throttle Build plugin brings hypervisor-aware scheduling to Jenkins. The plugin allows users to limit the number of builds on oversubscribed VM guests on a particular host.
When agents are hosted on virtual machines and share the same underlying physical resources, Jenkins may think that there is more capacity available for builds than there really is.
For example, in such an environment, Jenkins might think that there are ten agents with two executors each, but in reality the physical machine cannot execute twenty concurrent builds without thrashing. The number is usually much lower; say, four. (This number depends on the machine’s specifications and configuration.) This is particularly the case when you have a single-system hypervisor, such as VMWare ESXi, VirtualBox, etc.
Every time a new build is to start, Jenkins schedules it to one of the available virtual agents. However, in this particular case, the underlying physical infrastructure cannot support all the virtual agents running their respective builds concurrently.
CloudBees CI allows you to define an actual limit to the number of concurrent builds that can be run on the system. One can group agents together, then assign a limit that specifies how many concurrent builds can happen on all the agents that belong to that group. In this way, CloudBees CI avoids overloading your hypervisor host machine.
The benefit of using this plugin is that builds run much faster as the underlying physical machines are not overloaded anymore.
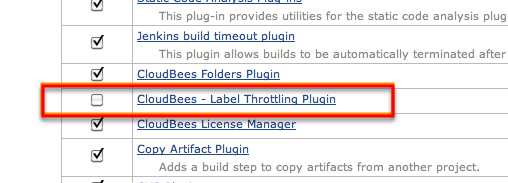
Install label throttling
Enable the CloudBees Label Throttle Build plugin in the plugin manager as shown in [throttle-img-install]. Restart CloudBees CI to enable the plugin.
Configure a label throttle
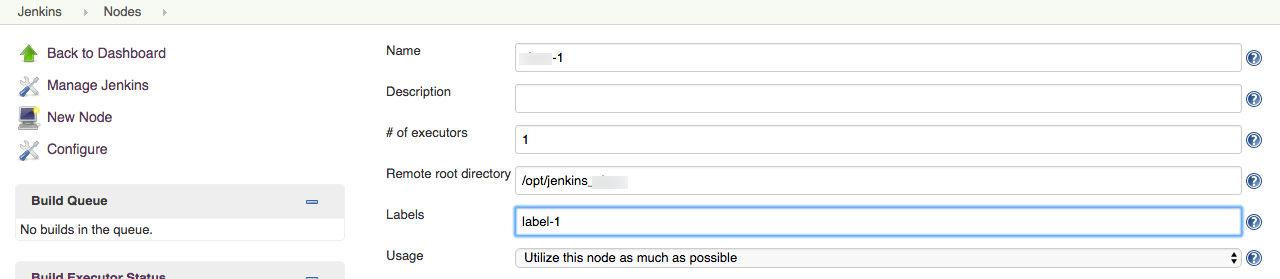
-
Decide on a label and assign it to all the agents that you’d like to group together. For example, you can use the hypervisor host name as a label, and put that label on all the agents that are the virtual machines on that host. This can be done from the agent configuration page:
-
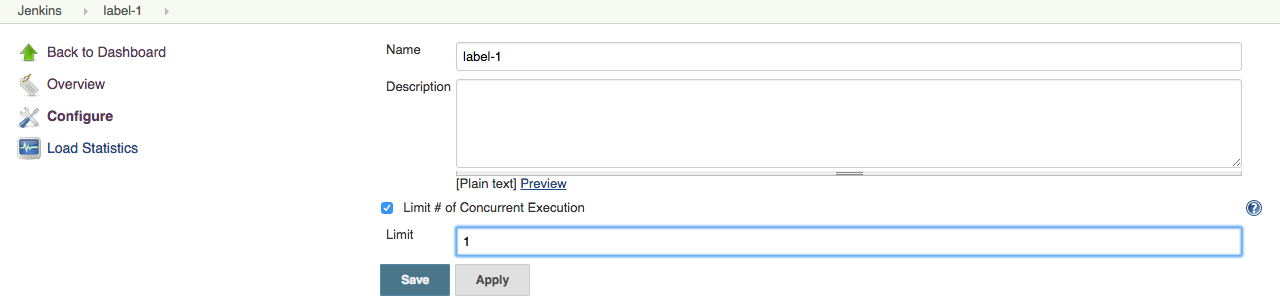
Select the newly entered label to jump to the label page:

-
Configure this label and enter the limit:
With this setting, the total number of concurrent builds on
hypervisor1is limited to 2, and CloudBees CI enforces this in the executor state. Two builds are already running, so the third job sits in the queue.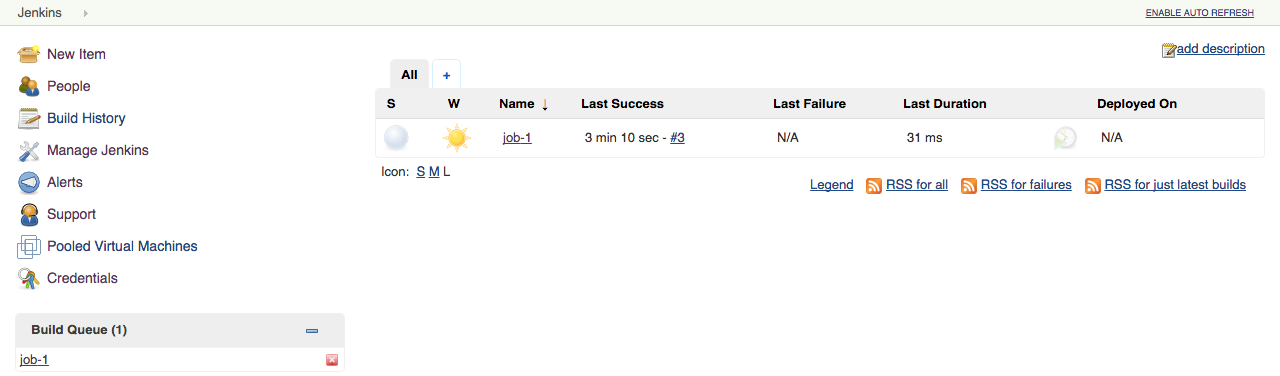
Kubernetes agents
CloudBees CI leverages the scaling abilities of Kubernetes to schedule build agents. Kubernetes build agents are contained in pods, where a pod is a group of one or more containers sharing a common storage system and network. A pod is the smallest deployable unit of computing that Kubernetes can create and manage (you can read more about pods in the Kubernetes documentation).
Pods are defined using pod templates.
One of the containers hosts the actual Jenkins build agent (the agent.jar file). By convention, this container always exists, and has the name
jnlp. If needed, this may be overridden by specifying a container with the name jnlp.
Other containers can be specified and the keyword container in a pipeline permits you to run commands directly inside these containers.
The agent workspace is shared between all pod containers, allowing you to smoothly switch between them during a build.
CloudBees CI offers several options to create pod templates, depending on the target audience: globally, using operations center, per-team, using controllers, or per-pipeline.
Use a custom Docker image to create a Kubernetes pod template
As of the CloudBees CI 2.462.3.3 release, the jenkins-agent ConfigMap has been deprecated. The jenkins-agent ConfigMap will be removed from the Helm chart in late 2025. For migration information, refer to Migrate from jenkins-agent ConfigMap to agent-injection.
|
Use a custom Docker image to create a Kubernetes pod template that uses the jenkins-agent config map.
To use a custom Docker image:
-
Select in the upper-right corner to navigate to the Manage Jenkins page.
-
Select .
-
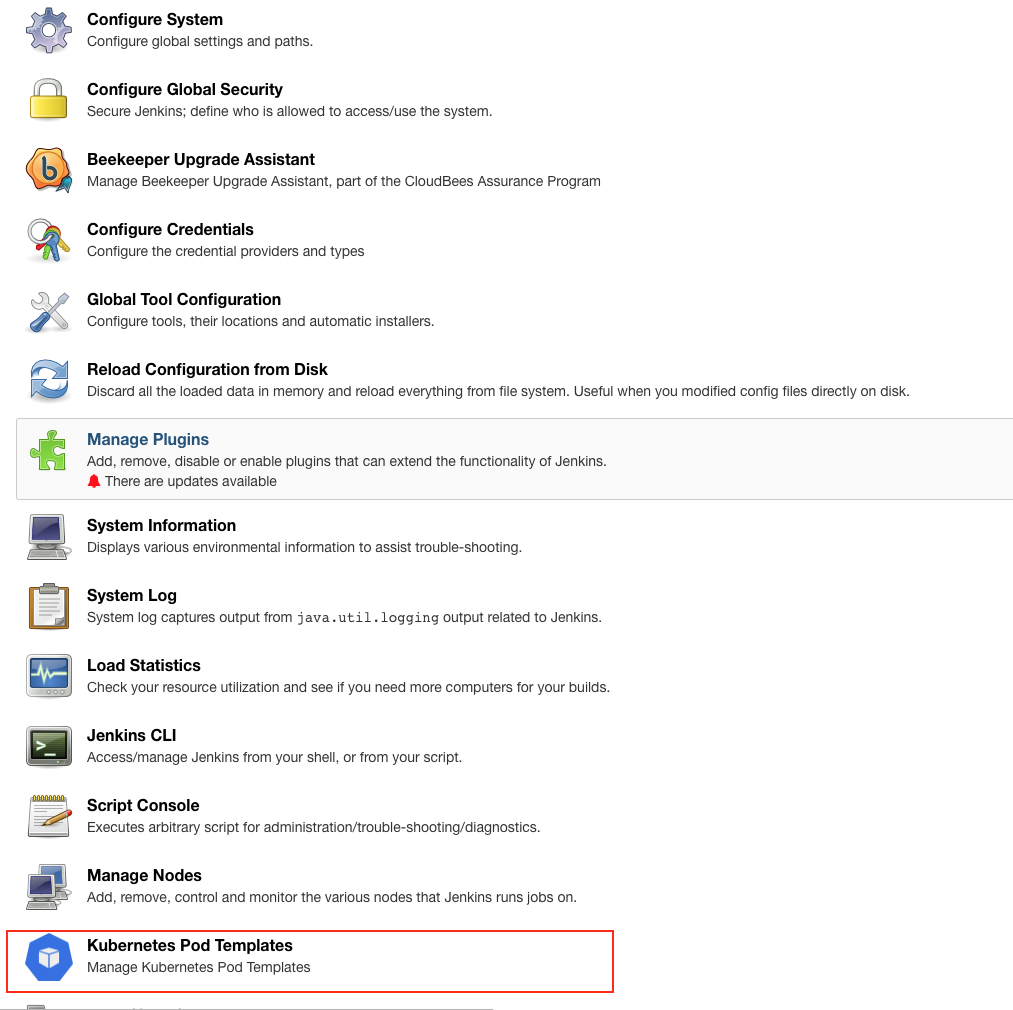
Scroll down to the Kubernetes Pod Template section.
-
In the Container section, enter the following:
-
Docker image: Enter the name of any Docker image with Java installed.
-
Command to run: Type
/bin/sh -
Arguments: Type
/var/jenkins_config/jenkins-agentIn the Volumes section, the Config map name is
jenkins-agentand the Mount path is/var/jenkins_config.
-
Globally edit pod templates in operations center
Administrators who want to enforce standards across development teams should consider managing pod templates centrally, which makes the necessary tools available and enforces corporate processes.
A pod template defined in operations center is available to any managed controller in the cluster.
To edit pod templates in operations center:
-
Browse to the operations center root folder.
-
Find the item named kubernetes shared cloud.
 Figure 2. kubernetes shared cloud
 -
After locating the shared configuration, select Configure to edit it.
 Figure 3. Configure kubernetes shared cloud
 -
Scroll to the bottom of the page and locate the pod template settings.
 Figure 4. Pod template settings
 -
Edit the pod template settings:
 Figure 5. Edit pod template settings
Edit pod templates per team using controllers
Pod templates can also be defined at a team level by a Team administrator.
A pod template defined at the team level will be available only to the specific team.
To install pod templates at the team level:
-
Select in the upper-right corner to navigate to the Manage Jenkins page.
-
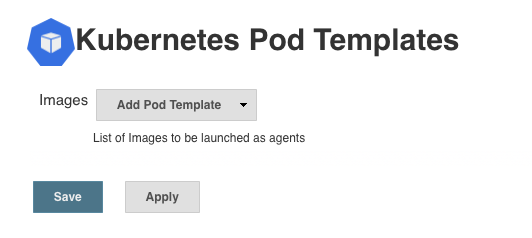
Select Kubernetes Pod Templates.
-
Edit the pod templates and select Save.
Edit pod templates using pipelines
You can declare pod templates using the pipeline DSL, using either a declarative or scripted pipeline.
Declarative pipeline
pipeline { agent { kubernetes { label 'mypodtemplate-v1' defaultContainer 'jnlp' yaml """ apiVersion: v1 kind: Pod metadata: labels: some-label: some-label-value spec: containers: - name: maven image: maven:3.3.9-jdk-8-alpine command: - cat tty: true """ } } stages { stage('Run maven') { steps { container('maven') { sh 'mvn -version' } } } } }
Scripted pipeline
def label = "mypodtemplate-v1" podTemplate(label: label, containers: [ containerTemplate(name: 'maven', image: 'maven:3.3.9-jdk-8-alpine', ttyEnabled: true, command: 'cat') ]) { node(label) { stage('Run maven') { container('maven') { sh 'mvn --version' } } } }
| For a full discussion of this feature, please see the Kubernetes plugin documentation. |
View pod templates
You can view a list of the pod templates that are available for use on a controller, if you have permissions to configure jobs. The Available pod templates page collects and displays pod template information from 3 sources:
-
Kubernetes clouds defined on the controller
-
Shared Kubernetes clouds from the operations center
-
Pod template definitions on the controller that are not associated with a cloud
To view available job templates, select Pod Templates on the job page.

The page displays the following information about the pod templates, if it is available:
-
Name
-
Label
-
Any containers defined in the template with the following specific information:
-
Container name
-
Docker image used
-
Resources
-

| If you have administrative access to the pod templates listed, the information displays as a link that takes you to the template. |
Monitor Kubernetes agents
A dedicated widget provides information about the ongoing provisioning of Kubernetes agents, which highlights failures and allows you to easily determine the root cause of a provisioning failure.


To view more information about the current pod, select its name to view the status of individual containers:

Run CloudBees CI build agents in Windows containers
Beginning with Kubernetes version 1.14, Windows containers can be used as build agents. Using Windows containers as build agents lets you leverage Kubernetes elasticity to manage a multiplatform CI environment from a single source.
This functionality is available for the following:
-
Azure Kubernetes Service (AKS): Available in CloudBees CI version 2.222.4.3 and later
-
Amazon Elastic Kubernetes Service (EKS): Available in CloudBees CI version 2.190.3.2 later
-
Google Kubernetes Engine (GKE): Available in CloudBees CI version 2.235.5.1 and later
Only GA releases of the above Kubernetes platforms are supported. Developer versions and public preview versions are not supported.
| The operations center and managed controllers must run on Linux nodes. Windows nodes support only build agents. |
Follow these steps to set up CloudBees CI build agents in Windows containers:
-
(Required only for operations center installations prior to November 2019) Update older operations center installations to enable build agents in Windows containers.
After setting up, create a pipeline to use a Windows node.
Set up a Kubernetes cluster with Linux and Windows node pools
This portion of the setup is done outside of CloudBees CI. Follow the instructions from the service provider.
-
AKS
-
EKS
-
CloudBees recommends using eksctl version 0.8.0 or later, as that version fixes a bug in previous versions that prevented Windows nodes from joining the cluster.
-
Amazon documents the use of
eksctlto add Windows nodes to a new cluster or to an existing cluster: -
To add Windows nodes to a new cluster, see Creating a new Windows Cluster.
-
To add Windows nodes to an existing cluster, see Adding Windows support to an existing Linux cluster.
-
-
GKE
-
When creating a Windows node pool for GKE, you must specify a Windows image type of
image-type=WINDOWS_LTSC.
-
Update pod templates to run Windows jobs
Any pod templates used to construct build agents, such as the pod templates used by CloudBees CI to define Kubernetes pods and containers, must be updated with additional information so that they can run on the correct operating system.
Templates without an explicitly defined nodeSelector for Windows default to run on Linux.
-
To run Windows jobs, define a Windows node selector:
spec: nodeSelector: kubernetes.io/os: windows -
Pod templates for Windows jobs must override the JNLP container to use the Windows JNLP agent. Otherwise, the pod will not be scheduled, because CloudBees CI injects a Linux JNLP container which cannot run on a Windows node.
The following example uses Groovy to override the JNLP container:
The container base image OS version should match the host OS version, or the containers will fail to run with the error
The operating system of the container does not match the operating system of the host. For more information, refer to Windows container version compatibility.In the below template, replace
INBOUND_AGENT_IMAGEwith one of the following options:-
If running product version 2.414.2.2 or greater use the cloudbees/cloudbees-core-agent tag that matches your product version and Windows version, for example:
-
If running a product version older than 2.414.2.2 use the jenkins/inbound-agent tag that matches your Windows version, for example:
-
If your controller is running Java 8, you must use a container image with Java 8, such as jenkins/inbound-agent:jdk8-windowsservercore-ltsc2019
-
If your controller is running Java 11, you must use a container image with Java 11, such as jenkins/inbound-agent:jdk11-windowsservercore-ltsc2019 or jenkins/inbound-agent:jdk11-windowsservercore-ltsc2022.
-
/* * Runs a build on a Windows pod. */ podTemplate(yaml: ''' apiVersion: v1 kind: Pod spec: containers: - name: jnlp image: INBOUND_AGENT_IMAGE - name: shell image: mcr.microsoft.com/powershell:preview-windowsservercore-1809 command: - powershell args: - Start-Sleep - 999999 nodeSelector: kubernetes.io/os: windows ''') { node(POD_LABEL) { container('shell') { // run powershell command here powershell 'Get-ChildItem Env: | Sort Name' } } } -
Update older operations center installations to enable build agents in Windows containers
Operations center installations created before November 2019 should be updated to clear the default-java value from the "Defaults Provider Template Name" field. Operations center installations after November 2019 do not have this limitation.
To clear the default-java value from older installations:
-
Sign in to the operations center UI.
-
From the dashboard, select .
-
Clear the
default-javavalue from the Defaults Provider Template Name field.