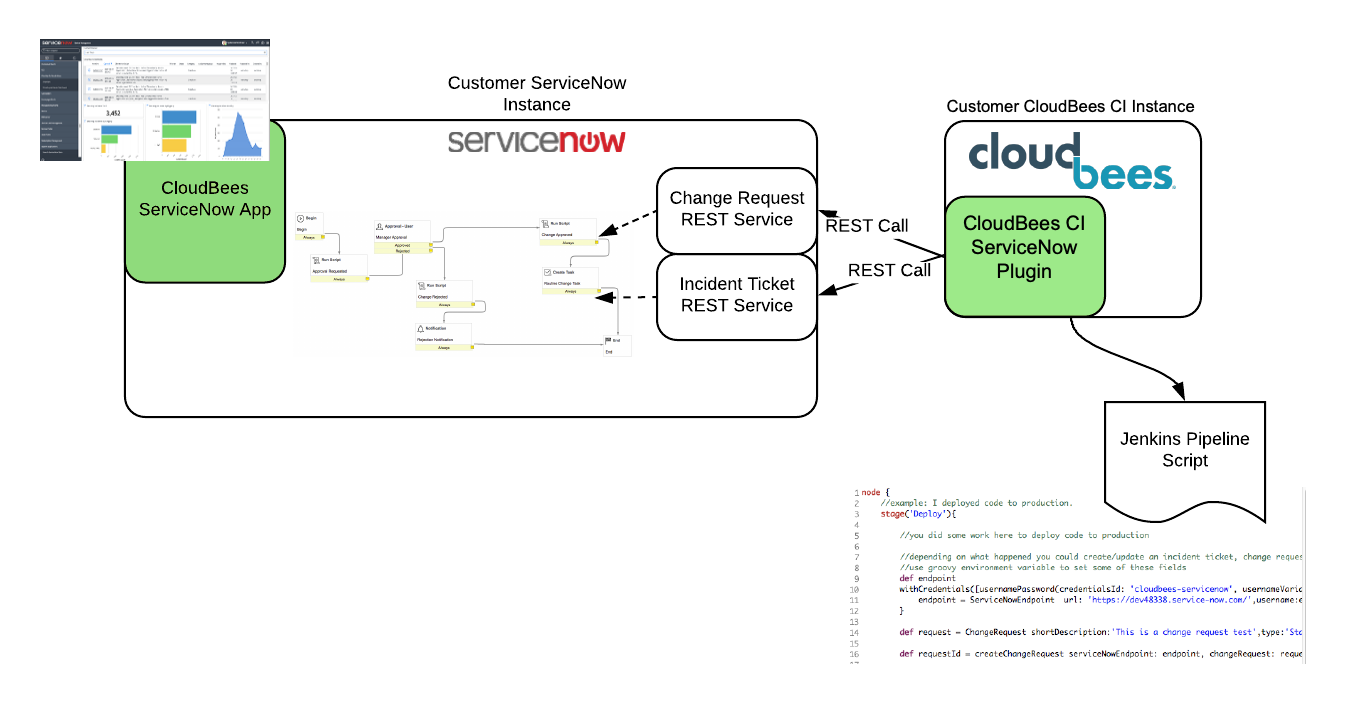
The CloudBees CI ServiceNow Integration provides the ability to create and manage ServiceNow change requests and incident tickets from your pipeline. CloudBees CI ServiceNow Integration consists of two components:
-
CloudBees CI ServiceNow App
-
CloudBees CI ServiceNow Plugin
Use cases for ServiceNow integration
-
Change Requests: With your Pipeline, automatically create and update change requests in ServiceNow to track updates to your build, test, and production environments. If you have issues with these environments, know what changes occurred.
-
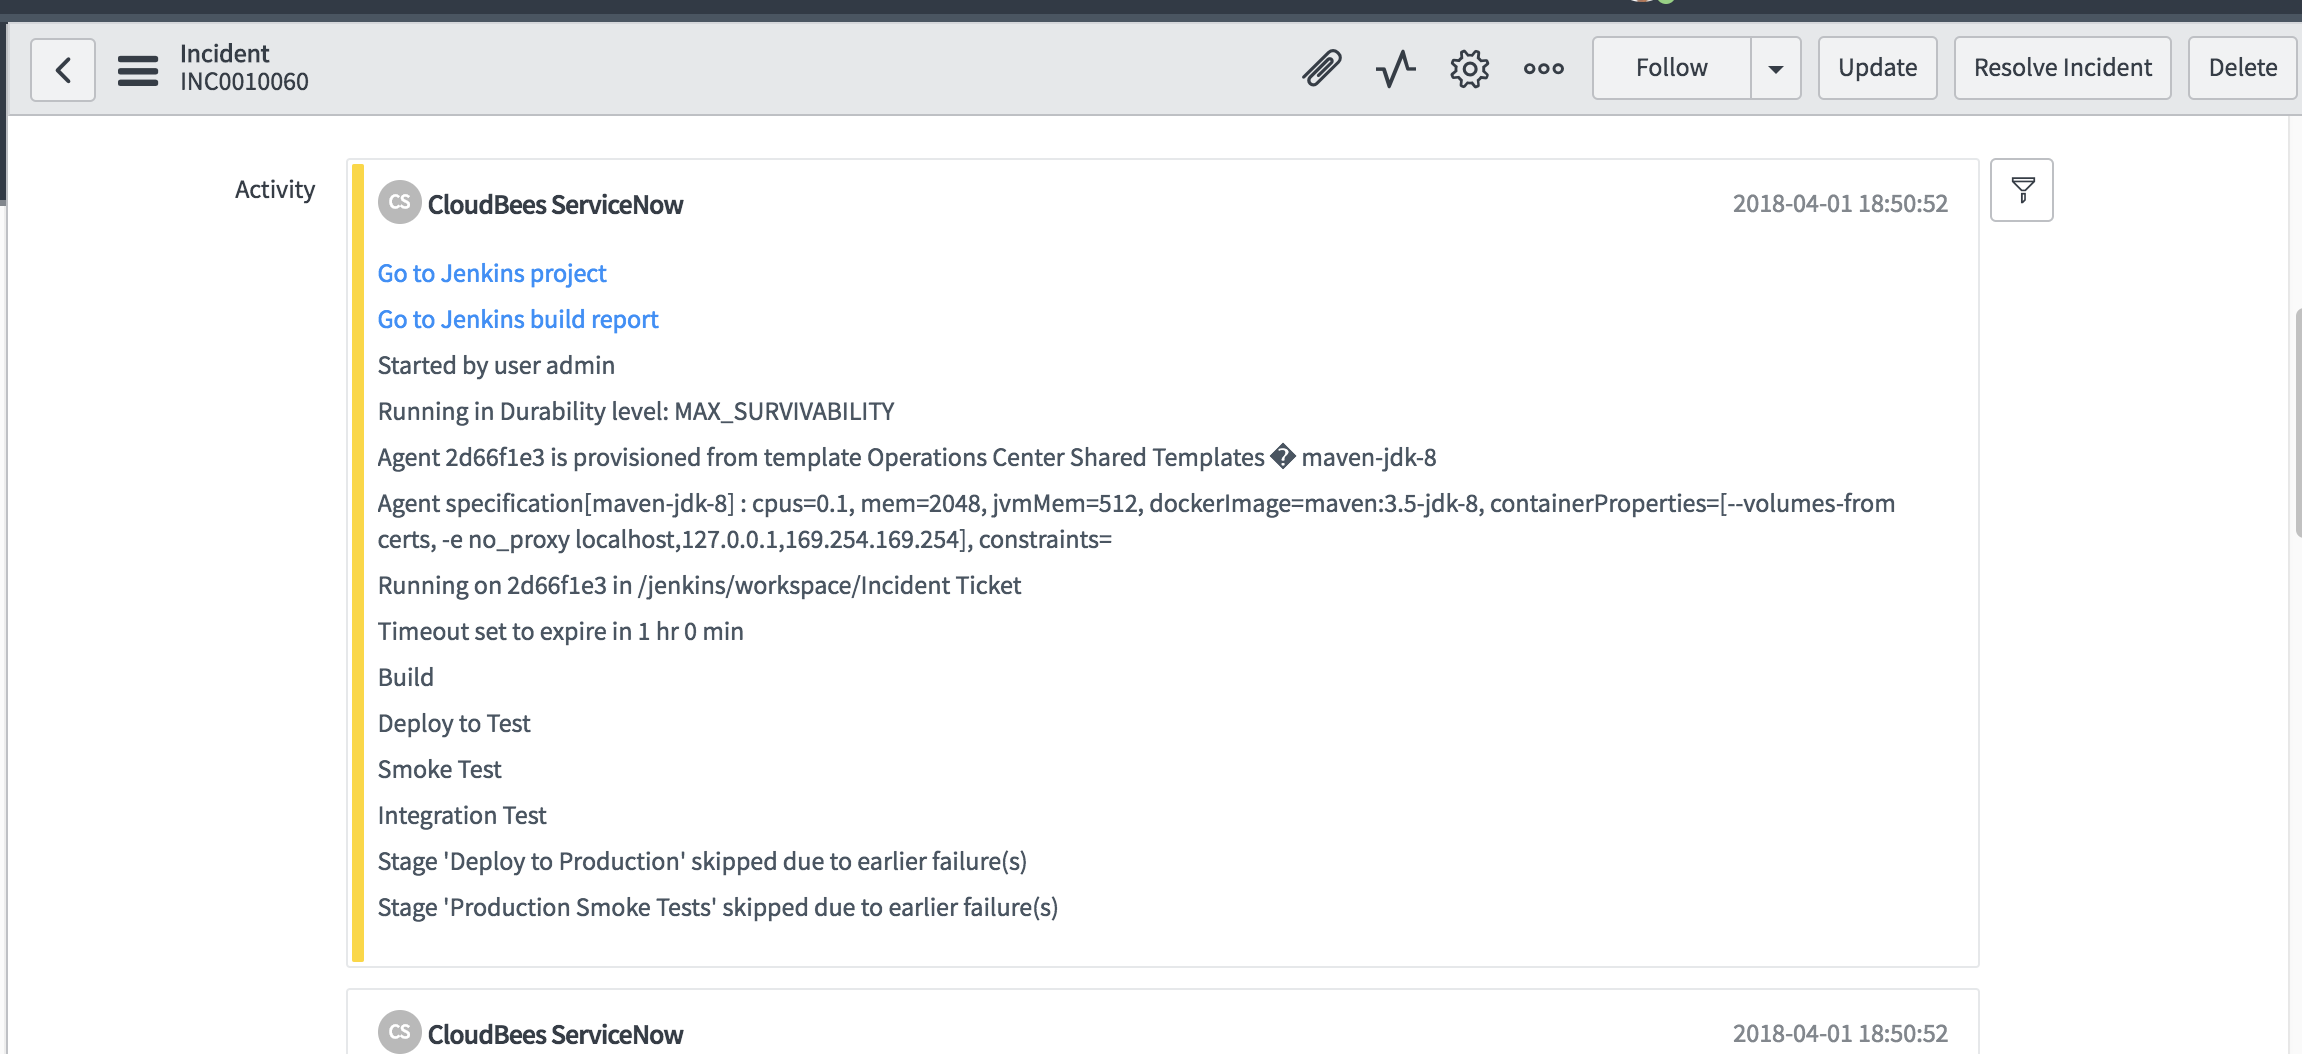
Incident Tickets: On Pipeline failures (build, test, etc.) automatically create and assign tickets in ServiceNow to triage and resolve incidents quickly.
CloudBees CI ServiceNow App
The CloudBees CI ServiceNow App provides the ServiceNow web service that allows your Jenkins projects to create and update change requests and incident tickets. This app includes the import set tables, transform maps, and security roles that allow this integration with Jenkins.
Install the CloudBees CI ServiceNow App
To install the CloudBees CI ServiceNow App:
-
Go to the ServiceNow store at https://store.servicenow.com.
-
Sign in with your HI credentials, and then search for CloudBees.
-
Choose the CloudBees tile, and then select Get.
-
Choose to install on all of your ServiceNow instances or specific instances.
-
Go to your ServiceNow instances.
-
Sign in with your admin account.
-
Go to System Applications > Applications.
-
In the Downloads tab choose the CloudBees CI ServiceNow App, and then select Install.
Add the web services user
The integration with CloudBees CI requires a web services user. Follow these steps to create this user.
-
Sign in as an admin, and then go to System Security > Users.
-
Select New to create a new user.
-
Complete the fields to add a user.
-
Add the role
x_clbe_cloudbees_s.web_serviceto this new user. This is the user that will be used to authenticate for the CloudBees CI ServiceNow Plugin. Use this user as your credentials in your CloudBees CI Pipeline.
Security roles for the CloudBees CI ServiceNow App
The following security roles are provided with the CloudBees CI ServiceNow App:
| Role | Description |
|---|---|
|
This role is required to use the web services to create and update incident tickets, change requests, and events. This role is required to use the CloudBees CI plugin. |
|
This role allows access to the import set tables (see below). |
|
This role allows the user to view the CloudBees CI ServiceNow App menu items. |
Web services for the CloudBees CI ServiceNow App
The following web services are set up with the CloudBees CI ServiceNow App:
| Web service | Description |
|---|---|
|
This is the endpoint to create and update change requests. |
|
This is the endpoint to create and update incident tickets. |
CloudBees CI ServiceNow Plugin
The CloudBees CI ServiceNow Plugin is a pipeline plugin that provides pipeline steps for creating and update change requests and incident tickets in your ServiceNow instance.
Install the CloudBees CI ServiceNow Plugin
To install the CloudBees CI ServiceNow Plugin:
-
Sign in to your managed controller as an administrator.
-
Select in the upper-right corner to navigate to the Manage Jenkins page.
-
Select Plugins.
-
Go to the Available tab.
-
In the Filter fields, type CloudBees CI ServiceNow Plugin.
-
Select the checkbox next to the name of the plugin.
-
Select Download now and install after restart.
-
Follow the instructions to restart the managed controller.
-
Select in the upper-right corner to navigate to the Manage Jenkins page.
-
Select System.
-
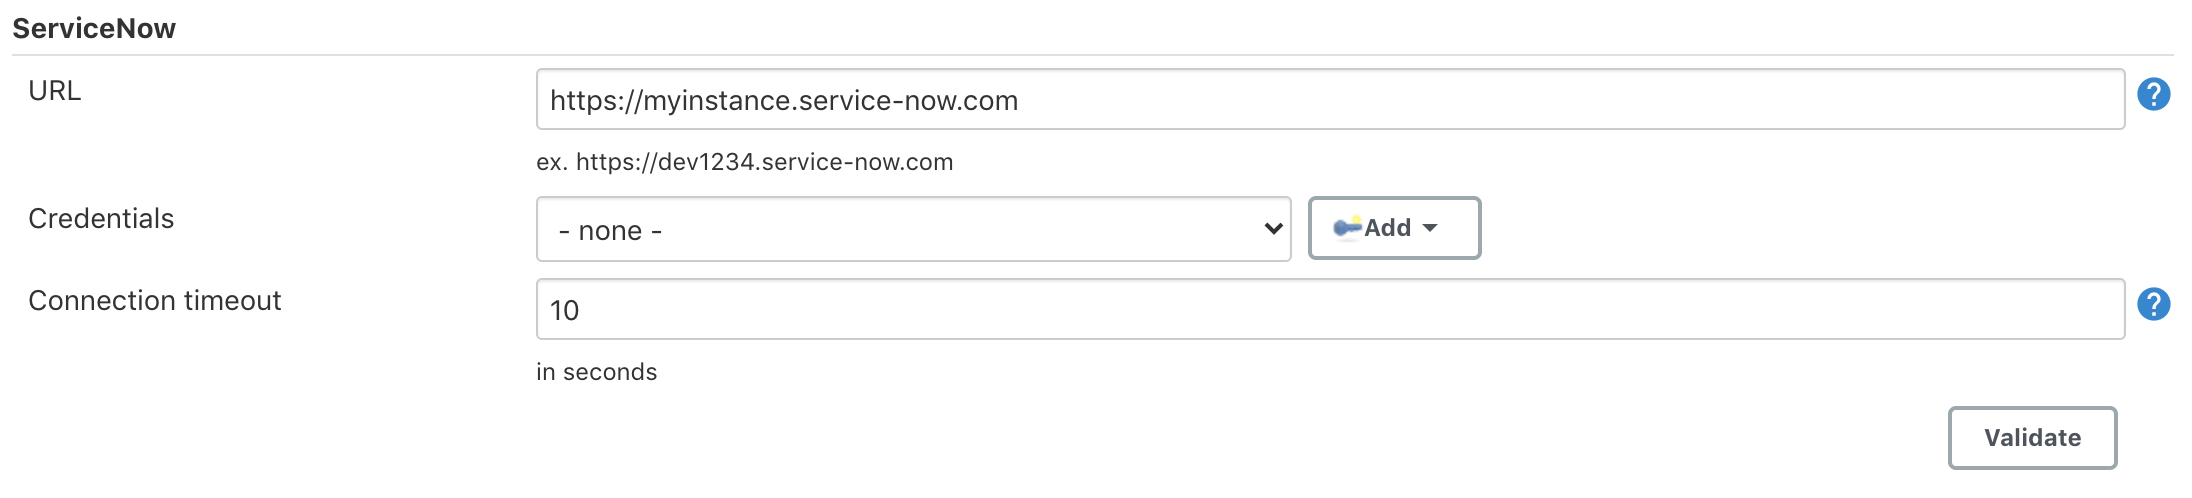
Scroll down to the ServiceNow section.
-
Specify the ServiceNow URL.
-
In Credentials, select the credentials to use to connect to your ServiceNow instance.
-
Select Validate to validate the settings.
Create and update change requests and incident tickets
Two pipeline steps are provided to create and manage change requests and incident tickets:
serviceNowCreate and serviceNowUpdate.
To use the Pipeline steps:
-
In the Snippet Generator, select the Pipeline step you want to use.
-
Select the type of record, either a change request or an incident ticket.
-
Complete the fields that you want to include.
Create a change request
Returns a correlation ID if successful. The correlation ID is used to identify a change request to update.
def corrId = serviceNowCreate changeRequest(shortDescription:'1')
Update a change request
Returns a correlation ID if successful. Requires correlationId. The correlation ID is used to identify a change request to update.
def corrId = serviceNowUpdate correlationId: corrId, record: changeRequest(shortDescription:'2')
Change request fields
The following changeRequest fields correspond to ServiceNow change request
fields:
assignedTo |
assignmentGroup |
category |
ci |
closedBy |
comments |
commentsAndWorkNotes |
description |
impact |
priority |
requestedBy |
risk |
shortDescription |
state |
type |
workEnd |
workNotes |
workStart |
Additional non-standard/custom fields may be specified using the additionalFields attribute. The value for this attribute is a map of fields and their values.
def corrId = serviceNowCreate changeRequest(shortDescription:'1', additionalFields:['justification':'because','my_field':'my_value'])
Scripted Pipeline examples
def request = ChangeRequest shortDescription:'Deploy to Test',type:'Standard',category:'Other',impact:'3 - Low',risk:'Moderate',priority:'4 - Low',ci:'AS400' createChangeRequest changeRequest: request
def start = new Date() sleep 30 def end = new Date() def request = ChangeRequest shortDescription:'Deploy to Production',type:'Standard',category:'Other',impact:'3 - Low',risk:'Moderate',priority:'4 - Low',ci:'AS400',workStartDate:start,workEndDate:end createChangeRequest changeRequest: request
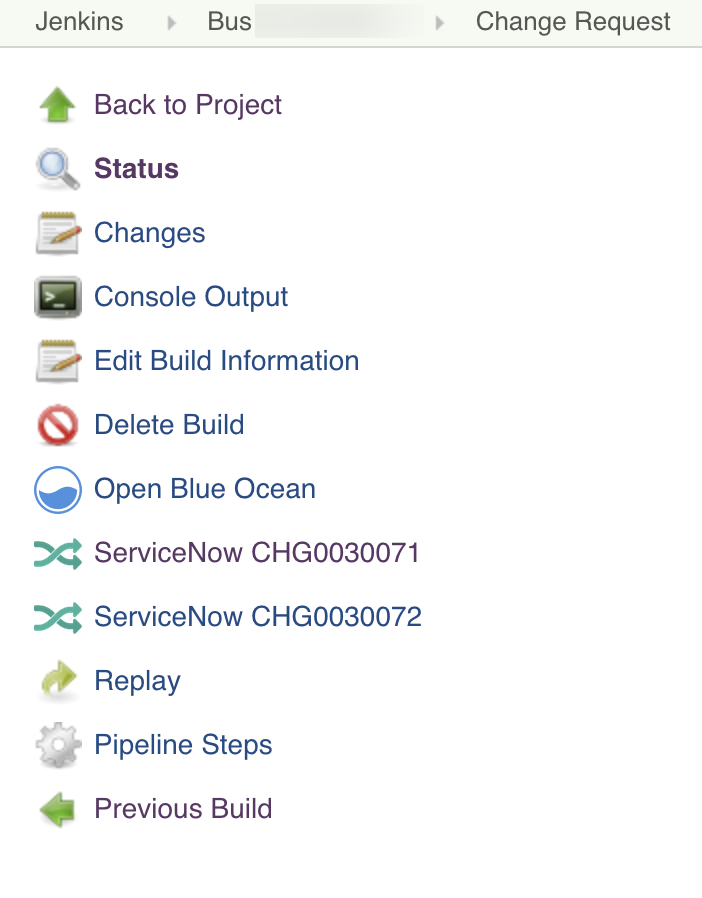
Links to change requests
Change requests that are created will be listed on the build page. Change requests will also be listed on the job page (see below), but only for the most recent build. You can select the link to go directly to the change request in ServiceNow.
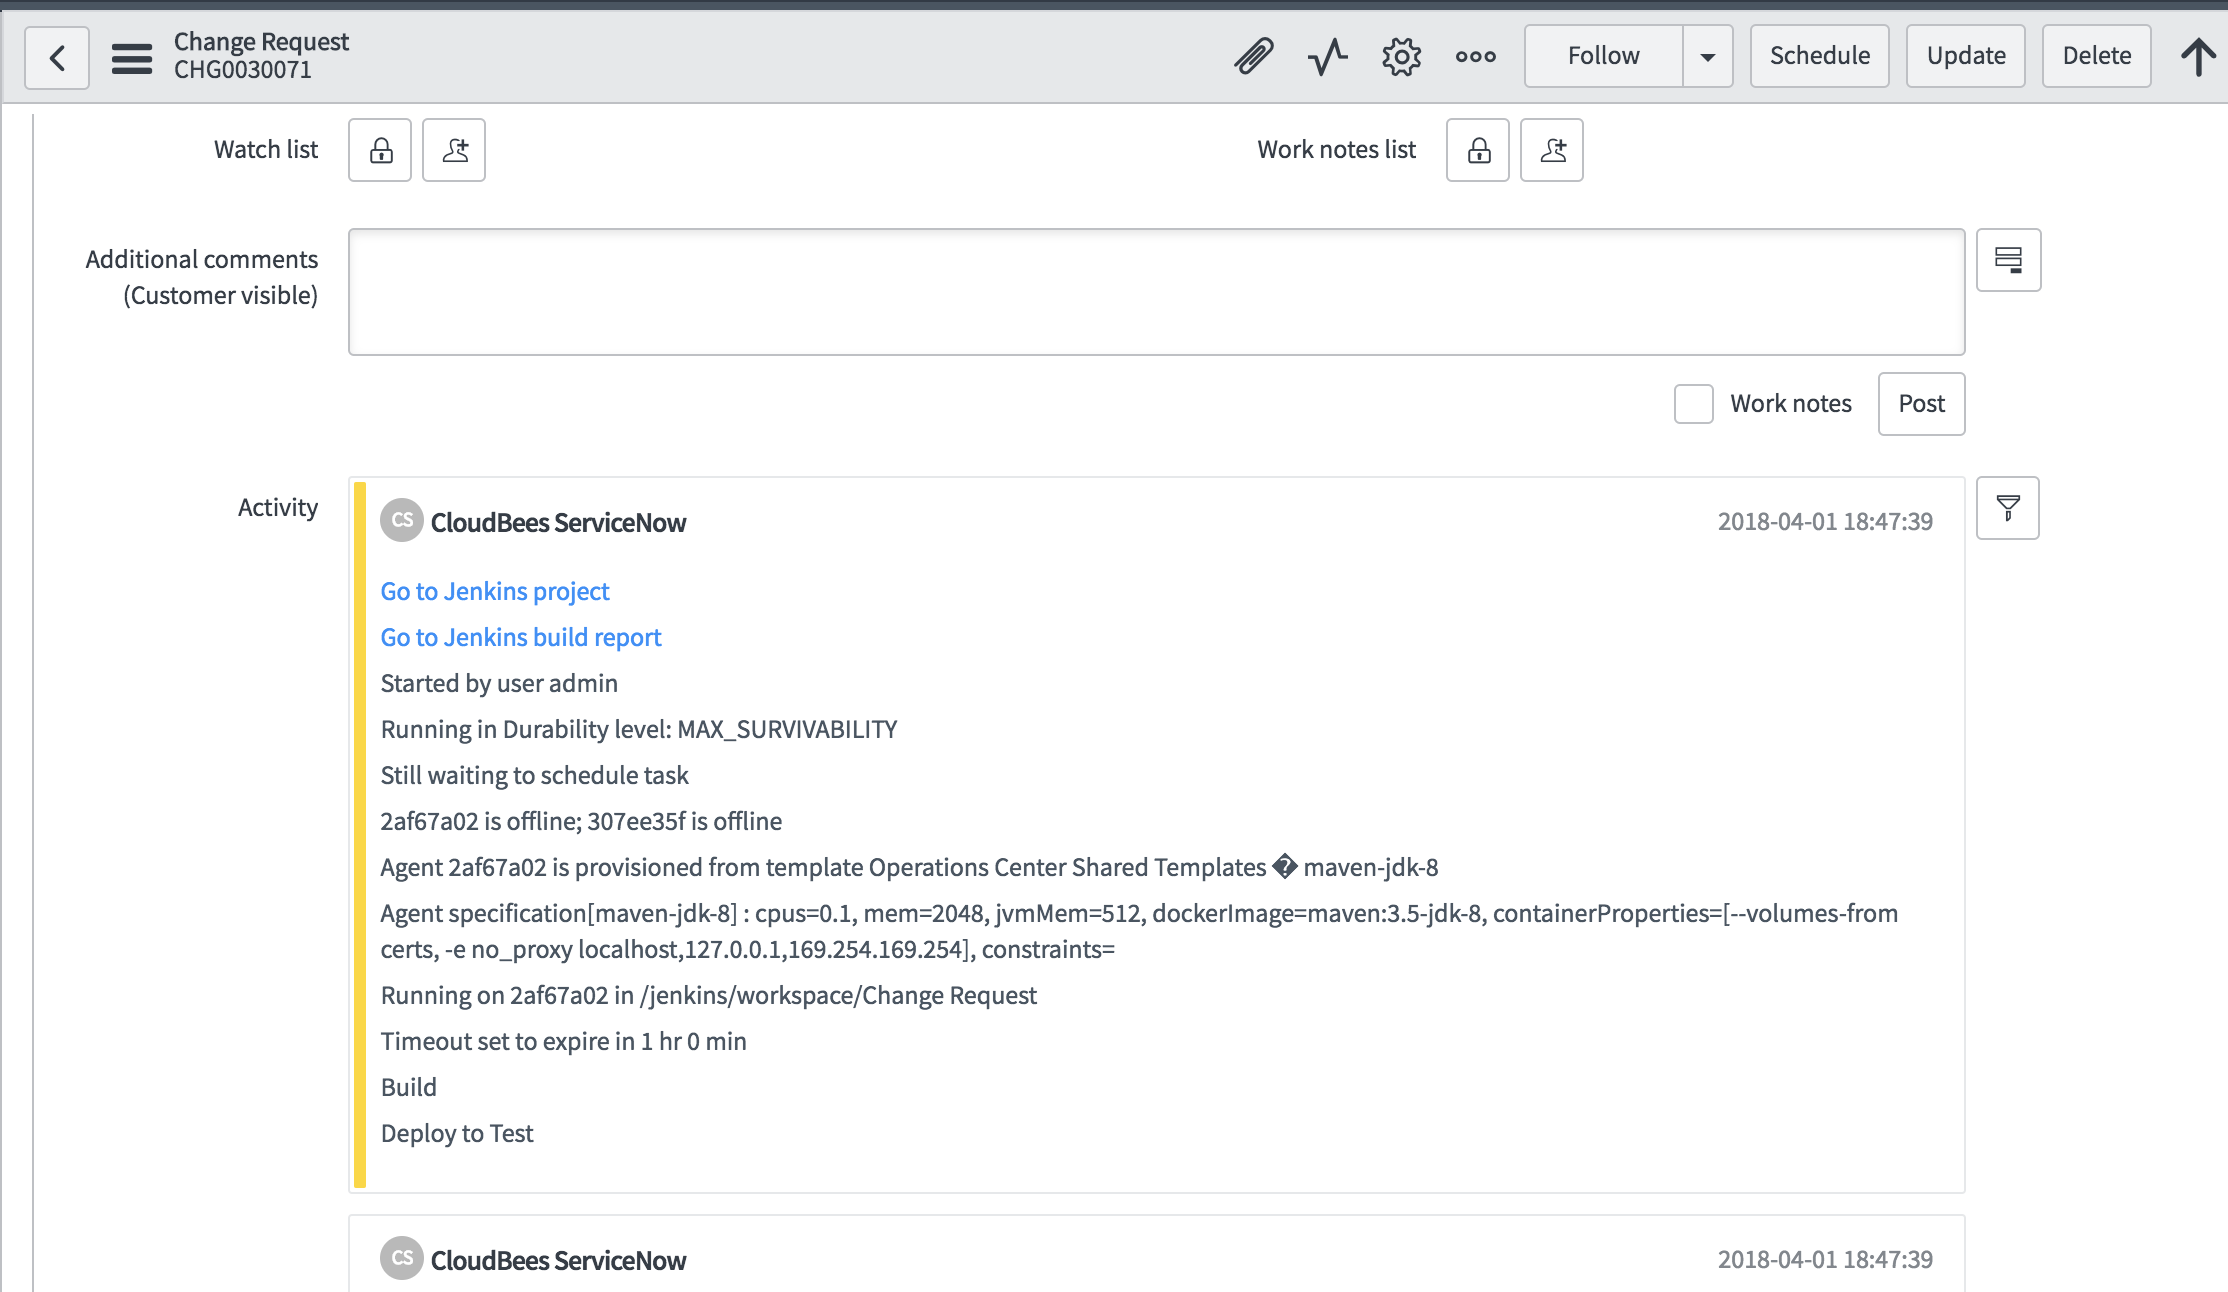
Change request in ServiceNow
In ServiceNow, the change request will have log output and links back to the project and build.
Create an incident ticket
Returns a correlation ID if successful. The correlation ID is used to identify an incident ticket to update.
def corrId = serviceNowCreate incidentTicket(shortDescription:'1')
Update an incident ticket
Returns a correlation ID if successful. Requires correlationId. The correlation ID is used to identify an incident ticket to update.
def corrId = serviceNowUpdate correlationId: corrId, record: incidentTicket(shortDescription:'2')
Incident ticket fields
The following incidentTicket fields correspond to ServiceNow incident ticket
fields.
assignedTo |
assignmentGroup |
callerId |
category |
ci |
description |
impact |
severity |
shortDescription |
state |
urgency |
Additional non-standard/custom fields may be specified using the additionalFields attribute. The value for this attribute is a map of fields and their values.
serviceNowCreate incidentTicket(shortDescription:'1', additionalFields:['location':'New York','my_field':'my_value'])
Scripted Pipeline example
def ticket = IncidentTicket shortDescription:'Job failed!',callerId:'Beth Anglin',impact:'3 - Low',urgency:'3 - Low' def requestId = createIncidentTicket incidentTicket: ticket

Troubleshoot CloudBees CI ServiceNow integration
If you are experiencing issues with CloudBees CI ServiceNow integration, review the following suggestions:
-
Ensure the CloudBees CI ServiceNow App is installed.
To validate that the CloudBees CI ServiceNow App is installed, type
CloudBeesin the main menu filter navigator. The CloudBees main menu item and submenu items should appear (if the app has been installed). -
Ensure the ServiceNow user has been created with the correct roles.
Verify that a user has been created under System Security > Users with the role
x_clbe_cloudbees_s.web_serviceon your ServiceNow instance. If not, follow the steps in Add the web services user above. -
Ensure that the ServiceNow credentials have been added to Jenkins.
To ensure that the ServiceNow credentials have been added to Jenkins:
-
Select in the upper-right corner to navigate to the Manage Jenkins page.
-
Select System on your client controller to verify that the ServiceNow credentials have been added.
-
Select Validate to ensure the credentials are correct.
-
-
Configure the log recorder to view all the logs for the plugin.
If you don’t configure the log recorder, you won’t see anything in the regular Jenkins logs.
To configure the log recorder:
-
Select in the upper-right corner to navigate to the Manage Jenkins page.
-
Select System Log.
-
Select New Log Recorder.
-
Enter a name for the logs, such as ServiceNow plugin logs.
-
Add a logger that points to the com.cloudbees.plugins.servicenow package.
-
Choose a log level, such as All.
-
Select Save.
-
Run a CloudBees CI ServiceNow plugin pipeline step.
-
View the logs in the log recorder.
-