This content applies only to CloudBees CI on modern cloud platforms and managed controllers.
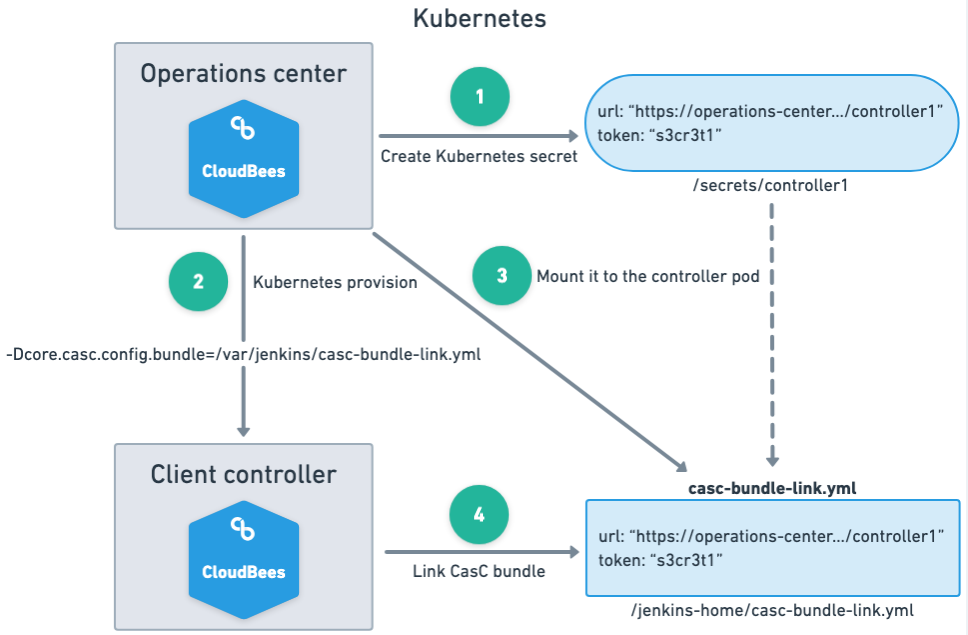
Controllers send requests for their configuration bundles through a secure HTTP(S) endpoint in operations center. Each controller is aware of the bundle it is connected to through the casc-bundle-link.yml file that contains the bundle URL and access token.
When using CloudBees CI on modern cloud platforms, you do not need to create the casc-bundle-link.yml and add the startup options for the managed controller; these steps are taken care of automatically.
| You can assign a bundle to a managed controller before it has been provisioned. If you assign a bundle to a managed controller after it has been provisioned, you must restart the controller for the configuration to take effect. For more information, refer to Assigning a bundle to a controller. |

Prerequisites
The following plugins must be installed to your controller:
-
If using CloudBees CI 2.222.4.3 - 2.303.3.3: CloudBees CasC API (Deprecated) plugin version 1.2 - 1.41
-
If using CloudBees CI 2.319.1.5 or later: CloudBees CasC Client plugin, version 1.44 or later
Adding system properties when initializing a managed controller
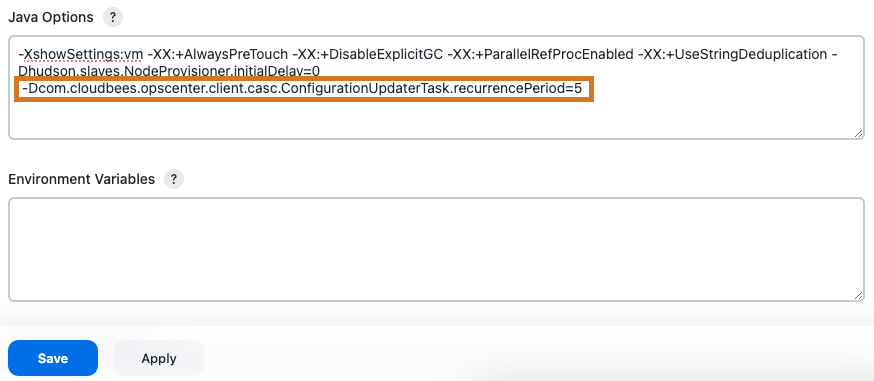
When initializing a managed controller using CloudBees CI on modern cloud platforms, system properties can be added in the Provisioning options when the controller is being created. You can add the same recurrencePeriod property to the Java Options section in the UI. For example, to check for updates every 5 minutes add the Java Option highlighted in red in the screenshot below:

recurrencePeriod property to Java optionsAssigning a bundle to a controller
Once you have configured bundle availability, you can assign a bundle to the controller.
To assign a bundle to a controller:
-
Ensure you are signed in to the operations center as a user with the Configure or Administer permission.
-
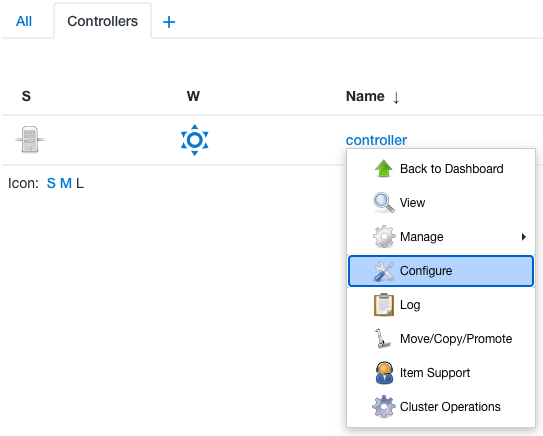
From the operations center dashboard, select the down arrow to the right of your controller’s name, and then select Configure.
 Figure 3. Controller dropdown menu
 -
Scroll down to Configuration as Code (CasC).
-
Select the appropriate bundle to assign to the controller.
If a Default bundle has already been selected from the Configuration as Code bundles screen, it is pre-selected in the Bundle dropdown. -
Select Save.
-
Take the appropriate action to apply the bundle to the controller:
-
If the controller has already been provisioned, and it’s the first time you are applying a CasC bundle to it, you must reprovision the controller.
-
If the controller has already been provisioned with another CasC bundle, you must restart the controller.
CasC bundle validation is automatically performed when the instance is started and the bundle is assigned to the controller. If problems are detected, validation messages are displayed in the managed controller’s log file and on the managed controller’s Manage screen. For more information, refer to Troubleshoot CasC for controllers.
-
Regenerating a bundle token
You can regenerate a bundle’s access token using the casc-bundle-regenerate-token CLI command. Re-generating the access token is not usually required and should only be done in certain situations, such as for security purposes. Any controller currently using the token will lose access to it after it is regenerated. For more information, refer to Configuration as Code (CasC) CLI.
For managed controllers, if the token needs to be regenerated, the controller using the token needs to be restarted from operations center and the casc-bundle-link.yml file needs to be updated with the new token.
Adding the CasC bundle column to the operations center dashboard
Once you have set up your controller and assigned a bundle to it, you can add the CasC bundle column to the operations center dashboard to display the CasC bundle assigned to each controller.
To add the CasC bundle column to the operations center dashboard:
-
From the operations center dashboard, select Edit View in the left pane.
-
Scroll down to Columns.
-
Select Add column.
-
Select CasC bundle.
-
Select OK.
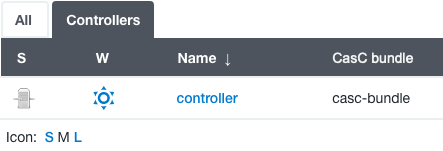
The CasC bundle column is now displayed in the operations center dashboard.
 Figure 4. CasC bundle column